time and date VAUXHALL CORSA 2016 Owner's Manual
[x] Cancel search | Manufacturer: VAUXHALL, Model Year: 2016, Model line: CORSA, Model: VAUXHALL CORSA 2016Pages: 267, PDF Size: 7.79 MB
Page 82 of 267

80Instruments and controls
Illustration shows Colour-Info-
Display.
Uplevel-Display
If outside temperature drops to 3 °C,
a warning message is displayed in the Driver Information Centre.9 Warning
The road surface may already be
icy even though the display
indicates a few degrees above 0
°C.
Clock
Graphic-Info Display
Press CONFIG to open the Settings
menu.
Scroll through the list and select the
menu item Time Date to display the
respective submenu.
Notice
For a detailed description of menu
operation, refer to the Infotainment
manual.
Set time
Press the MENU-TUNE knob to enter
the Set time submenu.
Turn the MENU-TUNE knob to
change the current value of the first setting.
Press the MENU-TUNE knob to
confirm the set value.
The cursor then switches to the next
value. If all values are set, you are
automatically returned to the next
higher menu level.
Page 83 of 267

Instruments and controls81Set date
Press the MENU-TUNE knob to enter
the Set date submenu.
Turn the MENU-TUNE knob to
change the current value of the first setting.
Press the MENU-TUNE knob to
confirm the set value.
The cursor then switches to the next
value. If all values are set, you are
automatically returned to the next
higher menu level.
Set time format
To switch between the available
options, repeatedly press the
MENU-TUNE knob.
Set date format
To switch between the available
options, repeatedly press the
MENU-TUNE knob.
RDS clock synchronization
The RDS signal of most VHF
transmitters automatically sets the time. RDS time synchronisation cantake a few minutes. Some
transmitters do not send a correct
time signal. In such cases, it is
recommended to switch off the
automatic time synchronisation.
To switch between the options On
and Off, repeatedly press the
MENU-TUNE knob.
Colour-Info Display
Press ; and then select the
Settings screen button.
Select Time & date settings to display
the respective submenu.
Notice
For a detailed description of menu
operation, refer to the Infotainment
manual.
Set time format
To select the desired time format, tap on the screen buttons 12 h or 24 h .
Set date format
To select the desired date format, tap
on the < and > screen buttons and
choose between the available options.
Page 84 of 267

82Instruments and controlsSet time and date
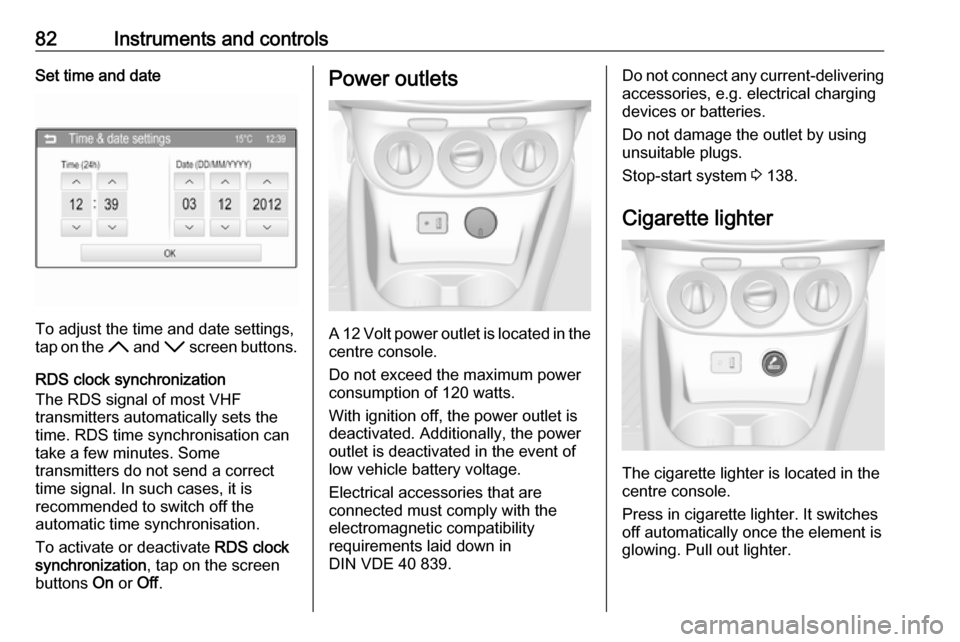
To adjust the time and date settings,
tap on the H and I screen buttons.
RDS clock synchronization
The RDS signal of most VHF
transmitters automatically sets the
time. RDS time synchronisation can take a few minutes. Some
transmitters do not send a correct
time signal. In such cases, it is
recommended to switch off the
automatic time synchronisation.
To activate or deactivate RDS clock
synchronization , tap on the screen
buttons On or Off.
Power outlets
A 12 Volt power outlet is located in the
centre console.
Do not exceed the maximum power
consumption of 120 watts.
With ignition off, the power outlet is
deactivated. Additionally, the power outlet is deactivated in the event of
low vehicle battery voltage.
Electrical accessories that are
connected must comply with the
electromagnetic compatibility
requirements laid down in
DIN VDE 40 839.
Do not connect any current-delivering accessories, e.g. electrical charging
devices or batteries.
Do not damage the outlet by using
unsuitable plugs.
Stop-start system 3 138.
Cigarette lighter
The cigarette lighter is located in the
centre console.
Press in cigarette lighter. It switches off automatically once the element is
glowing. Pull out lighter.
Page 100 of 267

98Instruments and controlsTrip/Fuel Information Menu
Press MENU to select Trip/Fuel
Information Menu information
page ;.
Turn the adjuster wheel to select a
submenu.
The following list contains all possible Trip/Fuel Information Menu pages.
Some may not be available for your particular vehicle.
Follow the instructions given in the
submenus.
● trip odometer 1
● trip odometer 2
● average fuel economy 1
● average fuel economy 2
● digital speed
● fuel range
● fuel range LPG version
● fuel level LPG version
● instantaneous fuel economy
● average vehicle speed
● clock
● temperature
● blank pageSelection and indication is different
between Midlevel- and Uplevel-
Display.
Trip odometer 1 and 2
Trip odometer displays the current
distance since a certain reset.
Trip odometer counts up to a distance
of 2000 miles then restarts at 0.
Turn the adjuster wheel to select
between trip odometer 1 and 2.
To reset, press SET/CLR for a few
seconds while viewing this page.
Simultaneously average fuel
economy 1 and 2 is indicated together with trip odometer 1 and 2.
The information of trip page 1 and 2
can be reset separately while the
respective display is active.
Average fuel economy 1 and 2
Display of average consumption. The measurement can be reset at any
time and starts with a default value.
To reset, press SET/CLR for a few
seconds while viewing this page.Simultaneously trip odometer 1 and 2
is indicated together with average fuel
economy 1 and 2.
The information of trip page 1 and 2
can be reset separately while the
respective display is active.
On vehicles with LPG engines:
Average consumption is indicated for
the currently selected mode (LPG or
petrol).
Digital speed
Digital display of the instantaneous
speed.
Fuel range
Range is calculated from current fuel
tank level and current consumption.
The display shows average values.
After refuelling, the range is updated
automatically after a brief delay.
When the fuel level in the tank is low, a message appears on the display
and the control indicator Y in the fuel
gauge illuminates.
Page 103 of 267

Instruments and controls101Economy trend
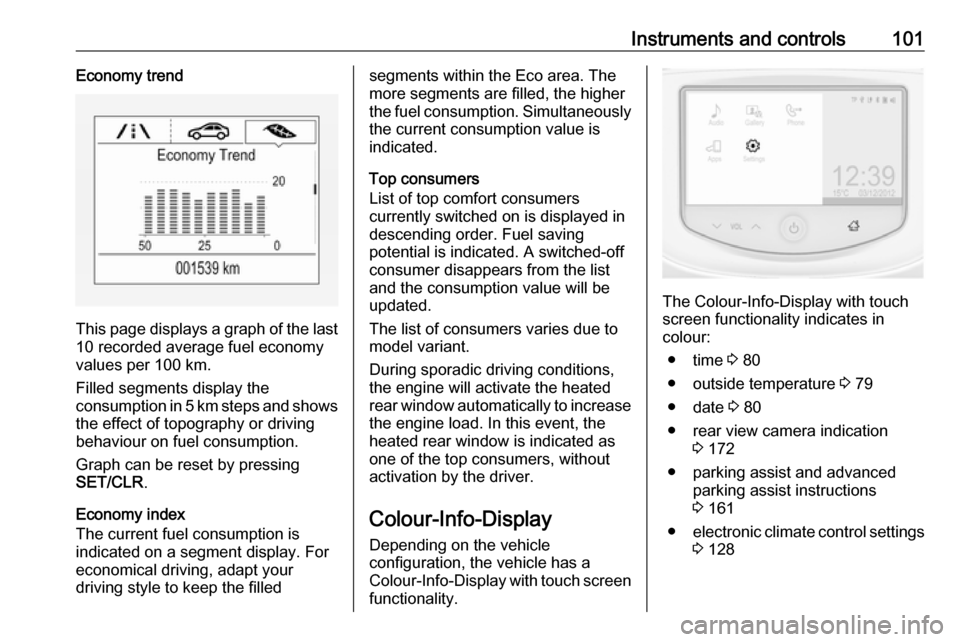
This page displays a graph of the last10 recorded average fuel economy
values per 100 km.
Filled segments display the
consumption in 5 km steps and shows
the effect of topography or driving
behaviour on fuel consumption.
Graph can be reset by pressing
SET/CLR .
Economy index
The current fuel consumption is
indicated on a segment display. For
economical driving, adapt your
driving style to keep the filled
segments within the Eco area. The
more segments are filled, the higher the fuel consumption. Simultaneously
the current consumption value is
indicated.
Top consumers
List of top comfort consumers
currently switched on is displayed in
descending order. Fuel saving
potential is indicated. A switched-off
consumer disappears from the list
and the consumption value will be
updated.
The list of consumers varies due to
model variant.
During sporadic driving conditions,
the engine will activate the heated
rear window automatically to increase
the engine load. In this event, the
heated rear window is indicated as
one of the top consumers, without
activation by the driver.
Colour-Info-Display
Depending on the vehicle
configuration, the vehicle has a
Colour-Info-Display with touch screen
functionality.
The Colour-Info-Display with touch
screen functionality indicates in
colour:
● time 3 80
● outside temperature 3 79
● date 3 80
● rear view camera indication 3 172
● parking assist and advanced parking assist instructions
3 161
● electronic climate control settings
3 128
Page 104 of 267

102Instruments and controls● Infotainment system, seedescription in the Infotainment
manual
● system messages
● vehicle messages 3 103
● settings for vehicle personalisation 3 106
The type of information and how it is
displayed depends on the settings
made.
Selecting menus and settings
Menus and settings are selected via
the touch screen display.
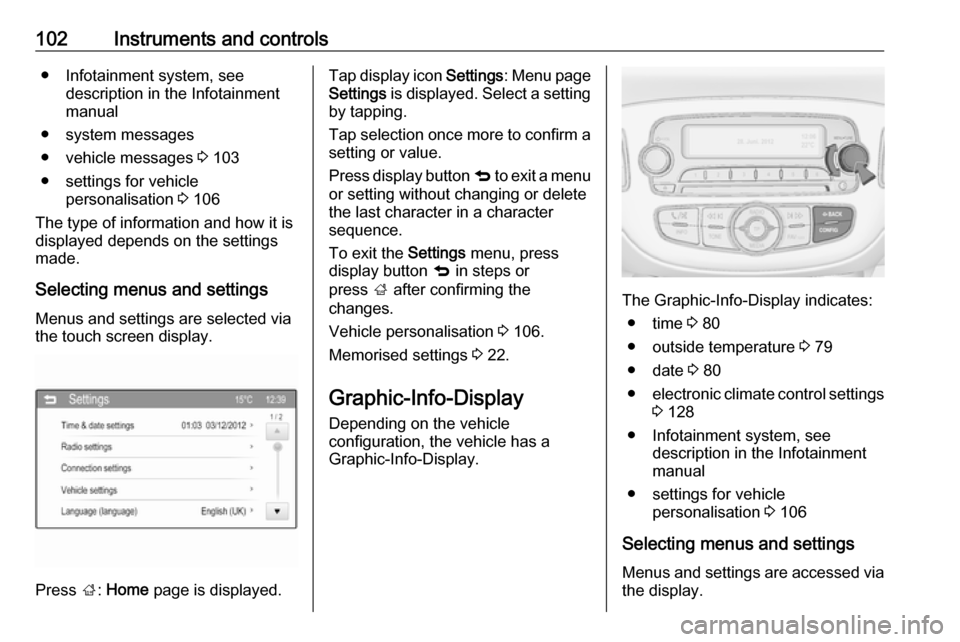
Press ;: Home page is displayed.
Tap display icon Settings: Menu page
Settings is displayed. Select a setting
by tapping.
Tap selection once more to confirm a
setting or value.
Press display button q to exit a menu
or setting without changing or delete
the last character in a character
sequence.
To exit the Settings menu, press
display button q in steps or
press ; after confirming the
changes.
Vehicle personalisation 3 106.
Memorised settings 3 22.
Graphic-Info-Display Depending on the vehicle
configuration, the vehicle has a
Graphic-Info-Display.
The Graphic-Info-Display indicates:
● time 3 80
● outside temperature 3 79
● date 3 80
● electronic climate control settings
3 128
● Infotainment system, see description in the Infotainment
manual
● settings for vehicle personalisation 3 106
Selecting menus and settings Menus and settings are accessed via
the display.
Page 109 of 267

Instruments and controls107
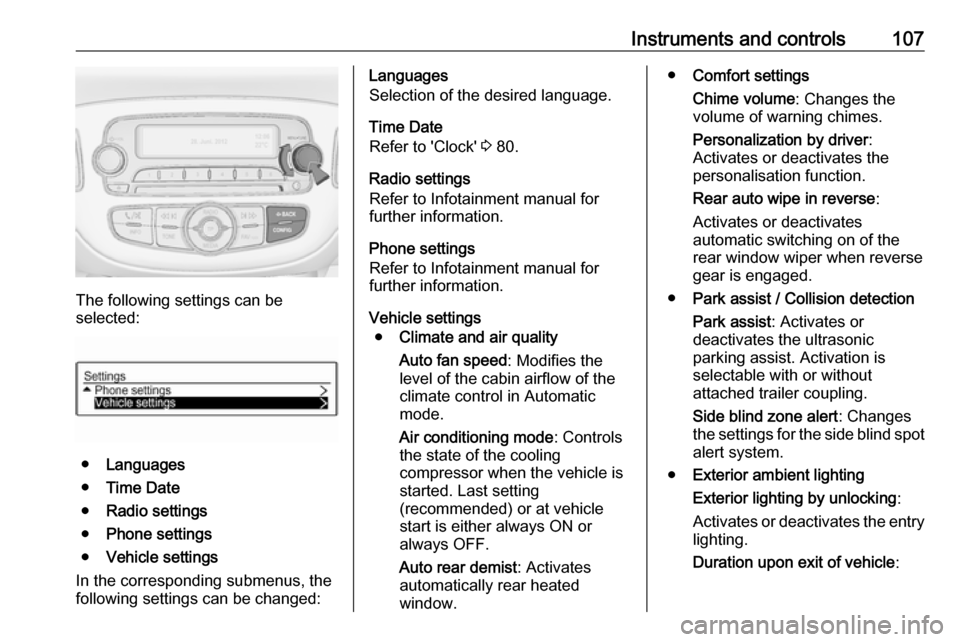
The following settings can be
selected:
● Languages
● Time Date
● Radio settings
● Phone settings
● Vehicle settings
In the corresponding submenus, the
following settings can be changed:
Languages
Selection of the desired language.
Time Date
Refer to 'Clock' 3 80.
Radio settings
Refer to Infotainment manual for
further information.
Phone settings
Refer to Infotainment manual for
further information.
Vehicle settings ● Climate and air quality
Auto fan speed : Modifies the
level of the cabin airflow of the
climate control in Automatic
mode.
Air conditioning mode : Controls
the state of the cooling
compressor when the vehicle is
started. Last setting
(recommended) or at vehicle
start is either always ON or
always OFF.
Auto rear demist : Activates
automatically rear heated
window.● Comfort settings
Chime volume : Changes the
volume of warning chimes.
Personalization by driver :
Activates or deactivates the
personalisation function.
Rear auto wipe in reverse :
Activates or deactivates
automatic switching on of the
rear window wiper when reverse gear is engaged.
● Park assist / Collision detection
Park assist : Activates or
deactivates the ultrasonic
parking assist. Activation is
selectable with or without
attached trailer coupling.
Side blind zone alert : Changes
the settings for the side blind spot alert system.
● Exterior ambient lighting
Exterior lighting by unlocking :
Activates or deactivates the entry
lighting.
Duration upon exit of vehicle :
Page 110 of 267

108Instruments and controlsActivates or deactivates and
changes the duration of exit
lighting.
● Power door locks
Auto door lock : Activates or
deactivates the automatic door
locking function after switching on ignition.
Stop door lock if door open :
Activates or deactivates the door
locking function while a door is open.
Delayed door lock : Activates or
deactivates the delayed door
locking function. This menu
option is displayed with Stop door
lock if door open deactivated.
Central locking system 3 22.
● Remote locking, unlocking,
starting
Remote unlock feedback :
Activates or deactivates the
hazard warning flasher feedback whilst unlocking.
Passive door unlock : Changes
the configuration to unlock only the driver's door or the whole
vehicle whilst unlocking.Auto relock doors : Activates or
deactivates the automatic relock
function after unlocking without
opening the vehicle.
● Restore factory settings :
Resets all settings to the default settings.
Personal settings
Colour-Info-Display
When audio is switched on, press ;
on the control panel.
Press Settings .
The following settings can be
selected:
● Time & date settings
● Radio settings
● Connection settings
● Vehicle settings
● Language
● Text scroll
● Touch beep volume
● Max startup volume
● System version
● DivX(R) VOD
In the corresponding submenus the
following settings can be changed:
Time & date settings
Refer to 'Clock' 3 80.
Page 115 of 267

Instruments and controls113Press Z to call an OnStar advisor and
describe the destination or point of
interest.
The OnStar advisor can look up any
address or point of interest and
directly download the destination to
the built-in navigation system.
OnStar settings
OnStar PIN
To have full access to all OnStar
services, a four-digit PIN is required.
The PIN has to be personalised when first talking to an OnStar advisor.
To change the PIN, press Z to call an
OnStar advisor.
Account data
An OnStar subscriber has an
account, where all the data is stored. To request a change of the account
information, press Z and talk to an
OnStar advisor or logon to your
account.
If the OnStar service is used on
another vehicle, press Z and request
that the account be transferred to the
new vehicle.Notice
In any case, if the vehicle is disposed
of, sold or otherwise transferred,
immediately inform OnStar about
the changes and terminate the
OnStar service on this vehicle.
Vehicle location
The vehicle location is transmitted to OnStar when service is requested ortriggered. A message on the Info-
Display informs about this
transmission.
To activate or deactivate the
transmission of the vehicle location,
press and hold j until an audio
message is heard.
The deactivation is indicated by the
status light flashing red and green for a short period of time and each time
the vehicle is started.
Notice
If the transmission of the vehicle
location is deactivated, some
services are no longer available.
Notice
The vehicle location always remains
accessible to OnStar in the case of
an emergency.Find the privacy policy in your
account.
Software updates
OnStar may remotely carry out
software updates without further
notice or consent. These updates are to enhance or maintain safety and
security or the operation of the
vehicle.
These updates may concern privacy
issues. Find the privacy policy in your
account.
Page 217 of 267

Vehicle care215A detected low tyre pressure
condition is indicated by the control
indicator w 3 94.
If w illuminates, stop as soon as
possible and inflate the tyres as
recommended 3 252.
If w flashes for 60-90 seconds then
illuminates continuously, there is a
fault in the system. Consult a
workshop.
After inflating, some driving may be
required to update the tyre pressure
values in the Driver Information
Centre. During this time w may
illuminate.
If w illuminates at lower temperatures
and extinguishes after driving, this
could be an indicator for approaching
a low tyre pressure condition. Check
tyre pressure.
Vehicle messages 3 103.
If the tyre pressure must be reduced
or increased, switch off ignition.
Only mount wheels with pressure
sensors, otherwise the tyre pressure
will not be displayed and w
illuminates continuously.A spare wheel or temporary spare
wheel is not equipped with pressure
sensors. The tyre pressure
monitoring system is not operational
for these tyres. Control indicator w
illuminates. For the further three
tyres, the system remains
operational.
The use of commercially-available
liquid tyre repair kits can impair the
function of the system. Factory-
approved repair kits can be used.
Operating electronic devices or being close to facilities using similar wave
frequencies could disrupt the tyre
pressure monitoring system.
Each time the tyres are replaced, tyre pressure monitoring system sensors
must be dismounted and serviced.
For the screwed sensor; replace
valve core and sealing ring. For the
clipped sensor; replace complete
valve stem.
Vehicle loading status Adjust tyre pressure to load condition
according to the tyre information label or tyre pressure chart 3 252, and
select the appropriate setting in themenu Tyre Load in the Driver
Information Centre, Vehicle
Information Menu ? 3 96. This
setting is the reference for the tyre
pressure warnings.
The menu Tyre Load only appears if
the vehicle is in a standstill and the
parking brake is applied. On vehicles
with automatic transmission the
selector lever must be in P.
Baselevel display and Midlevel
display: