wheel VAUXHALL CORSA F 2018 Owner's Guide
[x] Cancel search | Manufacturer: VAUXHALL, Model Year: 2018, Model line: CORSA F, Model: VAUXHALL CORSA F 2018Pages: 271, PDF Size: 7.86 MB
Page 71 of 271

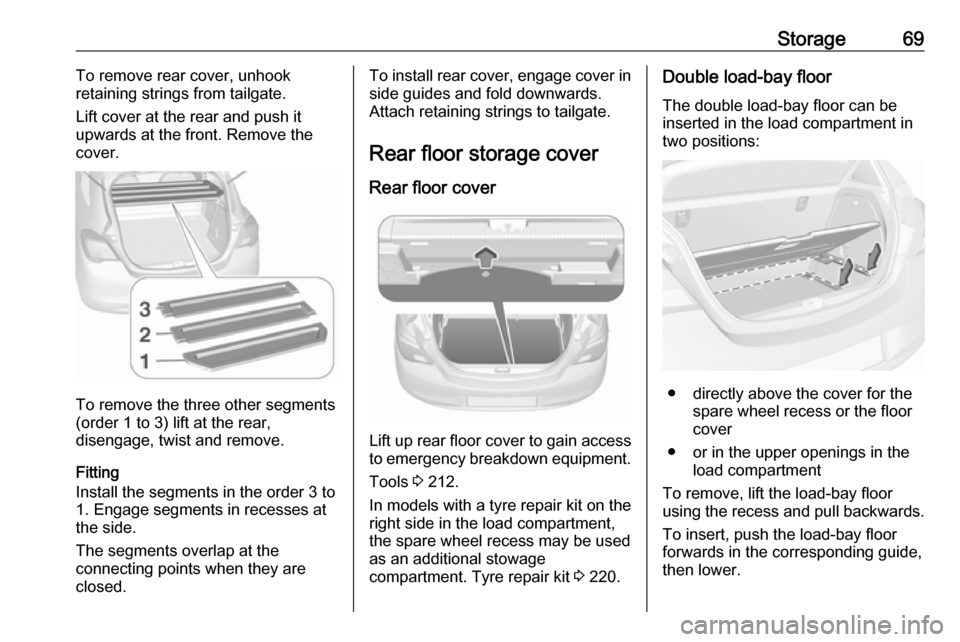
Storage69To remove rear cover, unhook
retaining strings from tailgate.
Lift cover at the rear and push it
upwards at the front. Remove the cover.
To remove the three other segments
(order 1 to 3) lift at the rear,
disengage, twist and remove.
Fitting
Install the segments in the order 3 to
1. Engage segments in recesses at
the side.
The segments overlap at the
connecting points when they are
closed.
To install rear cover, engage cover in side guides and fold downwards.
Attach retaining strings to tailgate.
Rear floor storage cover
Rear floor cover
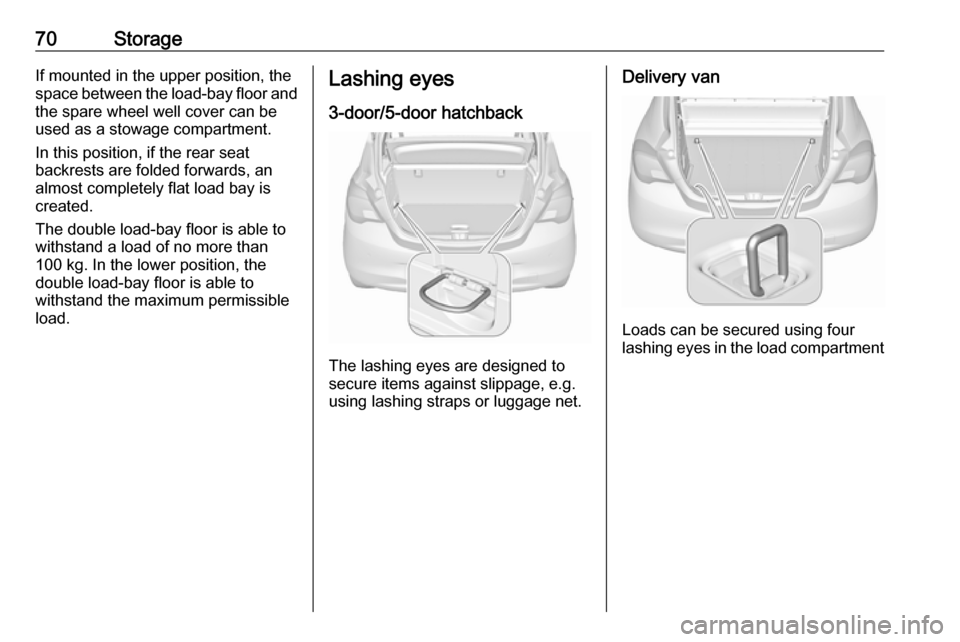
Lift up rear floor cover to gain access
to emergency breakdown equipment.
Tools 3 212.
In models with a tyre repair kit on the
right side in the load compartment,
the spare wheel recess may be used
as an additional stowage
compartment. Tyre repair kit 3 220.
Double load-bay floor
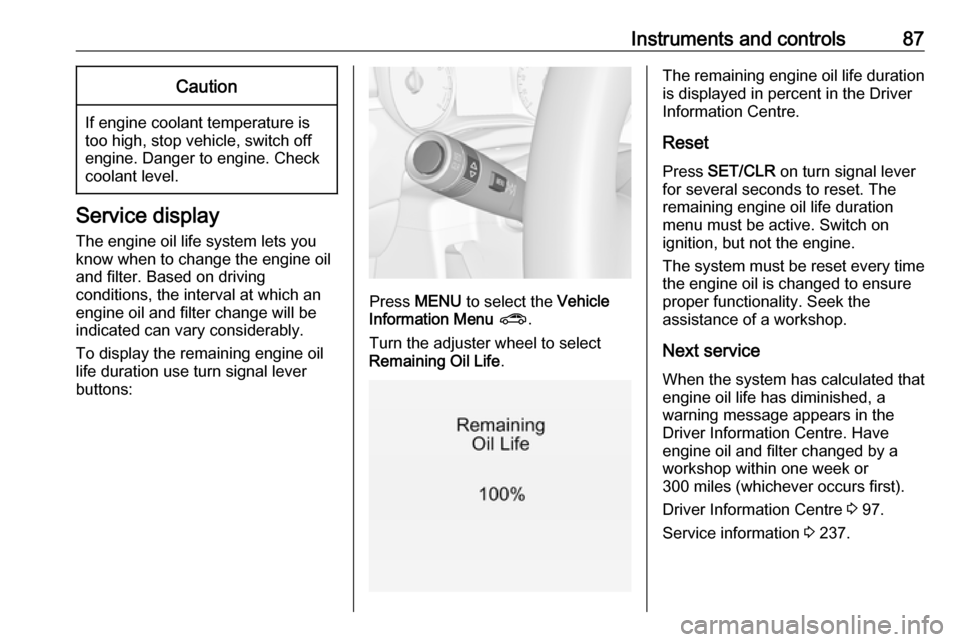
The double load-bay floor can be
inserted in the load compartment in
two positions:
● directly above the cover for the spare wheel recess or the floor
cover
● or in the upper openings in the load compartment
To remove, lift the load-bay floor
using the recess and pull backwards.
To insert, push the load-bay floor
forwards in the corresponding guide,
then lower.
Page 72 of 271

70StorageIf mounted in the upper position, the
space between the load-bay floor and
the spare wheel well cover can be
used as a stowage compartment.
In this position, if the rear seat
backrests are folded forwards, an
almost completely flat load bay is
created.
The double load-bay floor is able to
withstand a load of no more than
100 kg. In the lower position, the
double load-bay floor is able to
withstand the maximum permissible
load.Lashing eyes
3-door/5-door hatchback
The lashing eyes are designed to
secure items against slippage, e.g.
using lashing straps or luggage net.
Delivery van
Loads can be secured using four
lashing eyes in the load compartment
Page 76 of 271

74Instruments and controlsInstruments and
controlsControls ....................................... 75
Steering wheel adjustment ........75
Steering wheel controls .............75
Heated steering wheel ...............75
Horn ........................................... 76
Windscreen wiper/washer .........76
Rear window wiper/washer .......77
Outside temperature ..................78
Clock ......................................... 79
Power outlets ............................. 80
Inductive charging .....................81
Cigarette lighter ......................... 82
Ashtrays .................................... 82
Warning lights, gauges and indi‐ cators ........................................... 83
Instrument cluster ......................83
Speedometer ............................. 83
Odometer .................................. 83
Trip odometer ............................ 83
Tachometer ............................... 84
Fuel gauge ................................ 84
Fuel selector .............................. 85
Engine coolant temperature gauge ....................................... 86Service display.......................... 87
Control indicators ......................88
Turn signal ................................. 90
Seat belt reminder .....................91
Airbag and belt tensioners .........91
Airbag deactivation ....................92
Charging system .......................92
Malfunction indicator light ..........92
Service vehicle soon .................92
Brake and clutch system ...........93
Operate pedal ............................ 93
Antilock brake system (ABS) .....93
Gear shifting .............................. 93
Power steering .......................... 93
Lane departure warning ............93
Ultrasonic parking assist ...........94
Electronic Stability Control off ...94
Electronic Stability Control and Traction Control system ...........94
Traction Control system off .......94
Preheating ................................. 94
Diesel particle filter ....................94
Tyre pressure monitoring system ...................................... 95
Engine oil pressure ....................95
Low fuel ..................................... 95
Immobiliser ................................ 95
Reduced engine power .............95
Autostop .................................... 96
Exterior light .............................. 96High beam................................. 96
High beam assist .......................96
Fog light ..................................... 96
Rear fog light ............................. 96
Cruise control ............................ 96
Vehicle detected ahead .............96
Speed limiter ............................. 96
Traffic sign assistant ..................96
Door open .................................. 96
Information displays .....................97
Driver Information Centre ..........97
Colour-Info-Display ..................101
Graphic-Info-Display ................102
Vehicle messages ......................103
Warning chimes .......................105
Battery voltage ........................ 105
Vehicle personalisation ..............106
Telematics service .....................109
OnStar ..................................... 109
Page 77 of 271

Instruments and controls75Controls
Steering wheel adjustment
Unlock lever, adjust steering wheel,
then engage lever and ensure it is
fully locked.
Do not adjust steering wheel unless
vehicle is stationary and steering
wheel lock has been released.
Steering wheel controls
Cruise control, Speed limiter,
Forward collision alert setting,
Infotainment system and a connected
mobile phone can be operated via the controls on the steering wheel.
Driver assistance systems 3 155.
Further information is available in the
Infotainment manual.
Heated steering wheel
Activate heating by pressing *.
Activation is indicated by the LED in
the button.
Page 78 of 271

76Instruments and controlsThe highlighted grip areas of the
steering wheel are heated quicker
and to a higher temperature than the
other areas.
Heating is operational when the
engine is running and during an
Autostop.
Stop-start system 3 137.
Horn
Press j.
Windscreen wiper/washer
Windscreen wiperHI:fastLO:slowINT:interval wiping
or
automatic wiping with rain
sensorOFF:off
For a single wipe when the
windscreen wiper is off, press the
lever down to position 1x.
Do not use if the windscreen is frozen.
Switch off in car washes.
Adjustable wiper interval
Wiper lever in position INT.
Turn the adjuster wheel to adjust the
wiping frequency.
Page 79 of 271

Instruments and controls77Adjustable sensitivity of the rain
sensor
Wiper lever in position INT.
Turn the adjuster wheel to adjust the
sensitivity of the rain sensor.
The rain sensor detects the amount of water on the windscreen and
automatically regulates the wiping
frequency and speed.
After 20 seconds without wiping
activity, the wiper arms move slightly
down to park position.
Keep the sensor free from dust, dirt
and ice.
Windscreen washer
Pull lever. Washer fluid is sprayed
onto the windscreen and the wiper
wipes a few times.
Washer fluid 3 196
Rear window wiper/washer Rear window wiper
Press the rocker switch to activate the
rear window wiper:
ON:continuous operationOFF:offINT:intermittent operation
Do not use if the rear window is
frozen.
Page 86 of 271

84Instruments and controlsUplevel display
Two trip odometer pages are
selectable for different trips.
Select menu ; by pressing Menu
on the turn signal lever. Turn adjuster wheel on turn signal lever and
select ;1 or ; 2. Each trip
odometer page can be reset
separately by pressing SET/CLR on
the turn signal lever for a few seconds
on the respective menu.
Tachometer
Displays the engine speed.
Drive in a low engine speed range for each gear as much as possible.
Caution
If the needle is in the red warning
zone, the maximum permitted
engine speed is exceeded. Engine at risk.
Fuel gauge
Displays the fuel level or gas content
in the tank depending on the
operation mode.
Number of LEDs displayed shows the level in the respective fuel tank. 8
LEDs means fuel tank is full.
During liquid gas operation, the level
in the gas tank is displayed.
Low fuel indication
One remaining LED illuminating white indicates that the fuel level is low.
Page 89 of 271

Instruments and controls87Caution
If engine coolant temperature is
too high, stop vehicle, switch off
engine. Danger to engine. Check
coolant level.
Service display
The engine oil life system lets you
know when to change the engine oil
and filter. Based on driving
conditions, the interval at which an
engine oil and filter change will be
indicated can vary considerably.
To display the remaining engine oil
life duration use turn signal lever
buttons:
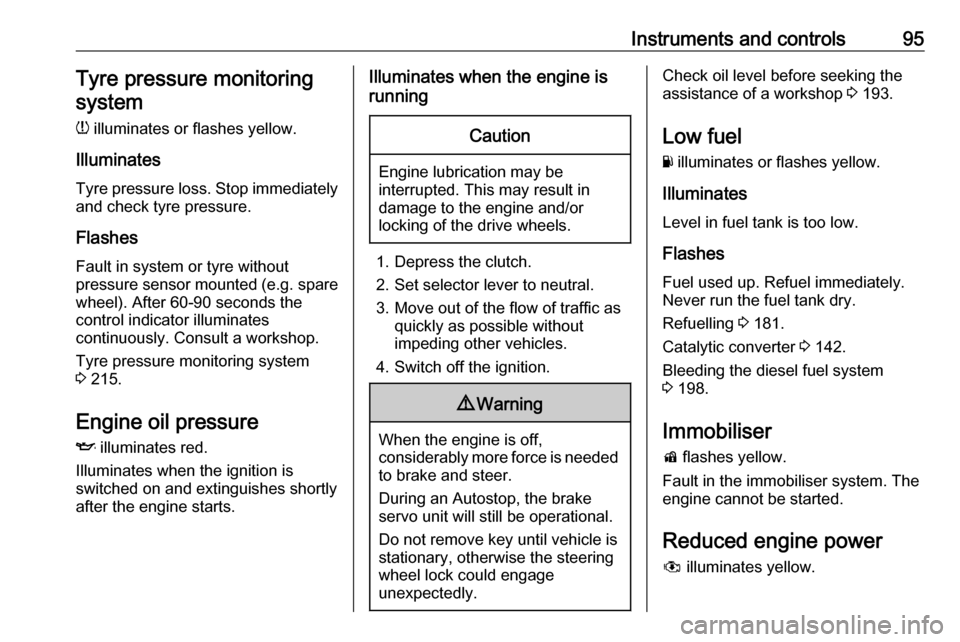
Press MENU to select the Vehicle
Information Menu ? .
Turn the adjuster wheel to select
Remaining Oil Life .
The remaining engine oil life duration
is displayed in percent in the Driver
Information Centre.
Reset Press SET/CLR on turn signal lever
for several seconds to reset. The
remaining engine oil life duration
menu must be active. Switch on
ignition, but not the engine.
The system must be reset every time
the engine oil is changed to ensure
proper functionality. Seek the
assistance of a workshop.
Next service When the system has calculated that
engine oil life has diminished, a
warning message appears in the
Driver Information Centre. Have
engine oil and filter changed by a
workshop within one week or
300 miles (whichever occurs first).
Driver Information Centre 3 97.
Service information 3 237.
Page 97 of 271

Instruments and controls95Tyre pressure monitoringsystem
w illuminates or flashes yellow.
Illuminates
Tyre pressure loss. Stop immediately
and check tyre pressure.
Flashes
Fault in system or tyre without pressure sensor mounted ( e.g. spare
wheel). After 60-90 seconds the
control indicator illuminates
continuously. Consult a workshop.
Tyre pressure monitoring system
3 215.
Engine oil pressure
I illuminates red.
Illuminates when the ignition is
switched on and extinguishes shortly
after the engine starts.Illuminates when the engine is
runningCaution
Engine lubrication may be
interrupted. This may result in
damage to the engine and/or
locking of the drive wheels.
1. Depress the clutch.
2. Set selector lever to neutral.
3. Move out of the flow of traffic as quickly as possible without
impeding other vehicles.
4. Switch off the ignition.
9 Warning
When the engine is off,
considerably more force is needed
to brake and steer.
During an Autostop, the brake
servo unit will still be operational.
Do not remove key until vehicle is stationary, otherwise the steeringwheel lock could engage
unexpectedly.
Check oil level before seeking the
assistance of a workshop 3 193.
Low fuel
Y illuminates or flashes yellow.
Illuminates
Level in fuel tank is too low.
Flashes
Fuel used up. Refuel immediately.
Never run the fuel tank dry.
Refuelling 3 181.
Catalytic converter 3 142.
Bleeding the diesel fuel system
3 198.
Immobiliser d flashes yellow.
Fault in the immobiliser system. The
engine cannot be started.
Reduced engine power
# illuminates yellow.
Page 100 of 271

98Instruments and controlsSome of the displayed functions differ
when the vehicle is being driven or at
a standstill. Some functions are only
available when the vehicle is being
driven.
Selecting menus and functions The menus and functions can be
selected via the buttons on the turn
signal lever.
Press MENU to switch between the
main menus or to return from a
submenu to the next higher menu
level.
Turn the adjuster wheel to select a
submenu of the main menu or to set
a numeric value.
Press SET/CLR to select and confirm
a function.
Vehicle and service messages are
popped-up in the Driver Information
Centre if required. Confirm messages
by pressing SET/CLR. Vehicle
messages 3 103.
Trip/Fuel information menu ;
Possible pages are: ● digital vehicle speed
● trip odometer
● average fuel economy
● average vehicle speed
● instantaneous fuel economy
● fuel range
● fuel range LPG version
● timer
● outside temperature
Selection and indication is different
between Midlevel display and Uplevel display.Digital vehicle speed
Digital display of the instantaneous
speed.
Trip odometer
Trip odometer displays the current
distance since a certain reset.
Trip odometer counts up to
9999 miles and then restarts at 0.
Turn the adjuster wheel to select between trip odometer 1 and 2 forUplevel display.
To reset, press SET/CLR for a few
seconds while viewing this page.
The information of trip page 1 and 2
can be reset separately while the
respective display is active.
Average fuel economy
Display of average consumption. The
measurement can be reset at any
time and starts with a default value.
To reset, press SET/CLR for a few
seconds while viewing this page.
The information of trip page 1 and 2
can be reset separately while the
respective display is active.