front VAUXHALL CORSA F 2019 Workshop Manual
[x] Cancel search | Manufacturer: VAUXHALL, Model Year: 2019, Model line: CORSA F, Model: VAUXHALL CORSA F 2019Pages: 229, PDF Size: 6.72 MB
Page 146 of 229
144Driving and operatingThe area displayed by the camera is
limited. The distance of the image that
appears on the display differs from
the actual distance.
Warning symbols
Warning symbols are indicated as
triangles 9 on the picture, which show
obstacles detected by the rear
sensors of the parking assist.
Additionally 9 appears on the top line
of the Info Display with the warning to
check the vehicle surrounding.
Deactivation
The camera is deactivated when a
certain forward speed is exceeded or if reverse gear is not engaged for
approx. 10 seconds.
Rear view camera can be manually
deactivated in the vehicle
personalisation menu in the
Info Display.
Vehicle personalisation 3 90.Deactivation of guiding lines and
warning symbols
Activation or deactivation of the visual
guiding lines and the warning
symbols can be changed by touch
buttons in the lower zone of the
display.
Fault
Fault messages are displayed with a
9 on the top line of the Info Display.
The rear view camera may not
operate properly when:
● The surrounding is dark.
● The sun or the beam of headlights is shining directly into
the camera lens.
● Ice, snow, mud, or anything else covers the camera lens. Clean
the lens, rinse it with water, and
wipe it with a soft cloth.
● The vehicle is towing a trailer.
● The vehicle had a rear end accident.
● There are extreme temperature changes.Traffic sign assistant
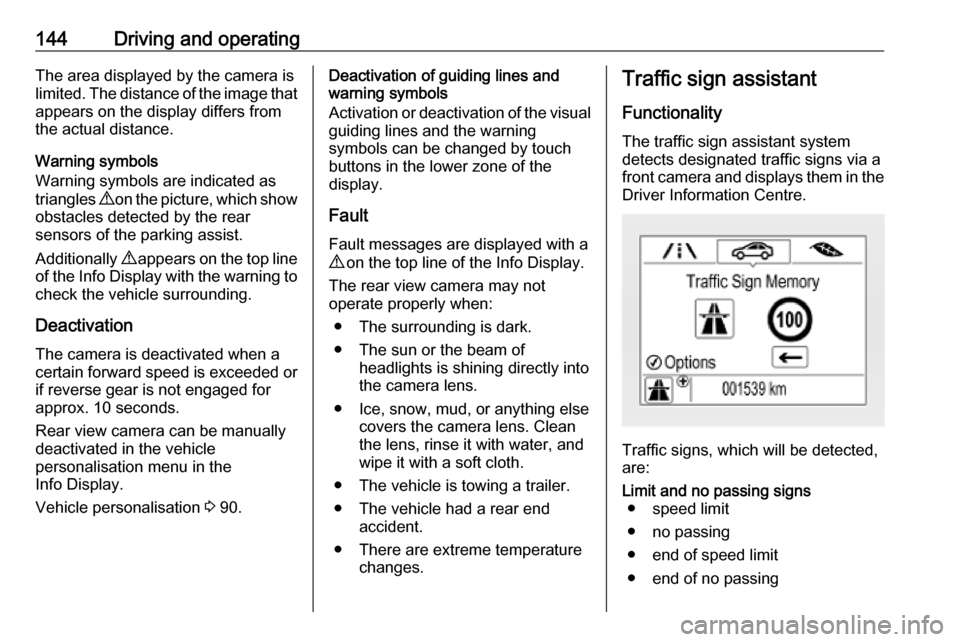
Functionality The traffic sign assistant systemdetects designated traffic signs via a
front camera and displays them in the
Driver Information Centre.
Traffic signs, which will be detected,
are:
Limit and no passing signs ● speed limit
● no passing
● end of speed limit
● end of no passing
Page 149 of 229
Driving and operating147In some cases, traffic sign assistant is
cleared up automatically by the
system.
Clearing of traffic signs
There are different scenarios that
lead to clearing the currently
displayed traffic signs. After clearing,
the “Default Sign” is displayed in the
Driver Information Centre.
Reasons for signs being cleared: ● A predefined distance was driven
or time has elapsed (differs for
each sign type)
● Vehicle drives through a turn
● The speed becomes slower than 32 mph (city entry detection)
Fault
The traffic sign assistant system may
not operate correctly if:
● The area of the windscreen, where the front camera is
located, is not clean or affected
by foreign items, e.g. stickers.
● Traffic signs are completely or partially covered or difficult to
discern.● There are adverse environmental
conditions, e.g. heavy rain, snow, direct sunlight or shadows.
● Traffic signs are incorrectly mounted or damaged.
● Traffic signs do not comply with the Vienna Convention on Road
Signs and Signals.Caution
The system is intended to help the
driver within a defined speed
range to discern certain traffic
signs. Do not ignore traffic signs
which are not displayed by the
system.
The system does not discern any other than the conventional traffic
signs that might give or end a
speed limit.
Do not let this special feature
tempt you into taking risks when
driving.
Always adapt speed to the road
conditions.
The driver assistance systems do not relieve the driver from full
responsibility for vehicle
operation.
Lane departure warning
The lane departure warning system
observes the lane markings between
which the vehicle is driving via a front camera. The system detects lane
changes and warns the driver in the
event of an unintended lane change
via visual and acoustic signals.
Criteria for the detection of an
unintended lane change are:
● No operation of turn lights.
● No brake pedal operation.
● No active accelerator operation or speeding-up.
● No active steering.
If the driver is performing these
actions, no warning will be issued.
Page 156 of 229

154Vehicle careVehicle careGeneral Information...................154
Accessories and vehicle modifications .......................... 154
Vehicle storage ........................155
End-of-life vehicle recovery .....155
Vehicle checks ........................... 156
Performing work ......................156
Bonnet ..................................... 156
Engine oil ................................. 157
Engine coolant ......................... 158
Washer fluid ............................ 159
Brakes ..................................... 160
Brake fluid ............................... 160
Vehicle battery ......................... 160
Wiper blade replacement ........162
Bulb replacement .......................162
Halogen headlights ..................162
Xenon headlights .....................165
Front fog lights ......................... 166
Front turn lights .......................166
Tail lights ................................. 167
Side turn lights ......................... 169
Centre high-mounted brake light ......................................... 169Number plate light...................169
Interior lights ............................ 170
Electrical system ........................170
Fuses ....................................... 170
Engine compartment fuse box . 171
Instrument panel fuse box .......174
Vehicle tools .............................. 175
Tools ........................................ 175
Wheels and tyres .......................176
Winter tyres ............................. 176
Tyre designations ....................177
Tyre pressure .......................... 177
Tyre pressure monitoring
system .................................... 178
Tread depth ............................. 182
Changing tyre and wheel size . 183
Wheel covers ........................... 183
Tyre chains .............................. 183
Tyre repair kit .......................... 184
Wheel changing .......................189
Spare wheel ............................ 190
Jump starting ............................. 193
Towing ....................................... 194
Towing the vehicle ...................194
Towing another vehicle ...........195
Appearance care .......................196
Exterior care ............................ 196
Interior care ............................. 198General Information
Accessories and vehiclemodifications
We recommend the use of genuine
parts and accessories and factory
approved parts specific for your
vehicle type. We cannot assess or guarantee reliability of other products
- even if they have a regulatory or
otherwise granted approval.
Any modification, conversion or other
changes made to standard vehicle
specifications (including, without
limitation, software modifications,
modifications of the electronic control units) may invalidate the warranty
offered by Vauxhall. Furthermore,
such changes may affect driver
assistance systems, fuel
consumption, CO 2 emissions and
other emissions of the vehicle. They
may also invalidate the vehicle
operating permit.
Page 165 of 229

Vehicle care163
Sidelight / daytime running light (1)
Low beam (2)
High beam (3)
Front turn lights 3 166.
Low beam
1. Rotate the cap (2) anticlockwise
and remove it.
2. Press the clip to disengage bulbholder. Withdraw the bulb holder
from the reflector.
3. Detach the bulb from the bulb holder and replace the bulb.
4. Insert the bulb holder with the clip
downwards and engage into the
reflector until it clicks.
5. Install cap.
Page 167 of 229
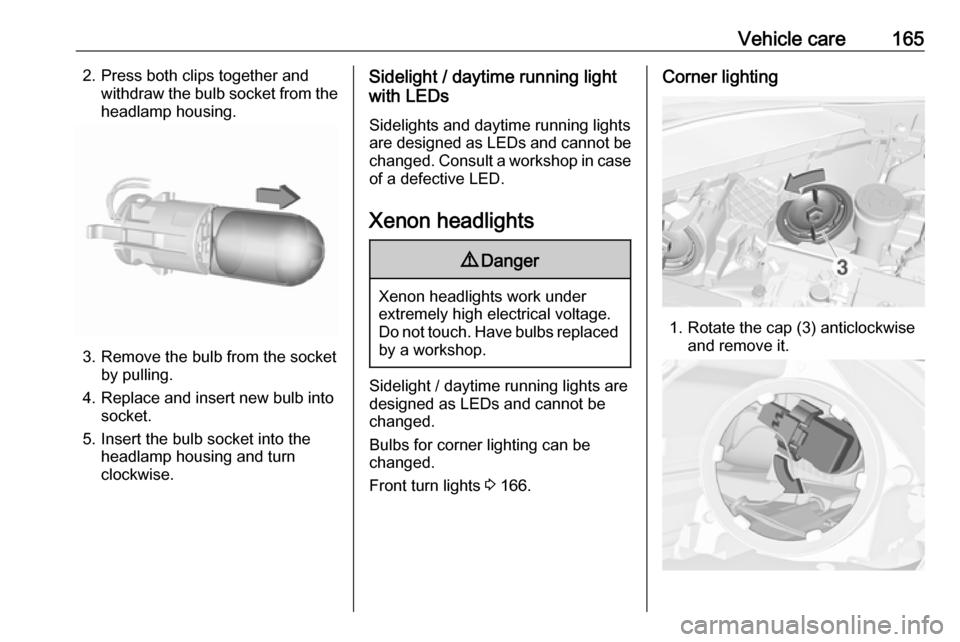
Vehicle care1652. Press both clips together andwithdraw the bulb socket from theheadlamp housing.
3. Remove the bulb from the socket by pulling.
4. Replace and insert new bulb into socket.
5. Insert the bulb socket into the headlamp housing and turn
clockwise.
Sidelight / daytime running light
with LEDs
Sidelights and daytime running lights
are designed as LEDs and cannot be
changed. Consult a workshop in case
of a defective LED.
Xenon headlights9 Danger
Xenon headlights work under
extremely high electrical voltage.
Do not touch. Have bulbs replaced by a workshop.
Sidelight / daytime running lights are
designed as LEDs and cannot be
changed.
Bulbs for corner lighting can be
changed.
Front turn lights 3 166.
Corner lighting
1. Rotate the cap (3) anticlockwise
and remove it.
Page 168 of 229

166Vehicle care2. Rotate the bulb holderanticlockwise to disengage.
Withdraw the bulb holder from the
reflector.
3. Remove the bulb from the plug connector by disengaging and
pulling.
4. Replace the bulb. Connect and engage bulb holder with the plug
connector.
5. Insert the bulb holder into the reflector and rotate clockwise to
secure.
6. Fit the cap and rotate clockwise.
Front fog lights
The bulbs are accessible from the
underside of the vehicle.
1. Turn the bulb holder anti- clockwise and remove it from the
reflector.
2. Disengage the bulb socket from the plug connector by pressing
the retaining lug.
3. Remove and replace the bulb socket with bulb and attach the
plug connector.
4. Insert the bulb socket into the reflector by turning clockwise and
engage.
Front turn lights Front turn lights consist of long-life
bulbs which cannot be changed.
Consult a workshop in case of a
defective long-life bulb.
Page 172 of 229
170Vehicle care
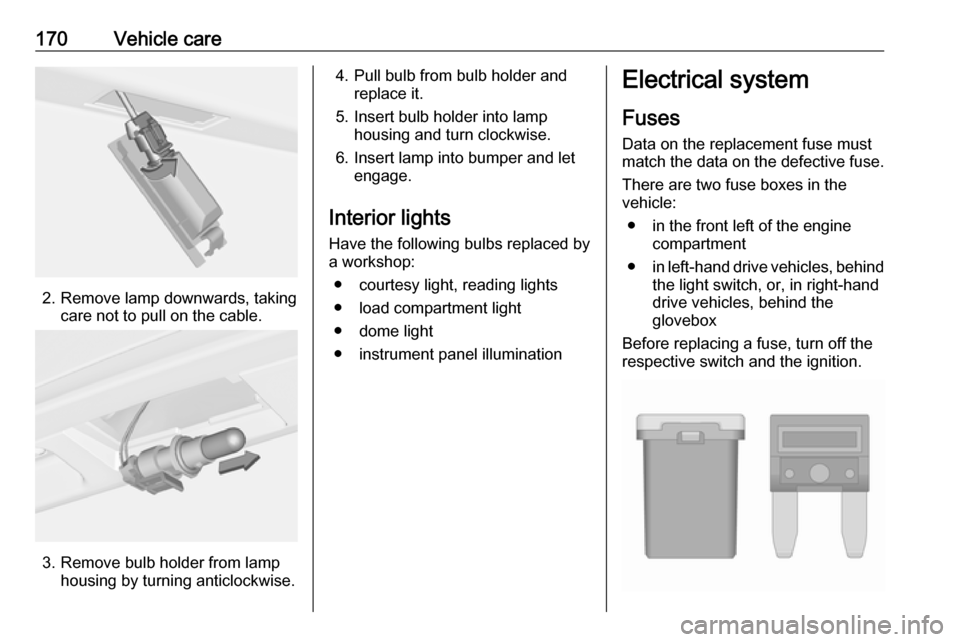
2. Remove lamp downwards, takingcare not to pull on the cable.
3. Remove bulb holder from lamphousing by turning anticlockwise.
4. Pull bulb from bulb holder andreplace it.
5. Insert bulb holder into lamp housing and turn clockwise.
6. Insert lamp into bumper and let engage.
Interior lights
Have the following bulbs replaced by
a workshop:
● courtesy light, reading lights
● load compartment light
● dome light
● instrument panel illuminationElectrical system
Fuses Data on the replacement fuse must
match the data on the defective fuse.
There are two fuse boxes in the
vehicle:
● in the front left of the engine compartment
● in left-hand drive vehicles, behind
the light switch, or, in right-hand
drive vehicles, behind the
glovebox
Before replacing a fuse, turn off the respective switch and the ignition.
Page 173 of 229
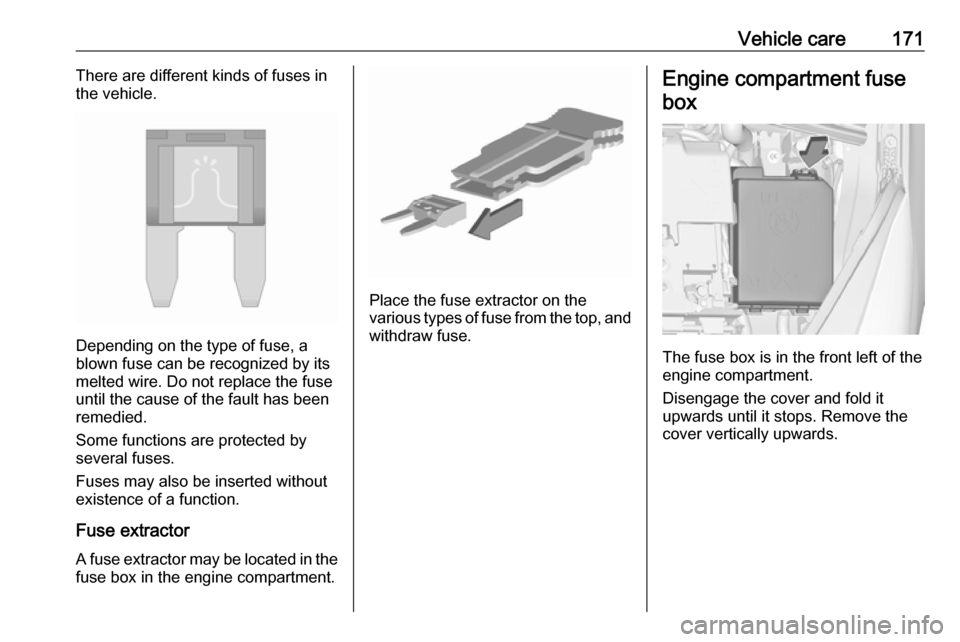
Vehicle care171There are different kinds of fuses in
the vehicle.
Depending on the type of fuse, a
blown fuse can be recognized by its
melted wire. Do not replace the fuse until the cause of the fault has been
remedied.
Some functions are protected by
several fuses.
Fuses may also be inserted without existence of a function.
Fuse extractorA fuse extractor may be located in the
fuse box in the engine compartment.
Place the fuse extractor on the
various types of fuse from the top, and withdraw fuse.
Engine compartment fuse
box
The fuse box is in the front left of the
engine compartment.
Disengage the cover and fold it
upwards until it stops. Remove the
cover vertically upwards.
Page 175 of 229
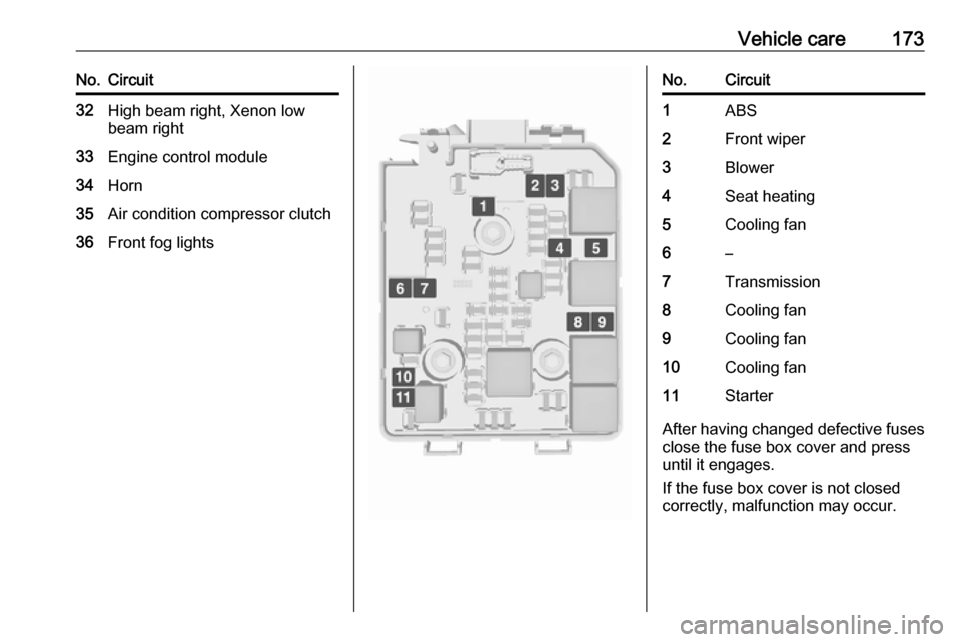
Vehicle care173No.Circuit32High beam right, Xenon low
beam right33Engine control module34Horn35Air condition compressor clutch36Front fog lightsNo.Circuit1ABS2Front wiper3Blower4Seat heating5Cooling fan6–7Transmission8Cooling fan9Cooling fan10Cooling fan11Starter
After having changed defective fuses
close the fuse box cover and press
until it engages.
If the fuse box cover is not closed
correctly, malfunction may occur.
Page 177 of 229
Vehicle care175No.Circuit18Air conditioning system19–20Parking assist, rain sensor, front
camera21Brake switch22Infotainment system23Display24–25Auxiliary jack26Instrument panel27–28–29–30–31Horn32–33Heated steering wheelNo.Circuit34–35Tyre repair kit36–37Rear wiper38Cigarette lighter39Power windows, automatic
transmission display40–Vehicle tools
Tools
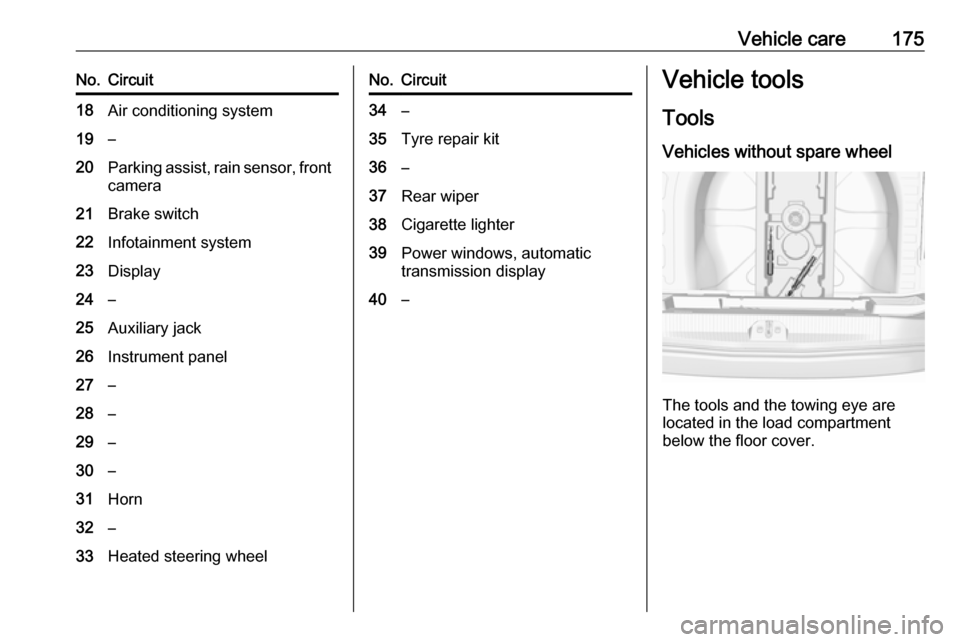
Vehicles without spare wheel
The tools and the towing eye are
located in the load compartment below the floor cover.