Reverse light VAUXHALL CORSA F 2019 Owner's Manual
[x] Cancel search | Manufacturer: VAUXHALL, Model Year: 2019, Model line: CORSA F, Model: VAUXHALL CORSA F 2019Pages: 229, PDF Size: 6.72 MB
Page 18 of 229
16In briefTransmission
Manual transmission
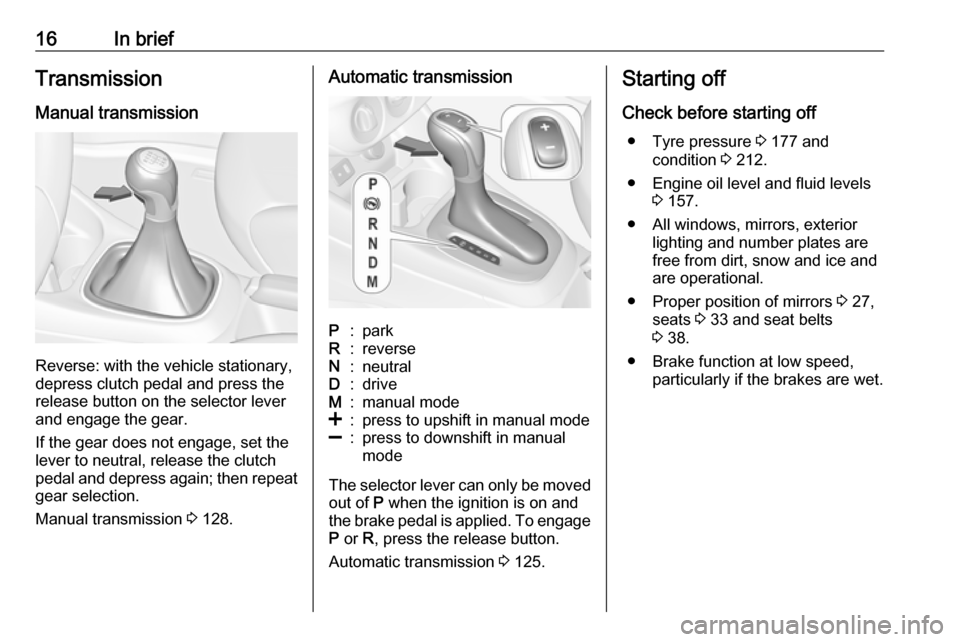
Reverse: with the vehicle stationary,
depress clutch pedal and press the release button on the selector lever
and engage the gear.
If the gear does not engage, set the
lever to neutral, release the clutch
pedal and depress again; then repeat
gear selection.
Manual transmission 3 128.
Automatic transmissionP:parkR:reverseN:neutralD:driveM:manual mode<:press to upshift in manual mode]:press to downshift in manual
mode
The selector lever can only be moved out of P when the ignition is on and
the brake pedal is applied. To engage
P or R, press the release button.
Automatic transmission 3 125.
Starting off
Check before starting off ● Tyre pressure 3 177 and
condition 3 212.
● Engine oil level and fluid levels 3 157.
● All windows, mirrors, exterior lighting and number plates are
free from dirt, snow and ice and
are operational.
● Proper position of mirrors 3 27,
seats 3 33 and seat belts
3 38.
● Brake function at low speed, particularly if the brakes are wet.
Page 19 of 229
In brief17Starting the engine
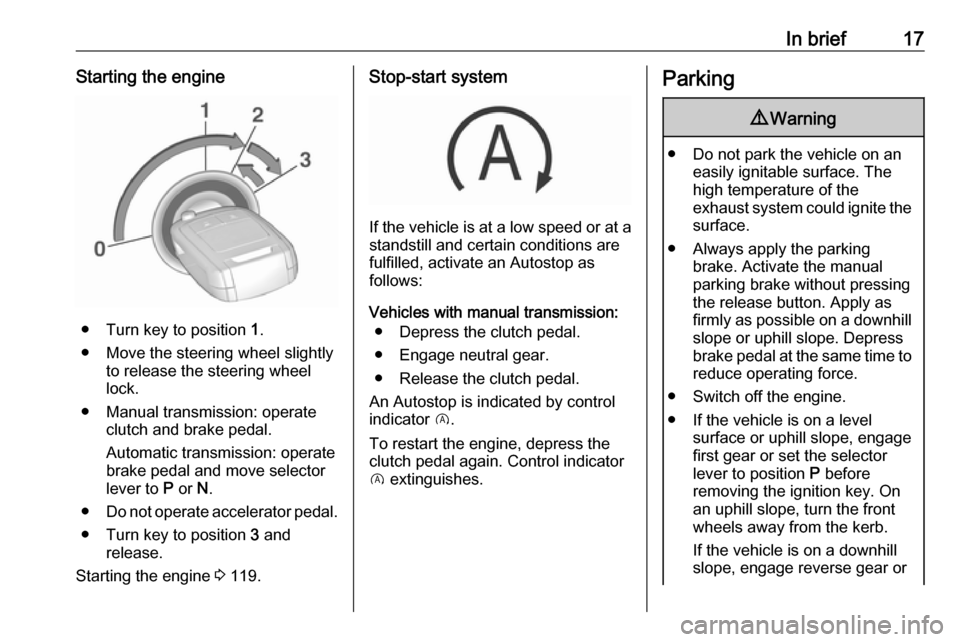
● Turn key to position 1.
● Move the steering wheel slightly to release the steering wheel
lock.
● Manual transmission: operate clutch and brake pedal.
Automatic transmission: operate
brake pedal and move selector
lever to P or N.
● Do not operate accelerator pedal.
● Turn key to position 3 and
release.
Starting the engine 3 119.
Stop-start system
If the vehicle is at a low speed or at a
standstill and certain conditions are
fulfilled, activate an Autostop as
follows:
Vehicles with manual transmission: ● Depress the clutch pedal.
● Engage neutral gear.
● Release the clutch pedal.
An Autostop is indicated by control
indicator D.
To restart the engine, depress the
clutch pedal again. Control indicator
D extinguishes.
Parking9 Warning
● Do not park the vehicle on an
easily ignitable surface. The
high temperature of the
exhaust system could ignite the
surface.
● Always apply the parking brake. Activate the manual
parking brake without pressing the release button. Apply as
firmly as possible on a downhill slope or uphill slope. Depress
brake pedal at the same time to
reduce operating force.
● Switch off the engine.
● If the vehicle is on a level surface or uphill slope, engage
first gear or set the selector
lever to position P before
removing the ignition key. On
an uphill slope, turn the front
wheels away from the kerb.
If the vehicle is on a downhill
slope, engage reverse gear or
Page 93 of 229
Instruments and controls91
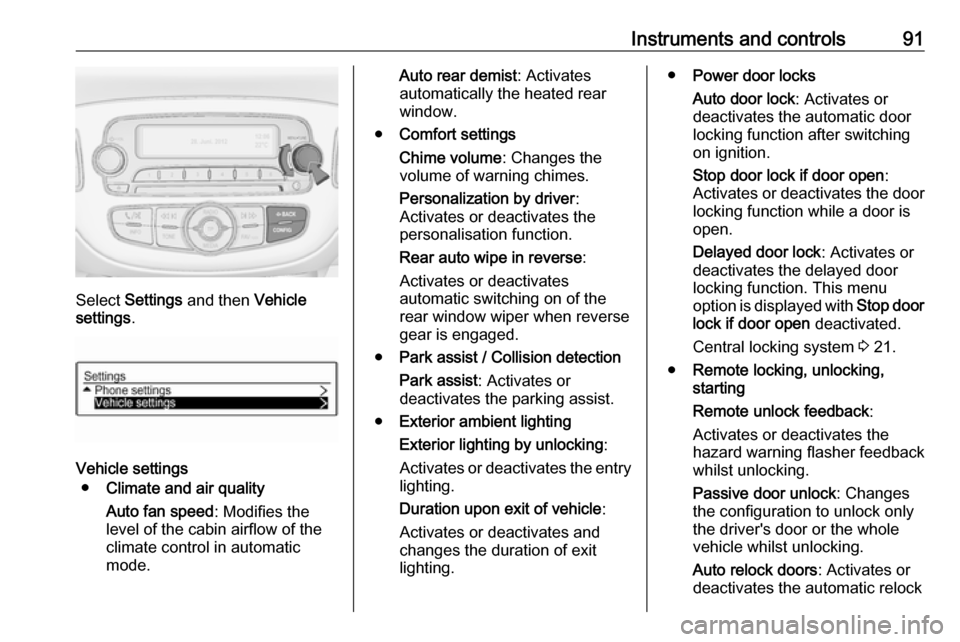
Select Settings and then Vehicle
settings .
Vehicle settings
● Climate and air quality
Auto fan speed : Modifies the
level of the cabin airflow of the
climate control in automatic
mode.
Auto rear demist : Activates
automatically the heated rear
window.
● Comfort settings
Chime volume : Changes the
volume of warning chimes.
Personalization by driver :
Activates or deactivates the
personalisation function.
Rear auto wipe in reverse :
Activates or deactivates
automatic switching on of the
rear window wiper when reverse gear is engaged.
● Park assist / Collision detection
Park assist : Activates or
deactivates the parking assist.
● Exterior ambient lighting
Exterior lighting by unlocking :
Activates or deactivates the entry
lighting.
Duration upon exit of vehicle :
Activates or deactivates and
changes the duration of exit
lighting.● Power door locks
Auto door lock : Activates or
deactivates the automatic door
locking function after switching on ignition.
Stop door lock if door open :
Activates or deactivates the door locking function while a door isopen.
Delayed door lock : Activates or
deactivates the delayed door
locking function. This menu
option is displayed with Stop door
lock if door open deactivated.
Central locking system 3 21.
● Remote locking, unlocking,
starting
Remote unlock feedback :
Activates or deactivates the
hazard warning flasher feedback
whilst unlocking.
Passive door unlock : Changes
the configuration to unlock only
the driver's door or the whole
vehicle whilst unlocking.
Auto relock doors : Activates or
deactivates the automatic relock
Page 94 of 229
92Instruments and controlsfunction after unlocking without
opening the vehicle.
● Restore factory settings :
Resets all settings to the default settings.
Personal settings Colour Info Display
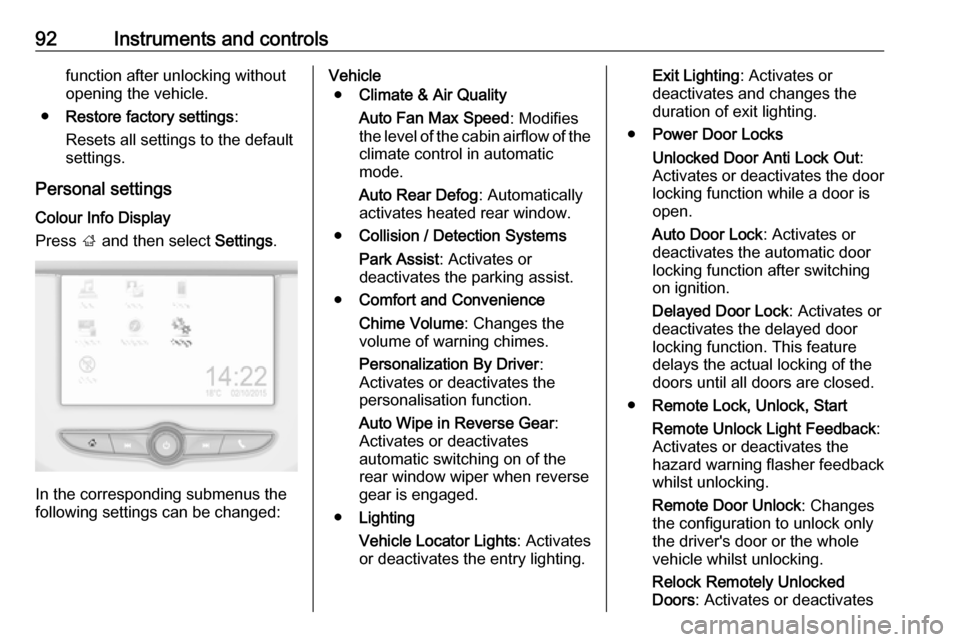
Press ; and then select Settings.
In the corresponding submenus the
following settings can be changed:
Vehicle
● Climate & Air Quality
Auto Fan Max Speed : Modifies
the level of the cabin airflow of the climate control in automatic
mode.
Auto Rear Defog : Automatically
activates heated rear window.
● Collision / Detection Systems
Park Assist : Activates or
deactivates the parking assist.
● Comfort and Convenience
Chime Volume : Changes the
volume of warning chimes.
Personalization By Driver :
Activates or deactivates the
personalisation function.
Auto Wipe in Reverse Gear :
Activates or deactivates
automatic switching on of the
rear window wiper when reverse gear is engaged.
● Lighting
Vehicle Locator Lights : Activates
or deactivates the entry lighting.Exit Lighting : Activates or
deactivates and changes the duration of exit lighting.
● Power Door Locks
Unlocked Door Anti Lock Out :
Activates or deactivates the door
locking function while a door is open.
Auto Door Lock : Activates or
deactivates the automatic door
locking function after switching on ignition.
Delayed Door Lock : Activates or
deactivates the delayed door
locking function. This feature
delays the actual locking of the
doors until all doors are closed.
● Remote Lock, Unlock, Start
Remote Unlock Light Feedback :
Activates or deactivates the
hazard warning flasher feedback
whilst unlocking.
Remote Door Unlock : Changes
the configuration to unlock only
the driver's door or the whole
vehicle whilst unlocking.
Relock Remotely Unlocked
Doors : Activates or deactivates
Page 103 of 229

Lighting101set to right-hand traffic mode.
Therefore, insert the key in the guide as shown in the illustration.
Alternatively, a Phillips head
screwdriver size three can be used for
setting.
To reset to left-hand traffic mode, turn
adjuster elements 1
/2 turn clockwise.
Daytime running lights Daytime running light increases
visibility of the vehicle during daylight.
They are switched on automatically
when ignition is on.
Versions with automatic light control
The system switches automatically
between daytime running light and
headlights, depending on the lighting
conditions and information given by
the rain sensor system.
Automatic light control 3 99.
Xenon lighting system Xenon lighting system includes:● xenon headlights for low and high
beam
● corner lighting
● reversing function
Xenon headlights Xenon headlights for low and high
beam ensure better visibility under all
conditions.
Operation is the same as for halogen headlights.
Light switch 3 98.
High beam 3 100.
Headlight flash 3 100.
Headlight range adjustment 3 100.
Headlights when driving abroad
3 100.
Automatic light control 3 99.
Corner lightingOn tight bends or when turning off,
depending on the steering angle or
the indicator light signal, an additional left or right reflector is switched on
which illuminates the road in the
direction of travel. It is activated up to
a speed of 25 mph.
Reversing function To assist driver's orientation when
parking, both corner lights and
reversing light illuminate when
headlights are on and reverse gear is
engaged. They remain illuminated for
a short time after disengaging reverse gear or until driving faster than
4 mph in a forward gear.
Page 105 of 229
Lighting103Rear fog light
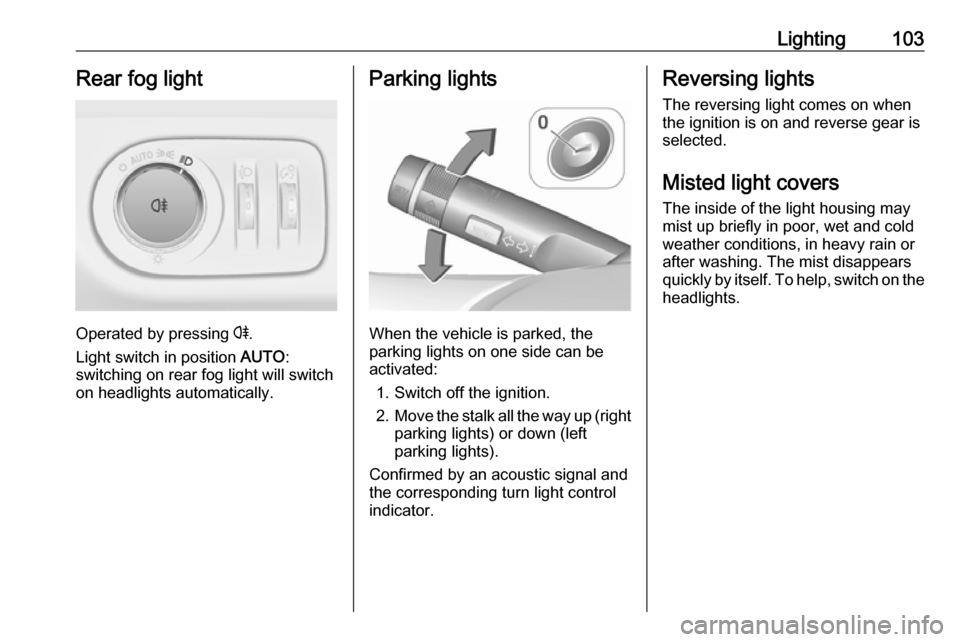
Operated by pressing r.
Light switch in position AUTO:
switching on rear fog light will switch
on headlights automatically.
Parking lights
When the vehicle is parked, the
parking lights on one side can be
activated:
1. Switch off the ignition.
2. Move the stalk all the way up (right
parking lights) or down (left
parking lights).
Confirmed by an acoustic signal and
the corresponding turn light control
indicator.
Reversing lights
The reversing light comes on when
the ignition is on and reverse gear is
selected.
Misted light covers
The inside of the light housing may
mist up briefly in poor, wet and cold weather conditions, in heavy rain or
after washing. The mist disappears
quickly by itself. To help, switch on the
headlights.
Page 145 of 229

Driving and operating143correct distance indication in the
upper part of these vehicles
cannot be guaranteed.
Objects with a very small reflection
cross-section, e.g. objects of
narrow size or soft materials, may
not be detected by the system.
Parking assist systems do not
detect objects outside the
detection range.
Notice
It is possible that the sensor detects
a non-existing object caused by
echo disturbance from external
acoustic noise or mechanical
misalignments (sporadic false
warnings may occur).
Make sure that the front number
plate is properly mounted (not bent
and no gaps to the bumper on the left
or right side) and the sensors are
firmly in place.
Low curbs and surface irregularities,
e.g. on construction zones, are not
detected by the system. The driver
accepts responsibility.
Rear view camera
The rear view camera assists the
driver when reversing by displaying a view of the area behind the vehicle.
The view of the camera is displayed
in the Colour Info Display.9 Warning
The rear view camera does not
replace driver vision. Note that
objects that are outside the
camera's field of view and the
parking assist sensors, e.g. below
the bumper or underneath the
vehicle, are not displayed.
Do not reverse or park the vehicle
using only the rear view camera.
Always check the surrounding of
the vehicle before driving.
Activation
Rear view camera is automatically
activated when reverse gear is
engaged.
Functionality
The camera is mounted between the
number plate lights and has a viewing angle of 130°.
Page 146 of 229
144Driving and operatingThe area displayed by the camera is
limited. The distance of the image that
appears on the display differs from
the actual distance.
Warning symbols
Warning symbols are indicated as
triangles 9 on the picture, which show
obstacles detected by the rear
sensors of the parking assist.
Additionally 9 appears on the top line
of the Info Display with the warning to
check the vehicle surrounding.
Deactivation
The camera is deactivated when a
certain forward speed is exceeded or if reverse gear is not engaged for
approx. 10 seconds.
Rear view camera can be manually
deactivated in the vehicle
personalisation menu in the
Info Display.
Vehicle personalisation 3 90.Deactivation of guiding lines and
warning symbols
Activation or deactivation of the visual
guiding lines and the warning
symbols can be changed by touch
buttons in the lower zone of the
display.
Fault
Fault messages are displayed with a
9 on the top line of the Info Display.
The rear view camera may not
operate properly when:
● The surrounding is dark.
● The sun or the beam of headlights is shining directly into
the camera lens.
● Ice, snow, mud, or anything else covers the camera lens. Clean
the lens, rinse it with water, and
wipe it with a soft cloth.
● The vehicle is towing a trailer.
● The vehicle had a rear end accident.
● There are extreme temperature changes.Traffic sign assistant
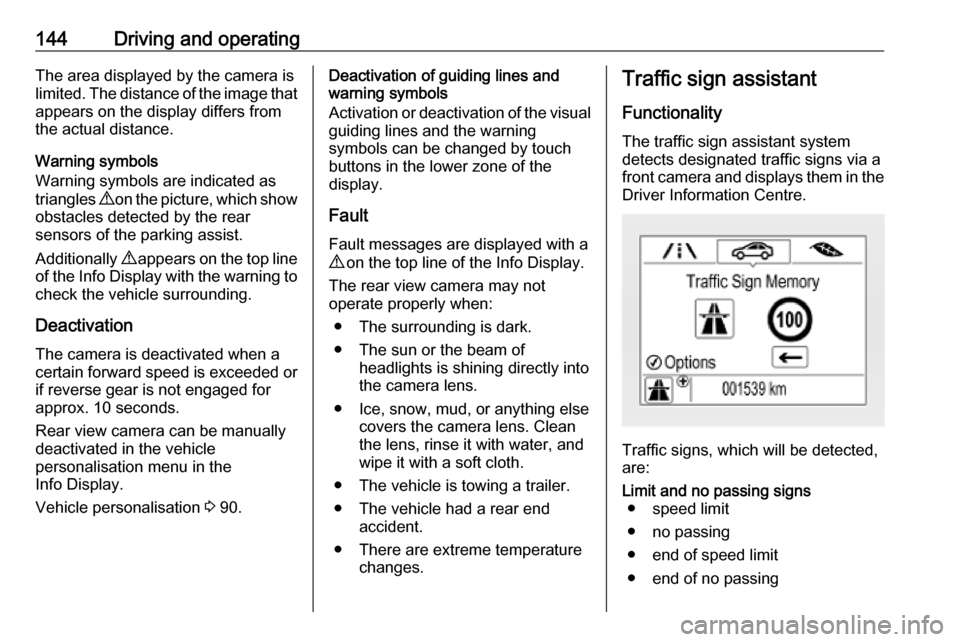
Functionality The traffic sign assistant systemdetects designated traffic signs via a
front camera and displays them in the
Driver Information Centre.
Traffic signs, which will be detected,
are:
Limit and no passing signs ● speed limit
● no passing
● end of speed limit
● end of no passing
Page 164 of 229
162Vehicle careWiper blade replacementWindscreen
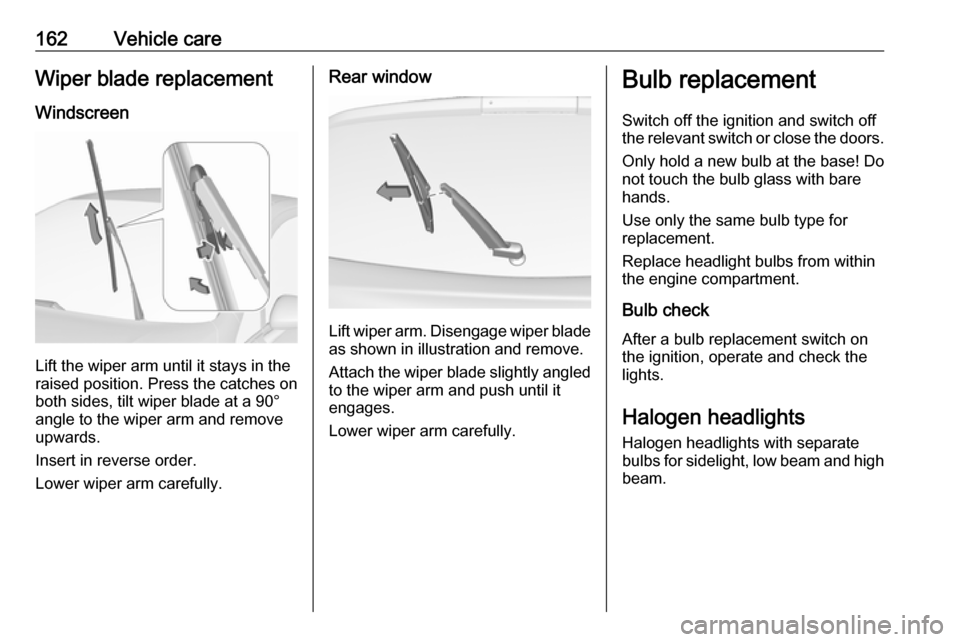
Lift the wiper arm until it stays in the
raised position. Press the catches on
both sides, tilt wiper blade at a 90°
angle to the wiper arm and remove
upwards.
Insert in reverse order.
Lower wiper arm carefully.
Rear window
Lift wiper arm. Disengage wiper blade as shown in illustration and remove.
Attach the wiper blade slightly angled
to the wiper arm and push until it
engages.
Lower wiper arm carefully.
Bulb replacement
Switch off the ignition and switch off
the relevant switch or close the doors.
Only hold a new bulb at the base! Do not touch the bulb glass with bare
hands.
Use only the same bulb type for
replacement.
Replace headlight bulbs from within
the engine compartment.
Bulb check
After a bulb replacement switch on
the ignition, operate and check the
lights.
Halogen headlights Halogen headlights with separate
bulbs for sidelight, low beam and high
beam.
Page 191 of 229
Vehicle care189General informationNotice
The driving characteristics of the
repaired tyre are severely affected,
therefore have this tyre replaced.
If unusual noise is heard or the
compressor becomes hot, turn
compressor off for at least 30 min.
The built-in safety valve opens at a
pressure of 7 bar (102 psi).
Note the expiry date of the kit. After
this date its sealing capability is no
longer guaranteed. Pay attention to
storage information on sealant
bottle.
Replace the used sealant bottle. Dispose of the bottle as prescribed
by applicable laws.
The compressor and sealant can be
used from approx. -30 °C.
The adapters possibly supplied can
be used to pump up other items e.g. footballs, air mattresses, inflatable
dinghies etc. They can be located on the underside of the compressor. To
remove, screw on compressor air
hose and withdraw adapter.Wheel changing
Make the following preparations and
observe the following information:
● Park the vehicle on a level, firm and non-skid surface. The front
wheels must be in the straight- ahead position.
● Apply the parking brake and engage first gear, reverse gear or
P .
● If the ground on which the vehicle
is standing is soft, a solid board
(max. 1 cm thick) should be
placed under the jack.
● Take heavy objects out of the vehicle before jacking up.
● No people or animals may be in the vehicle when it is jacked-up.
● Never crawl under a jacked-up vehicle.
● Do not start the vehicle when it is
raised on the jack.
● Before screwing in the wheel bolts, clean them and lightly coat
the taper of each wheel bolt with
commercially available grease.9 Warning
Do not grease the thread of the
wheel bolt.
Jacking positions
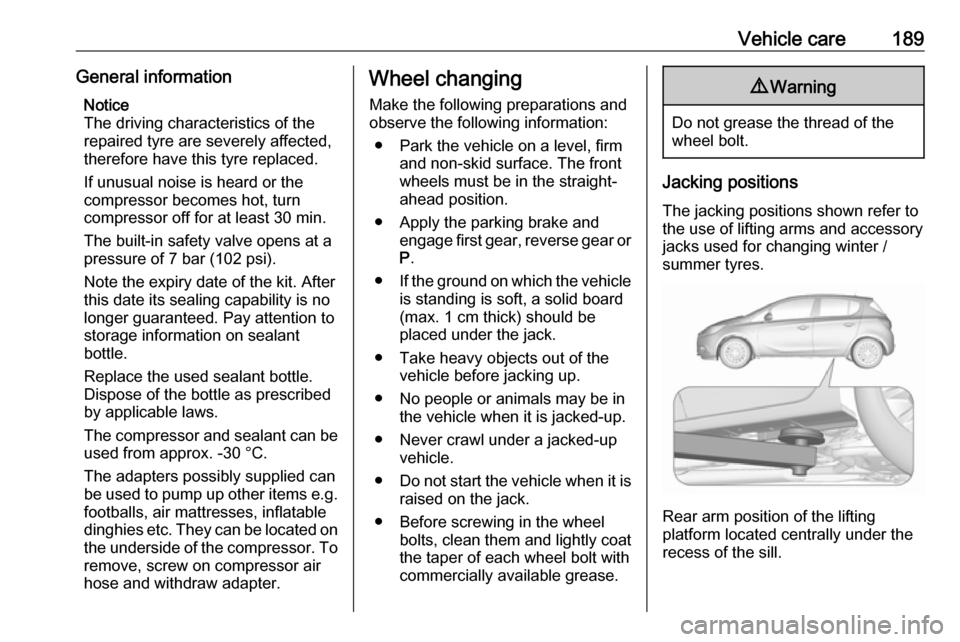
The jacking positions shown refer to the use of lifting arms and accessory
jacks used for changing winter /
summer tyres.
Rear arm position of the lifting
platform located centrally under the
recess of the sill.