interior VAUXHALL CORSA F 2019 Owner's Manual
[x] Cancel search | Manufacturer: VAUXHALL, Model Year: 2019, Model line: CORSA F, Model: VAUXHALL CORSA F 2019Pages: 229, PDF Size: 6.72 MB
Page 5 of 229

Introduction3Vehicle specific dataPlease enter your vehicle's data on
the previous page to keep it easily
accessible. This information is
available in the sections "Service and
maintenance" and "Technical data"
as well as on the identification plate.
Introduction
Your vehicle is a designed
combination of advanced technology, safety, environmental friendliness
and economy.
This Owner's Manual provides you
with all the necessary information to
enable you to drive your vehicle
safely and efficiently.
Make sure your passengers are
aware of the possible risk of accident
and injury which may result from
improper use of the vehicle.
You must always comply with the
specific laws and regulations of the
country that you are in. These laws
may differ from the information in this Owner's Manual.
Disregarding the description given in
this manual may affect your warranty.When this Owner's Manual refers to a
workshop visit, we recommend your
Vauxhall Authorised Repairer.
For gas vehicles, we recommend a
Vauxhall Authorised Repairer
licensed to service gas vehicles.
All Vauxhall Authorised Repairers
provide first-class service at
reasonable prices. Experienced
mechanics trained by Vauxhall work according to specific Vauxhall
instructions.
The customer literature pack should
always be kept ready to hand in the
vehicle.
Using this manual ● This manual describes all options
and features available for this
model. Certain descriptions,
including those for display and
menu functions, may not apply to
your vehicle due to model
variant, country specifications,
special equipment or
accessories.
● The "In brief" section will give you
an initial overview.● The table of contents at the beginning of this manual and
within each section shows where the information is located.
● The index will enable you to search for specific information.
● This Owner's Manual depicts left-
hand drive vehicles. Operation is similar for right-hand drive
vehicles.
● The Owner's Manual uses the engine identifier code. The
corresponding sales designation
and engineering code can be
found in the section "Technical
data".
● Directional data, e.g. left or right, or front or back, always relate to
the direction of travel.
● Displays may not support your specific language.
● Display messages and interior labelling are written in bold
letters.
Page 10 of 229
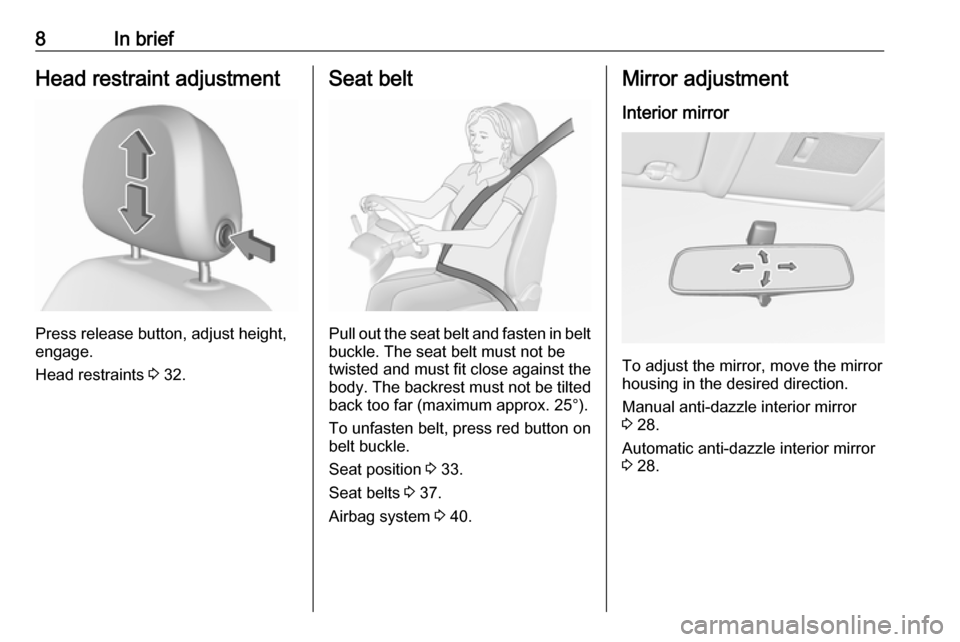
8In briefHead restraint adjustment
Press release button, adjust height,
engage.
Head restraints 3 32.
Seat belt
Pull out the seat belt and fasten in belt
buckle. The seat belt must not be
twisted and must fit close against the
body. The backrest must not be tilted back too far (maximum approx. 25°).
To unfasten belt, press red button on belt buckle.
Seat position 3 33.
Seat belts 3 37.
Airbag system 3 40.
Mirror adjustment
Interior mirror
To adjust the mirror, move the mirror
housing in the desired direction.
Manual anti-dazzle interior mirror
3 28.
Automatic anti-dazzle interior mirror 3 28.
Page 21 of 229

Keys, doors and windows19Keys, doors and
windowsKeys, locks ................................... 19
Keys .......................................... 19
Radio remote control .................20
Memorised settings ...................21
Central locking system ..............21
Automatic locking ......................23
Child locks ................................. 23
Doors ........................................... 24
Load compartment ....................24
Vehicle security ............................ 25
Anti-theft locking system ...........25
Anti-theft alarm system ..............25
Immobiliser ................................ 26
Exterior mirrors ............................ 27
Convex shape ........................... 27
Electric adjustment ....................27
Folding mirrors .......................... 27
Heated mirrors ........................... 28
Interior mirrors ............................. 28
Manual anti-dazzle ....................28
Automatic anti-dazzle ................28
Windows ...................................... 29
Windscreen ............................... 29Manual windows........................29
Power windows ......................... 29
Heated rear window ..................30
Heated windscreen ....................31
Sun visors .................................. 31Keys, locks
KeysCaution
Do not attach heavy or bulky itemsto the ignition key.
Replacement keys
The key number is specified on a
detachable tag.
The key number must be quoted
when ordering replacement keys, as
it is a component of the immobiliser
system.
Locks 3 196.
The code number of the adapter for
the locking wheel bolts is specified on a card. It must be quoted when
ordering a replacement adapter.
Wheel changing 3 189.
Page 23 of 229
Keys, doors and windows21Radio remote control battery
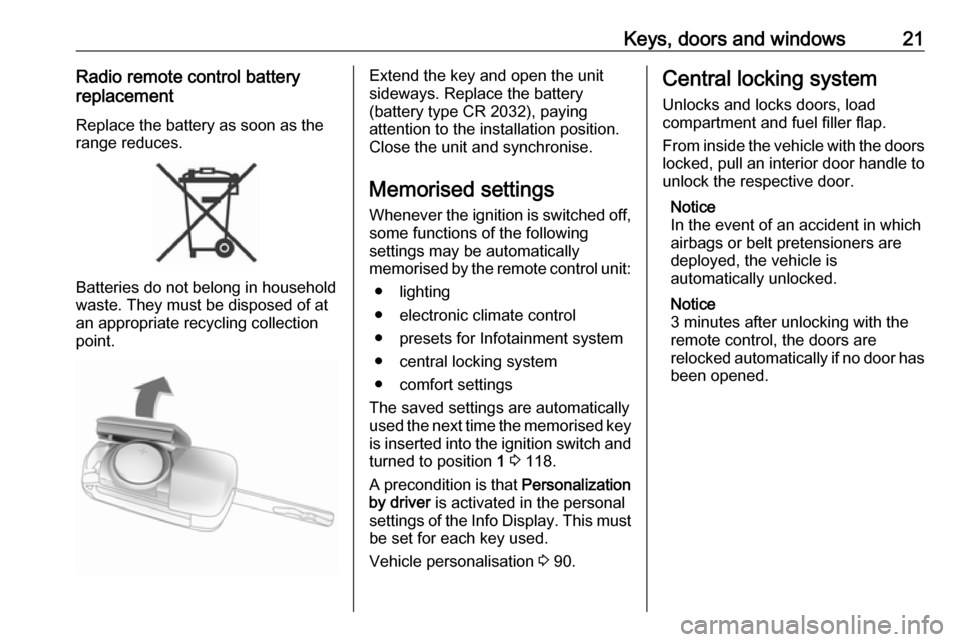
replacement
Replace the battery as soon as the
range reduces.
Batteries do not belong in household
waste. They must be disposed of at
an appropriate recycling collection
point.
Extend the key and open the unit
sideways. Replace the battery
(battery type CR 2032), paying
attention to the installation position.
Close the unit and synchronise.
Memorised settings
Whenever the ignition is switched off,
some functions of the following
settings may be automatically
memorised by the remote control unit:
● lighting
● electronic climate control
● presets for Infotainment system
● central locking system
● comfort settings
The saved settings are automatically
used the next time the memorised key
is inserted into the ignition switch and
turned to position 1 3 118.
A precondition is that Personalization
by driver is activated in the personal
settings of the Info Display. This must
be set for each key used.
Vehicle personalisation 3 90.Central locking system
Unlocks and locks doors, load
compartment and fuel filler flap.
From inside the vehicle with the doors locked, pull an interior door handle to
unlock the respective door.
Notice
In the event of an accident in which
airbags or belt pretensioners are
deployed, the vehicle is
automatically unlocked.
Notice
3 minutes after unlocking with the
remote control, the doors are
relocked automatically if no door has
been opened.
Page 25 of 229
Keys, doors and windows23Fault in radio remote control
system
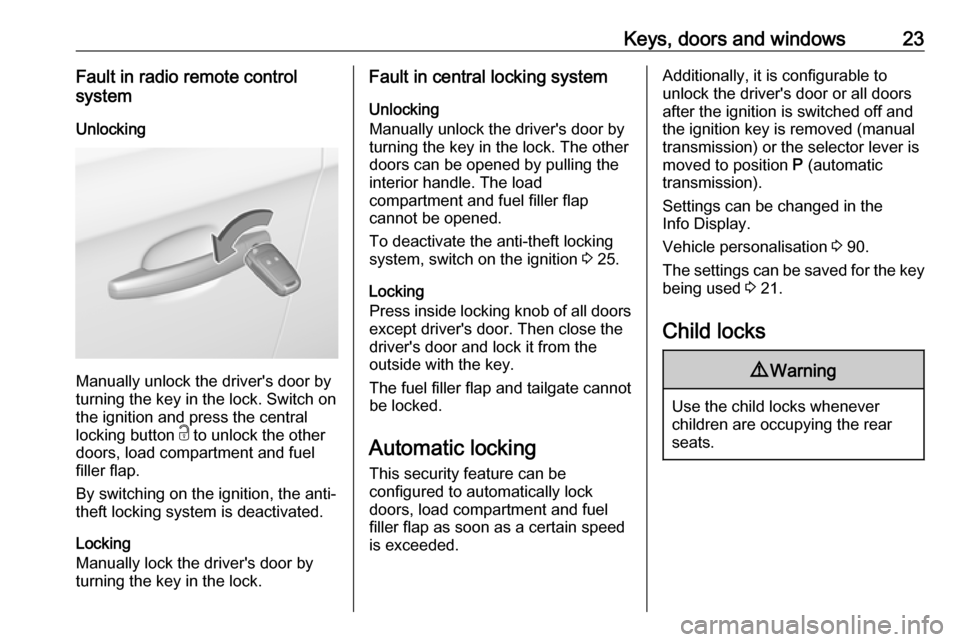
Unlocking
Manually unlock the driver's door by
turning the key in the lock. Switch on
the ignition and press the central
locking button c to unlock the other
doors, load compartment and fuel
filler flap.
By switching on the ignition, the anti-
theft locking system is deactivated.
Locking
Manually lock the driver's door by
turning the key in the lock.
Fault in central locking system
Unlocking
Manually unlock the driver's door by
turning the key in the lock. The other
doors can be opened by pulling the
interior handle. The load
compartment and fuel filler flap
cannot be opened.
To deactivate the anti-theft locking system, switch on the ignition 3 25.
Locking
Press inside locking knob of all doors
except driver's door. Then close the driver's door and lock it from the
outside with the key.
The fuel filler flap and tailgate cannot
be locked.
Automatic locking
This security feature can be
configured to automatically lock
doors, load compartment and fuel
filler flap as soon as a certain speed
is exceeded.Additionally, it is configurable to
unlock the driver's door or all doors after the ignition is switched off and
the ignition key is removed (manual
transmission) or the selector lever is
moved to position P (automatic
transmission).
Settings can be changed in the
Info Display.
Vehicle personalisation 3 90.
The settings can be saved for the key being used 3 21.
Child locks9 Warning
Use the child locks whenever
children are occupying the rear
seats.
Page 26 of 229

24Keys, doors and windows
Using a key or suitable screwdriver,
turn switch on rear door lock to the
horizontal position. The door cannot
be opened from inside.
Doors
Load compartment TailgateOpening
To open the tailgate, push the
touchpad switch below the brand
emblem.
Closing
Use interior handle.
Do not press the touchpad switch
whilst closing as this will unlock the
tailgate again.
Central locking system 3 21.
General hints for operating
tailgate
9 Danger
Do not drive with the tailgate open
or ajar, e.g. when transporting
bulky objects, since toxic exhaust
Page 30 of 229

28Keys, doors and windowsHeated mirrors
Operated by pressing Ü.
Mirror heating works with the engine
running.
It is switched off automatically after
6 minutes.
Pressing Ü once more during the
same ignition cycle allows the heating to operate for another 3 minutes.
Interior mirrors
Manual anti-dazzle
To reduce dazzle, adjust the lever on the underside of the mirror housing.
Automatic anti-dazzle
Dazzle from following vehicles is
automatically reduced, when driving
in the dark.
Page 31 of 229
Keys, doors and windows29Windows
Windscreen
Windscreen stickers
Do not attach stickers, e.g. toll road stickers or similar, on the windscreen
in the area of the interior mirror.
Otherwise the detection zone of the
sensor in the mirror housing could be
restricted.
Windscreen replacementCaution
If the vehicle has a front-looking
camera sensor for the driver
assistance systems, it is very
important that any windscreen
replacement is performed
accurately according to Vauxhall
specifications. Otherwise, these systems may not work properly
and there is a risk of unexpected
behaviour and / or messages from these systems.
Manual windows
The rear door windows can be
opened or closed manually with the
window cranks.
Power windows9 Warning
Take care when operating the
power windows. Risk of injury,
particularly to children.
Be careful when closing the
windows. Ensure that nothing
becomes trapped in them as they
move.
Operable with ignition on (position 2)
3 118.
Retained power off 3 119.
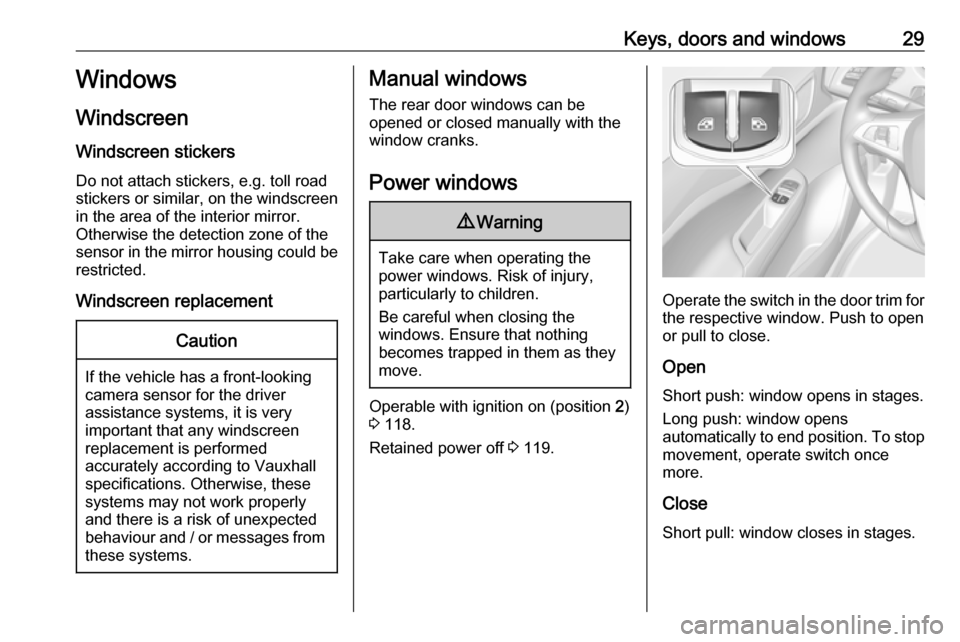
Operate the switch in the door trim for
the respective window. Push to open
or pull to close.
Open
Short push: window opens in stages. Long push: window opens
automatically to end position. To stop movement, operate switch once
more.
Close
Short pull: window closes in stages.
Page 62 of 229

60Storage●Use the hook at the right sidewall
of the load compartment for
hanging up carrier bags.
Maximum load: 5 kg.
● Do not allow the load to protrude above the upper edge of the
backrests.
● Do not place any objects on the load compartment cover or theinstrument panel.
● Do not cover the sensor on top of
the instrument panel.
● The load must not obstruct the operation of the pedals, parking
brake and gear selector lever, or
hinder the freedom of movement of the driver. Do not place any
unsecured objects in the interior.
● Do not drive with an open load compartment.9Warning
Always make sure that the load in
the vehicle is securely stowed.
Otherwise objects can be thrown
around inside the vehicle and
cause personal injury or damage
to the load or vehicle.
● The payload is the difference between the permitted gross
vehicle weight (see identification
plate 3 204) and the EC kerb
weight.
To calculate the payload, enter
the data for your vehicle in the
weights table at the front of this
manual.
The EC kerb weight includes
weights for the driver (68 kg),
luggage (7 kg) and all fluids (fuel
tank 90% full).
Optional equipment and
accessories increase the kerb
weight.
● Driving with a roof load increases
the sensitivity of the vehicle to
cross-winds and has a
detrimental effect on vehicle
handling due to the vehicle's
higher centre of gravity.
Distribute the load evenly and secure it properly with retaining
straps. Adjust the tyre pressure
and vehicle speed according to
the load conditions. Check and
retighten the straps frequently.
Do not drive faster than 75 mph.
The permissible roof load is
75 kg. The roof load is the
combined weight of the roof rack and the load.
Page 100 of 229
98LightingLightingExterior lighting............................ 98
Light switch ................................ 98
Automatic light control ...............99
High beam ............................... 100
Headlight flash ......................... 100
Headlight range adjustment ....100
Headlights when driving abroad .................................... 100
Daytime running lights .............101
Xenon lighting system .............101
Hazard warning flashers ..........102
Turn lights ................................ 102
Front fog lights ......................... 102
Rear fog light ........................... 103
Parking lights ........................... 103
Reversing lights .......................103
Misted light covers ...................103
Interior lighting ........................... 104
Instrument panel illumination control ..................................... 104
Interior lights ............................ 104
Reading lights .......................... 105
Lighting features ........................105
Entry lighting ............................ 105Exit lighting.............................. 106
Battery discharge protection ....106Exterior lighting
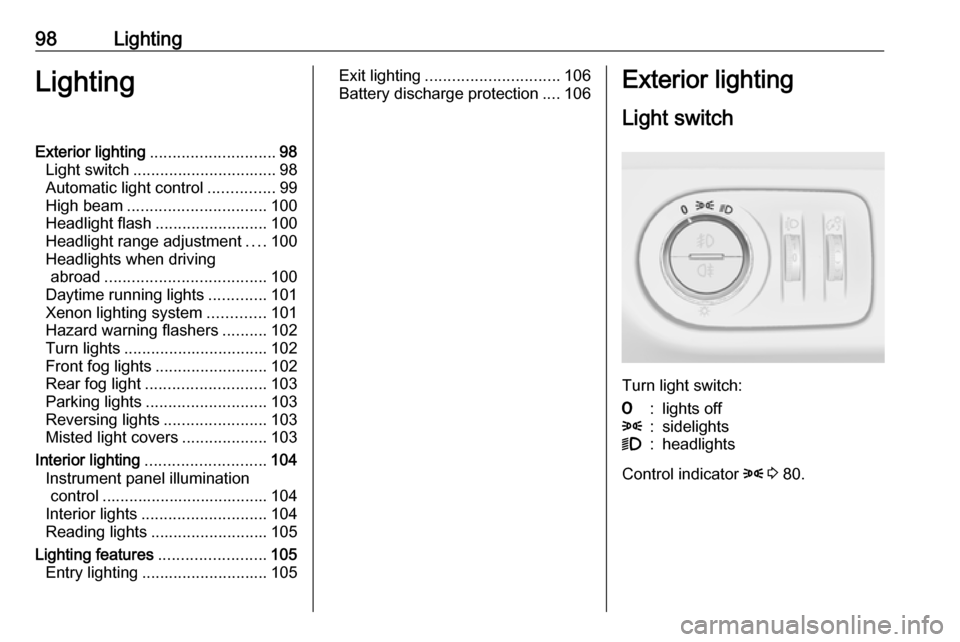
Light switch
Turn light switch:
7:lights off8:sidelights9:headlights
Control indicator 8 3 80.