change VAUXHALL CORSA F 2020 Infotainment system
[x] Cancel search | Manufacturer: VAUXHALL, Model Year: 2020, Model line: CORSA F, Model: VAUXHALL CORSA F 2020Pages: 103, PDF Size: 3.31 MB
Page 7 of 103

Introduction79Warning
In some areas one-way streets
and other roads and entrances
(e.g. pedestrian zones) that you
are not allowed to turn into are not marked on the map. In such areas
the Infotainment system may
issue a warning that must be
accepted. Here you must pay
particular attention to one-way
streets, roads and entrances that
you are not allowed to drive into.
Radio reception
Radio reception may be disrupted by
static, noise, distortion or loss of
reception due to:
● changes in distance from the transmitter
● multi-path reception due to reflection
● shadowing
Theft-deterrent feature
The Infotainment system is equipped
with an electronic security system for
the purpose of theft deterrence.
The Infotainment system therefore
functions only in your vehicle and is
worthless to a thief.
Page 19 of 103
Basic operation19Tone settings
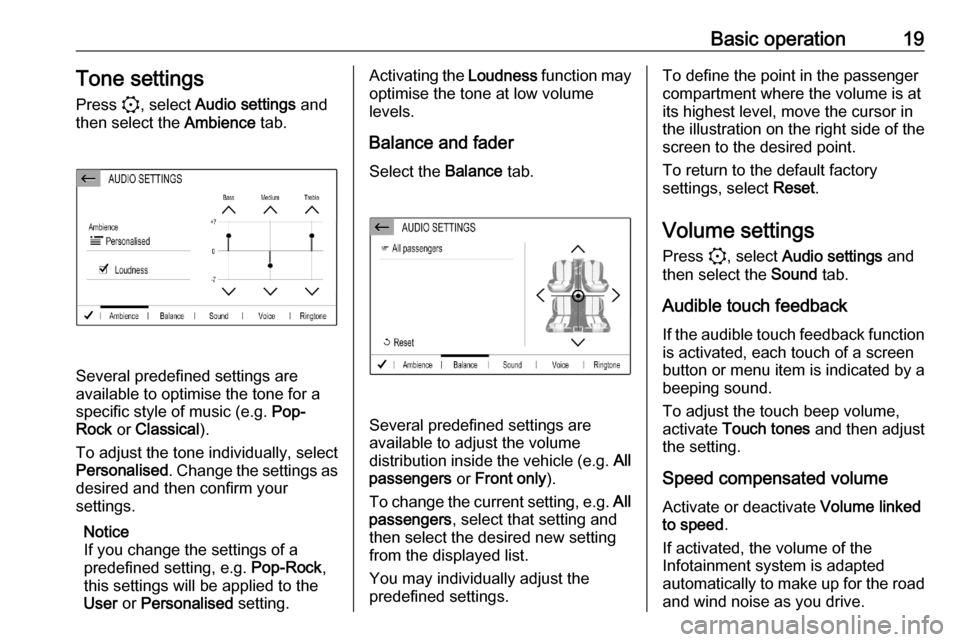
Press :, select Audio settings and
then select the Ambience tab.
Several predefined settings are
available to optimise the tone for a
specific style of music (e.g. Pop-
Rock or Classical ).
To adjust the tone individually, select
Personalised . Change the settings as
desired and then confirm your
settings.
Notice
If you change the settings of a
predefined setting, e.g. Pop-Rock,
this settings will be applied to the
User or Personalised setting.
Activating the Loudness function may
optimise the tone at low volume
levels.
Balance and fader
Select the Balance tab.
Several predefined settings are
available to adjust the volume
distribution inside the vehicle (e.g. All
passengers or Front only ).
To change the current setting, e.g. All
passengers , select that setting and
then select the desired new setting
from the displayed list.
You may individually adjust the
predefined settings.
To define the point in the passenger
compartment where the volume is at
its highest level, move the cursor in
the illustration on the right side of the
screen to the desired point.
To return to the default factory
settings, select Reset.
Volume settings Press :, select Audio settings and
then select the Sound tab.
Audible touch feedback
If the audible touch feedback function is activated, each touch of a screen
button or menu item is indicated by a
beeping sound.
To adjust the touch beep volume,
activate Touch tones and then adjust
the setting.
Speed compensated volume Activate or deactivate Volume linked
to speed .
If activated, the volume of the
Infotainment system is adapted
automatically to make up for the road
and wind noise as you drive.
Page 20 of 103
20Basic operationSpeech output
Select the Voice tab.
Adjust the volume for all speech
outputs of the system, e.g. traffic
announcements, navigation
messages etc.
Ringtone
Select the Ringtone tab.
Adjust the ringtone volume of
incoming calls.
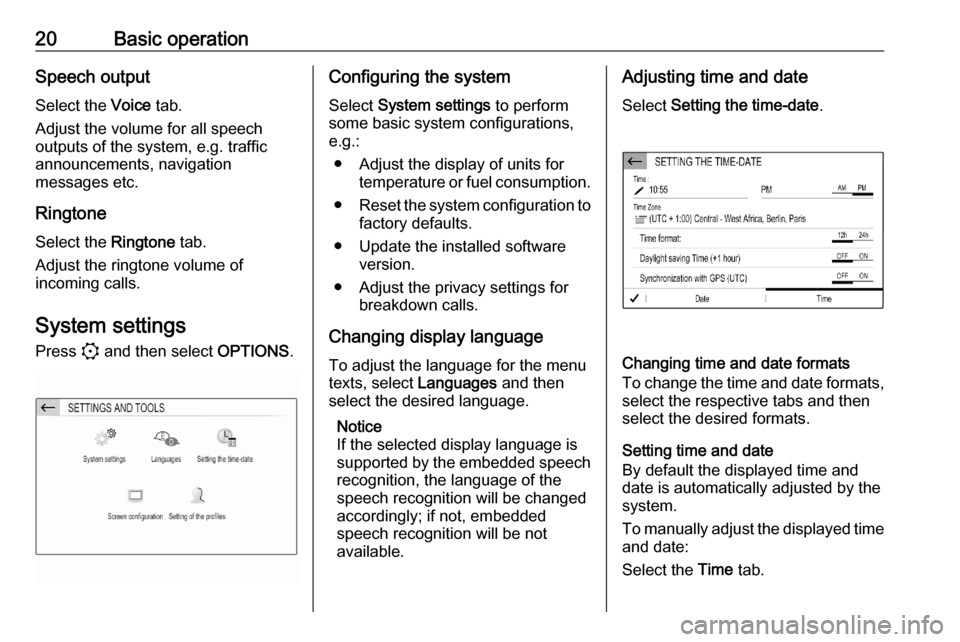
System settings Press : and then select OPTIONS.Configuring the system
Select System settings to perform
some basic system configurations,
e.g.:
● Adjust the display of units for temperature or fuel consumption.
● Reset the system configuration to
factory defaults.
● Update the installed software version.
● Adjust the privacy settings for breakdown calls.
Changing display language To adjust the language for the menu
texts, select Languages and then
select the desired language.
Notice
If the selected display language is
supported by the embedded speech
recognition, the language of the
speech recognition will be changed
accordingly; if not, embedded
speech recognition will be not
available.Adjusting time and date
Select Setting the time-date .
Changing time and date formats
To change the time and date formats, select the respective tabs and then
select the desired formats.
Setting time and date
By default the displayed time and
date is automatically adjusted by the
system.
To manually adjust the displayed time
and date:
Select the Time tab.
Page 29 of 103
External devices29Bluetooth audio streamingStreaming allows you to listen to
music from your smartphone.
For a detailed description on how to
establish a Bluetooth connection
3 48.
If audio playback does not start
automatically, it may be necessary to
start the playback on the smartphone.
First adjust the volume on your
smartphone (to a high level). Then
adjust the volume of Infotainment system.
File formats The audio equipment supports
different file formats.
Playing audio
Activating the music function
Connecting the USB or Bluetooth
device 3 28.
If device already connected, but
playback of stored music files not
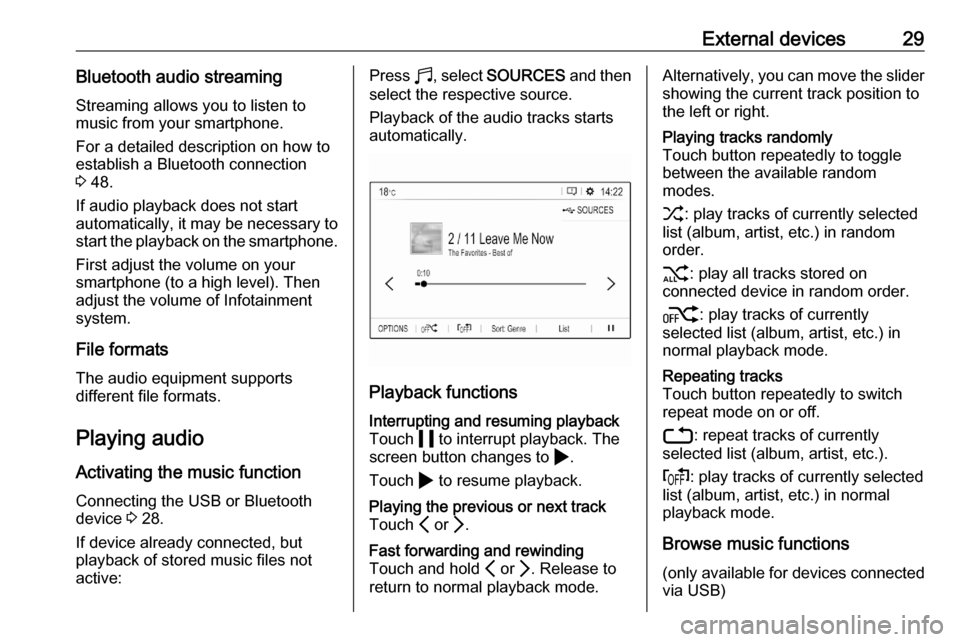
active:Press b, select SOURCES and then
select the respective source.
Playback of the audio tracks starts
automatically.
Playback functions
Interrupting and resuming playback
Touch 5 to interrupt playback. The
screen button changes to 4.
Touch 4 to resume playback.Playing the previous or next track
Touch P or Q.Fast forwarding and rewinding
Touch and hold P or Q. Release to
return to normal playback mode.Alternatively, you can move the slider showing the current track position to
the left or right.Playing tracks randomly
Touch button repeatedly to toggle
between the available random
modes.
1 : play tracks of currently selected
list (album, artist, etc.) in random
order.
2 : play all tracks stored on
connected device in random order.
k : play tracks of currently
selected list (album, artist, etc.) in
normal playback mode.Repeating tracks
Touch button repeatedly to switch
repeat mode on or off.
3 : repeat tracks of currently
selected list (album, artist, etc.).
f : play tracks of currently selected
list (album, artist, etc.) in normal
playback mode.
Browse music functions
(only available for devices connected
via USB)
Page 30 of 103
30External devicesYou can have your music files sorted
according to different criteria. Two
options are available for browsing the
music files stored on the connected
USB device.Browsing via main menu
If you want to change the currently
active USB source, select
SOURCES and then select the
desired source. The respective main
menu is displayed.
Select the button showing the
currently selected sorting criteria, e.g. Sort: Album or Sort: Artist , and then
select the desired new sorting criteria.
A sorting process is performed.
Select List and then select the desired
track.
Playback of the selected track is
started.Browsing via device menu
Select OPTIONS and then select
Music files .
If you want to change the currently active USB source, select Other.
Select the desired sorting criteria, e.g.
Albums or Artists , and then select the
desired track.Playback of the selected track is
started.
Displaying picturesYou can view pictures stored on a USB device.
Activating the picture viewer Connecting the USB device 3 28.
If device already connected, but
picture viewer not active:
Press b, select OPTIONS and then
select Managing photos .
Select the desired picture.
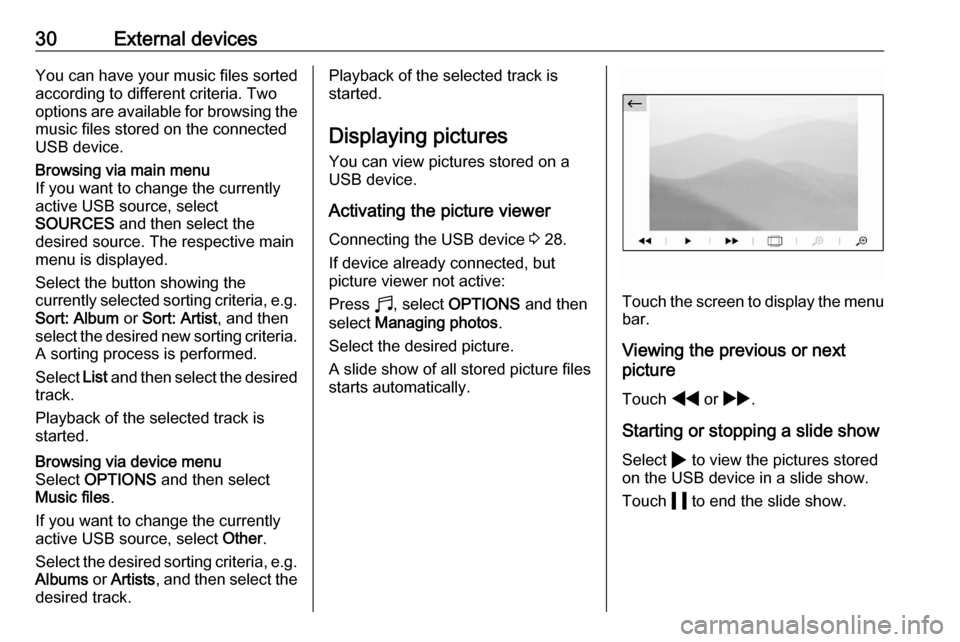
A slide show of all stored picture files
starts automatically.
Touch the screen to display the menu bar.
Viewing the previous or next
picture
Touch f or g .
Starting or stopping a slide show Select 4 to view the pictures stored
on the USB device in a slide show.
Touch 5 to end the slide show.
Page 32 of 103
32NavigationNavigationGeneral information.....................32
Usage .......................................... 33
Destination input ..........................37
Guidance ..................................... 41General information
This chapter is about the embedded
navigation system which guides to
desired destinations.
The current traffic situation is taken
into account in the route calculation.
For this purpose, the Infotainment
system receives traffic
announcements in the current
reception area via RDS-TMC.
The navigation system cannot,
however, take into account traffic
incidents, traffic regulations changed
at short notice and hazards or
problems that arise suddenly (e.g.
road works).Caution
The usage of the navigation
system does not release the driver
from the responsibility for a
correct, vigilant attitude in road
traffic. The relevant traffic
regulations must always be
followed. If a navigation instruction contradicts traffic regulations, the
traffic regulations always apply.
Functioning of the navigation
system
The position and movement of the
vehicle are detected by the navigation
system using sensors. The travelled
distance is determined by the
vehicle's speedometer signal, turning
movements on bends by a sensor.
The position is determined by the
GPS (Global Positioning System)
satellites.
By comparing the sensor signals with the digital maps, it is possible to
determine the position with an
accuracy of approx. 10 m.
The system will also work with poor
GPS reception. However, the
accuracy of the determination of the
position will be reduced.
After the entry of the destination
address or point of interest (nearest
petrol station, hotel, etc.), the route is
calculated from the current location to the destination selected.
Route guidance is provided by voice
output and an arrow, as well as with
the aid of a multi-colour map display.
Page 34 of 103
34NavigationRoute guidance active
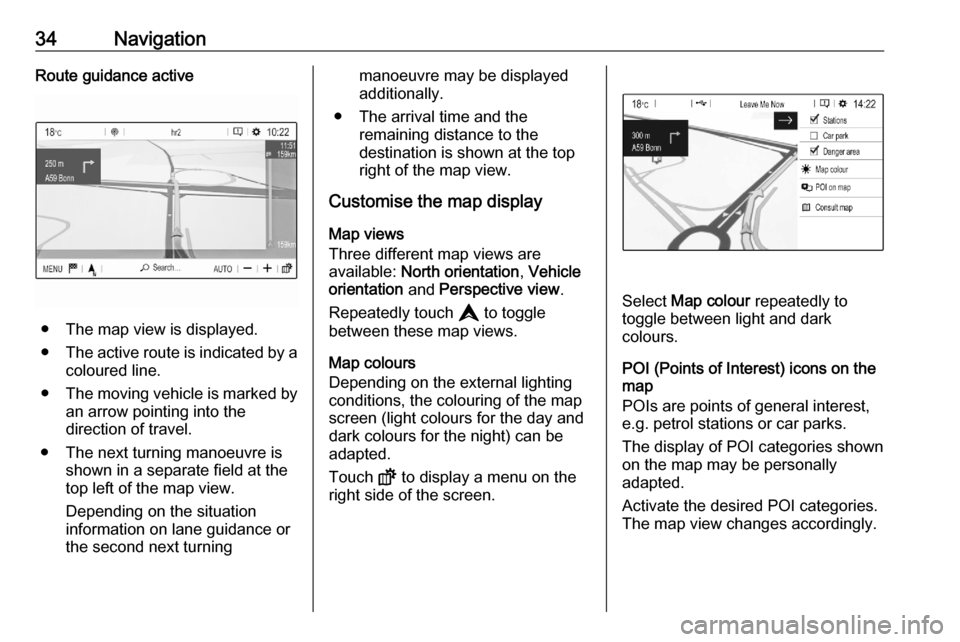
● The map view is displayed.
● The active route is indicated by a
coloured line.
● The moving vehicle is marked by
an arrow pointing into the
direction of travel.
● The next turning manoeuvre is shown in a separate field at the
top left of the map view.
Depending on the situation
information on lane guidance or
the second next turning
manoeuvre may be displayed additionally.
● The arrival time and the remaining distance to the
destination is shown at the top
right of the map view.
Customise the map display
Map views
Three different map views are
available: North orientation , Vehicle
orientation and Perspective view .
Repeatedly touch L to toggle
between these map views.
Map colours
Depending on the external lighting
conditions, the colouring of the map
screen (light colours for the day and
dark colours for the night) can be
adapted.
Touch ! to display a menu on the
right side of the screen.
Select Map colour repeatedly to
toggle between light and dark
colours.
POI (Points of Interest) icons on the
map
POIs are points of general interest,
e.g. petrol stations or car parks.
The display of POI categories shown
on the map may be personally
adapted.
Activate the desired POI categories.
The map view changes accordingly.
Page 35 of 103
Navigation35Alternatively, select POI on map to
display a menu with a multitude of
POI categories and subcategories to
choose from. Activate the desired
POI categories.
Traffic events
Traffic events may be indicated on the
map. Additionally, information on
these events may be displayed in a
list.
Select Consult map to switch to an
alternative map display with new
menu options.
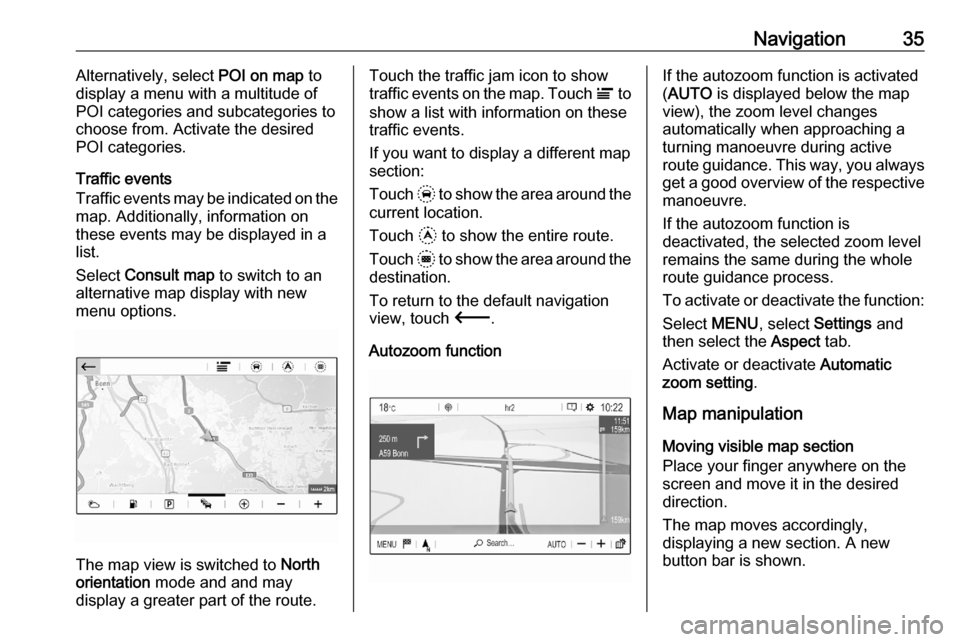
The map view is switched to North
orientation mode and and may
display a greater part of the route.
Touch the traffic jam icon to show
traffic events on the map. Touch Ï to
show a list with information on these
traffic events.
If you want to display a different map
section:
Touch + to show the area around the
current location.
Touch , to show the entire route.
Touch . to show the area around the
destination.
To return to the default navigation
view, touch 3.
Autozoom functionIf the autozoom function is activated
( AUTO is displayed below the map
view), the zoom level changes
automatically when approaching a
turning manoeuvre during active
route guidance. This way, you always get a good overview of the respective
manoeuvre.
If the autozoom function is
deactivated, the selected zoom level
remains the same during the whole
route guidance process.
To activate or deactivate the function: Select MENU, select Settings and
then select the Aspect tab.
Activate or deactivate Automatic
zoom setting .
Map manipulation
Moving visible map section
Place your finger anywhere on the
screen and move it in the desired
direction.
The map moves accordingly,
displaying a new section. A new
button bar is shown.
Page 38 of 103
38NavigationEnter an address or search term. As
soon as characters are entered an
address search is performed and the
list of found addresses is updated
continuously.
Select the desired list item.
Depending on the current situation
and your selection, the navigation
system may react differently:
● If the selected list item is a valid destination address and route
guidance is currently not active:
The navigation main menu is
displayed again and route
guidance is started.
For a detailed description on
route guidance 3 41.
● If the selected list item is a valid destination address but route
guidance is already active:
A message is displayed and you
need to decide first if the old
destination should be replaced,
or if you want to add the selected
address as an intermediate
destination to a waypoint trip.
Detailed description on waypoint
trips, see below.Select the desired option.
● If the navigation system needs more detailed information for
route calculation:
Enter a further search term to refine your search.
Detailed address entry
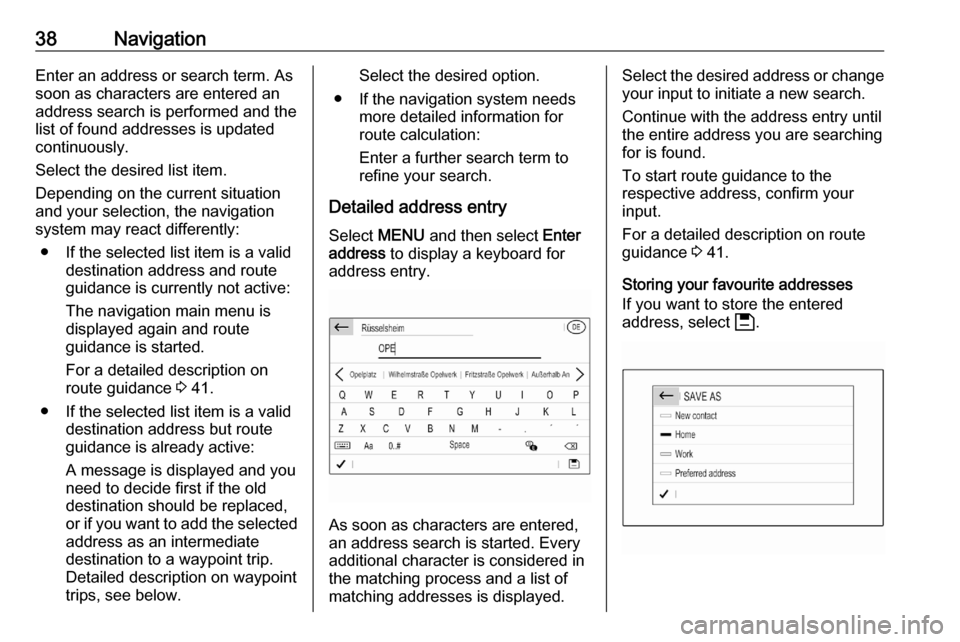
Select MENU and then select Enter
address to display a keyboard for
address entry.
As soon as characters are entered,
an address search is started. Every additional character is considered inthe matching process and a list of
matching addresses is displayed.
Select the desired address or change
your input to initiate a new search.
Continue with the address entry until
the entire address you are searching for is found.
To start route guidance to the
respective address, confirm your
input.
For a detailed description on route
guidance 3 41.
Storing your favourite addresses
If you want to store the entered
address, select 6.
Page 40 of 103
40Navigation
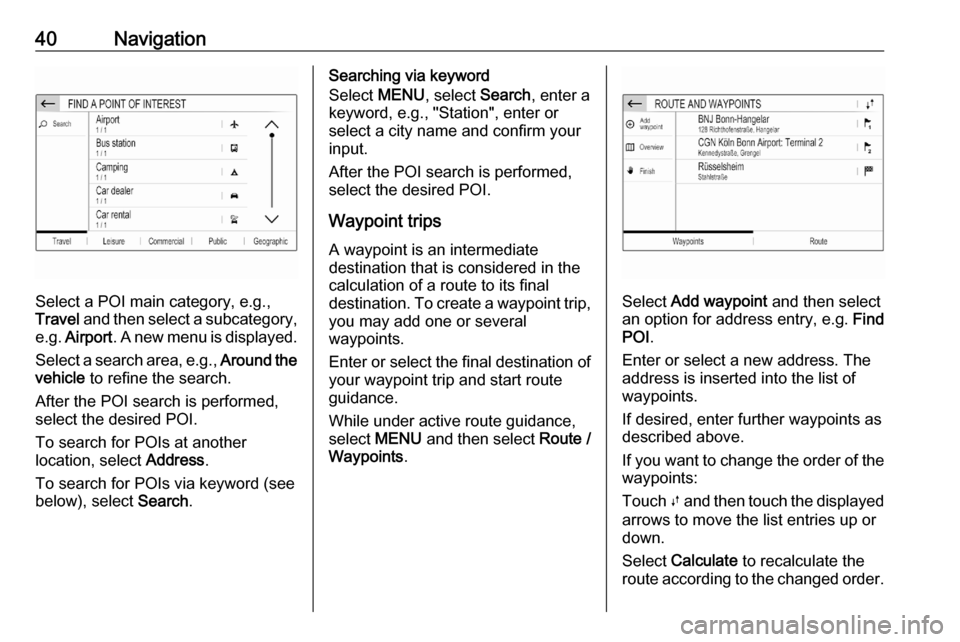
Select a POI main category, e.g.,
Travel and then select a subcategory,
e.g. Airport . A new menu is displayed.
Select a search area, e.g., Around the
vehicle to refine the search.
After the POI search is performed,
select the desired POI.
To search for POIs at another
location, select Address.
To search for POIs via keyword (see below), select Search.
Searching via keyword
Select MENU, select Search, enter a
keyword, e.g., "Station", enter or
select a city name and confirm your
input.
After the POI search is performed,
select the desired POI.
Waypoint trips
A waypoint is an intermediate
destination that is considered in the
calculation of a route to its final
destination. To create a waypoint trip,
you may add one or several
waypoints.
Enter or select the final destination of
your waypoint trip and start route
guidance.
While under active route guidance,
select MENU and then select Route /
Waypoints .
Select Add waypoint and then select
an option for address entry, e.g. Find
POI .
Enter or select a new address. The
address is inserted into the list of
waypoints.
If desired, enter further waypoints as
described above.
If you want to change the order of the
waypoints:
Touch Ú and then touch the displayed
arrows to move the list entries up or
down.
Select Calculate to recalculate the
route according to the changed order.