Control VAUXHALL CORSA F 2020 User Guide
[x] Cancel search | Manufacturer: VAUXHALL, Model Year: 2020, Model line: CORSA F, Model: VAUXHALL CORSA F 2020Pages: 227, PDF Size: 18.77 MB
Page 21 of 227

Keys, doors and windows193. Leave the vehicle and close thedoors.
4. Activate the anti-theft alarm system.
Indication
LED in the ! button flashes if the
anti-theft alarm system is activated. The hazard warning lights illuminates for a few seconds.
Deactivation Unlocking the vehicle with radio
remote control by pressing a or with
the electronic key deactivates the
anti-theft alarm system.
The system is not deactivated by
unlocking the front door with the key
or with the central locking button in
the passenger compartment.
The hazard warning lights flash for a
few seconds.Alarm
When triggered, the alarm siren
sounds and the hazard warning lights flash simultaneously. The number
and duration of alarm signals are
stipulated by legislation.
The anti-theft alarm can be
deactivated by pressing a or
switching on the ignition.
A triggered alarm, which has not been interrupted by the driver, will be
indicated by the LED in the
button !. The LED will flash quickly
the next time the vehicle is unlocked.
If the battery has been reconnected
(e.g. after maintenance work), wait for 10 minutes to restart the engine.
Fault
If the LED in the button !
illuminates permanently when
switching on the ignition, seek the
assistance of a workshop.
Locking the vehicle without
activation of the anti-theft alarm
Lock the vehicle by locking the front
door with the integral key.Immobiliser
The system is part of the ignition
switch and checks whether the
vehicle is allowed to be started with
the key being used.
The immobiliser is activated
automatically.
Notice
Radio Frequency Identification
(RFID) tags may cause interference with the key. Do not have it placednear the key when starting the
vehicle.
Notice
The immobiliser does not lock the doors. Always lock the vehicle after
leaving it 3 11.
Switch on the anti-theft alarm
system 3 18.
Emergency operation of electronic
key 3 99.
Page 22 of 227
20Keys, doors and windowsExterior mirrors
Convex shape
The shape of the mirror makes
objects appear smaller, which will
affect the ability to estimate
distances.
Side blind spot assistant 3 20.
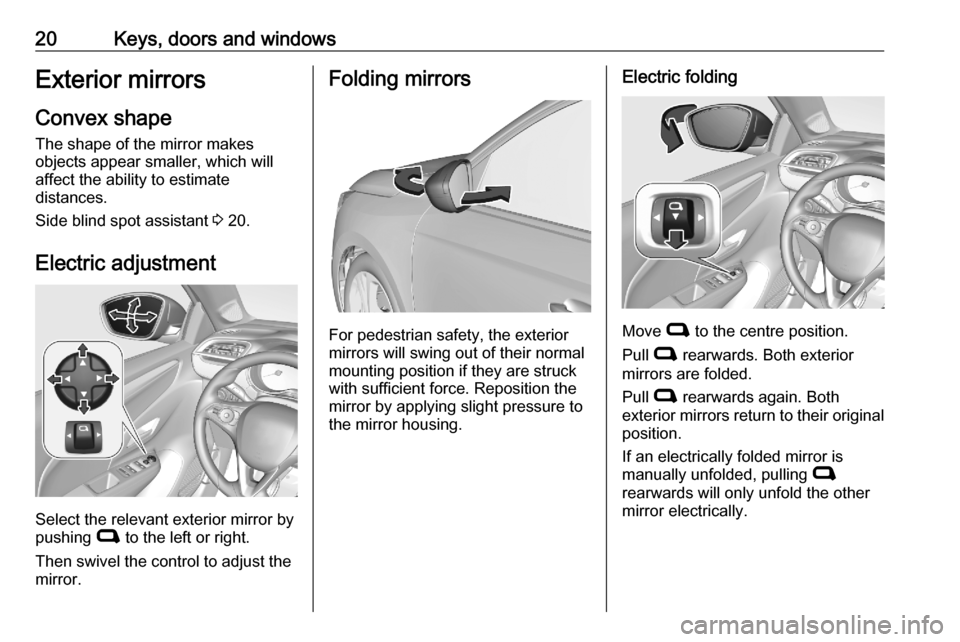
Electric adjustment
Select the relevant exterior mirror by
pushing C to the left or right.
Then swivel the control to adjust the
mirror.
Folding mirrors
For pedestrian safety, the exterior
mirrors will swing out of their normal
mounting position if they are struck
with sufficient force. Reposition the mirror by applying slight pressure tothe mirror housing.
Electric folding
Move C to the centre position.
Pull C rearwards. Both exterior
mirrors are folded.
Pull C rearwards again. Both
exterior mirrors return to their original position.
If an electrically folded mirror is
manually unfolded, pulling C
rearwards will only unfold the other
mirror electrically.
Page 26 of 227
24Keys, doors and windowsInitialising the power windowsIf the windows cannot be closed
automatically (e.g. after
disconnecting the vehicle battery), a
warning message is displayed in the
Driver Information Centre.
Vehicle messages 3 75.
Activate the window electronics as
follows:
1. Close doors.
2. Switch on ignition.
3. Pull the switch until the window is completely opened and keep
pulling for additional 2 seconds.
4. Push the switch as long as the window is completely closed and
keep pushing for additional
2 seconds.
5. Repeat for each window.
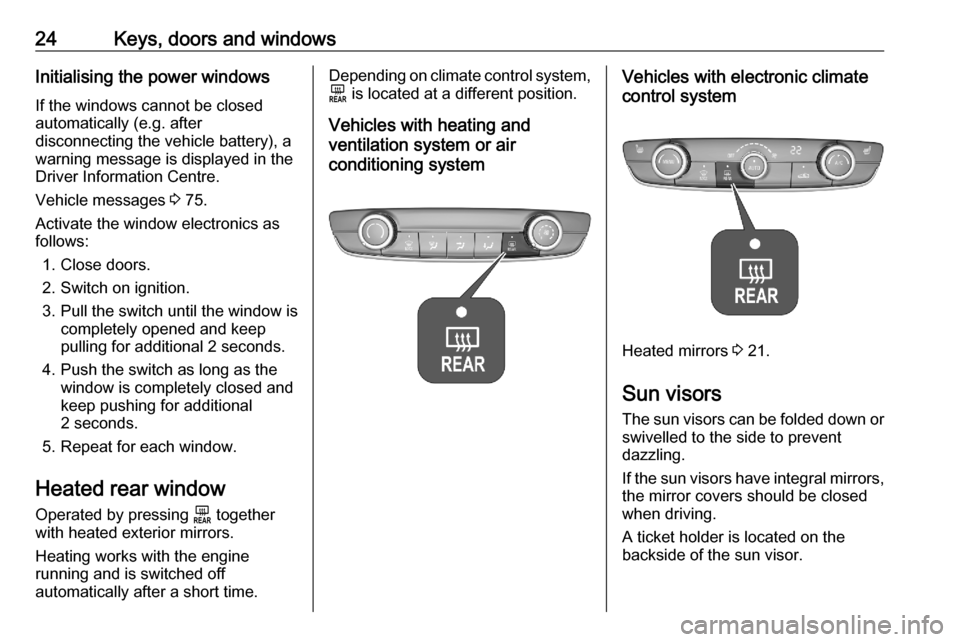
Heated rear window
Operated by pressing f together
with heated exterior mirrors.
Heating works with the engine
running and is switched off
automatically after a short time.Depending on climate control system, f is located at a different position.
Vehicles with heating and
ventilation system or air
conditioning systemVehicles with electronic climate
control system
Heated mirrors 3 21.
Sun visors
The sun visors can be folded down or swivelled to the side to prevent
dazzling.
If the sun visors have integral mirrors, the mirror covers should be closed
when driving.
A ticket holder is located on the
backside of the sun visor.
Page 29 of 227
Seats, restraints27Head restraints on rear seats
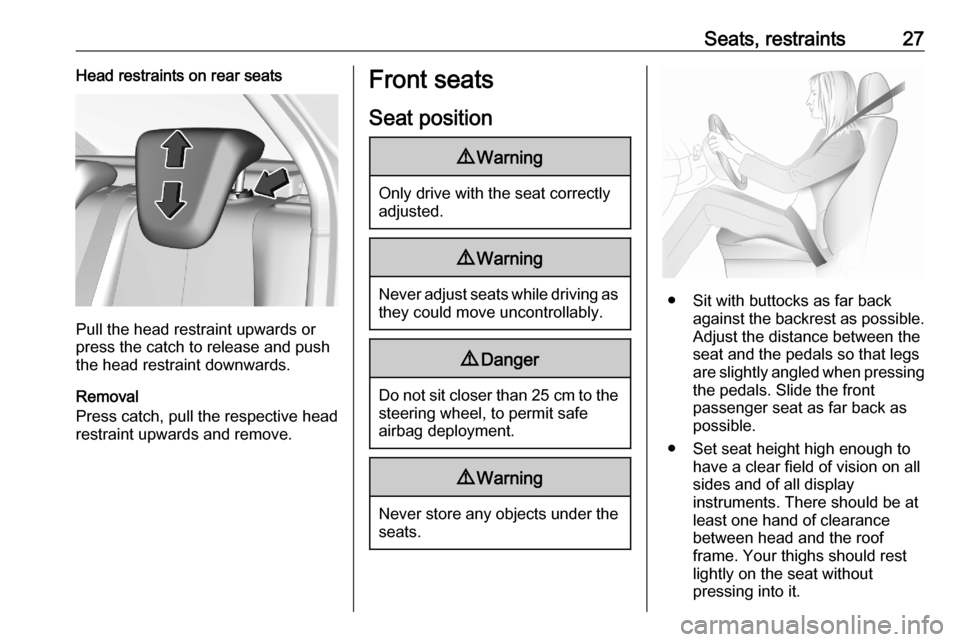
Pull the head restraint upwards or
press the catch to release and push the head restraint downwards.
Removal
Press catch, pull the respective head
restraint upwards and remove.
Front seats
Seat position9 Warning
Only drive with the seat correctly
adjusted.
9 Warning
Never adjust seats while driving as
they could move uncontrollably.
9 Danger
Do not sit closer than 25 cm to the
steering wheel, to permit safe
airbag deployment.
9 Warning
Never store any objects under the
seats.
● Sit with buttocks as far back against the backrest as possible.
Adjust the distance between the
seat and the pedals so that legs
are slightly angled when pressing the pedals. Slide the front
passenger seat as far back as
possible.
● Set seat height high enough to have a clear field of vision on allsides and of all display
instruments. There should be at
least one hand of clearance
between head and the roof
frame. Your thighs should rest
lightly on the seat without
pressing into it.
Page 32 of 227
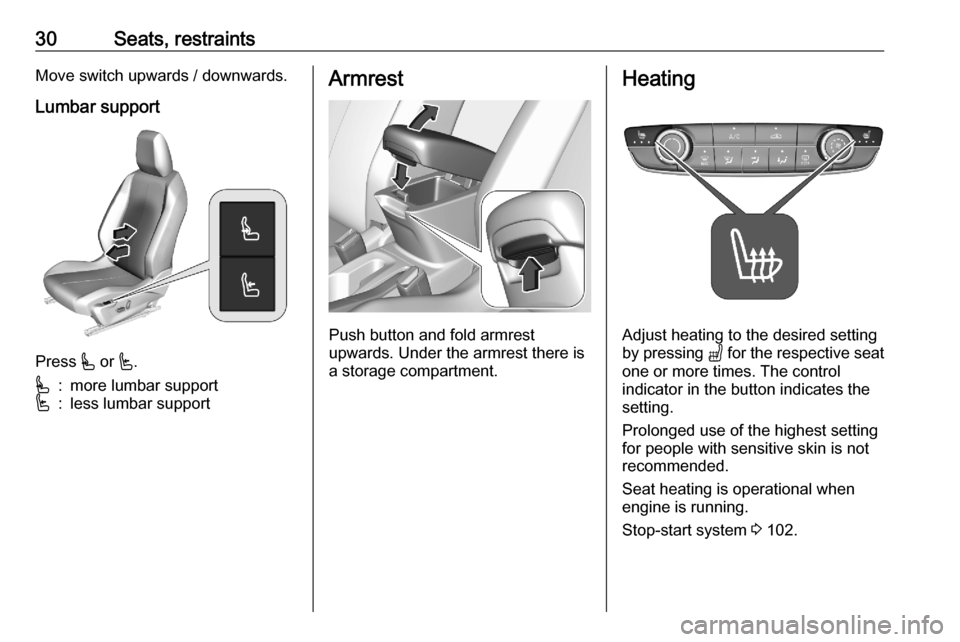
30Seats, restraintsMove switch upwards / downwards.Lumbar support
Press * or '.
*:more lumbar support':less lumbar supportArmrest
Push button and fold armrest
upwards. Under the armrest there is
a storage compartment.
Heating
Adjust heating to the desired setting
by pressing " for the respective seat
one or more times. The control
indicator in the button indicates the
setting.
Prolonged use of the highest setting
for people with sensitive skin is not
recommended.
Seat heating is operational when engine is running.
Stop-start system 3 102.
Page 33 of 227
Seats, restraints31Massage
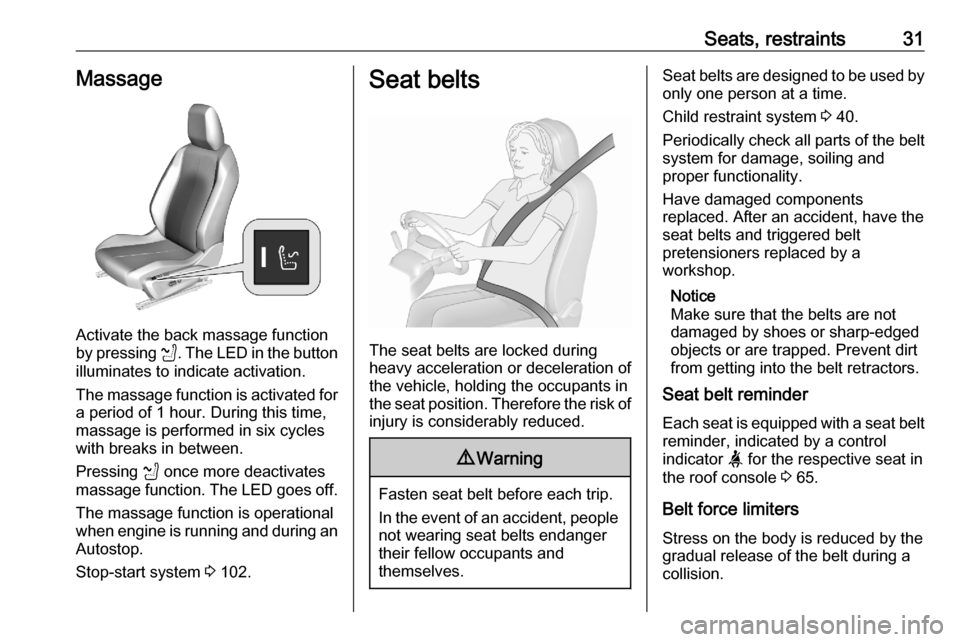
Activate the back massage function
by pressing K. The LED in the button
illuminates to indicate activation.
The massage function is activated for
a period of 1 hour. During this time,
massage is performed in six cycles
with breaks in between.
Pressing K once more deactivates
massage function. The LED goes off.
The massage function is operational
when engine is running and during an
Autostop.
Stop-start system 3 102.
Seat belts
The seat belts are locked during
heavy acceleration or deceleration of
the vehicle, holding the occupants in
the seat position. Therefore the risk of injury is considerably reduced.
9 Warning
Fasten seat belt before each trip.
In the event of an accident, people
not wearing seat belts endanger their fellow occupants and
themselves.
Seat belts are designed to be used by only one person at a time.
Child restraint system 3 40.
Periodically check all parts of the belt
system for damage, soiling and
proper functionality.
Have damaged components
replaced. After an accident, have the
seat belts and triggered belt
pretensioners replaced by a
workshop.
Notice
Make sure that the belts are not
damaged by shoes or sharp-edged
objects or are trapped. Prevent dirt
from getting into the belt retractors.
Seat belt reminder
Each seat is equipped with a seat belt reminder, indicated by a control
indicator a for the respective seat in
the roof console 3 65.
Belt force limiters
Stress on the body is reduced by the
gradual release of the belt during a
collision.
Page 34 of 227
32Seats, restraintsBelt pretensionersIn the event of a head-on, rear-end or
side-on collision of a certain severity,
the front seat belts and the outer rear seat belts are tightened.9 Warning
Incorrect handling (e.g. removal or
fitting of belts) can trigger the belt
pretensioners.
Deployment of the belt pretensioners
is indicated by continuous illumination
of control indicator d 3 66.
Triggered belt pretensioners must be replaced by a workshop. Belt
pretensioners can only be triggered
once.
Notice
Do not affix or install accessories or
other objects that may interfere with
the operation of the belt
pretensioners. Do not make any
modifications to belt pretensioner components as this will invalidate
the operating permit of your vehicle.
Three-point seat belt
Fasten
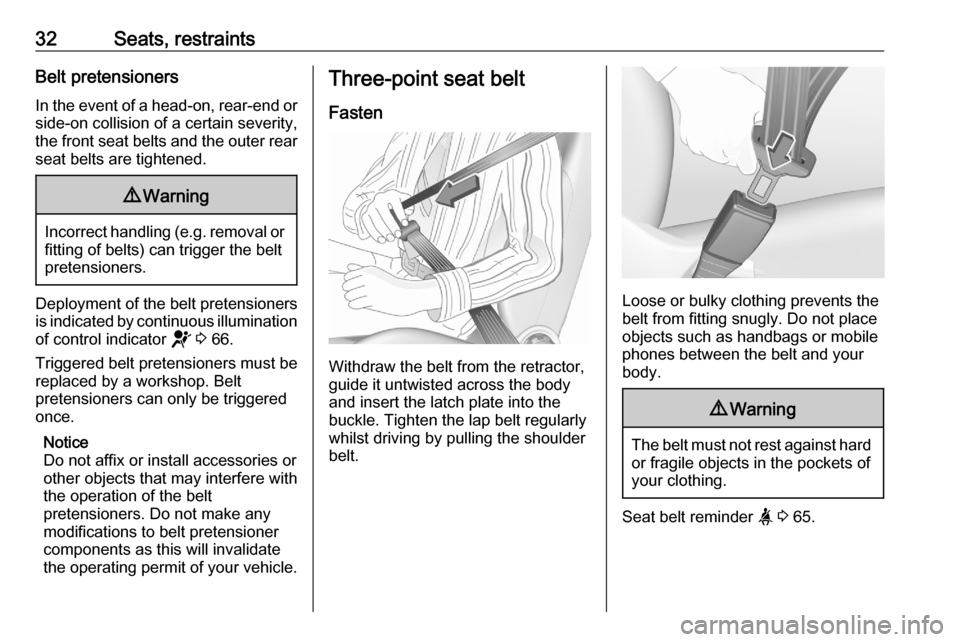
Withdraw the belt from the retractor,
guide it untwisted across the body
and insert the latch plate into the
buckle. Tighten the lap belt regularly
whilst driving by pulling the shoulder
belt.
Loose or bulky clothing prevents the
belt from fitting snugly. Do not place
objects such as handbags or mobile
phones between the belt and your body.
9 Warning
The belt must not rest against hard
or fragile objects in the pockets of
your clothing.
Seat belt reminder a 3 65.
Page 36 of 227
34Seats, restraintsairbag sensing and diagnostic
module, steering wheel,
instrument panel, inner door seals including the speakers, any of the
airbag modules, ceiling or pillar
trim, front sensors, side impact
sensors or airbag wiring.
Notice
The airbag systems and belt
pretensioner control electronics are
located in the centre console area.
Do not put any magnetic objects in
this area.
Do not affix any objects onto the
airbag covers and do not cover them with other materials. Have damagedcovers replaced by a workshop.
Each airbag is triggered only once.
Have deployed airbags replaced by
a workshop. Furthermore, it may be
necessary to have the steering
wheel, the instrument panel, parts of
the panelling, the door seals,
handles and the seats replaced.
Do not make any modifications to
the airbag system as this will
invalidate the vehicle operating
permit.
Control indicator v for airbag systems
3 66.
Child restraint systems on front passenger seat with airbag
systems
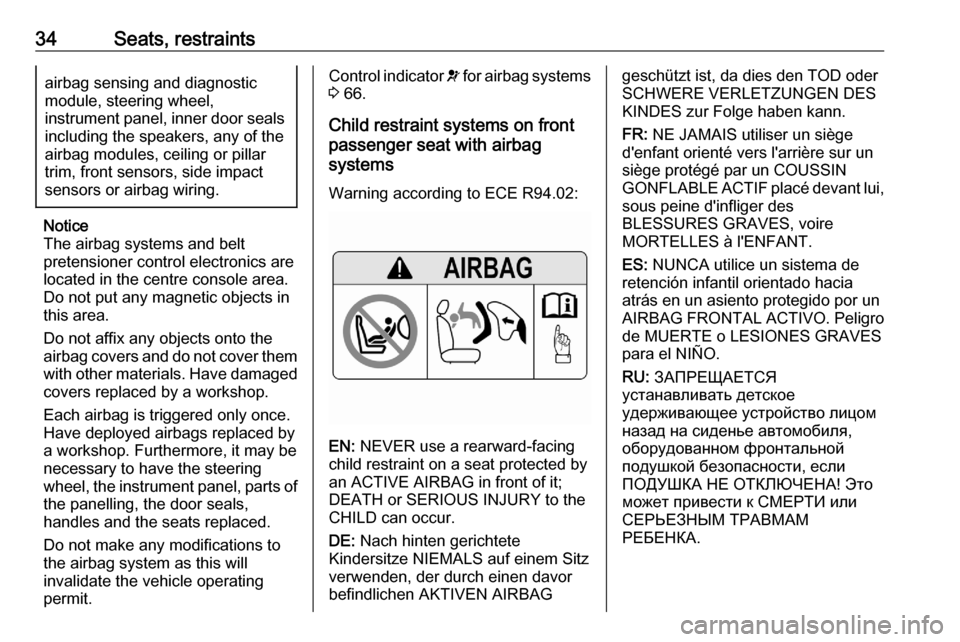
Warning according to ECE R94.02:
EN: NEVER use a rearward-facing
child restraint on a seat protected by
an ACTIVE AIRBAG in front of it;
DEATH or SERIOUS INJURY to the
CHILD can occur.
DE: Nach hinten gerichtete
Kindersitze NIEMALS auf einem Sitz
verwenden, der durch einen davor
befindlichen AKTIVEN AIRBAG
geschützt ist, da dies den TOD oder
SCHWERE VERLETZUNGEN DES
KINDES zur Folge haben kann.
FR: NE JAMAIS utiliser un siège
d'enfant orienté vers l'arrière sur un
siège protégé par un COUSSIN
GONFLABLE ACTIF placé devant lui,
sous peine d'infliger des
BLESSURES GRAVES, voire
MORTELLES à l'ENFANT.
ES: NUNCA utilice un sistema de
retención infantil orientado hacia
atrás en un asiento protegido por un
AIRBAG FRONTAL ACTIVO. Peligro de MUERTE o LESIONES GRAVES
para el NIÑO.
RU: ЗАПРЕЩАЕТСЯ
устанавливать детское
удерживающее устройство лицом
назад на сиденье автомобиля,
оборудованном фронтальной
подушкой безопасности, если
ПОДУШКА НЕ ОТКЛЮЧЕНА! Это
может привести к СМЕРТИ или
СЕРЬЕЗНЫМ ТРАВМАМ
РЕБЕНКА.
Page 41 of 227
Seats, restraints39Use the ignition key to choose theposition:OFF *:front passenger airbag is
deactivated and will not
inflate in the event of a
collision, control indicator
OFF * illuminates
continuously in the centre
console.ON Ó:front passenger airbag is
active.9 Danger
Deactivate passenger airbag only
in combination with the use of a
child restraint system, subject to
the instructions and restrictions in
the table 3 43.
Otherwise, there is a risk of fatal
injury for a person occupying a
seat with a deactivated front
passenger airbag.
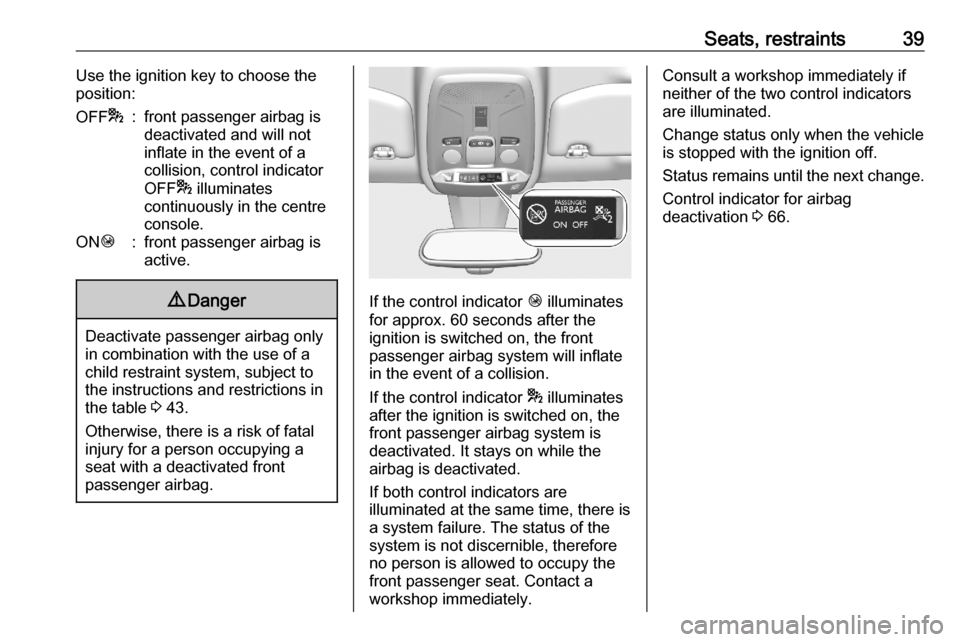
If the control indicator Ó illuminates
for approx. 60 seconds after the
ignition is switched on, the front
passenger airbag system will inflate
in the event of a collision.
If the control indicator * illuminates
after the ignition is switched on, the front passenger airbag system is
deactivated. It stays on while the
airbag is deactivated.
If both control indicators are
illuminated at the same time, there is
a system failure. The status of the
system is not discernible, therefore
no person is allowed to occupy the
front passenger seat. Contact a
workshop immediately.
Consult a workshop immediately if
neither of the two control indicators
are illuminated.
Change status only when the vehicle is stopped with the ignition off.
Status remains until the next change.
Control indicator for airbag
deactivation 3 66.
Page 55 of 227

Instruments and controls53Instruments and
controlsControls ....................................... 54
Steering wheel adjustment ........54
Steering wheel controls .............54
Heated steering wheel ...............54
Horn ........................................... 55
Windscreen wiper and washer ..55
Rear window wiper and washer ...................................... 57
Outside temperature ..................57
Clock ......................................... 58
Power outlets ............................. 58
Inductive charging .....................59
Cigarette lighter ......................... 60
Ashtrays .................................... 60
Warning lights, gauges and indi‐ cators ........................................... 61
Instrument cluster ......................61
Speedometer ............................. 62
Odometer .................................. 62
Trip odometer ............................ 62
Tachometer ............................... 63
Fuel gauge ................................ 63
Engine coolant temperature gauge ....................................... 63Engine oil level monitor.............64
Service display .......................... 64
Control indicators ......................65
Turn lights .................................. 65
Seat belt reminder .....................65
Airbag and belt tensioners .........66
Airbag deactivation ....................66
Charging system .......................66
Malfunction indicator light ..........67
Service vehicle soon .................67
Stop engine ............................... 67
System check ............................ 67
Brake and clutch system ...........67
Parking brake ............................ 68
Electric parking brake ................68
Electric parking brake fault ........68
Automatic operation of electric parking brake off ....................... 68
Antilock brake system (ABS) .....68
Gear shifting .............................. 69
Lane keep assist .......................69
Electronic Stability Control and Traction Control system ...........69
Engine coolant temperature ......69
Preheating ................................. 69
Exhaust filter .............................. 69
AdBlue ....................................... 70
Deflation detection system ........70
Engine oil pressure ....................70
Low fuel ..................................... 71Autostop.................................... 71
Exterior light .............................. 71
Low beam .................................. 71
High beam ................................. 71
High beam assist .......................71
LED headlights .......................... 71
Front fog lights ........................... 71
Rear fog light ............................. 71
Rain sensor ............................... 71
Active emergency braking .........72
Door open .................................. 72
Displays ....................................... 72
Driver Information Centre ..........72
Info Display ................................ 74
Vehicle messages ........................75
Warning chimes .........................76
Vehicle personalisation ................76
Telematics services .....................77
Vauxhall Connect ......................77