Door VAUXHALL CORSA F 2020 Owner's Guide
[x] Cancel search | Manufacturer: VAUXHALL, Model Year: 2020, Model line: CORSA F, Model: VAUXHALL CORSA F 2020Pages: 227, PDF Size: 18.77 MB
Page 48 of 227

46StorageStorageStorage compartments................46
Glovebox ................................... 46
Cupholders ................................ 46
Door panel storage ....................47
Centre console storage .............47
Load compartment .......................48
Load compartment cover ...........49
Rear floor storage cover ............50
Lashing eyes ............................. 50
Roof rack system .........................50
Roof rack ................................... 50
Loading information .....................51Storage compartments9Warning
Do not store heavy or sharp
objects in the storage
compartments. Otherwise, the
storage compartment lid could
open and vehicle occupants could be injured by objects being thrown
around in the event of hard
braking, a sudden change in
direction or an accident.
Glovebox
Pull lever to open the glovebox.
The glovebox should be closed whilst driving.
Cupholders
Cupholders are located in the centre
console.
Page 49 of 227

Storage47
Depending on the version, additional
cupholders may be located in the
centre console.
Door panel storage
A storage compartment is located in
the front and rear door panels.
Centre console storage
A storage compartment is located in
the storage container.
Page 52 of 227
50StorageRemove the cover.
Fitting cover Engage cover in side guides and fold
downwards. Attach the retaining
straps to the tailgate.
Rear floor storage cover
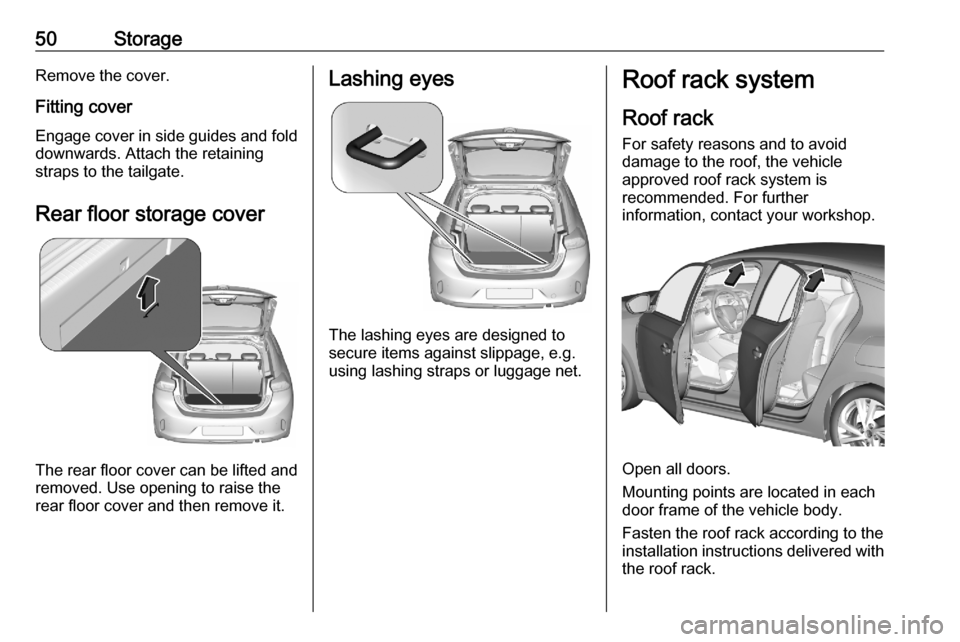
The rear floor cover can be lifted and
removed. Use opening to raise the
rear floor cover and then remove it.
Lashing eyes
The lashing eyes are designed to
secure items against slippage, e.g.
using lashing straps or luggage net.
Roof rack system
Roof rack For safety reasons and to avoid
damage to the roof, the vehicle
approved roof rack system is
recommended. For further
information, contact your workshop.
Open all doors.
Mounting points are located in each
door frame of the vehicle body.
Fasten the roof rack according to the installation instructions delivered with the roof rack.
Page 55 of 227

Instruments and controls53Instruments and
controlsControls ....................................... 54
Steering wheel adjustment ........54
Steering wheel controls .............54
Heated steering wheel ...............54
Horn ........................................... 55
Windscreen wiper and washer ..55
Rear window wiper and washer ...................................... 57
Outside temperature ..................57
Clock ......................................... 58
Power outlets ............................. 58
Inductive charging .....................59
Cigarette lighter ......................... 60
Ashtrays .................................... 60
Warning lights, gauges and indi‐ cators ........................................... 61
Instrument cluster ......................61
Speedometer ............................. 62
Odometer .................................. 62
Trip odometer ............................ 62
Tachometer ............................... 63
Fuel gauge ................................ 63
Engine coolant temperature gauge ....................................... 63Engine oil level monitor.............64
Service display .......................... 64
Control indicators ......................65
Turn lights .................................. 65
Seat belt reminder .....................65
Airbag and belt tensioners .........66
Airbag deactivation ....................66
Charging system .......................66
Malfunction indicator light ..........67
Service vehicle soon .................67
Stop engine ............................... 67
System check ............................ 67
Brake and clutch system ...........67
Parking brake ............................ 68
Electric parking brake ................68
Electric parking brake fault ........68
Automatic operation of electric parking brake off ....................... 68
Antilock brake system (ABS) .....68
Gear shifting .............................. 69
Lane keep assist .......................69
Electronic Stability Control and Traction Control system ...........69
Engine coolant temperature ......69
Preheating ................................. 69
Exhaust filter .............................. 69
AdBlue ....................................... 70
Deflation detection system ........70
Engine oil pressure ....................70
Low fuel ..................................... 71Autostop.................................... 71
Exterior light .............................. 71
Low beam .................................. 71
High beam ................................. 71
High beam assist .......................71
LED headlights .......................... 71
Front fog lights ........................... 71
Rear fog light ............................. 71
Rain sensor ............................... 71
Active emergency braking .........72
Door open .................................. 72
Displays ....................................... 72
Driver Information Centre ..........72
Info Display ................................ 74
Vehicle messages ........................75
Warning chimes .........................76
Vehicle personalisation ................76
Telematics services .....................77
Vauxhall Connect ......................77
Page 64 of 227
62Instruments and controlsmActive emergency braking
3 72PDoor open 3 72
Speedometer
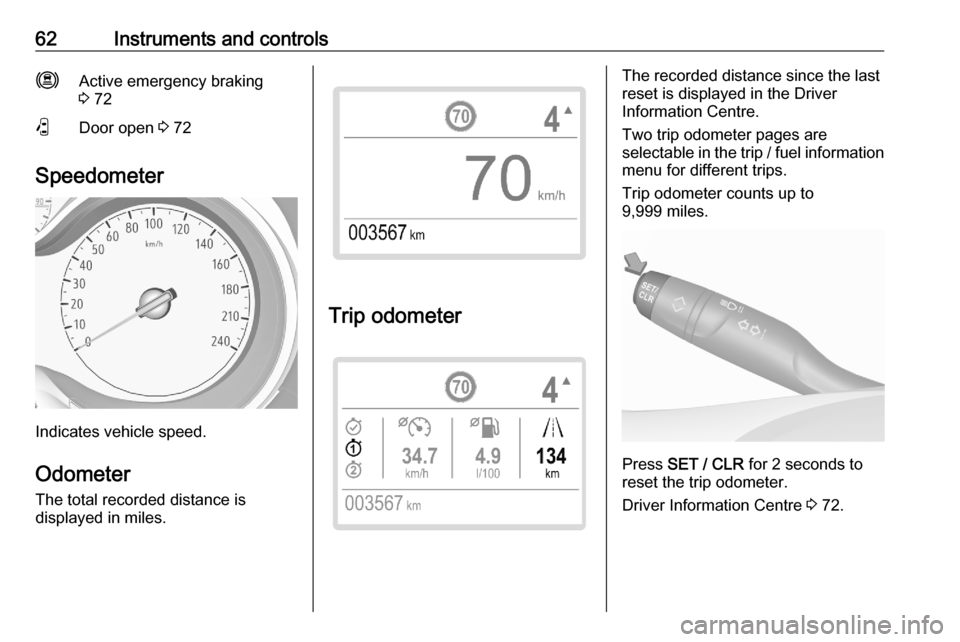
Indicates vehicle speed.
Odometer
The total recorded distance is
displayed in miles.
Trip odometer
The recorded distance since the last
reset is displayed in the Driver
Information Centre.
Two trip odometer pages are
selectable in the trip / fuel information menu for different trips.
Trip odometer counts up to
9,999 miles.
Press SET / CLR for 2 seconds to
reset the trip odometer.
Driver Information Centre 3 72.
Page 74 of 227

72Instruments and controlsActive emergency brakingm illuminates or flashes yellow.
Illuminates
The system has been deactivated or
a fault has been detected.
Additionally, a warning message is
displayed in the Driver Information
Centre.
Check the reason of the deactivation
3 131 and in case of a system fault,
seek the assistance of a workshop.
Notice
m also illuminates if the seat belts
of the front passengers are not
fastened. In this case, active
emergency braking is deactivated.
Flashes
The system is actively engaged. Depending on the situation, the
vehicle may automatically brake
moderately or hard.
Forward collision alert 3 134.
Front pedestrian protection 3 136.Door open
P illuminates red.
A door or the tailgate is open.Displays
Driver Information Centre
The Driver Information Centre is
located in the instrument cluster.
Driver Information Centre indicates: ● overall and trip odometer
● digital speed indication
● trip / fuel information menu
● gear shift indication
● service information
● vehicle and warning messages
● driver assistance messages
● pop-up messages
Selecting menus and functions The menus and functions can be
selected via the buttons on the
indicator lever.
Page 78 of 227
76Instruments and controlsMessages in the Info DisplaySome important messages may
appear additionally in the
Info Display. Some messages only
pop-up for a few seconds.
Warning chimes The warning chime regarding not
fastened seat belts has priority over
any other warning chime.
When starting the engine or whilst driving
A warning chime will sound when ● a seat belt is not fastened
● a door or the tailgate is not fully closed
● a certain speed is exceeded with
parking brake applied
● cruise control deactivates automatically
● a programmed speed or speed limit is exceeded
● a warning message appears in the Driver Information Centre● the electronic key is not in thepassenger compartment
● the parking assist detects an object
● an unintended lane change occurs
● hands-off driving is recognised ● the exhaust filter has reached the
maximum filling level
If several warnings appear at the
same time, only one warning chime
will sound
When the vehicle is parked and / or the driver's door is opened
● With exterior lights on.
During an Autostop ● If the driver's door is opened.
● If any condition for a restart of the
engine is not fulfilled.Vehicle personalisation
The vehicle's behaviour can be
personalised by changing the settings in the Info Display.
Depending on vehicle equipment and
country-specific regulations, some of
the functions described below may
not be available.
Some functions are only displayed or
active when the engine is running.
Radio (Infotainment system)
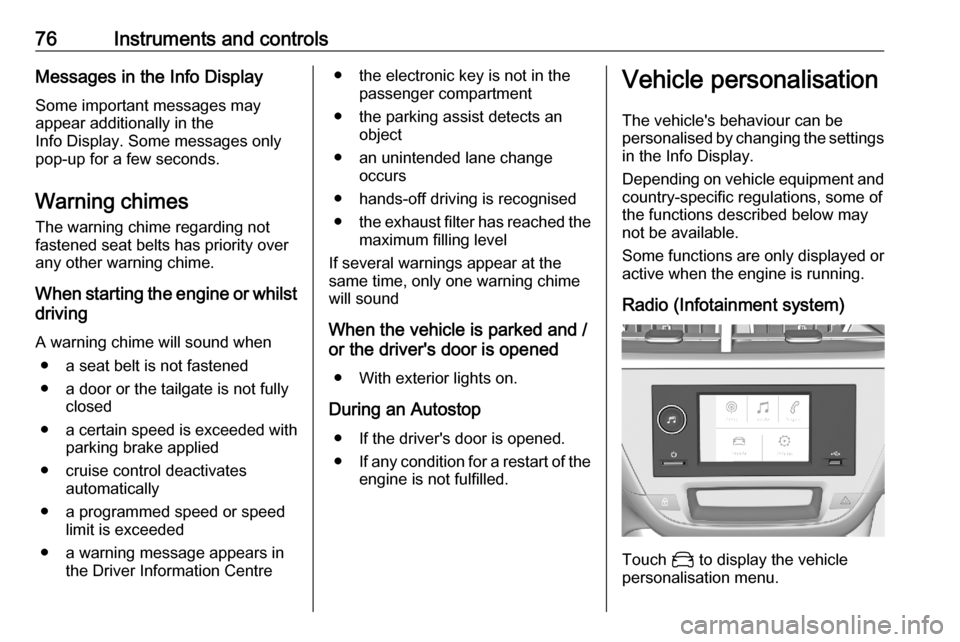
Touch _ to display the vehicle
personalisation menu.
Page 89 of 227

Lighting87Lighting features
Entry lighting Welcome lighting
Some or all of the following lights are
switched on for a short time by
unlocking the vehicle with the radio
remote control:
● headlights
● puddle lights
● interior lights
The number of activated lights
depends on the surrounding light
conditions.
The lighting switches off immediately
when the ignition is switched on.
Starting off 3 98.
This function can be activated or
deactivated in the vehicle
personalisation.
Vehicle personalisation 3 76.The following lights will additionally
switch on when the driver's door is
opened:
● illumination of some switches
● Driver Information Centre
● door pocket lights
Exit lighting The following lights are switched on
when the ignition is switched off:
● headlights
● interior lights
● centre console lighting
They will switch off automatically after
a delay. This function works only in
the dark.
Vehicle locator lighting
This function allows to locate the
vehicle, e.g., in weak lighting
conditions using the remote control.
The headlights come on and the turn
lights flash for 10 seconds.
Press b on the remote control.Peripheral lighting
Peripheral lighting allows you to
switch on the position lights, low
beam and number plate lighting using the remote control.
Press D on the remote control to
switch on peripheral lighting.
Press D a second time to switch off
peripheral lighting.
Battery discharge protection
To prevent discharge of the vehicle
battery when the ignition is switched
off, some interior lights are switched
off automatically after some time.
Page 90 of 227
88Climate controlClimate controlClimate control systems...............88
Heating and ventilation system . 88 Air conditioning system .............89
Electronic climate control system ...................................... 91
Auxiliary heater .......................... 95
Air vents ....................................... 95
Adjustable air vents ...................95
Fixed air vents ........................... 96
Maintenance ................................ 96
Air intake ................................... 96
Air conditioning regular operation .................................. 96
Service ...................................... 96Climate control systems
Heating and ventilation system
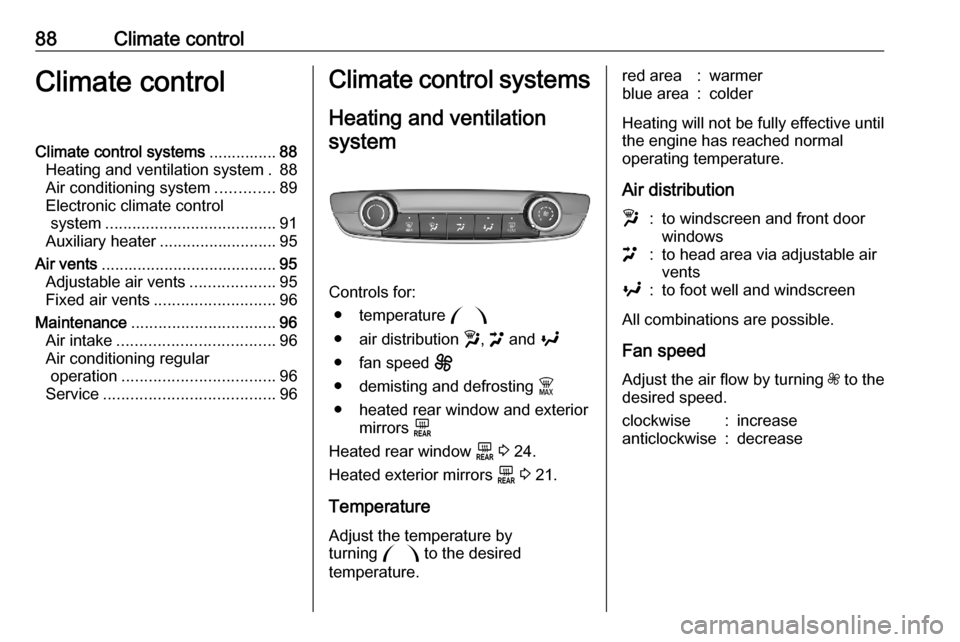
Controls for: ● temperature :
● air distribution w, > and y
● fan speed E
● demisting and defrosting $
● heated rear window and exterior mirrors f
Heated rear window f 3 24.
Heated exterior mirrors f 3 21.
Temperature
Adjust the temperature by
turning : to the desired
temperature.
red area:warmerblue area:colder
Heating will not be fully effective until the engine has reached normal
operating temperature.
Air distribution
w:to windscreen and front door
windows>:to head area via adjustable air
ventsy:to foot well and windscreen
All combinations are possible.
Fan speed
Adjust the air flow by turning Z to the
desired speed.
clockwise:increaseanticlockwise:decrease
Page 91 of 227
Climate control89Demisting and defrosting
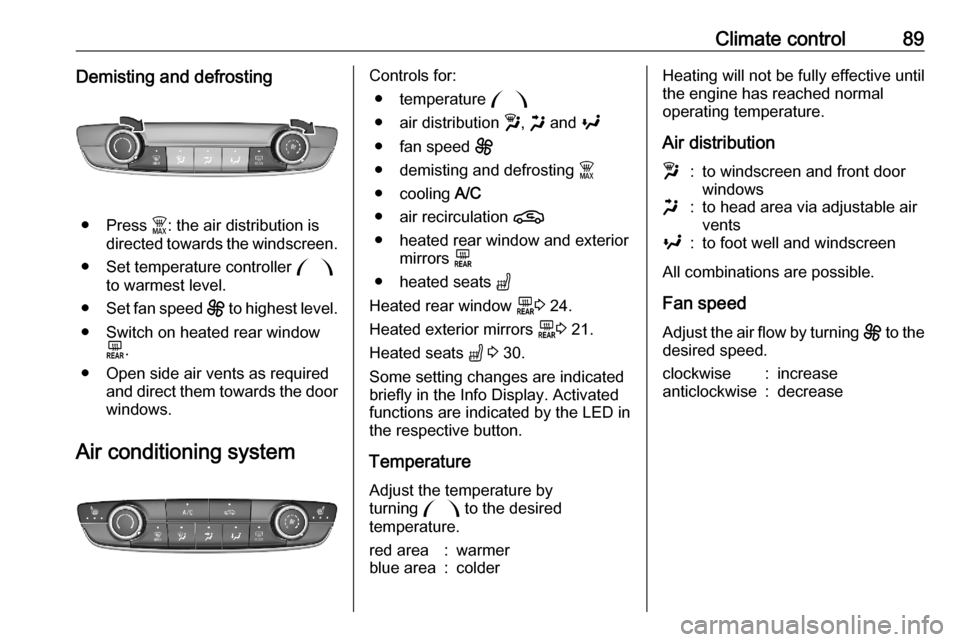
● Press $: the air distribution is
directed towards the windscreen.
● Set temperature controller :
to warmest level.
● Set fan speed E to highest level.
● Switch on heated rear window f.
● Open side air vents as required and direct them towards the doorwindows.
Air conditioning system
Controls for: ● temperature :
● air distribution w, x and y
● fan speed E
● demisting and defrosting $
● cooling A/C
● air recirculation n
● heated rear window and exterior mirrors f
● heated seats "
Heated rear window f3 24.
Heated exterior mirrors f3 21.
Heated seats " 3 30.
Some setting changes are indicated briefly in the Info Display. Activated
functions are indicated by the LED in
the respective button.
Temperature
Adjust the temperature by
turning : to the desired
temperature.red area:warmerblue area:colderHeating will not be fully effective until
the engine has reached normal
operating temperature.
Air distributionw:to windscreen and front door
windowsx:to head area via adjustable air
ventsy:to foot well and windscreen
All combinations are possible.
Fan speed
Adjust the air flow by turning E to the
desired speed.
clockwise:increaseanticlockwise:decrease