AUX VAUXHALL CORSA F 2020 Owner's Manual
[x] Cancel search | Manufacturer: VAUXHALL, Model Year: 2020, Model line: CORSA F, Model: VAUXHALL CORSA F 2020Pages: 227, PDF Size: 18.77 MB
Page 5 of 227

Introduction3Vehicle specific dataPlease enter your vehicle's data on
the previous page to keep it easily
accessible.
Please refer to the sections "Service
and maintenance", "Technical data",
the vehicle’s identification plate and
national registration documents.
Introduction
Your vehicle is a designed
combination of advanced technology, safety, environmental friendliness
and economy.
This Owner's Manual provides you
with all the necessary information to
enable you to drive your vehicle
safely and efficiently.
Make sure your passengers are
aware of the possible risk of accident
and injury which may result from
improper use of the vehicle.
You must always comply with the
specific laws and regulations of the
country that you are in. These laws
may differ from the information in this Owner's Manual.Disregarding the description given in
this manual may affect your warranty.
When this Owner's Manual refers to a
workshop visit, we recommend your Vauxhall Authorised Repairer.
All Vauxhall Authorised Repairers provide first-class service at
reasonable prices. Experienced
mechanics trained by Vauxhall work
according to specific Vauxhall
instructions.
The customer literature pack should
always be kept ready to hand in the
vehicle.
Using this manual ● This manual describes all options
and features available for this
model. Certain descriptions,
including those for display and
menu functions, may not apply to
your vehicle due to model
variant, country specifications,
special equipment or
accessories.● The table of contents at the beginning of this manual and
within each section shows where the information is located.
● The index will enable you to search for specific information.
● This Owner's Manual depicts left-
hand drive vehicles. Operation is
similar for right-hand drive
vehicles.
● The Owner's Manual uses the engine identifier code. The
corresponding sales designation
and engineering code can be
found in the section "Technical
data".
● Directional data, e.g. left or right, or front or back, always relate to
the direction of travel.
● Displays may not support your specific language.
● Display messages and interior labelling are written in bold
letters.
Page 6 of 227

4IntroductionDanger, Warnings andCautions9 Danger
Text marked 9 Danger provides
information on risk of fatal injury.
Disregarding this information may
endanger life.
9 Warning
Text marked 9 Warning provides
information on risk of accident or
injury. Disregarding this
information may lead to injury.
Caution
Text marked Caution provides
information on possible damage to
the vehicle. Disregarding this
information may lead to vehicle
damage.
Symbols
Page references are indicated with 3.
3 means "see page".
Page references and index entries
refer to the indented headings given
in the section table of content.
Thank you for choosing a Vauxhall.
We wish you many hours of
pleasurable driving.
Your Vauxhall Team
Page 24 of 227

22Keys, doors and windowsAutomatic anti-dazzle
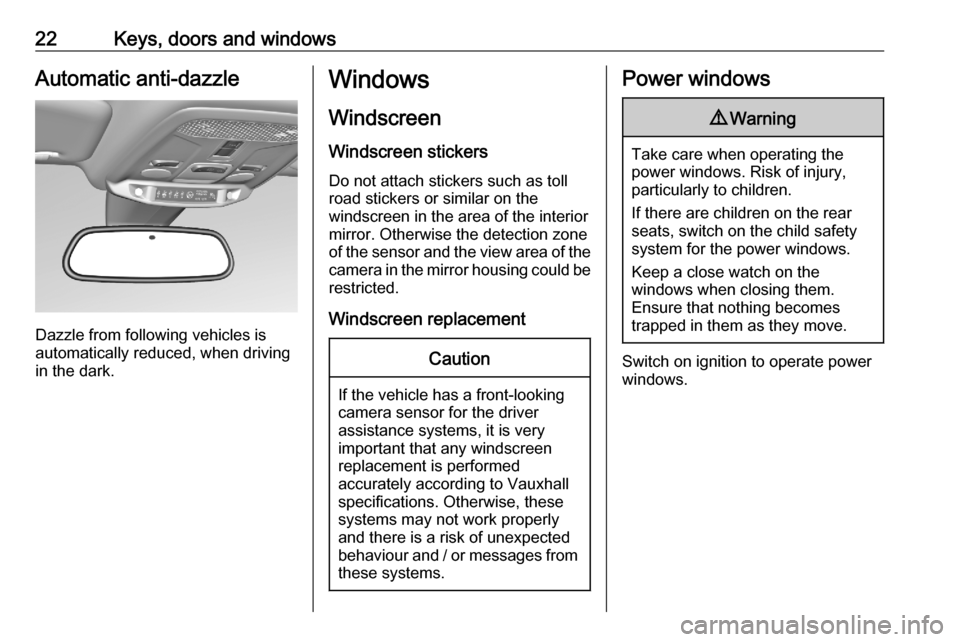
Dazzle from following vehicles is
automatically reduced, when driving
in the dark.
Windows
Windscreen
Windscreen stickers
Do not attach stickers such as toll
road stickers or similar on the
windscreen in the area of the interior
mirror. Otherwise the detection zone
of the sensor and the view area of the camera in the mirror housing could be
restricted.
Windscreen replacementCaution
If the vehicle has a front-looking
camera sensor for the driver
assistance systems, it is very
important that any windscreen
replacement is performed
accurately according to Vauxhall
specifications. Otherwise, these systems may not work properly
and there is a risk of unexpected
behaviour and / or messages from these systems.
Power windows9 Warning
Take care when operating the
power windows. Risk of injury,
particularly to children.
If there are children on the rear seats, switch on the child safety
system for the power windows.
Keep a close watch on the
windows when closing them.
Ensure that nothing becomes
trapped in them as they move.
Switch on ignition to operate power
windows.
Page 55 of 227

Instruments and controls53Instruments and
controlsControls ....................................... 54
Steering wheel adjustment ........54
Steering wheel controls .............54
Heated steering wheel ...............54
Horn ........................................... 55
Windscreen wiper and washer ..55
Rear window wiper and washer ...................................... 57
Outside temperature ..................57
Clock ......................................... 58
Power outlets ............................. 58
Inductive charging .....................59
Cigarette lighter ......................... 60
Ashtrays .................................... 60
Warning lights, gauges and indi‐ cators ........................................... 61
Instrument cluster ......................61
Speedometer ............................. 62
Odometer .................................. 62
Trip odometer ............................ 62
Tachometer ............................... 63
Fuel gauge ................................ 63
Engine coolant temperature gauge ....................................... 63Engine oil level monitor.............64
Service display .......................... 64
Control indicators ......................65
Turn lights .................................. 65
Seat belt reminder .....................65
Airbag and belt tensioners .........66
Airbag deactivation ....................66
Charging system .......................66
Malfunction indicator light ..........67
Service vehicle soon .................67
Stop engine ............................... 67
System check ............................ 67
Brake and clutch system ...........67
Parking brake ............................ 68
Electric parking brake ................68
Electric parking brake fault ........68
Automatic operation of electric parking brake off ....................... 68
Antilock brake system (ABS) .....68
Gear shifting .............................. 69
Lane keep assist .......................69
Electronic Stability Control and Traction Control system ...........69
Engine coolant temperature ......69
Preheating ................................. 69
Exhaust filter .............................. 69
AdBlue ....................................... 70
Deflation detection system ........70
Engine oil pressure ....................70
Low fuel ..................................... 71Autostop.................................... 71
Exterior light .............................. 71
Low beam .................................. 71
High beam ................................. 71
High beam assist .......................71
LED headlights .......................... 71
Front fog lights ........................... 71
Rear fog light ............................. 71
Rain sensor ............................... 71
Active emergency braking .........72
Door open .................................. 72
Displays ....................................... 72
Driver Information Centre ..........72
Info Display ................................ 74
Vehicle messages ........................75
Warning chimes .........................76
Vehicle personalisation ................76
Telematics services .....................77
Vauxhall Connect ......................77
Page 79 of 227

Instruments and controls77Parking, lighting, comfort and safety
settings are adjustable.
Multimedia / Multimedia Navi /
Multimedia Navi Pro
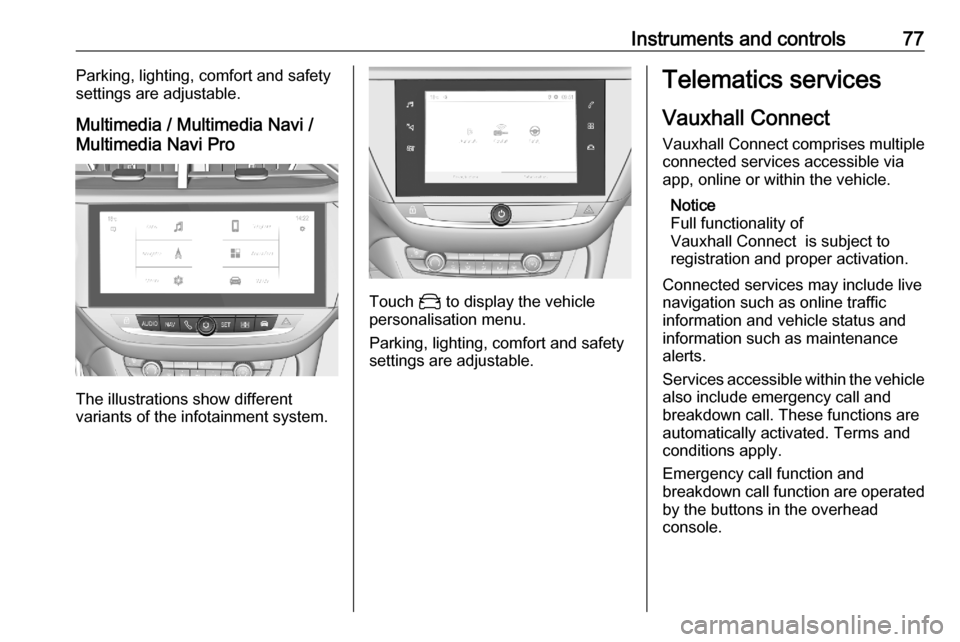
The illustrations show different
variants of the infotainment system.
Touch _ to display the vehicle
personalisation menu.
Parking, lighting, comfort and safety
settings are adjustable.
Telematics services
Vauxhall Connect Vauxhall Connect comprises multiple
connected services accessible via
app, online or within the vehicle.
Notice
Full functionality of
Vauxhall Connect is subject to registration and proper activation.
Connected services may include live
navigation such as online traffic
information and vehicle status and
information such as maintenance alerts.
Services accessible within the vehicle also include emergency call and
breakdown call. These functions are
automatically activated. Terms and
conditions apply.
Emergency call function and
breakdown call function are operated
by the buttons in the overhead
console.
Page 80 of 227

78Instruments and controlsStatus LED in the overhead
console
Illuminates green and red and
extinguishes after a short time, when
the ignition is switched on: the system
works properly.
Illuminates red: fault in the system.
Contact a workshop.
Flashes red: backup battery needs
replacement. Contact a workshop.
Emergency call
The emergency call function will
establish a connection to the nearest
public safety answering point (PSAP). A minimum set of data including
vehicle and location information will
be sent to the PSAP.
Notice
Establishing an emergency call may
not be possible in areas without
sufficient network availability or due
to hardware damage during an
accident.
In case of an emergency, press the
red SOS button for more than
2 seconds . The LED flashes green toconfirm that a connection to the
nearest PSAP is being established.
The LED illuminates steadily as long
as the call is active.
Pressing the SOS button immediately
a second time will terminate the call.
The LED switches off.
Automatic crash notification
In case of an accident with airbag
deployment, an automatic
emergency call is established and an
automatic crash notification will be
transmitted to the next PSAP.
Breakdown call
Pressing the . button for more than
2 seconds connects you to a roadside assistance service provider.
For information about coverage and
scope of services of the roadside
assistance, please refer to the
Service and warranty booklet.
Privacy settings
Privacy settings of Vauxhall Connect
can be configured in your vehicle.
This will impact the set of data beingsent, e.g., in case a breakdown call is triggered.The emergency call
function will not be impacted.
Depending on version, the privacy
settings can be changed by
simultaneously pressing . and
SOS in the overhead console or via
the system settings menu in the Info Display.
Page 90 of 227

88Climate controlClimate controlClimate control systems...............88
Heating and ventilation system . 88 Air conditioning system .............89
Electronic climate control system ...................................... 91
Auxiliary heater .......................... 95
Air vents ....................................... 95
Adjustable air vents ...................95
Fixed air vents ........................... 96
Maintenance ................................ 96
Air intake ................................... 96
Air conditioning regular operation .................................. 96
Service ...................................... 96Climate control systems
Heating and ventilation system
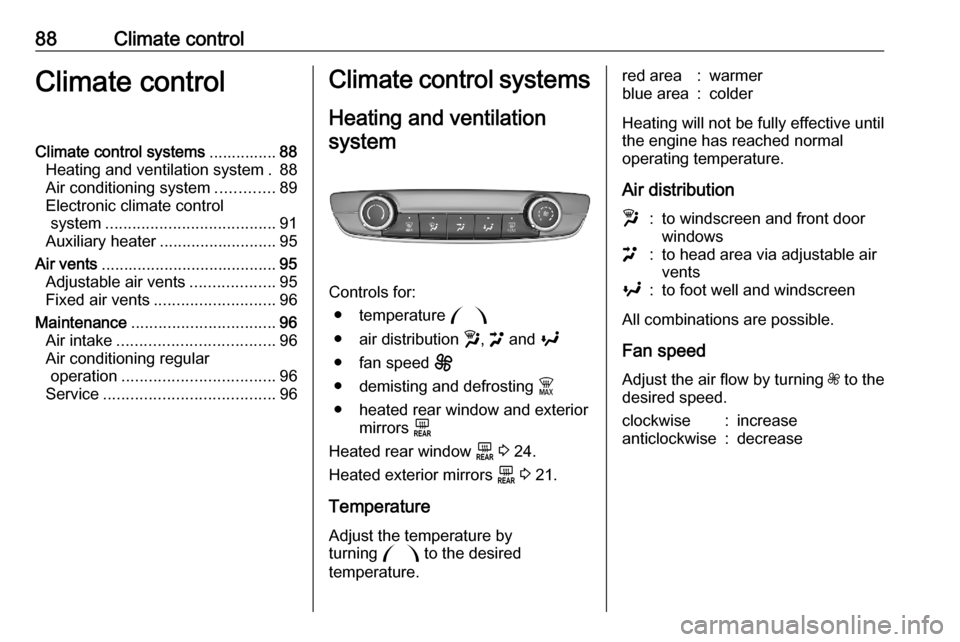
Controls for: ● temperature :
● air distribution w, > and y
● fan speed E
● demisting and defrosting $
● heated rear window and exterior mirrors f
Heated rear window f 3 24.
Heated exterior mirrors f 3 21.
Temperature
Adjust the temperature by
turning : to the desired
temperature.
red area:warmerblue area:colder
Heating will not be fully effective until the engine has reached normal
operating temperature.
Air distribution
w:to windscreen and front door
windows>:to head area via adjustable air
ventsy:to foot well and windscreen
All combinations are possible.
Fan speed
Adjust the air flow by turning Z to the
desired speed.
clockwise:increaseanticlockwise:decrease
Page 97 of 227

Climate control95Auxiliary heaterAir heater
Quickheat is an electric auxiliary air
heater which automatically warms up
the passenger compartment more
quickly.Air vents
Adjustable air vents Centre air vents in the instrument
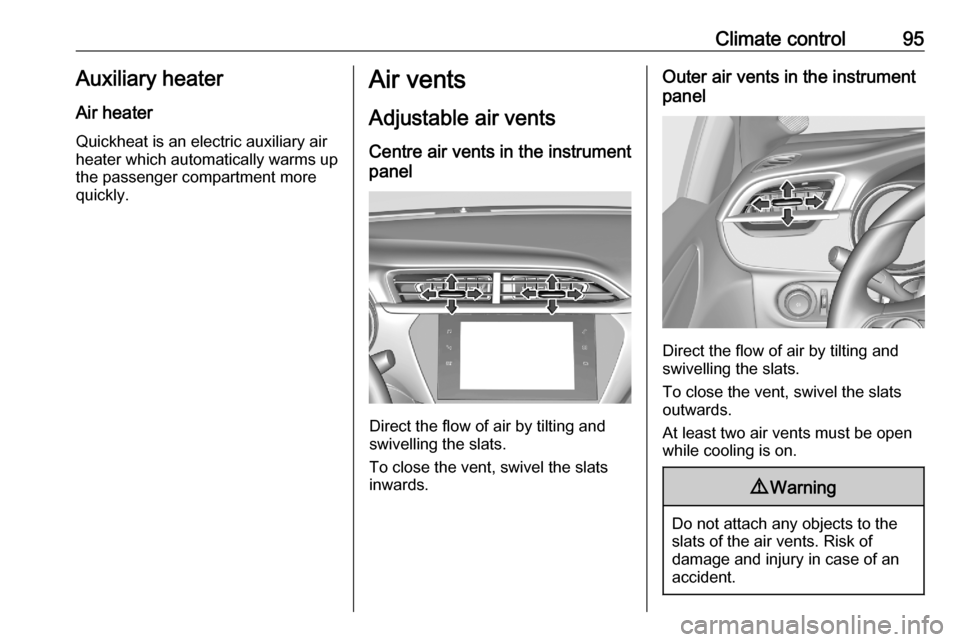
panel
Direct the flow of air by tilting and
swivelling the slats.
To close the vent, swivel the slats
inwards.
Outer air vents in the instrument
panel
Direct the flow of air by tilting and
swivelling the slats.
To close the vent, swivel the slats
outwards.
At least two air vents must be open
while cooling is on.
9 Warning
Do not attach any objects to the
slats of the air vents. Risk of
damage and injury in case of an
accident.
Page 106 of 227

104Driving and operatingPower saving measures
During an Autostop, several electrical
features such as auxiliary electric
heater or rear window heating are
disabled or switched to a power
saving mode. The fan speed of the
climate control system is reduced to
save power.
Restart of the engine by the driver
Vehicles with manual transmission
Depress the clutch pedal without
depressing the brake pedal to restart
the engine.
Vehicles with automatic transmission The engine is restarted in the
following cases:
● brake pedal released while the selector lever in position D or M
● brake pedal released or selector lever in position N when selector
lever is moved to position D or
M
● selector lever moved to position RRestart of the engine by the stop-
start system
The selector lever must be in neutral to enable an automatic restart.
If one of the following conditions occurs during an Autostop, the
engine will be restarted automatically by the stop-start system:
● stop-start system manually deactivated
● driver's seat belt unfastened and driver's door opened
● engine temperature too low
● charging level of vehicle battery below a defined level
● brake vacuum not sufficient
● vehicle driven at least at walking speed
● climate control system requests engine start
● air conditioning manually switched on
If an electrical accessory, e.g. a
portable CD player, is connected to
the power outlet, a brief power drop
during the restart might be noticeable.Parking9 Warning
● Do not park the vehicle on an
easily ignitable surface. The
high temperature of the
exhaust system could ignite the
surface.
● Always apply the parking brake.
● If the vehicle is on a level surface or uphill slope, engage
first gear or set the selector
lever to position P. On an uphill
slope, turn the front wheels
away from the kerb.
If the vehicle is on a downhill
slope, engage reverse gear or
set the selector lever to position
P . Turn the front wheels
towards the kerb.
● Close the windows.
● Switch off the engine.
● Remove the ignition key from the ignition switch or switch off
ignition on vehicles with power
Page 110 of 227

108Driving and operatingRefilling AdBlueCaution
Only use AdBlue that complies
with European standards
DIN 70 070 and ISO 22241-1.
Do not use additives.
Do not dilute AdBlue.
Otherwise the selective catalytic
reduction system could be
damaged.
Notice
Whenever a filling pump with a
nozzle for passenger cars is not
available at a filling station, use only
AdBlue bottles or canisters with a
sealed refill adapter for refilling, to
prevent splashback and overspill,
and in order to ensure that the fumes
from the tank are captured and do
not emerge. AdBlue in bottles or
canisters is available in many filling
stations and can be purchased e.g. at Vauxhall dealers and other retail
outlets.
Since AdBlue has a limited
durability, check the date of expiry
before refilling.
Notice
Refill the tank to a level of at least
5 l to ensure that the new AdBlue
level is being detected.
In case AdBlue refill is not
successfully detected:
1. Continuously drive the vehicle for 10 min making sure that
vehicle speed is always higher
than 12 mph.
2. If AdBlue refill is detected successfully, AdBlue supply-
driven warnings or limitations will
disappear.
If AdBlue refill is still not detected, seek the assistance of a workshop.
If AdBlue must be refilled at
temperatures below -11 °C, the
refilling of AdBlue may not be
detected by the system. In this
event, park the vehicle in a space
with a higher ambient temperature
until AdBlue is liquified.Notice
When unscrewing the protective cap
from the filler neck, ammonia fumes
may emerge. Do not inhale as the
fumes have a pungent smell. The
fumes are not harmful by inhalation.
The AdBlue tank should be filled
completely. This must be done if the
warning message regarding
prevention of an engine restart is
already displayed.
The vehicle must be parked on a level surface.
The filler neck for AdBlue is located
behind the fuel filler flap.
The fuel filler flap can only be opened
if the vehicle is unlocked.
1. Switch off the ignition.
2. Close all doors to avoid ammonia fumes entering the interior of the
vehicle.
3. Release the fuel filler flap by pushing the flap 3 156.