auto hold VAUXHALL CORSA F 2020 Owner's Manual
[x] Cancel search | Manufacturer: VAUXHALL, Model Year: 2020, Model line: CORSA F, Model: VAUXHALL CORSA F 2020Pages: 227, PDF Size: 18.77 MB
Page 13 of 227
Keys, doors and windows11Replacing battery in electronic
key
Replace the battery as soon as the
system no longer operates properly or the range is reduced.
In the event of a discharged battery,
C illuminates in the instrument
cluster and a warning message is
displayed in the Driver Information
Centre.
Driver Information Centre 3 75.
Batteries do not belong in household
waste. They must be disposed of at
an appropriate recycling collection
point.
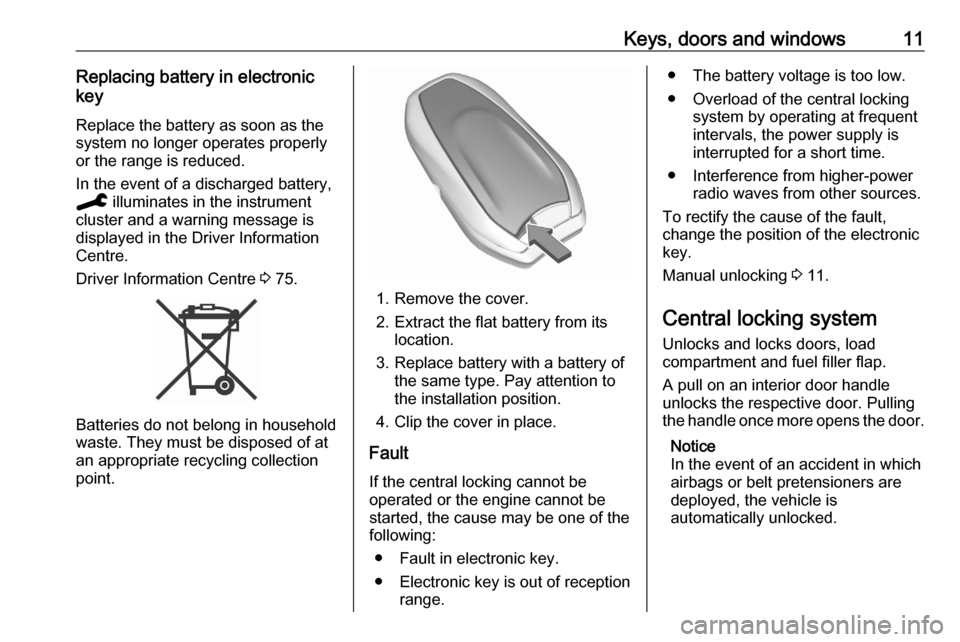
1. Remove the cover.
2. Extract the flat battery from its location.
3. Replace battery with a battery of the same type. Pay attention to
the installation position.
4. Clip the cover in place.
Fault
If the central locking cannot be
operated or the engine cannot be
started, the cause may be one of the
following:
● Fault in electronic key.
● Electronic key is out of reception range.
● The battery voltage is too low.
● Overload of the central locking system by operating at frequent
intervals, the power supply is
interrupted for a short time.
● Interference from higher-power radio waves from other sources.
To rectify the cause of the fault,
change the position of the electronic
key.
Manual unlocking 3 11.
Central locking system Unlocks and locks doors, load
compartment and fuel filler flap.
A pull on an interior door handle
unlocks the respective door. Pulling
the handle once more opens the door.
Notice
In the event of an accident in which
airbags or belt pretensioners are
deployed, the vehicle is
automatically unlocked.
Page 25 of 227
Keys, doors and windows23
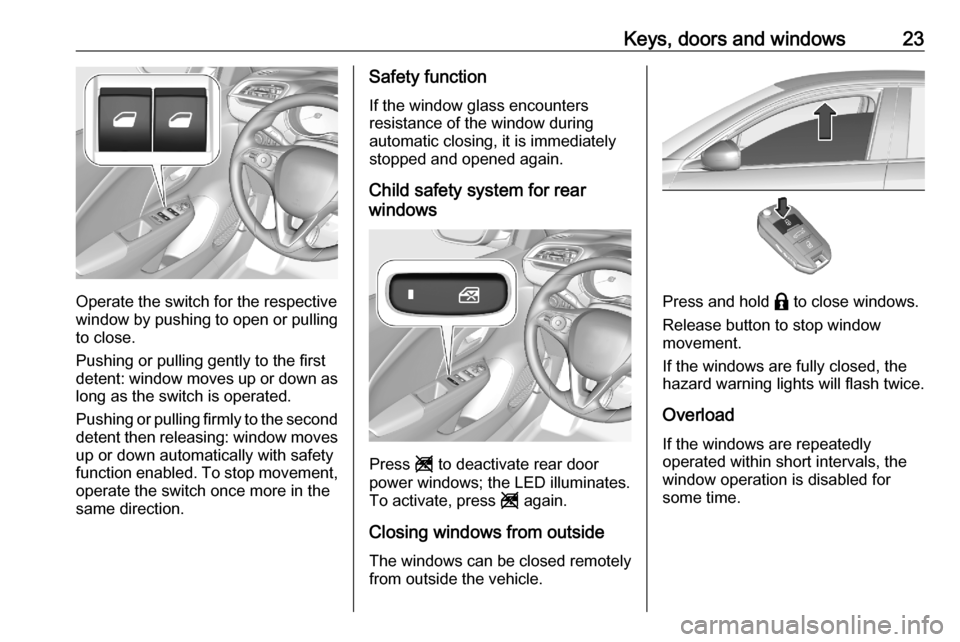
Operate the switch for the respective
window by pushing to open or pulling to close.
Pushing or pulling gently to the first
detent: window moves up or down as long as the switch is operated.
Pushing or pulling firmly to the second
detent then releasing: window moves
up or down automatically with safety
function enabled. To stop movement,
operate the switch once more in the
same direction.
Safety function
If the window glass encounters
resistance of the window during
automatic closing, it is immediately
stopped and opened again.
Child safety system for rear
windows
Press g to deactivate rear door
power windows; the LED illuminates.
To activate, press g again.
Closing windows from outside The windows can be closed remotely
from outside the vehicle.
Press and hold b to close windows.
Release button to stop window
movement.
If the windows are fully closed, the
hazard warning lights will flash twice.
Overload
If the windows are repeatedly
operated within short intervals, the
window operation is disabled for
some time.
Page 26 of 227
24Keys, doors and windowsInitialising the power windowsIf the windows cannot be closed
automatically (e.g. after
disconnecting the vehicle battery), a
warning message is displayed in the
Driver Information Centre.
Vehicle messages 3 75.
Activate the window electronics as
follows:
1. Close doors.
2. Switch on ignition.
3. Pull the switch until the window is completely opened and keep
pulling for additional 2 seconds.
4. Push the switch as long as the window is completely closed and
keep pushing for additional
2 seconds.
5. Repeat for each window.
Heated rear window
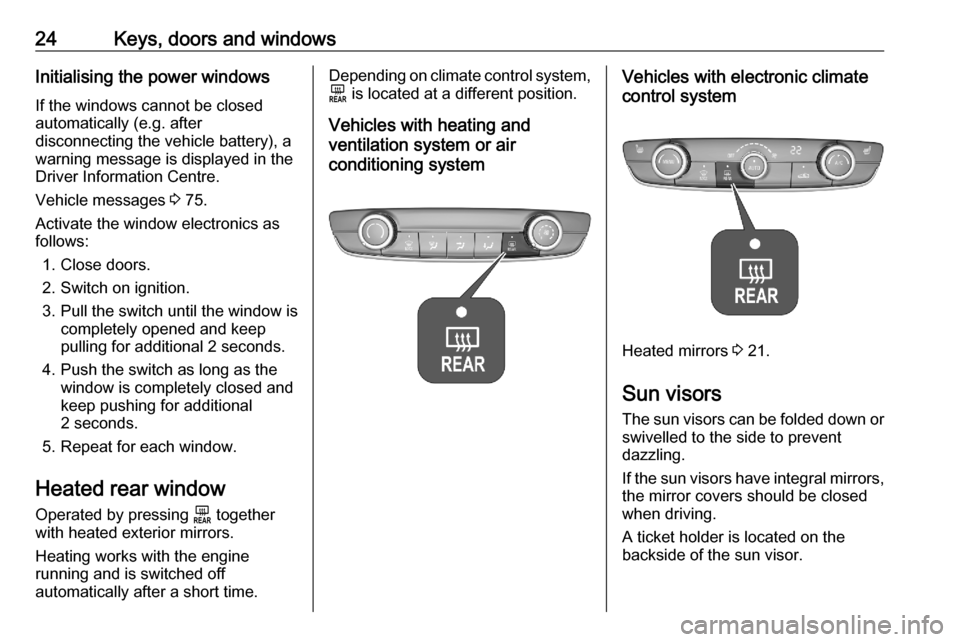
Operated by pressing f together
with heated exterior mirrors.
Heating works with the engine
running and is switched off
automatically after a short time.Depending on climate control system, f is located at a different position.
Vehicles with heating and
ventilation system or air
conditioning systemVehicles with electronic climate
control system
Heated mirrors 3 21.
Sun visors
The sun visors can be folded down or swivelled to the side to prevent
dazzling.
If the sun visors have integral mirrors, the mirror covers should be closed
when driving.
A ticket holder is located on the
backside of the sun visor.
Page 33 of 227
Seats, restraints31Massage
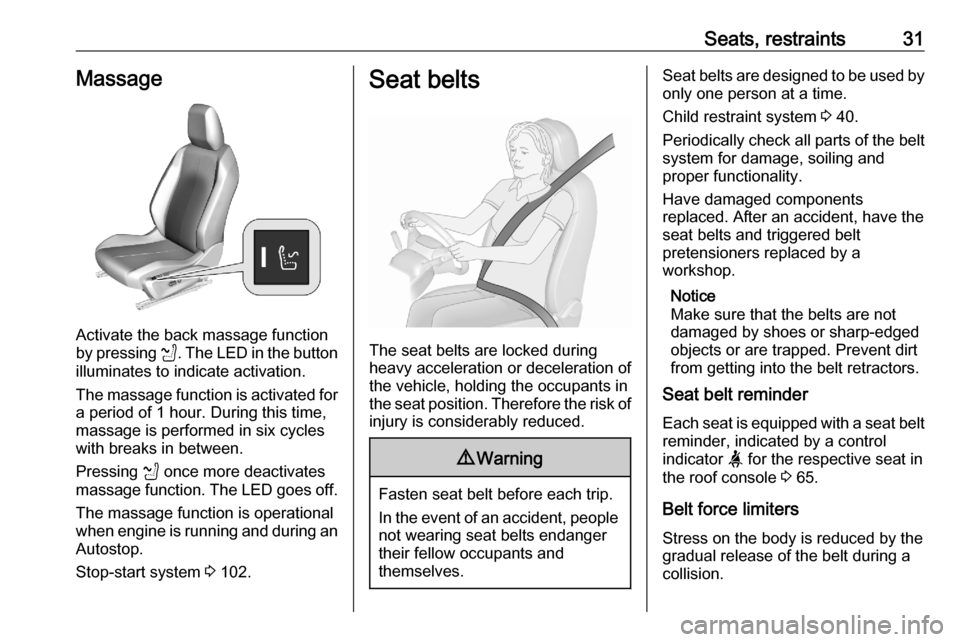
Activate the back massage function
by pressing K. The LED in the button
illuminates to indicate activation.
The massage function is activated for
a period of 1 hour. During this time,
massage is performed in six cycles
with breaks in between.
Pressing K once more deactivates
massage function. The LED goes off.
The massage function is operational
when engine is running and during an
Autostop.
Stop-start system 3 102.
Seat belts
The seat belts are locked during
heavy acceleration or deceleration of
the vehicle, holding the occupants in
the seat position. Therefore the risk of injury is considerably reduced.
9 Warning
Fasten seat belt before each trip.
In the event of an accident, people
not wearing seat belts endanger their fellow occupants and
themselves.
Seat belts are designed to be used by only one person at a time.
Child restraint system 3 40.
Periodically check all parts of the belt
system for damage, soiling and
proper functionality.
Have damaged components
replaced. After an accident, have the
seat belts and triggered belt
pretensioners replaced by a
workshop.
Notice
Make sure that the belts are not
damaged by shoes or sharp-edged
objects or are trapped. Prevent dirt
from getting into the belt retractors.
Seat belt reminder
Each seat is equipped with a seat belt reminder, indicated by a control
indicator a for the respective seat in
the roof console 3 65.
Belt force limiters
Stress on the body is reduced by the
gradual release of the belt during a
collision.
Page 62 of 227
60Instruments and controlsProtective cover for the mobile device
could have impact on the inductive
charging.
In the event that the mobile device is
not charging properly, rotate it 180°
and place it on the charging device
again.
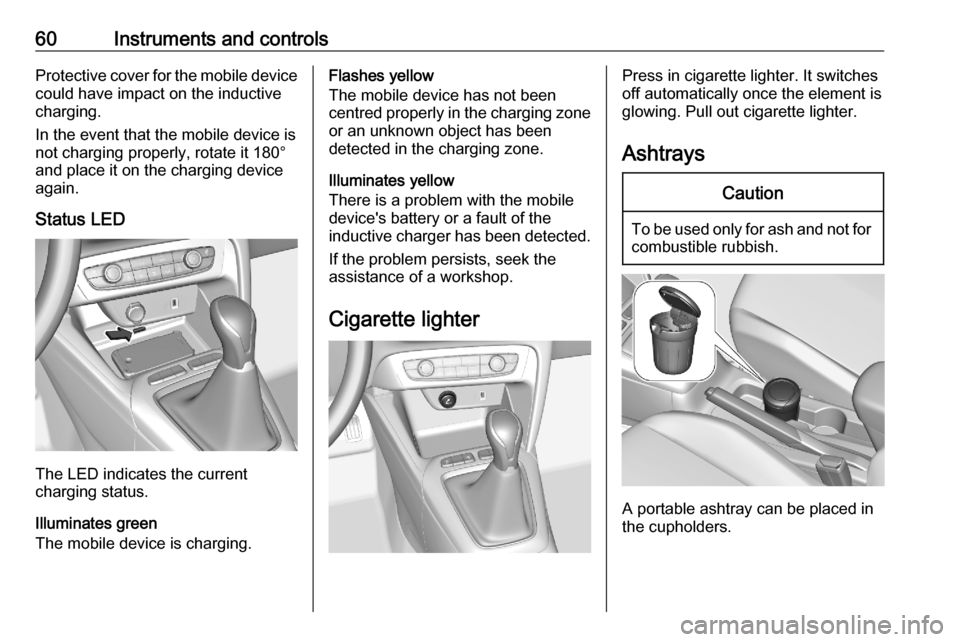
Status LED
The LED indicates the current
charging status.
Illuminates green
The mobile device is charging.
Flashes yellow
The mobile device has not been
centred properly in the charging zone
or an unknown object has been
detected in the charging zone.
Illuminates yellow
There is a problem with the mobile
device's battery or a fault of the
inductive charger has been detected.
If the problem persists, seek the
assistance of a workshop.
Cigarette lighterPress in cigarette lighter. It switches
off automatically once the element is
glowing. Pull out cigarette lighter.
AshtraysCaution
To be used only for ash and not for combustible rubbish.
A portable ashtray can be placed in
the cupholders.
Page 86 of 227
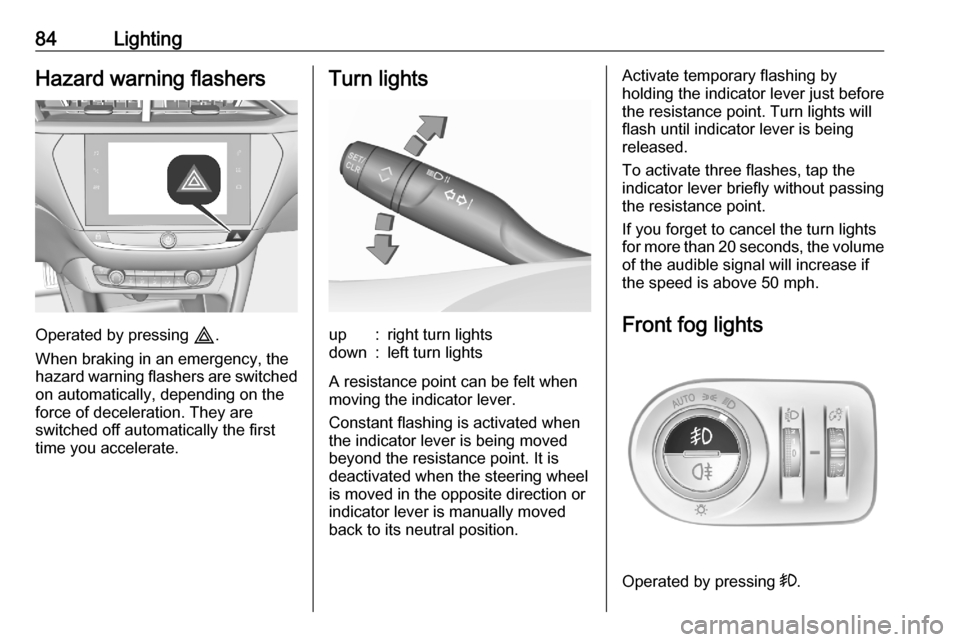
84LightingHazard warning flashers
Operated by pressing c.
When braking in an emergency, the
hazard warning flashers are switched
on automatically, depending on the
force of deceleration. They are
switched off automatically the first
time you accelerate.
Turn lightsup:right turn lightsdown:left turn lights
A resistance point can be felt when
moving the indicator lever.
Constant flashing is activated when
the indicator lever is being moved
beyond the resistance point. It is
deactivated when the steering wheel
is moved in the opposite direction or
indicator lever is manually moved
back to its neutral position.
Activate temporary flashing by
holding the indicator lever just before
the resistance point. Turn lights will
flash until indicator lever is being
released.
To activate three flashes, tap the
indicator lever briefly without passing
the resistance point.
If you forget to cancel the turn lights
for more than 20 seconds, the volume
of the audible signal will increase if
the speed is above 50 mph.
Front fog lights
Operated by pressing >.
Page 88 of 227
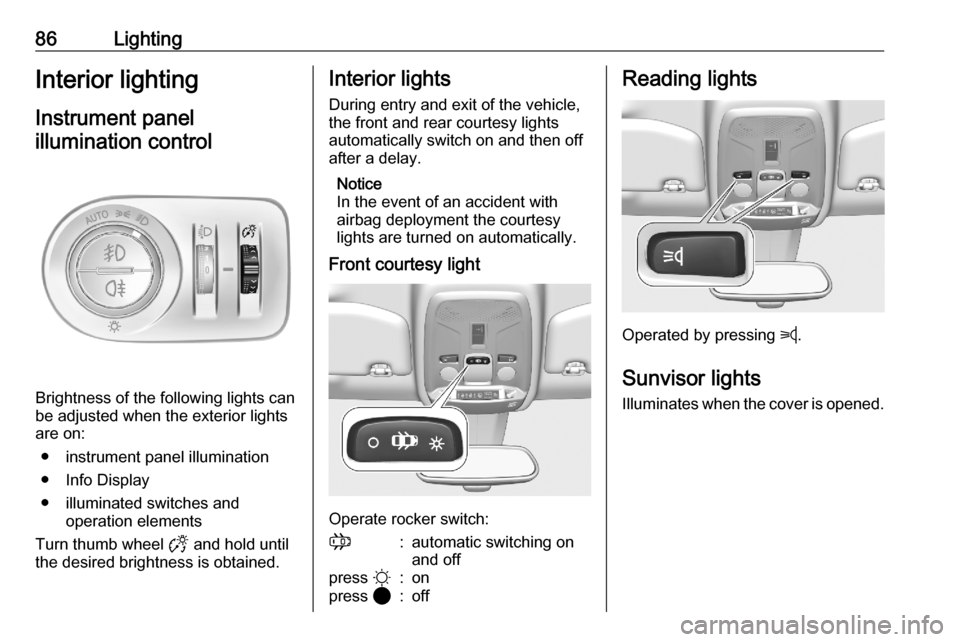
86LightingInterior lightingInstrument panelillumination control
Brightness of the following lights can
be adjusted when the exterior lights
are on:
● instrument panel illumination
● Info Display
● illuminated switches and operation elements
Turn thumb wheel F and hold until
the desired brightness is obtained.
Interior lights
During entry and exit of the vehicle,
the front and rear courtesy lights
automatically switch on and then off
after a delay.
Notice
In the event of an accident with
airbag deployment the courtesy
lights are turned on automatically.
Front courtesy light
Operate rocker switch:
;:automatic switching on
and offpress §:onpress 2:offReading lights
Operated by pressing z.
Sunvisor lights Illuminates when the cover is opened.
Page 102 of 227
100Driving and operating9Warning
If the vehicle battery is discharged,
the vehicle must not be towed,
tow-started or jump-started as the
steering wheel lock cannot be
disengaged.
Smart access
This function enables the starting of the vehicle via a mobile device. The
vehicle is controlled via an
application.
After entering into the vehicle and
confirming a message, there are
10 seconds to start the vehicle.
When no message pops up, place the smart phone in the designated area.
Operation on vehicles with
electronic key system in case of
failure
If either the electronic key fails or the battery of the electronic key is weak,
a message may be displayed in the
Driver Information Centre.
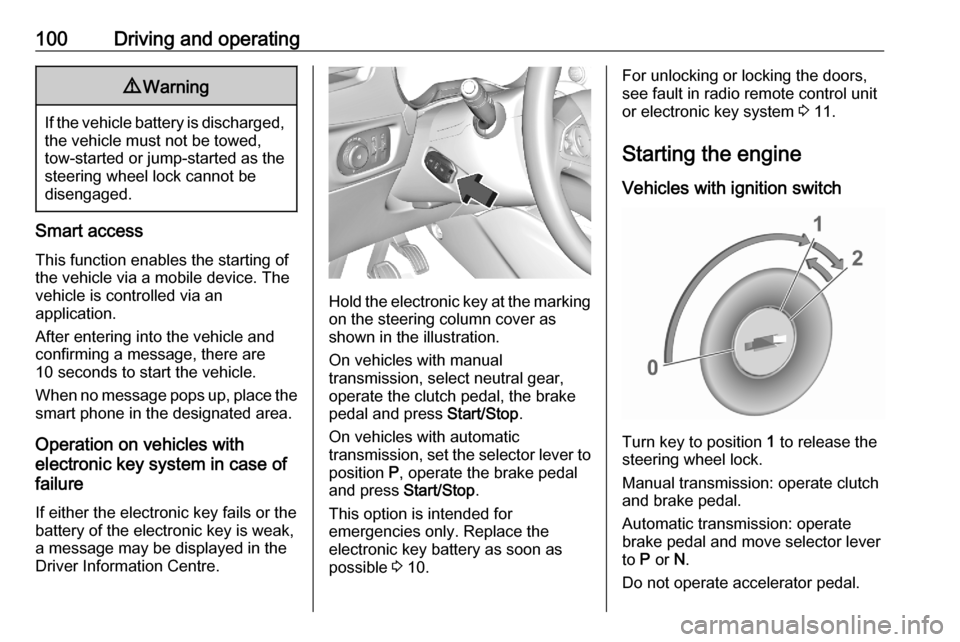
Hold the electronic key at the marking on the steering column cover as
shown in the illustration.
On vehicles with manual
transmission, select neutral gear,
operate the clutch pedal, the brake
pedal and press Start/Stop.
On vehicles with automatic
transmission, set the selector lever to position P, operate the brake pedal
and press Start/Stop.
This option is intended for
emergencies only. Replace the
electronic key battery as soon as
possible 3 10.
For unlocking or locking the doors,
see fault in radio remote control unit
or electronic key system 3 11.
Starting the engine
Vehicles with ignition switch
Turn key to position 1 to release the
steering wheel lock.
Manual transmission: operate clutch
and brake pedal.
Automatic transmission: operate
brake pedal and move selector lever
to P or N.
Do not operate accelerator pedal.
Page 118 of 227

116Driving and operatingparking brake is activated. It is not
possible when switch j is pulled at
the same time.
Braking when vehicle is moving
When the vehicle is moving and the
switch j is kept pulled, the electric
parking brake system will decelerate the vehicle. As soon as the switch
j is released, braking will be
stopped.
The antilock brake system and the
Electronic Stability Control stabilise
the vehicle while the switch j is kept
pulled. If an error of the electric
parking brake occurs, a warning
message is displayed in the driver
information centre. If the antilock
brake system and the Electronic
Stability Control fail, one or both
indicators i and J illuminate in the
instrument cluster. In this case,
stability can only be provided by
repeatedly pulling and pushing the
switch j until the vehicle is
immobilised.Automatic operation
Automatic operation includes
automatic application and automatic
release of the electric parking brake.
The electric parking brake can also be
applied or released manually by using
the switch j.
Automatic application: ● The electric parking brake is automatically applied when the
vehicle is stationary and the
ignition is switched off.
● j illuminates in the instrument
cluster and a display message
pops up to confirm the
application.
Automatic release: ● Parking brake releases automatically after moving off.
● j extinguishes in the
instrument cluster and a display message pops up to confirm the
release.If the vehicle is equipped with an
automatic transmission and the brake is not released automatically, make
sure the front doors are correctly
closed.Deactivation of automatic operation 1. Start the engine.
2. If the parking brake is released, apply the parking brake pulling the
switch j.
3. Take your foot off the brake pedal.
4. Press the switch j for at least
10 seconds and maximum 15 seconds.
5. Release the switch j.
6. Press and hold the brake pedal.
7. Pull the switch j for 2 seconds.
The deactivation of the automatic
operation of the electric parking brake
is confirmed by o illuminating in the
instrument cluster 3 68. The electric
parking brake can only be applied and released manually.
To reactivate the automatic
operation, repeat the steps described above.
Page 127 of 227
Driving and operating125
Activation of the functionalitySetting speed by the driver
The adaptive cruise control has to be
switched on manually at a speed
between 19 mph and 112 mph. For
vehicles with automatic transmission, the automatic selector lever must be
in position D or M.
Accelerate to the desired speed and
move the thumb wheel to SET/-. The
current speed is stored and
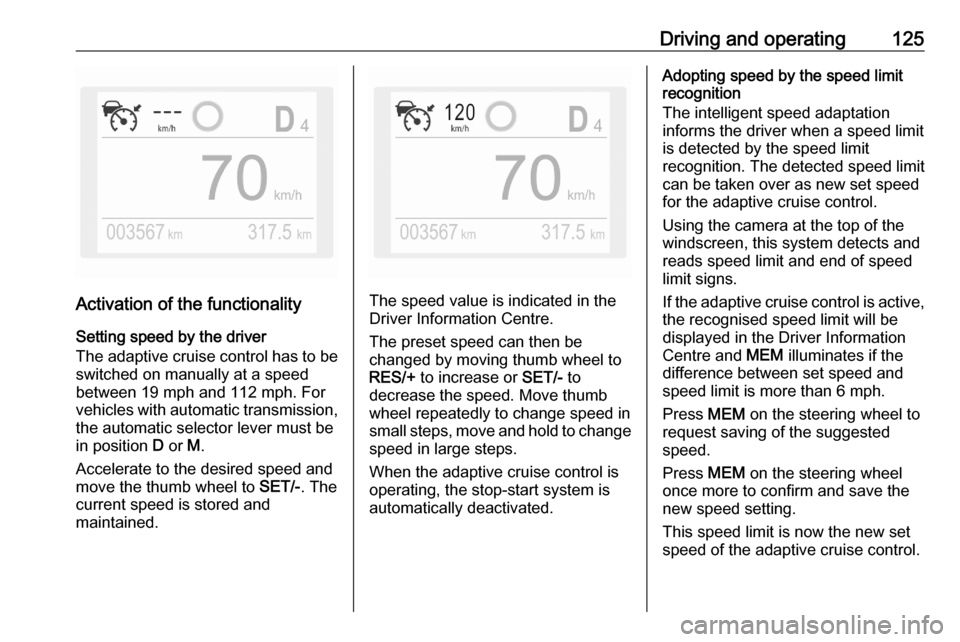
maintained.The speed value is indicated in the
Driver Information Centre.
The preset speed can then be
changed by moving thumb wheel to
RES/+ to increase or SET/- to
decrease the speed. Move thumb
wheel repeatedly to change speed in
small steps, move and hold to change speed in large steps.
When the adaptive cruise control is
operating, the stop-start system is
automatically deactivated.
Adopting speed by the speed limit
recognition
The intelligent speed adaptation
informs the driver when a speed limit
is detected by the speed limit
recognition. The detected speed limit
can be taken over as new set speed
for the adaptive cruise control.
Using the camera at the top of the
windscreen, this system detects and
reads speed limit and end of speed
limit signs.
If the adaptive cruise control is active, the recognised speed limit will be
displayed in the Driver Information Centre and MEM illuminates if the
difference between set speed and
speed limit is more than 6 mph.
Press MEM on the steering wheel to
request saving of the suggested
speed.
Press MEM on the steering wheel
once more to confirm and save the
new speed setting.
This speed limit is now the new set
speed of the adaptive cruise control.