buttons VAUXHALL CORSA F 2020 Owner's Manual
[x] Cancel search | Manufacturer: VAUXHALL, Model Year: 2020, Model line: CORSA F, Model: VAUXHALL CORSA F 2020Pages: 227, PDF Size: 18.77 MB
Page 9 of 227

In brief71Power windows .....................22
2 Exterior mirrors .....................20
3 Side air vents ........................ 95
4 Turn lights, headlight
flash, low/high beam, high
beam assist ........................... 84
Exit lighting ........................... 87
Parking lights ........................ 85
Buttons for Driver
Information Centre ................72
5 Cruise control .....................119
Speed limiter ....................... 121
Heated steering wheel ..........54
6 Instruments .......................... 62
Driver Information Centre ...... 72
7 Infotainment controls
8 Windscreen wiper and
washer, rear wiper and
washer ................................. 55
9 Power button ......................... 99
10 Central locking system ..........11
11 Centre air vents .................... 9512Controls for Info-Display
operation ............................... 74
13 Anti-theft alarm system
status LED ........................... 18
14 Info-Display .......................... 74
15 Hazard warning flashers ......84
16 Glovebox .............................. 46
17 Climate control system .......... 89
18 USB charging port ................ 58
19 Power outlet .......................... 58
20 Parking assist / Advanced
parking assist .....................137
Lane keep assist .................151
Stop start system ................102
Electronic Stability Control and Traction Control ...........117
21 Manual transmission ..........113
Automatic transmission ......109
22 Manual parking brake ........114
Electric parking brake ........114
23 Ignition switch ....................... 98
24 Steering wheel adjustment ..54
25 Horn ..................................... 5526Fuse box ............................ 175
27 Bonnet release lever ..........162
28 Light switch .......................... 79
Headlight range
adjustment ........................... 81
Front/rear fog lights ..............84
Instrument illumination .........86
Page 11 of 227
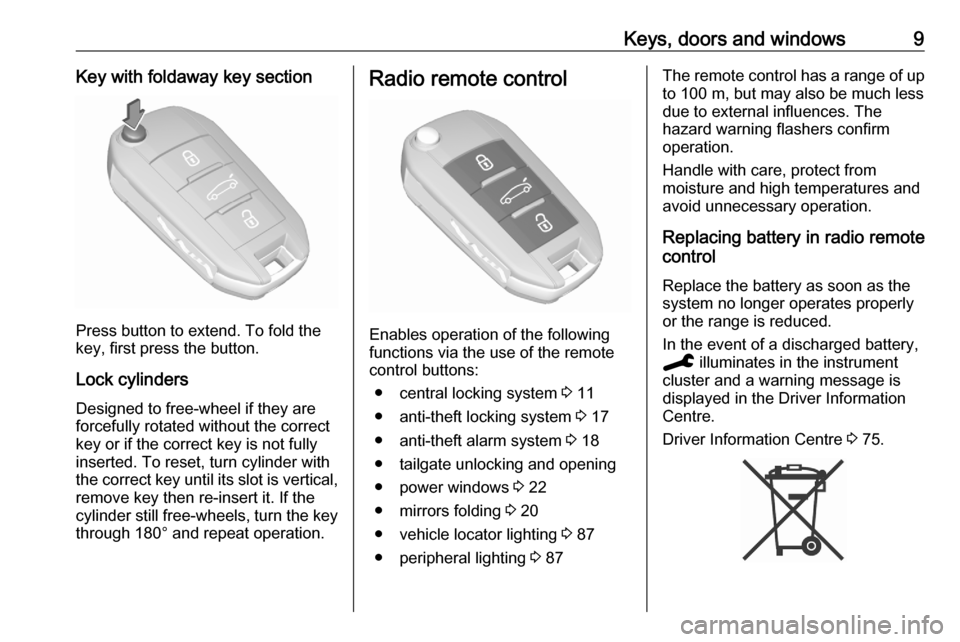
Keys, doors and windows9Key with foldaway key section
Press button to extend. To fold the
key, first press the button.
Lock cylinders
Designed to free-wheel if they are forcefully rotated without the correct
key or if the correct key is not fully
inserted. To reset, turn cylinder with
the correct key until its slot is vertical, remove key then re-insert it. If the
cylinder still free-wheels, turn the key
through 180° and repeat operation.
Radio remote control
Enables operation of the following
functions via the use of the remote control buttons:
● central locking system 3 11
● anti-theft locking system 3 17
● anti-theft alarm system 3 18
● tailgate unlocking and opening
● power windows 3 22
● mirrors folding 3 20
● vehicle locator lighting 3 87
● peripheral lighting 3 87
The remote control has a range of up
to 100 m, but may also be much less
due to external influences. The
hazard warning flashers confirm
operation.
Handle with care, protect from
moisture and high temperatures and
avoid unnecessary operation.
Replacing battery in radio remote
control
Replace the battery as soon as the
system no longer operates properly
or the range is reduced.
In the event of a discharged battery,
C illuminates in the instrument
cluster and a warning message is
displayed in the Driver Information
Centre.
Driver Information Centre 3 75.
Page 15 of 227
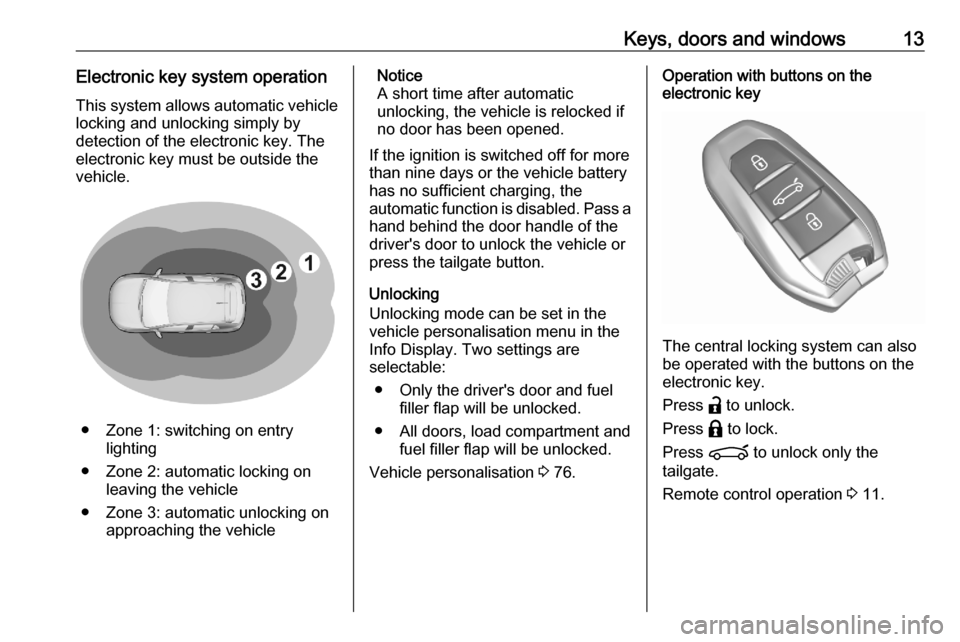
Keys, doors and windows13Electronic key system operationThis system allows automatic vehiclelocking and unlocking simply by
detection of the electronic key. The
electronic key must be outside the
vehicle.
● Zone 1: switching on entry lighting
● Zone 2: automatic locking on leaving the vehicle
● Zone 3: automatic unlocking on approaching the vehicle
Notice
A short time after automatic
unlocking, the vehicle is relocked if
no door has been opened.
If the ignition is switched off for more than nine days or the vehicle battery
has no sufficient charging, the
automatic function is disabled. Pass a hand behind the door handle of the
driver's door to unlock the vehicle or
press the tailgate button.
Unlocking
Unlocking mode can be set in the
vehicle personalisation menu in the
Info Display. Two settings are
selectable:
● Only the driver's door and fuel filler flap will be unlocked.
● All doors, load compartment and fuel filler flap will be unlocked.
Vehicle personalisation 3 76.Operation with buttons on the
electronic key
The central locking system can also
be operated with the buttons on the
electronic key.
Press a to unlock.
Press b to lock.
Press ? to unlock only the
tailgate.
Remote control operation 3 11.
Page 74 of 227

72Instruments and controlsActive emergency brakingm illuminates or flashes yellow.
Illuminates
The system has been deactivated or
a fault has been detected.
Additionally, a warning message is
displayed in the Driver Information
Centre.
Check the reason of the deactivation
3 131 and in case of a system fault,
seek the assistance of a workshop.
Notice
m also illuminates if the seat belts
of the front passengers are not
fastened. In this case, active
emergency braking is deactivated.
Flashes
The system is actively engaged. Depending on the situation, the
vehicle may automatically brake
moderately or hard.
Forward collision alert 3 134.
Front pedestrian protection 3 136.Door open
P illuminates red.
A door or the tailgate is open.Displays
Driver Information Centre
The Driver Information Centre is
located in the instrument cluster.
Driver Information Centre indicates: ● overall and trip odometer
● digital speed indication
● trip / fuel information menu
● gear shift indication
● service information
● vehicle and warning messages
● driver assistance messages
● pop-up messages
Selecting menus and functions The menus and functions can be
selected via the buttons on the
indicator lever.
Page 77 of 227
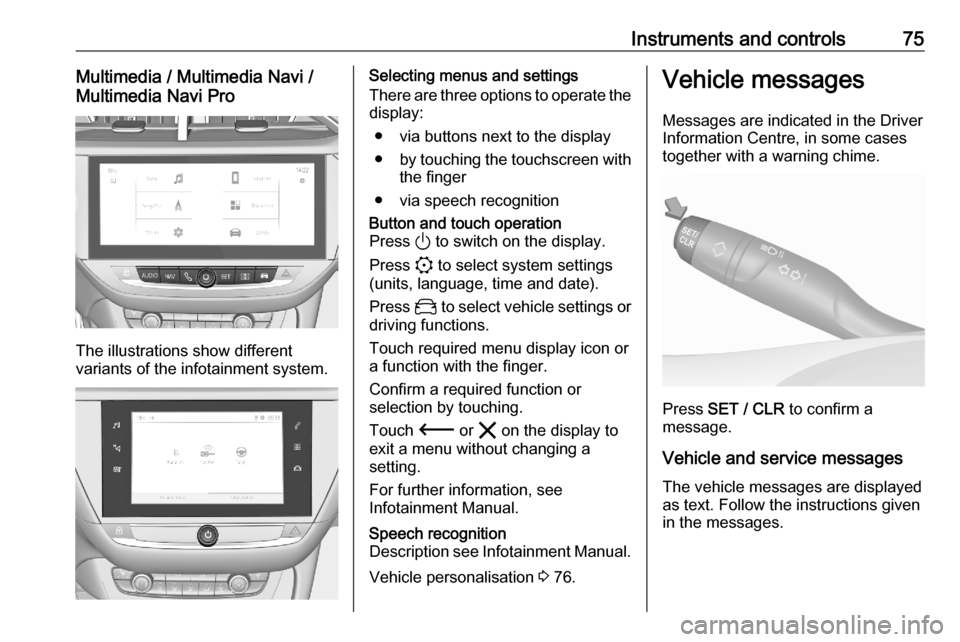
Instruments and controls75Multimedia / Multimedia Navi /
Multimedia Navi Pro
The illustrations show different
variants of the infotainment system.
Selecting menus and settings
There are three options to operate the
display:
● via buttons next to the display● by touching the touchscreen with
the finger
● via speech recognitionButton and touch operation
Press ) to switch on the display.
Press : to select system settings
(units, language, time and date).
Press _ to select vehicle settings or
driving functions.
Touch required menu display icon or a function with the finger.
Confirm a required function or
selection by touching.
Touch 3 or & on the display to
exit a menu without changing a setting.
For further information, see
Infotainment Manual.Speech recognition
Description see Infotainment Manual.
Vehicle personalisation 3 76.
Vehicle messages
Messages are indicated in the Driver Information Centre, in some cases
together with a warning chime.
Press SET / CLR to confirm a
message.
Vehicle and service messages The vehicle messages are displayed
as text. Follow the instructions given
in the messages.
Page 79 of 227
Instruments and controls77Parking, lighting, comfort and safety
settings are adjustable.
Multimedia / Multimedia Navi /
Multimedia Navi Pro
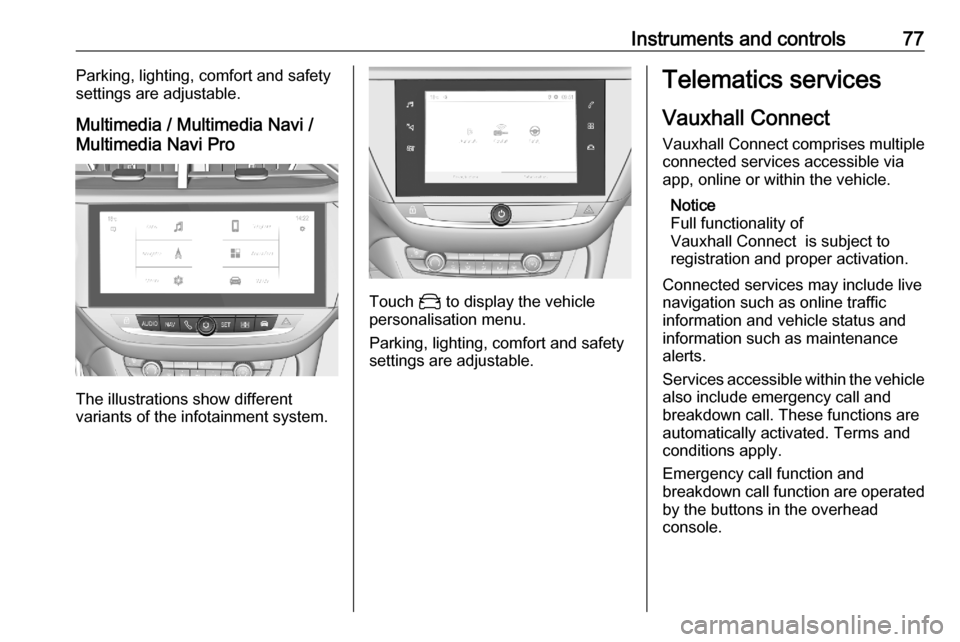
The illustrations show different
variants of the infotainment system.
Touch _ to display the vehicle
personalisation menu.
Parking, lighting, comfort and safety
settings are adjustable.
Telematics services
Vauxhall Connect Vauxhall Connect comprises multiple
connected services accessible via
app, online or within the vehicle.
Notice
Full functionality of
Vauxhall Connect is subject to registration and proper activation.
Connected services may include live
navigation such as online traffic
information and vehicle status and
information such as maintenance alerts.
Services accessible within the vehicle also include emergency call and
breakdown call. These functions are
automatically activated. Terms and
conditions apply.
Emergency call function and
breakdown call function are operated
by the buttons in the overhead
console.
Page 112 of 227
110Driving and operatingIn automatic mode, the driving
programme is indicated by D.
In manual mode, M and the number
of the selected gear is indicated.
R indicates reverse gear.
N indicates neutral position.
P indicates park position.
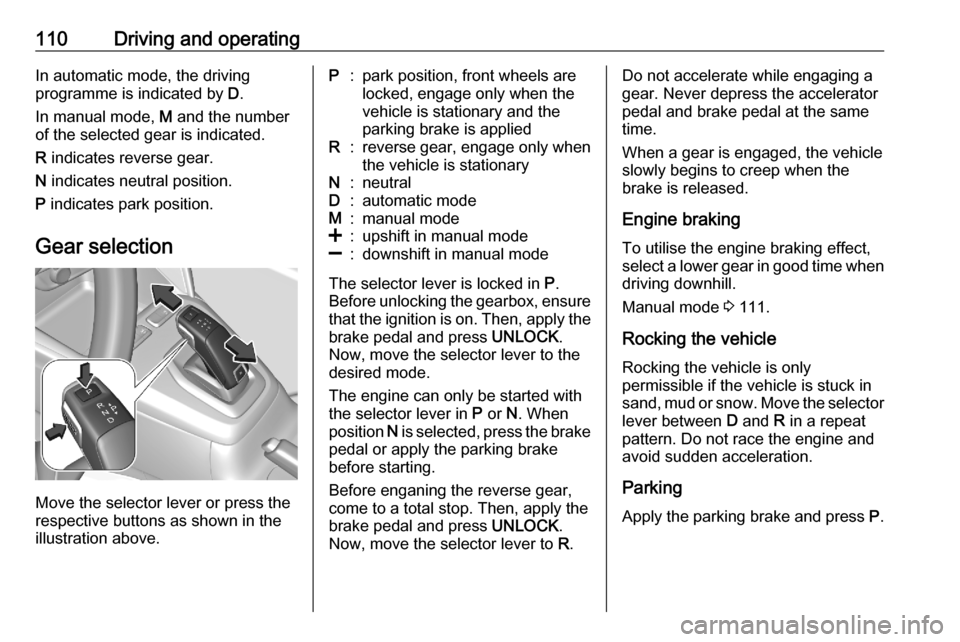
Gear selection
Move the selector lever or press the
respective buttons as shown in the
illustration above.
P:park position, front wheels are
locked, engage only when the
vehicle is stationary and the
parking brake is appliedR:reverse gear, engage only when
the vehicle is stationaryN:neutralD:automatic modeM:manual mode<:upshift in manual mode]:downshift in manual mode
The selector lever is locked in P.
Before unlocking the gearbox, ensure
that the ignition is on. Then, apply the
brake pedal and press UNLOCK.
Now, move the selector lever to the desired mode.
The engine can only be started with
the selector lever in P or N. When
position N is selected, press the brake
pedal or apply the parking brake
before starting.
Before enganing the reverse gear,
come to a total stop. Then, apply the
brake pedal and press UNLOCK.
Now, move the selector lever to R.
Do not accelerate while engaging a
gear. Never depress the accelerator
pedal and brake pedal at the same
time.
When a gear is engaged, the vehicle
slowly begins to creep when the
brake is released.
Engine braking To utilise the engine braking effect,
select a lower gear in good time when
driving downhill.
Manual mode 3 111.
Rocking the vehicle Rocking the vehicle is only
permissible if the vehicle is stuck in
sand, mud or snow. Move the selector
lever between D and R in a repeat
pattern. Do not race the engine and
avoid sudden acceleration.
Parking Apply the parking brake and press P.