start stop button VAUXHALL CROSSLAND X 2017.75 User Guide
[x] Cancel search | Manufacturer: VAUXHALL, Model Year: 2017.75, Model line: CROSSLAND X, Model: VAUXHALL CROSSLAND X 2017.75Pages: 245, PDF Size: 7.38 MB
Page 134 of 245

132Driving and operatingActivation
The stop-start system is available as
soon as the engine is started, the
vehicle starts-off and the conditions
as stated below in this section are
fulfilled.
Deactivation
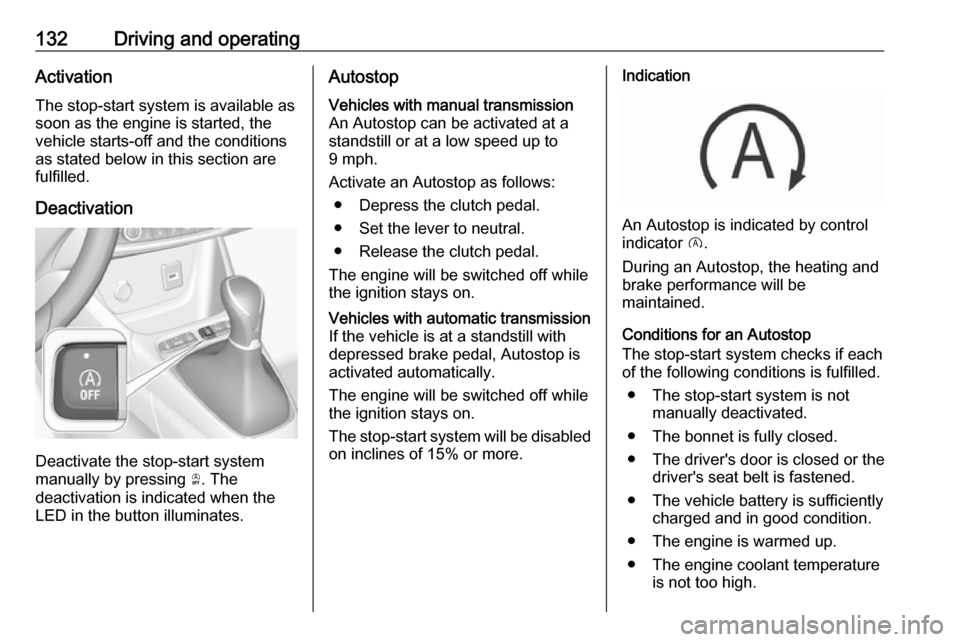
Deactivate the stop-start system
manually by pressing Ò. The
deactivation is indicated when the
LED in the button illuminates.
AutostopVehicles with manual transmission
An Autostop can be activated at a
standstill or at a low speed up to
9 mph.
Activate an Autostop as follows: ● Depress the clutch pedal.
● Set the lever to neutral.
● Release the clutch pedal.
The engine will be switched off while the ignition stays on.Vehicles with automatic transmissionIf the vehicle is at a standstill with
depressed brake pedal, Autostop is
activated automatically.
The engine will be switched off while the ignition stays on.
The stop-start system will be disabled
on inclines of 15% or more.Indication
An Autostop is indicated by control
indicator D.
During an Autostop, the heating and
brake performance will be
maintained.
Conditions for an Autostop
The stop-start system checks if each
of the following conditions is fulfilled.
● The stop-start system is not manually deactivated.
● The bonnet is fully closed.
● The driver's door is closed or the driver's seat belt is fastened.
● The vehicle battery is sufficiently charged and in good condition.
● The engine is warmed up.
● The engine coolant temperature is not too high.
Page 146 of 245

144Driving and operatingFault9Warning
If there is a fault in the ABS, the
wheels may be liable to lock due
to braking that is heavier than
normal. The advantages of ABS are no longer available. During
hard braking, the vehicle can no longer be steered and may
swerve.
Have the cause of the fault remedied
by a workshop.
Parking brake
9 Warning
Before leaving the vehicle, check
parking brake status. Control
indicator R must illuminate
constantly.
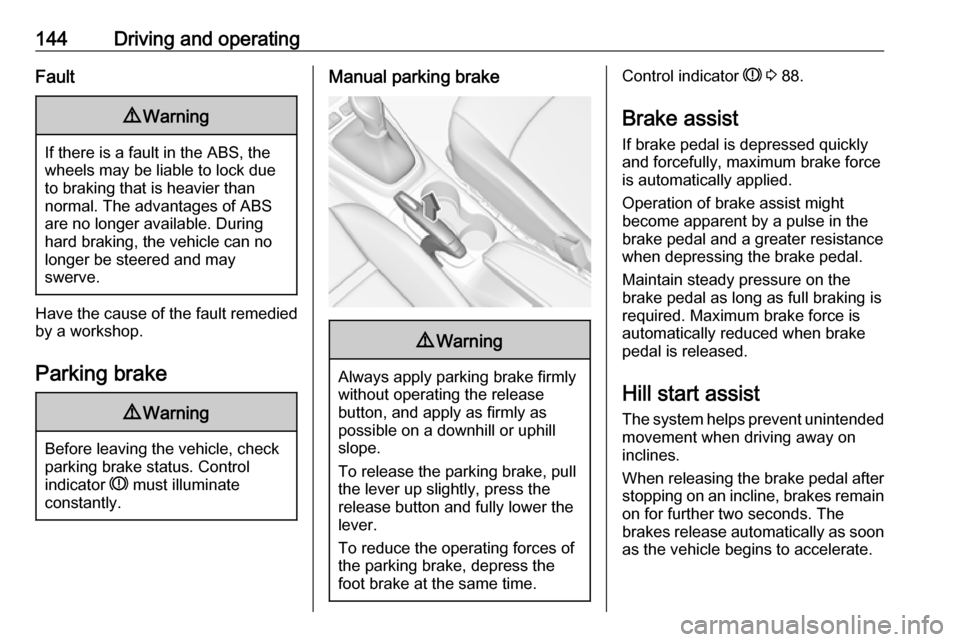
Manual parking brake9 Warning
Always apply parking brake firmly
without operating the release
button, and apply as firmly as
possible on a downhill or uphill
slope.
To release the parking brake, pull
the lever up slightly, press the
release button and fully lower the
lever.
To reduce the operating forces of
the parking brake, depress the
foot brake at the same time.
Control indicator R 3 88.
Brake assist
If brake pedal is depressed quickly
and forcefully, maximum brake force
is automatically applied.
Operation of brake assist might
become apparent by a pulse in the
brake pedal and a greater resistance when depressing the brake pedal.
Maintain steady pressure on the
brake pedal as long as full braking is
required. Maximum brake force is
automatically reduced when brake
pedal is released.
Hill start assist The system helps prevent unintendedmovement when driving away on
inclines.
When releasing the brake pedal after
stopping on an incline, brakes remain on for further two seconds. The
brakes release automatically as soon
as the vehicle begins to accelerate.
Page 159 of 245

Driving and operating157Display indicationThe instructions on the display show: ● General hints and warning messages.
● The demand to stop the vehicle, when a parking slot is detected.
● The direction of driving during the
parking manoeuvre.
● The demand to shift into reverse or first gear.
● The demand to stop or to drive slowly.
● The successful completion of the
parking manoeuvre indicated by
a pop-up symbol and a chime.
● The cancelling of a parking manoeuvre.
Deactivation The current park assist manoeuvre is
cancelled via the button to return to
the previous screen in the Colour-
Info-Display. To deactivate the
system completely, press r Off in
the centre console.The system is deactivated
automatically:
● if the ignition is switched off
● if stalling the engine
● if no manoeuvre is started within 5 minutes of selection of the type
of manoeuvre
● after a prolonged stop of the vehicle during a manoeuvre
● if the electronic stability control (ESC) is triggered
● if the speed of the vehicle exceeds the stated limit
● when the driver interrupts movement of the steering wheel
● after 4 manoeuvre cycles
● on opening the driver's door
● if one of the front wheels encounters an obstacle
● parking manoeuvre successfully ended
Deactivation by the driver or by the
system during manoeuvring will be indicated on the display. Additionally, an acoustic signal sounds.The system is switched off
automatically when towing a
electrically connected trailer.
Contact your dealer to switch off the
system for a prolonged period.
Fault
In the event of a fault, $ flashes for a
few seconds, accompanied by an
acoustic signal. If the fault occurs
during the use of the system, $
extinguishes.
In the event of a fault in the power
steering, c flashes in the instrument
panel, accompanied by a message.9 Warning
Under certain circumstances,
various reflective surfaces on
objects or clothing as well as
external noise sources may cause the system to fail to detect
obstacles.
Special attention must be paid to
low obstacles which can damage
the lower part of the bumper.
Page 203 of 245

Vehicle care201
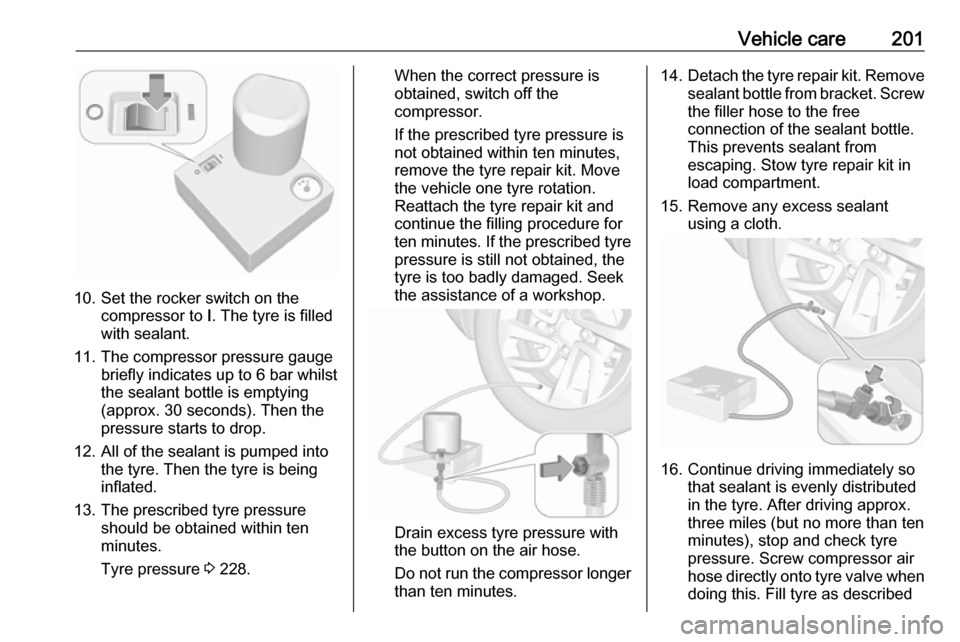
10. Set the rocker switch on thecompressor to I. The tyre is filled
with sealant.
11. The compressor pressure gauge briefly indicates up to 6 bar whilstthe sealant bottle is emptying
(approx. 30 seconds). Then the
pressure starts to drop.
12. All of the sealant is pumped into the tyre. Then the tyre is being
inflated.
13. The prescribed tyre pressure should be obtained within ten
minutes.
Tyre pressure 3 228.
When the correct pressure is
obtained, switch off the
compressor.
If the prescribed tyre pressure is
not obtained within ten minutes,
remove the tyre repair kit. Move
the vehicle one tyre rotation.
Reattach the tyre repair kit and
continue the filling procedure for
ten minutes. If the prescribed tyre
pressure is still not obtained, the
tyre is too badly damaged. Seek
the assistance of a workshop.
Drain excess tyre pressure with
the button on the air hose.
Do not run the compressor longer
than ten minutes.
14. Detach the tyre repair kit. Remove
sealant bottle from bracket. Screw
the filler hose to the free
connection of the sealant bottle.
This prevents sealant from
escaping. Stow tyre repair kit in
load compartment.
15. Remove any excess sealant using a cloth.
16. Continue driving immediately sothat sealant is evenly distributed
in the tyre. After driving approx.
three miles (but no more than ten
minutes), stop and check tyre
pressure. Screw compressor air
hose directly onto tyre valve when
doing this. Fill tyre as described