change wheel VAUXHALL CROSSLAND X 2018.5 Owner's Manual
[x] Cancel search | Manufacturer: VAUXHALL, Model Year: 2018.5, Model line: CROSSLAND X, Model: VAUXHALL CROSSLAND X 2018.5Pages: 259, PDF Size: 7.9 MB
Page 52 of 259
50Seats, restraintsAirbag systemThe airbag system consists of a
number of individual systems
depending on the scope of
equipment.
When triggered, the airbags inflate
within milliseconds. They also deflate
so quickly that it is often unnoticeable during the collision.9 Warning
The airbag system deploys in an
explosive manner, repairs must be performed by skilled personnel
only.
9 Warning
Adding accessories that change
the vehicle's frame, bumper
system, height, front end or side
sheet metal, may keep the airbag
system from working properly. The operation of the airbag system can
also be affected by changing any
parts of the front seats, seat belts,
airbag sensing and diagnostic
module, steering wheel,
instrument panel, inner door seals including the speakers, any of the
airbag modules, ceiling or pillar
trim, front sensors, side impact
sensors or airbag wiring.
Notice
The airbag systems and belt
pretensioner control electronics are
located in the centre console area.
Do not put any magnetic objects in
this area.
Do not affix any objects onto the
airbag covers and do not cover them with other materials. Have damagedcovers replaced by a workshop.
Each airbag is triggered only once.
Have deployed airbags replaced by
a workshop. Furthermore, it may be
necessary to have the steering
wheel, the instrument panel, parts of
the panelling, the door seals,
handles and the seats replaced.
Do not make any modifications to
the airbag system as this will
invalidate the vehicle operating
permit.
Control indicator v for airbag systems
3 88.
Child restraint systems on front
passenger seat with airbag
systems
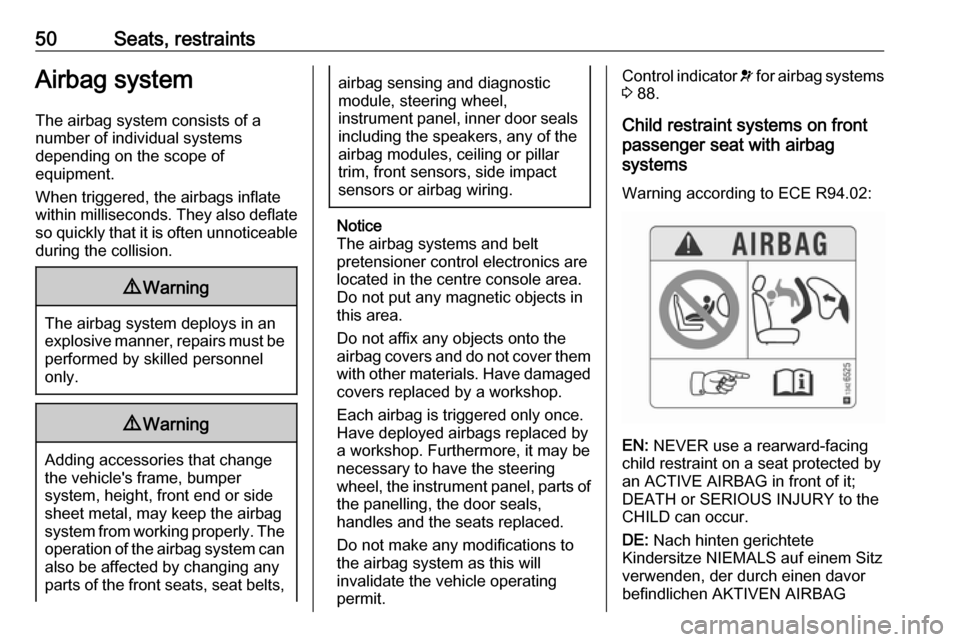
Warning according to ECE R94.02:
EN: NEVER use a rearward-facing
child restraint on a seat protected by
an ACTIVE AIRBAG in front of it;
DEATH or SERIOUS INJURY to the
CHILD can occur.
DE: Nach hinten gerichtete
Kindersitze NIEMALS auf einem Sitz
verwenden, der durch einen davor
befindlichen AKTIVEN AIRBAG
Page 102 of 259
100Instruments and controls● If a warning message appears inthe Driver Information Centre.
● If the electronic key is not in the passenger compartment.
● If the parking assist detects an object.
● If an unintended lane change occurs.
● If the diesel particle filter has reached the maximum filling
level.
When the vehicle is parked and /
or the driver's door is opened
● With exterior lights on.
During an Autostop ● If the driver's door is opened.● If any condition for an autostart is
not fulfilled.
Battery voltage When the vehicle battery voltage isrunning low, a warning message will
appear in the Driver Information
Centre.When the vehicle is being driven, the
load reduction function temporarily
deactivates certain functions, such as
the air conditioning, the heated rear
screen, heated steering wheel, etc.
The deactivated functions are
reactivated automatically as soon as
conditions permit.Vehicle personalisation
The vehicle's behaviour can be
personalised by changing the settings in the Info Display.
Depending on vehicle equipment and
country-specific regulations some of the functions described below may
not be available.
Some functions are only displayed or
active when the engine is running.
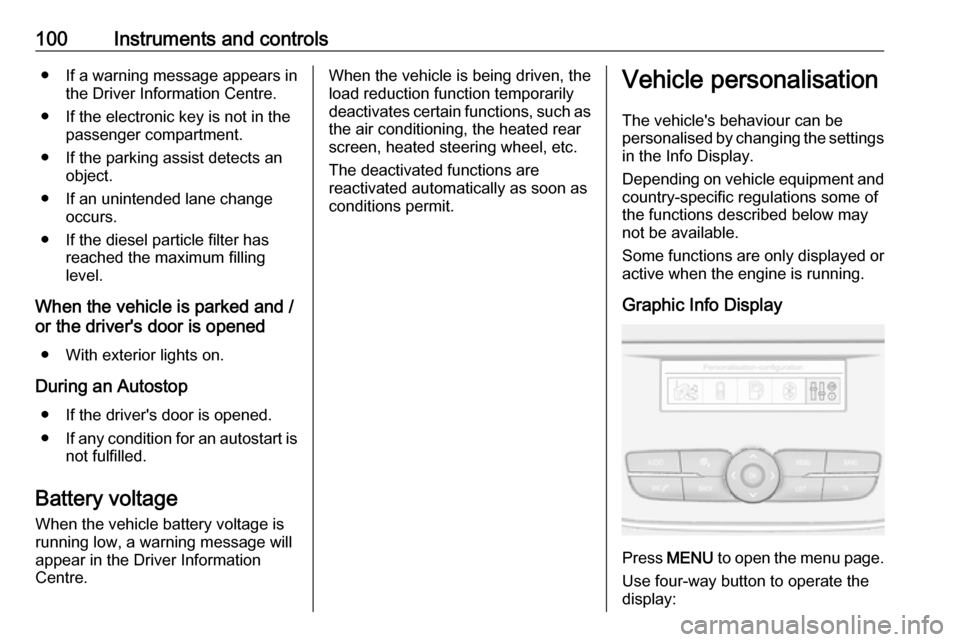
Graphic Info Display
Press MENU to open the menu page.
Use four-way button to operate the
display:
Page 152 of 259
150Driving and operatingSwitching on the system
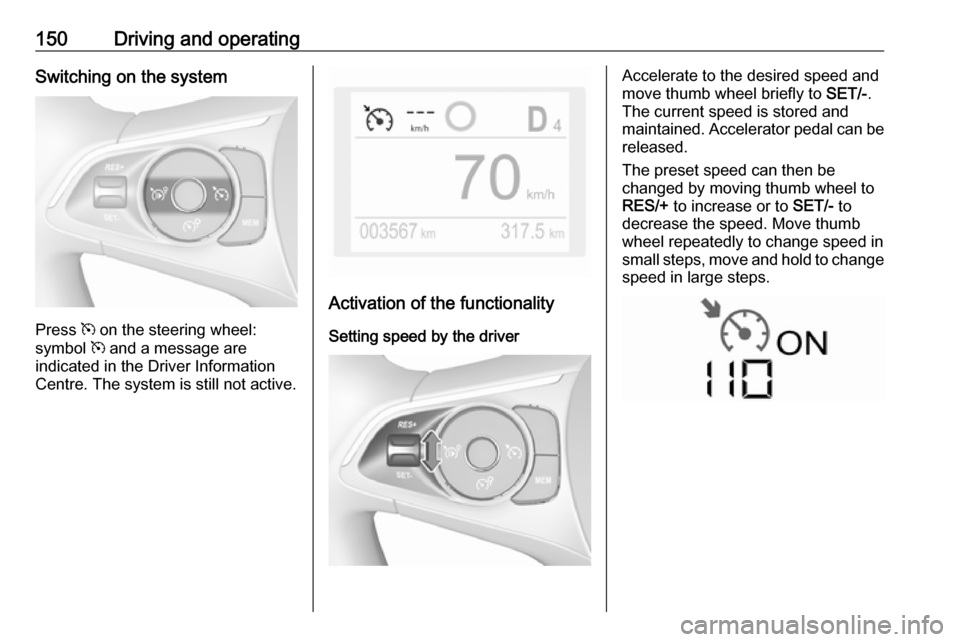
Press m on the steering wheel:
symbol m and a message are
indicated in the Driver Information
Centre. The system is still not active.
Activation of the functionality
Setting speed by the driver
Accelerate to the desired speed and
move thumb wheel briefly to SET/-.
The current speed is stored and
maintained. Accelerator pedal can be
released.
The preset speed can then be
changed by moving thumb wheel to RES/+ to increase or to SET/- to
decrease the speed. Move thumb
wheel repeatedly to change speed in
small steps, move and hold to change speed in large steps.
Page 155 of 259
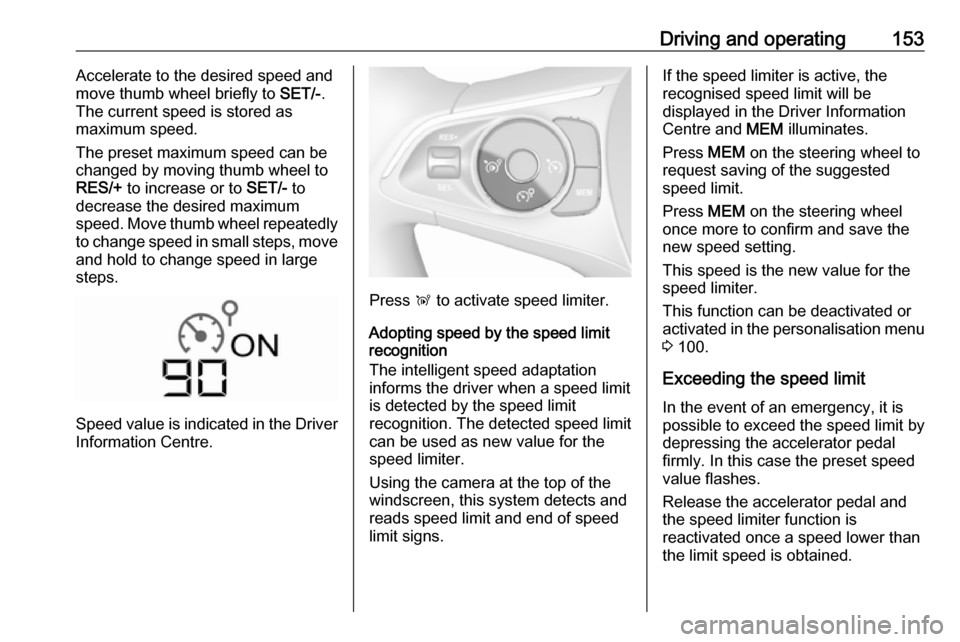
Driving and operating153Accelerate to the desired speed and
move thumb wheel briefly to SET/-.
The current speed is stored as
maximum speed.
The preset maximum speed can be
changed by moving thumb wheel to
RES/+ to increase or to SET/- to
decrease the desired maximum
speed. Move thumb wheel repeatedly
to change speed in small steps, move
and hold to change speed in large
steps.
Speed value is indicated in the Driver
Information Centre.
Press Ñ to activate speed limiter.
Adopting speed by the speed limit recognition
The intelligent speed adaptation
informs the driver when a speed limit
is detected by the speed limit
recognition. The detected speed limit
can be used as new value for the
speed limiter.
Using the camera at the top of the
windscreen, this system detects and
reads speed limit and end of speed
limit signs.
If the speed limiter is active, the
recognised speed limit will be
displayed in the Driver Information Centre and MEM illuminates.
Press MEM on the steering wheel to
request saving of the suggested
speed limit.
Press MEM on the steering wheel
once more to confirm and save the
new speed setting.
This speed is the new value for the
speed limiter.
This function can be deactivated or activated in the personalisation menu 3 100.
Exceeding the speed limit
In the event of an emergency, it is
possible to exceed the speed limit by
depressing the accelerator pedal
firmly. In this case the preset speed
value flashes.
Release the accelerator pedal and
the speed limiter function is
reactivated once a speed lower than
the limit speed is obtained.
Page 159 of 259
Driving and operating157Emergency automatic braking may
slow the vehicle to a complete stop to
try to avoid a potential crash.9 Warning
Emergency automatic braking is
an emergency crash preparation
feature and is not designed to
avoid crashes. Do not rely on the
system to brake the vehicle.
Emergency automatic braking will
not brake outside of its operating speed range and only responds to
detected vehicles and
pedestrians.
Forward looking brake assist
In addition to emergency automatic
braking, the forward looking brake
assist function makes the brake assist more sensitive. Therefore, pressing
the brake pedal less strongly results in immediate hard braking. This
function helps the driver brake
quicker and harder before the
imminent collision.
9 Warning
Active emergency braking is not
designed to apply hard
autonomous braking or to
automatically avoid a collision. It is designed to reduce the vehicle
speed before a collision. It may not
react to animals. After a sudden
lane change, the system needs a
certain time to detect the next
preceding vehicle.
The complete attention of the
driver is always required while
driving. The driver must always be
ready to take action and apply the brakes and steer to avoid
collisions.
The system is designed to work with
all occupants wearing their seat belts.
Forward collision alert
3 154.
Front pedestrian protection
3 158.
Deactivation
Active emergency braking can bedeactivated in the personalisation
menu 3 100. If deactivated, m
illuminates in the instrument cluster
and a warning message is displayed
in the Driver Information Centre.
We recommend to deactivate the
system in the vehicle personalisation
in the following cases:
● when towing a trailer or caravan
● when carrying long objects on roof bars or a roof rack
● when the vehicle is being towed with the engine running
● when a spare wheel is fitted that is smaller than the other wheels
● before using an automatic car wash with the engine running
● before placing the vehicle on a rolling road in a workshop
● if the windscreen has been damaged close to the camera
● if the front bumper has been damaged
● if the brake lamps are not working
Page 172 of 259

170Driving and operatingRear view
The area behind the vehicle is
displayed in the screen. The vertical
lines represent the width of the
vehicle with mirrors unfolded. The
direction of the lines changes with the position of the steering wheel.
The first horizontal line represents a
distance of about 30 cm beyond the
edge of vehicle's rear bumper. The
upper horizontal lines represent
distances of about 1 and 2 m beyond
the edge of your vehicle's rear
bumper.
This view is available in AUTO mode
or in the view selection menu.
Auto mode
This mode is activated by default.
Using sensors in the rear bumper, the automatic view changes from a rear
view to a view from above, as an
obstacle is approached during a
manoeuvre.
Zoom view
The camera records the vehicle's
surroundings during the manoeuvre in order to reconstruct a view fromabove the rear of the vehicle in its
near surroundings, allowing the
vehicle to be manoeuvred around
obstacles nearby. This view is
available with AUTO mode or in the
view selection menu.
180° view
The 180° view facilitates reversing
out of a parking bay, making it
possible to see the approach of
vehicles, pedestrians and cyclists.
This view is not recommended for
carrying out a complete manoeuvre.
It is made up of three areas: left 1,
centre 2 and right 3. This view is
available from the view selection menu only.
Page 176 of 259

174Driving and operatingSystem limitations
The system performance may not operate properly when:
● Vehicle speed is below 37 mph.
● Driving on winding or hilly roads. ● During nighttime driving.
● Weather limits visibility, such as fog, rain, or snow.
● The sensor in the windscreen is blocked by snow, ice, slush, mud,dirt, windscreen damage or
affected by foreign items, e.g.
stickers.
● The sun is shining directly into the camera lens.
● Close vehicles ahead.
● Banked roads.
● Road edges.
● Roads with poor lane markings.
● Sudden lighting changes.
Driver alert
The driver alert system monitores the driving time and the vigilance of the
driver. Monitoring the vigilance of thedriver is based on the trajectory
variations of the vehicle compared to
the lane markings.
The system includes a driving time alert combined with driver drowsiness detection.9 Warning
The system cannot replace the
need for vigilance on the part of
the driver. It is recommended that
you take a break as soon as you
feel tired or at least every two
hours. Do not take the wheel if you are tired.
Activation or Deactivation
The system can be activated or
deactivated in the vehicle
personalisation 3 100
The state of the system stays in
memory when the ignition is switched
off.
Driving time alert
The driver gets notified by a pop-upreminder symbol € in the Driver
Information Centre simultaneously with a acoustic alert if the driver has
not taken a break after two hours of
driving at a speed above 40 mph. The alert is repeated hourly until the
vehicle is stopped, no matter how
vehicle speed evolves.
The counting of driving time alert is
reset when the ignition has been
switched off for a few minutes.
Driver drowsiness detection
The system monitors the driver's level
of vigilance. A camera at the top of the windscreen detects variations in
trajectory compared to the lane
markings. This system is particularly
suited to fast roads (speed higher
than 40 mph).
If the trajectory of the vehicle
suggests a certain level of
drowsiness or inattention by the
driver, the system triggers the first
Page 187 of 259

Vehicle care185Vehicle careGeneral Information...................185
Accessories and vehicle modifications .......................... 185
Vehicle storage ........................186
End-of-life vehicle recovery .....186
Vehicle checks ........................... 187
Performing work ......................187
Bonnet ..................................... 187
Engine oil ................................. 188
Engine coolant ......................... 189
Washer fluid ............................ 189
Brakes ..................................... 190
Brake fluid ............................... 190
Vehicle battery ......................... 190
Diesel fuel system bleeding .....191
Wiper blade replacement ........192
Bulb replacement .......................192
Halogen headlights ..................192
LED headlights ........................ 195
Fog lights ................................. 195
Tail lights ................................. 195
Side turn lights ......................... 199
Number plate light ...................200
Interior lights ............................ 200
Instrument panel illumination ...200Electrical system ........................200
Fuses ....................................... 200
Engine compartment fuse box . 201
Instrument panel fuse box .......202
Vehicle tools .............................. 205
Tools ........................................ 205
Wheels and tyres .......................205
Winter tyres ............................. 205
Tyre designations ....................206
Tyre pressure .......................... 206
Tyre deflation detection system .................................... 207
Tread depth ............................. 208
Changing tyre and wheel size . 209
Wheel covers ........................... 209
Tyre chains .............................. 209
Tyre repair kit .......................... 210
Wheel changing .......................213
Spare wheel ............................ 214
Jump starting ............................. 218
Towing ....................................... 219
Towing the vehicle ...................219
Towing another vehicle ...........220
Appearance care .......................221
Exterior care ............................ 221
Interior care ............................. 223General Information
Accessories and vehiclemodifications
We recommend the use of genuine
parts and accessories and factory approved parts specific for your
vehicle type. We cannot assess or guarantee reliability of other products
- even if they have a regulatory or
otherwise granted approval.
Any modification, conversion or other changes made to standard vehicle
specifications (including, without
limitation, software modifications,
modifications of the electronic control
units) may invalidate the warranty
offered by Vauxhall. Furthermore,
such changes may affect driver
assistance systems, may impact fuel
consumption, CO 2 emissions and
other emissions of the vehicle and
cause the vehicle to no longer
conform to the operating permit,
impacting the validity of your vehicle
registration.
Page 210 of 259
208Vehicle careSystem initialisation
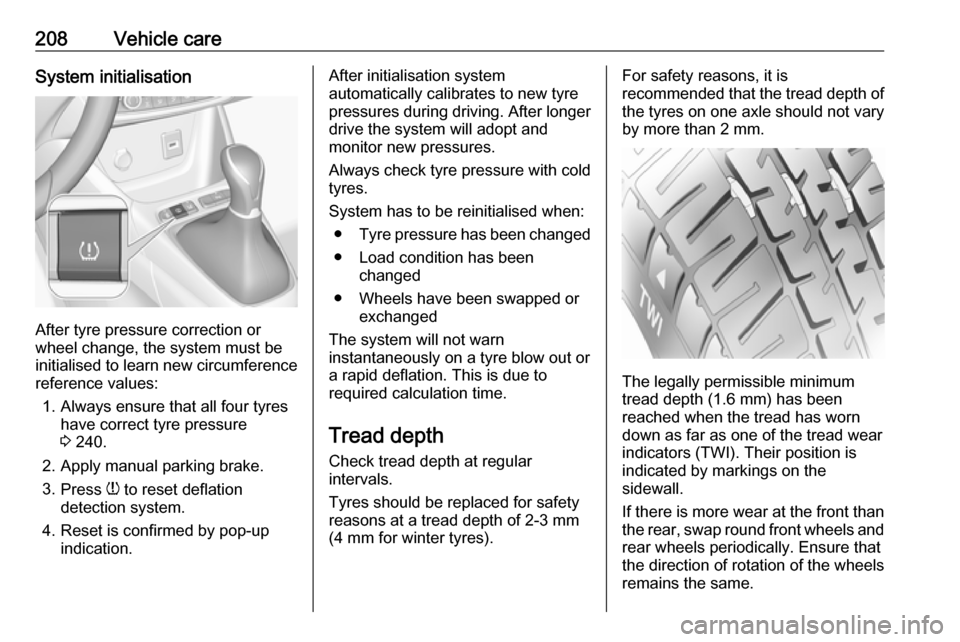
After tyre pressure correction or
wheel change, the system must be
initialised to learn new circumference reference values:
1. Always ensure that all four tyres have correct tyre pressure3 240.
2. Apply manual parking brake.
3. Press w to reset deflation
detection system.
4. Reset is confirmed by pop-up indication.
After initialisation system
automatically calibrates to new tyre
pressures during driving. After longer
drive the system will adopt and
monitor new pressures.
Always check tyre pressure with cold
tyres.
System has to be reinitialised when: ● Tyre pressure has been changed
● Load condition has been changed
● Wheels have been swapped or exchanged
The system will not warn instantaneously on a tyre blow out or
a rapid deflation. This is due to
required calculation time.
Tread depthCheck tread depth at regular
intervals.
Tyres should be replaced for safety
reasons at a tread depth of 2-3 mm
(4 mm for winter tyres).For safety reasons, it is
recommended that the tread depth of
the tyres on one axle should not vary
by more than 2 mm.
The legally permissible minimum
tread depth (1.6 mm) has been
reached when the tread has worn
down as far as one of the tread wear
indicators (TWI). Their position is
indicated by markings on the
sidewall.
If there is more wear at the front than
the rear, swap round front wheels and rear wheels periodically. Ensure that
the direction of rotation of the wheels
remains the same.
Page 215 of 259
Vehicle care213Replace the used sealant bottle.
Dispose of the bottle as prescribed
by applicable laws.
The compressor and sealant can be
used from approx. -30 °C.
Wheel changing Make the following preparations and
observe the following information:
● Park the vehicle on a level, firm and non-skid surface. The front
wheels must be in the straight-
ahead position.
● If necessary, place a chock under
the wheel diagonally opposite the wheel to be changed.
● Apply the parking brake and engage first gear, reverse gear or
P .
● If the ground on which the vehicle
is standing is soft, a solid board
(max. 1 cm thick) should be
placed under the jack.
● Take heavy objects out of the vehicle before jacking up.
● No people or animals may be in the vehicle when it is jacked-up.● Never crawl under a jacked-upvehicle.
● Do not start the vehicle when it is
raised on the jack.
● Before screwing in the wheel bolts, clean them.9Warning
Do not grease wheel bolts.
Tightening torques
Caution
If the vehicle is equipped with alloy
wheels, tighten the wheel bolts
manually at least for the first five
turns.
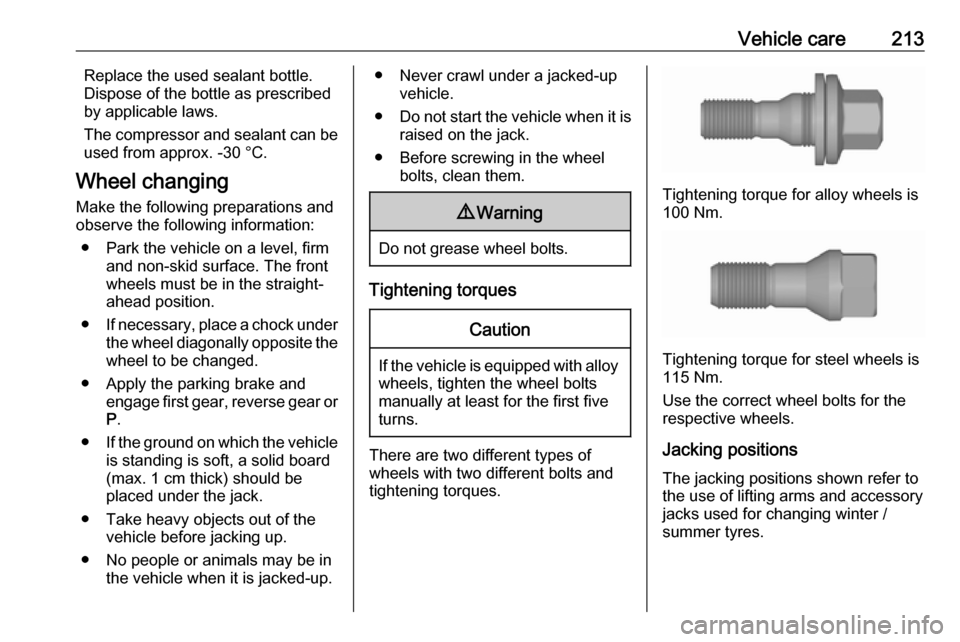
There are two different types of
wheels with two different bolts and tightening torques.
Tightening torque for alloy wheels is
100 Nm.
Tightening torque for steel wheels is
115 Nm.
Use the correct wheel bolts for the respective wheels.
Jacking positions The jacking positions shown refer to
the use of lifting arms and accessory
jacks used for changing winter /
summer tyres.