lights VAUXHALL CROSSLAND X 2019.75 Owner's Guide
[x] Cancel search | Manufacturer: VAUXHALL, Model Year: 2019.75, Model line: CROSSLAND X, Model: VAUXHALL CROSSLAND X 2019.75Pages: 247, PDF Size: 7.77 MB
Page 108 of 247
106Lighting
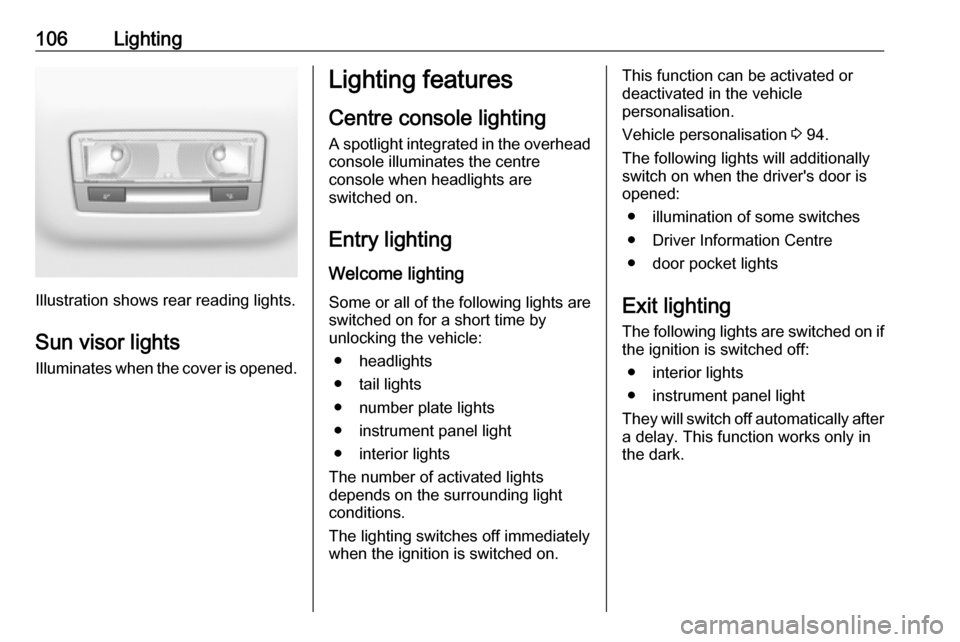
Illustration shows rear reading lights.Sun visor lights
Illuminates when the cover is opened.
Lighting features
Centre console lighting A spotlight integrated in the overheadconsole illuminates the centre
console when headlights are
switched on.
Entry lighting Welcome lighting
Some or all of the following lights are
switched on for a short time by
unlocking the vehicle:
● headlights
● tail lights
● number plate lights
● instrument panel light
● interior lights
The number of activated lights
depends on the surrounding light
conditions.
The lighting switches off immediately
when the ignition is switched on.This function can be activated or
deactivated in the vehicle
personalisation.
Vehicle personalisation 3 94.
The following lights will additionally
switch on when the driver's door is
opened:
● illumination of some switches
● Driver Information Centre
● door pocket lights
Exit lighting The following lights are switched on if
the ignition is switched off:
● interior lights
● instrument panel light
They will switch off automatically after
a delay. This function works only in
the dark.
Page 109 of 247

Lighting107Battery discharge protection
Vehicle battery state of charge
function
The function guarantees longest
vehicle battery life via a generator with controllable power output and
optimised power distribution.
To prevent discharge of the vehicle
battery when driving, the following
systems are reduced automatically in two stages and finally switched off:
● auxiliary heater
● heated rear window and heated mirrors
● heated seats
● fan
In the second stage, a message
which confirms the activation of the
vehicle battery discharge protection
will be displayed in the Driver
Information Centre.Switching off interior lights
To prevent discharge of the vehicle
battery when the ignition is switched off, some interior lights are switched
off automatically after some time.
Page 124 of 247
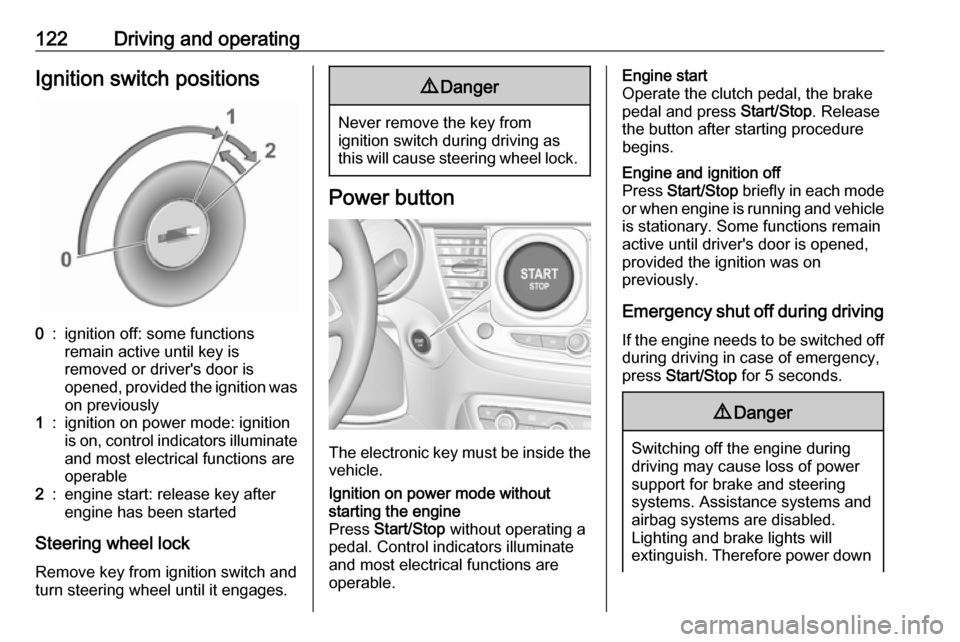
122Driving and operatingIgnition switch positions0:ignition off: some functions
remain active until key is
removed or driver's door is
opened, provided the ignition was
on previously1:ignition on power mode: ignition
is on, control indicators illuminate and most electrical functions are
operable2:engine start: release key after
engine has been started
Steering wheel lock
Remove key from ignition switch and
turn steering wheel until it engages.
9 Danger
Never remove the key from
ignition switch during driving as
this will cause steering wheel lock.
Power button
The electronic key must be inside the
vehicle.
Ignition on power mode without
starting the engine
Press Start/Stop without operating a
pedal. Control indicators illuminate
and most electrical functions are
operable.Engine start
Operate the clutch pedal, the brake
pedal and press Start/Stop. Release
the button after starting procedure
begins.Engine and ignition off
Press Start/Stop briefly in each mode
or when engine is running and vehicle
is stationary. Some functions remain
active until driver's door is opened,
provided the ignition was on
previously.
Emergency shut off during driving
If the engine needs to be switched offduring driving in case of emergency,
press Start/Stop for 5 seconds.
9Danger
Switching off the engine during
driving may cause loss of power
support for brake and steering
systems. Assistance systems and
airbag systems are disabled.
Lighting and brake lights will
extinguish. Therefore power down
Page 162 of 247
160Driving and operatingDeactivation
Panoramic view system is
deactivated when:
● driving faster than 6 mph
● 7 seconds after disengaging reverse gear
● by pressing the icon q in the left
upper corner of the touch screen
● opening the tailgate
General information9 Warning
The panoramic view system does
not replace driver vision. It will not display children, pedestrians,
cyclists, crossing traffic, animals,
or any other objects outside of the camera view area, e. g. below the
bumper, or underneath the
vehicle.
Do not drive or park the vehicle
using only the panoramic view
system.
Always check the surrounding of
the vehicle before driving.
Displayed images may be further
or closer than they appear. The
area displayed is limited and
objects that are close to either
edge of the bumper or under the
bumper are not displayed on the
screen.
System limitations
Caution
For optimal operation of the
system, it is important to keep the
lense of the camera in the tailgate between the number plate lightsalways clean. Rinse the lense with water and wipe with a soft cloth.
Do not clean the lense with a
steam-jet or high-pressure jet
cleaner.
The panoramic view system may not
operate properly when:
● The surrounding is dark.
● The sun or the beam of headlights is shining directly into
the camera lenses.
● During nighttime driving.
● Weather limits visibility, such as fog, rain, or snow.
● The camera lenses are blocked by snow, ice, slush, mud, dirt.
● A trailer or bike carrier is attached
to the trailer hitch.
● The vehicle had an accident.
● There are extreme temperature changes.
Rear view camera The rear view camera assists the
driver when reversing by displaying a
view of the area behind the vehicle.
The view of the camera is displayed
in the Info Display.9 Warning
The rear view camera does not
replace driver vision. Note that
objects that are outside the
camera's field of view and the
Page 163 of 247
Driving and operating161parking assist sensors, e.g. below
the bumper or underneath the
vehicle, are not displayed.
Do not reverse or park the vehicle using only the rear view camera.
Always check the surrounding of
the vehicle before driving.
Switching on
Rear view camera is automatically
activated when reverse gear is
engaged.
Functionality
The area displayed by the camera is
limited. The distance of the image that
appears on the display differs from
the actual distance.
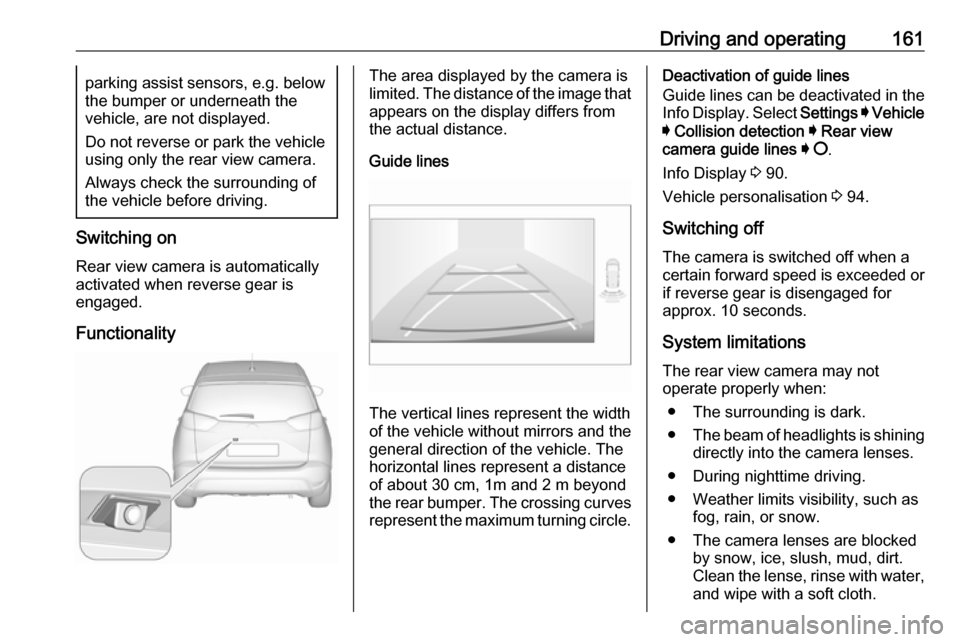
Guide lines
The vertical lines represent the width
of the vehicle without mirrors and the
general direction of the vehicle. The
horizontal lines represent a distance of about 30 cm, 1m and 2 m beyond
the rear bumper. The crossing curves
represent the maximum turning circle.
Deactivation of guide lines
Guide lines can be deactivated in the Info Display. Select Settings I Vehicle
I Collision detection I Rear view
camera guide lines I § .
Info Display 3 90.
Vehicle personalisation 3 94.
Switching off
The camera is switched off when a
certain forward speed is exceeded or
if reverse gear is disengaged for
approx. 10 seconds.
System limitations
The rear view camera may not
operate properly when:
● The surrounding is dark.
● The beam of headlights is shining
directly into the camera lenses.
● During nighttime driving.
● Weather limits visibility, such as fog, rain, or snow.
● The camera lenses are blocked by snow, ice, slush, mud, dirt.
Clean the lense, rinse with water,
and wipe with a soft cloth.
Page 164 of 247
162Driving and operating● The tailgate will be opened.
● A trailer or bike carrier is attached
to the trailer hitch.
● The vehicle had a rear end accident.
● There are extreme temperature changes.
Lane departure warning The lane departure warning system
observes the lane markings between which the vehicle is driving via a front camera. The system detects lane
changes and warns the driver in the
event of an unintended lane change
via visual and acoustic signals.
Criteria for the detection of an
unintended lane change are:
● no operation of turn lights
● no brake pedal operation
● no active acceleration
If the driver is active, no warning will
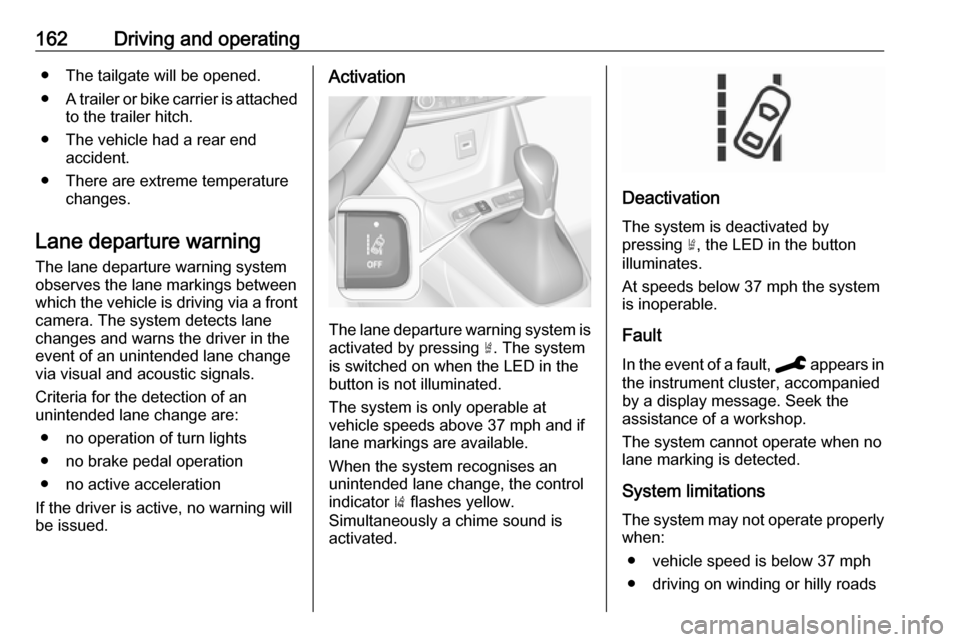
be issued.Activation
The lane departure warning system is activated by pressing ½. The system
is switched on when the LED in the
button is not illuminated.
The system is only operable at
vehicle speeds above 37 mph and if
lane markings are available.
When the system recognises an
unintended lane change, the control
indicator ) flashes yellow.
Simultaneously a chime sound is
activated.
Deactivation
The system is deactivated by
pressing ½, the LED in the button
illuminates.
At speeds below 37 mph the system
is inoperable.
Fault
In the event of a fault, C appears in
the instrument cluster, accompanied
by a display message. Seek the
assistance of a workshop.
The system cannot operate when no
lane marking is detected.
System limitations The system may not operate properly
when:
● vehicle speed is below 37 mph● driving on winding or hilly roads
Page 169 of 247
Driving and operating167
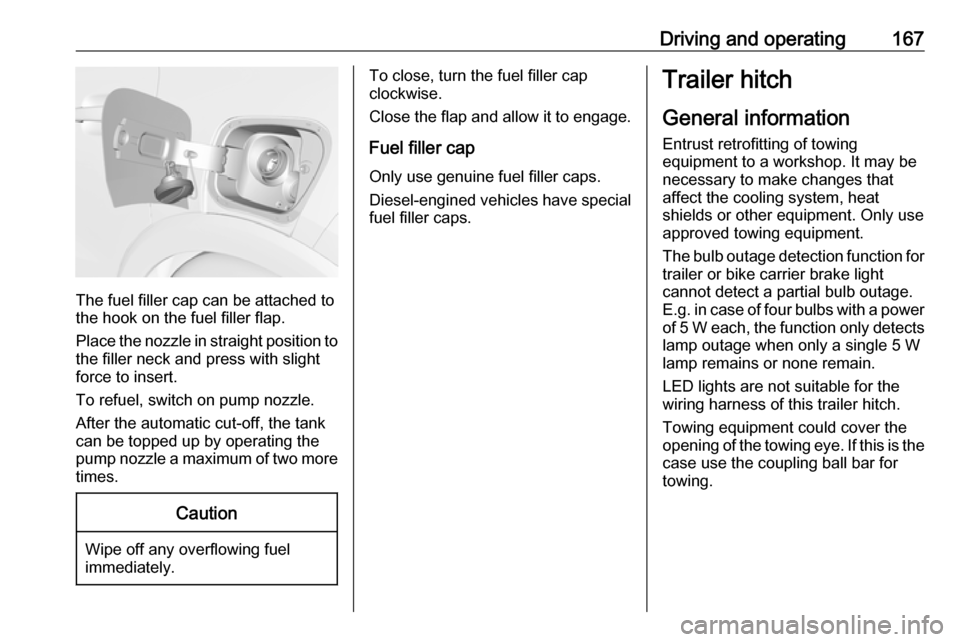
The fuel filler cap can be attached to
the hook on the fuel filler flap.
Place the nozzle in straight position to the filler neck and press with slight
force to insert.
To refuel, switch on pump nozzle.
After the automatic cut-off, the tank can be topped up by operating the
pump nozzle a maximum of two more
times.
Caution
Wipe off any overflowing fuel
immediately.
To close, turn the fuel filler cap
clockwise.
Close the flap and allow it to engage.
Fuel filler cap
Only use genuine fuel filler caps.
Diesel-engined vehicles have special fuel filler caps.Trailer hitch
General information
Entrust retrofitting of towing
equipment to a workshop. It may be
necessary to make changes that
affect the cooling system, heat
shields or other equipment. Only use
approved towing equipment.
The bulb outage detection function for
trailer or bike carrier brake light
cannot detect a partial bulb outage.
E.g. in case of four bulbs with a power
of 5 W each, the function only detects lamp outage when only a single 5 W
lamp remains or none remain.
LED lights are not suitable for the
wiring harness of this trailer hitch.
Towing equipment could cover the
opening of the towing eye. If this is the case use the coupling ball bar for
towing.
Page 174 of 247

172Vehicle careVehicle careGeneral Information...................172
Accessories and vehicle modifications .......................... 172
Vehicle storage ........................173
End-of-life vehicle recovery .....173
Vehicle checks ........................... 174
Performing work ......................174
Bonnet ..................................... 174
Engine oil ................................. 175
Engine coolant ......................... 176
Washer fluid ............................ 176
Brakes ..................................... 177
Brake fluid ............................... 177
Vehicle battery ......................... 177
Diesel fuel system bleeding .....179
Wiper blade replacement ........179
Bulb replacement .......................180
Halogen headlights ..................180
LED headlights ........................ 183
Front fog lights ......................... 183
Tail lights ................................. 183
Side turn lights ......................... 187
Number plate light ...................188
Interior lights ............................ 188Electrical system........................188
Fuses ....................................... 188
Engine compartment fuse box . 189
Instrument panel fuse box .......190
Vehicle tools .............................. 192
Tools ........................................ 192
Wheels and tyres .......................193
Winter tyres ............................. 193
Tyre designations ....................193
Tyre pressure .......................... 194
Tyre deflation detection system .................................... 195
Tread depth ............................. 196
Changing tyre and wheel size . 196
Wheel covers ........................... 196
Tyre chains .............................. 197
Tyre repair kit .......................... 197
Wheel changing .......................200
Spare wheel ............................ 201
Jump starting ............................. 205
Towing ....................................... 206
Towing the vehicle ...................206
Towing another vehicle ...........207
Appearance care .......................208
Exterior care ............................ 208
Interior care ............................. 210
Floor mats ............................... 211General Information
Accessories and vehicle modifications
We recommend the use of genuine parts and accessories and factory
approved parts specific for this
vehicle type. We cannot assess or
guarantee reliability of other products - even if they have a regulatory or
otherwise granted approval.
Any modification, conversion or other
changes made to standard vehicle
specifications (including, without
limitation, software modifications,
modifications of the electronic control units) may invalidate the warranty
offered by Vauxhall.
Furthermore, such changes may
affect driver assistance systems, may
impact fuel consumption, CO 2
emissions and other emissions of the
vehicle and cause the vehicle to no
longer conform to the operating
permit, impacting the validity of your
vehicle registration.
Page 181 of 247
Vehicle care179● See the Owner's Manual forfurther information.
● Explosive gas may be present in the vicinity of the vehicle battery.
Power saving mode
This mode deactivates electrical
consumers to avoid excessive
discharging of the vehicle battery.
These consumers, such as the
infotainment system, windscreen
wipers, low beam headlights,
courtesy light, etc. can be used for a
total maximum time of about
40 minutes after ignition is switched
off.
Deactivating power saving mode
Power saving mode is deactivated
automatically when the engine is
restarted. Run the engine for a
sufficient charge:
● for less than 10 minutes to use the consumers for approx.
5 minutes
● for more than 10 minutes to use the consumers for up to approx.
30 minutesDiesel fuel system bleeding
If the tank has been run dry, the diesel fuel system must be bled. Switch on
the ignition three times for
15 seconds at a time. Then crank the
engine for a maximum of
40 seconds. Repeat this process after
no less than 5 seconds. If the engine fails to start, seek the assistance of a
workshop.
Wiper blade replacement
Windscreen
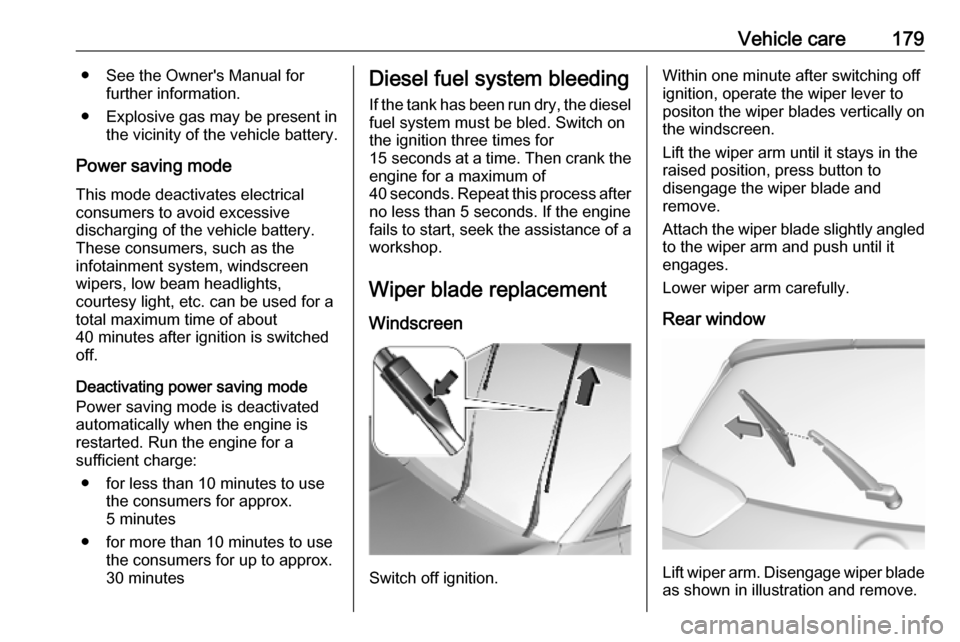
Switch off ignition.
Within one minute after switching off
ignition, operate the wiper lever to
positon the wiper blades vertically on
the windscreen.
Lift the wiper arm until it stays in the
raised position, press button to
disengage the wiper blade and
remove.
Attach the wiper blade slightly angled
to the wiper arm and push until it
engages.
Lower wiper arm carefully.
Rear window
Lift wiper arm. Disengage wiper blade as shown in illustration and remove.
Page 182 of 247
180Vehicle careAttach the wiper blade slightly angledto the wiper arm and push until it
engages.
Lower wiper arm carefully.Bulb replacement
Switch off the ignition and switch off
the relevant switch or close the doors.
Only hold a new bulb at the base. Do
not touch the bulb glass with bare
hands.
Use only the same bulb type for
replacement.
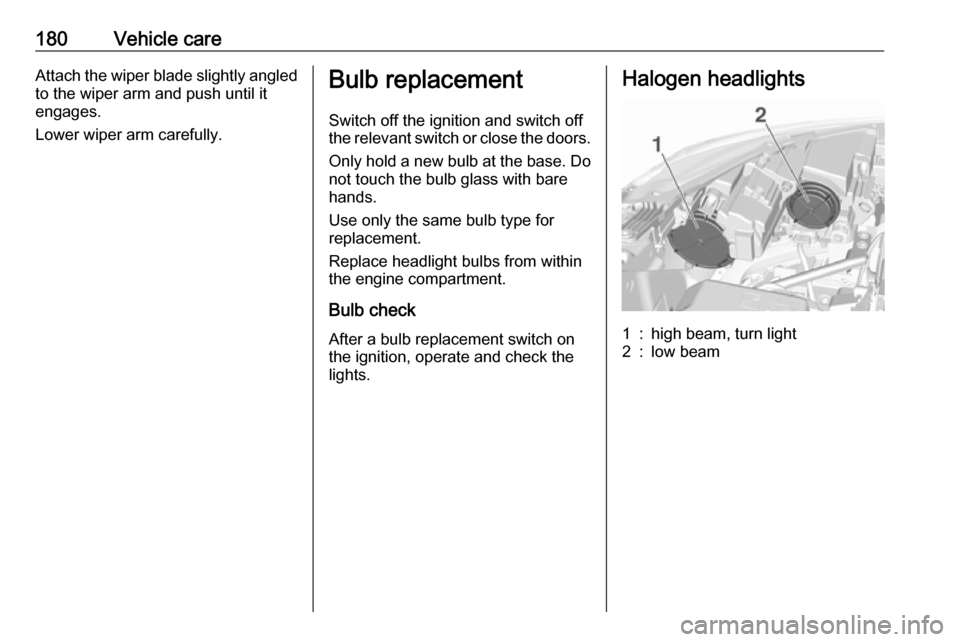
Replace headlight bulbs from within the engine compartment.
Bulb check After a bulb replacement switch on
the ignition, operate and check the
lights.Halogen headlights1:high beam, turn light2:low beam