range VAUXHALL CROSSLAND X 2019 Owner's Manual
[x] Cancel search | Manufacturer: VAUXHALL, Model Year: 2019, Model line: CROSSLAND X, Model: VAUXHALL CROSSLAND X 2019Pages: 261, PDF Size: 7.98 MB
Page 13 of 261

In brief111Power windows .....................36
2 Exterior mirrors .....................33
3 Cruise control .....................150
Speed limiter ....................... 152
4 Turn lights ........................... 113
Headlight flash ....................110
High beam ........................... 110
High beam assist ...............111
Exit lighting ......................... 116
Parking lights ...................... 114
Buttons for Driver
Information Centre ................94
5 Side air vents ...................... 126
6 Instruments .......................... 83
Driver Information Centre ...... 94
7 Infotainment controls
8 Windscreen wiper and
washer, rear wiper and
washer ................................. 73
9 Head-up display ....................98
10 Centre air vents .................. 126
11 Hazard warning flashers ....11212 Info Display .......................... 96
13 Centre air vent ......................96
14 Anti-theft alarm system
status LED ........................... 31
15 Central locking system ..........23
16 Glovebox .............................. 62
Fuse box ............................ 203
17 Controls for Info Display
operation ............................... 96
18 Climate control system ........ 119
19 USB charging port ................ 76
20 Parking assist / Advanced
parking assist .....................160
Lane departure warning .....174
Eco button for stop-start
system ................................. 136
Electronic Stability Control and Traction Control ..........148
21 Power outlet .......................... 76
22 Manual transmission ..........146
Automatic transmission ......143
23 Manual parking brake .........147
24 Power button ....................... 13225Ignition switch .....................131
26 Steering wheel adjustment ..72
27 Horn ..................................... 73
28 Bonnet release lever ..........188
29 Storage ................................. 62
Fuse box ............................ 203
30 Head-up display ....................98
31 Light switch ........................ 109
Headlight range
adjustment ......................... 111
Front / rear fog lights ..........113
Instrument illumination .......115
Page 23 of 261
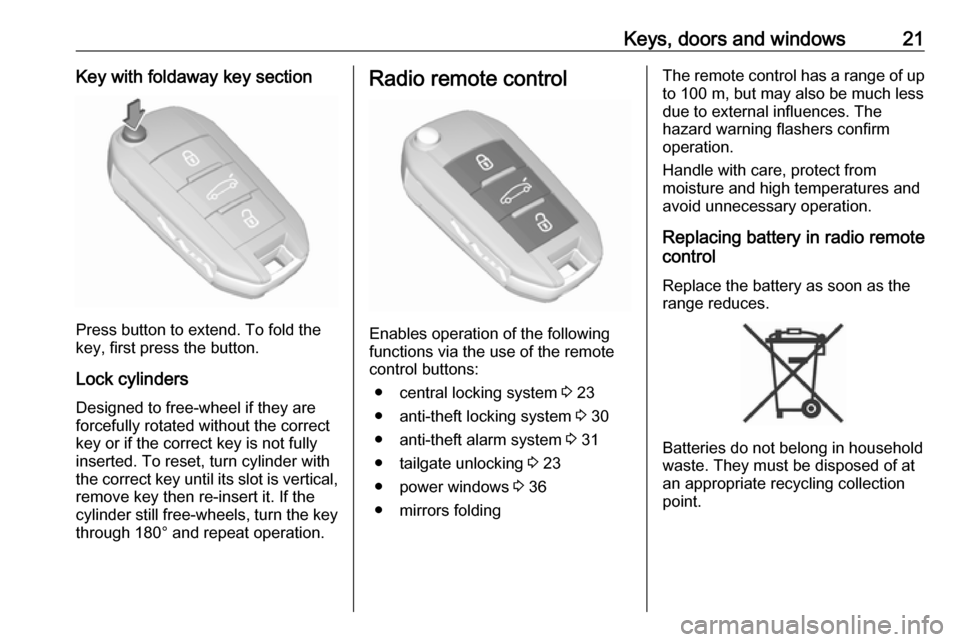
Keys, doors and windows21Key with foldaway key section
Press button to extend. To fold the
key, first press the button.
Lock cylinders
Designed to free-wheel if they are forcefully rotated without the correct
key or if the correct key is not fully
inserted. To reset, turn cylinder with
the correct key until its slot is vertical, remove key then re-insert it. If the
cylinder still free-wheels, turn the key
through 180° and repeat operation.
Radio remote control
Enables operation of the following
functions via the use of the remote control buttons:
● central locking system 3 23
● anti-theft locking system 3 30
● anti-theft alarm system 3 31
● tailgate unlocking 3 23
● power windows 3 36
● mirrors folding
The remote control has a range of up
to 100 m, but may also be much less
due to external influences. The
hazard warning flashers confirm
operation.
Handle with care, protect from
moisture and high temperatures and
avoid unnecessary operation.
Replacing battery in radio remote
control
Replace the battery as soon as the
range reduces.
Batteries do not belong in household
waste. They must be disposed of at
an appropriate recycling collection
point.
Page 24 of 261
22Keys, doors and windows
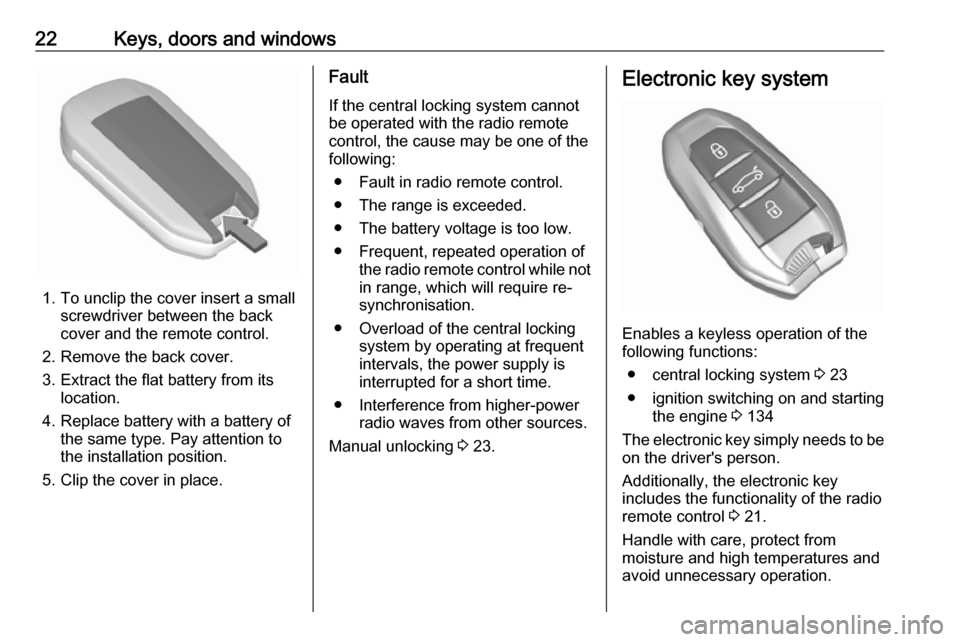
1. To unclip the cover insert a smallscrewdriver between the back
cover and the remote control.
2. Remove the back cover.
3. Extract the flat battery from its location.
4. Replace battery with a battery of the same type. Pay attention to
the installation position.
5. Clip the cover in place.
Fault
If the central locking system cannot
be operated with the radio remote
control, the cause may be one of the
following:
● Fault in radio remote control.
● The range is exceeded.
● The battery voltage is too low.
● Frequent, repeated operation of the radio remote control while not
in range, which will require re-
synchronisation.
● Overload of the central locking system by operating at frequent
intervals, the power supply is
interrupted for a short time.
● Interference from higher-power radio waves from other sources.
Manual unlocking 3 23.Electronic key system
Enables a keyless operation of the
following functions:
● central locking system 3 23
● ignition switching on and starting the engine 3 134
The electronic key simply needs to be on the driver's person.
Additionally, the electronic key
includes the functionality of the radio
remote control 3 21.
Handle with care, protect from
moisture and high temperatures and
avoid unnecessary operation.
Page 25 of 261
Keys, doors and windows23Replacing battery in electronic
key
Replace the battery as soon as the
system no longer operates properly or the range is reduced. The need for battery replacement is indicated by a
message in the Driver Information
Centre 3 100.
Batteries do not belong in household
waste. They must be disposed of at
an appropriate recycling collection
point.
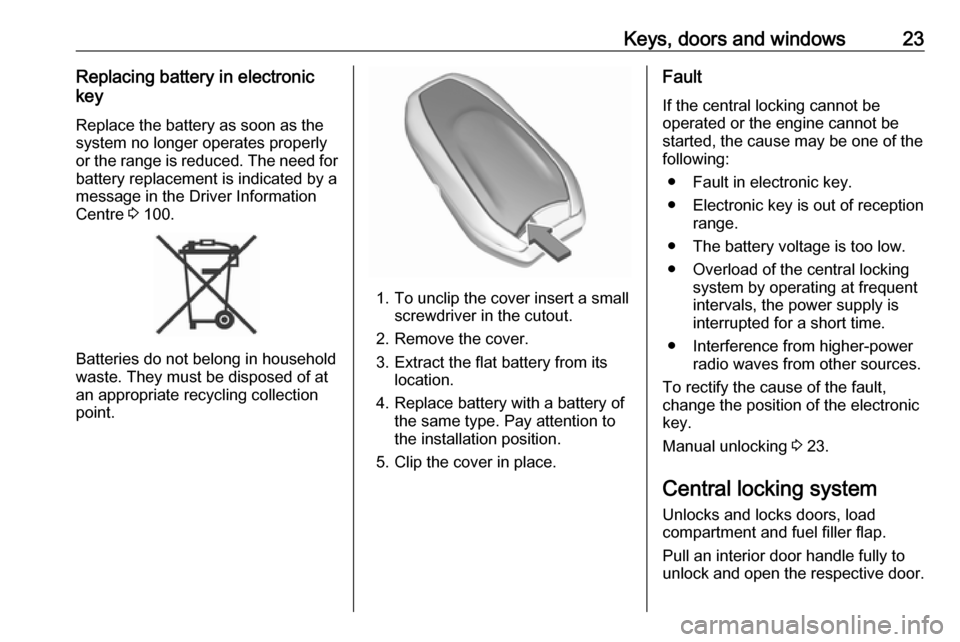
1. To unclip the cover insert a small screwdriver in the cutout.
2. Remove the cover.
3. Extract the flat battery from its location.
4. Replace battery with a battery of the same type. Pay attention to
the installation position.
5. Clip the cover in place.
Fault
If the central locking cannot be operated or the engine cannot be
started, the cause may be one of the
following:
● Fault in electronic key.
● Electronic key is out of reception range.
● The battery voltage is too low.
● Overload of the central locking system by operating at frequentintervals, the power supply is
interrupted for a short time.
● Interference from higher-power radio waves from other sources.
To rectify the cause of the fault,
change the position of the electronic
key.
Manual unlocking 3 23.
Central locking system Unlocks and locks doors, load
compartment and fuel filler flap.
Pull an interior door handle fully to
unlock and open the respective door.
Page 27 of 261
Keys, doors and windows25Electronic key system operation
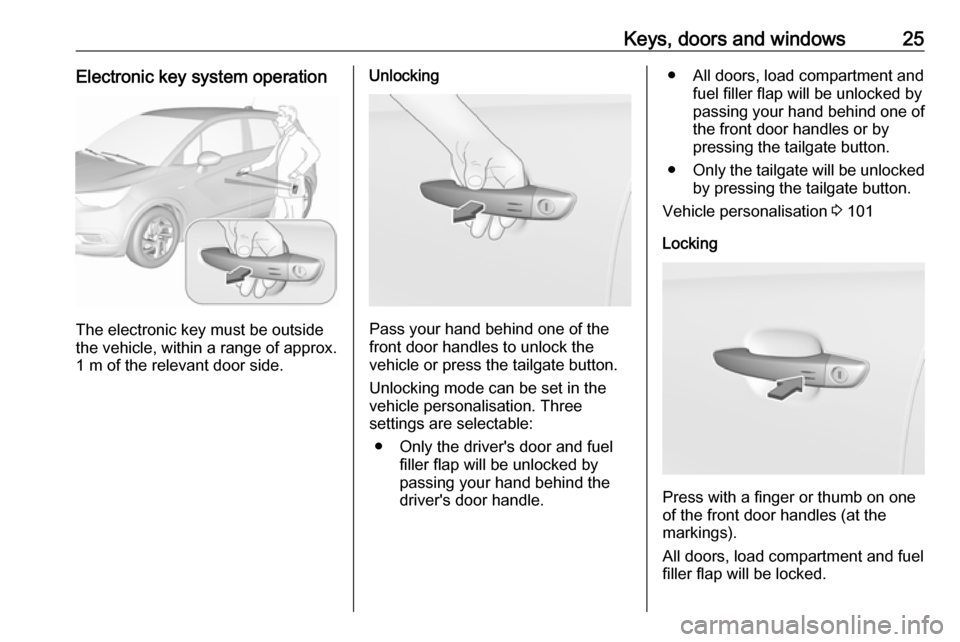
The electronic key must be outside
the vehicle, within a range of approx. 1 m of the relevant door side.
Unlocking
Pass your hand behind one of the
front door handles to unlock the
vehicle or press the tailgate button.
Unlocking mode can be set in the
vehicle personalisation. Three
settings are selectable:
● Only the driver's door and fuel filler flap will be unlocked by
passing your hand behind the
driver's door handle.
● All doors, load compartment and fuel filler flap will be unlocked by
passing your hand behind one of
the front door handles or by
pressing the tailgate button.
● Only the tailgate will be unlocked
by pressing the tailgate button.
Vehicle personalisation 3 101
Locking
Press with a finger or thumb on one
of the front door handles (at the
markings).
All doors, load compartment and fuel
filler flap will be locked.
Page 28 of 261
26Keys, doors and windowsThe system locks if any door has
been opened and all doors are now
closed.
If the driver's door is not closed
properly, the electronic key remains in the vehicle or the ignition is not off,
locking will not be permitted and a
warning chime sounds.
If there have been two or more
electronic keys in the vehicle and the
ignition was on once, the doors will be locked even if just one electronic key
is taken out of the vehicle.
Unlocking and opening the tailgate
The tailgate can be unlocked and
opened by pushing the touchpad
under the tailgate moulding when the
electronic key is in range. The doors
remain locked depending on the
configuration in the vehicle
personalisation.
Load compartment 3 29
Vehicle personalisation 3 101Operation with buttons on the
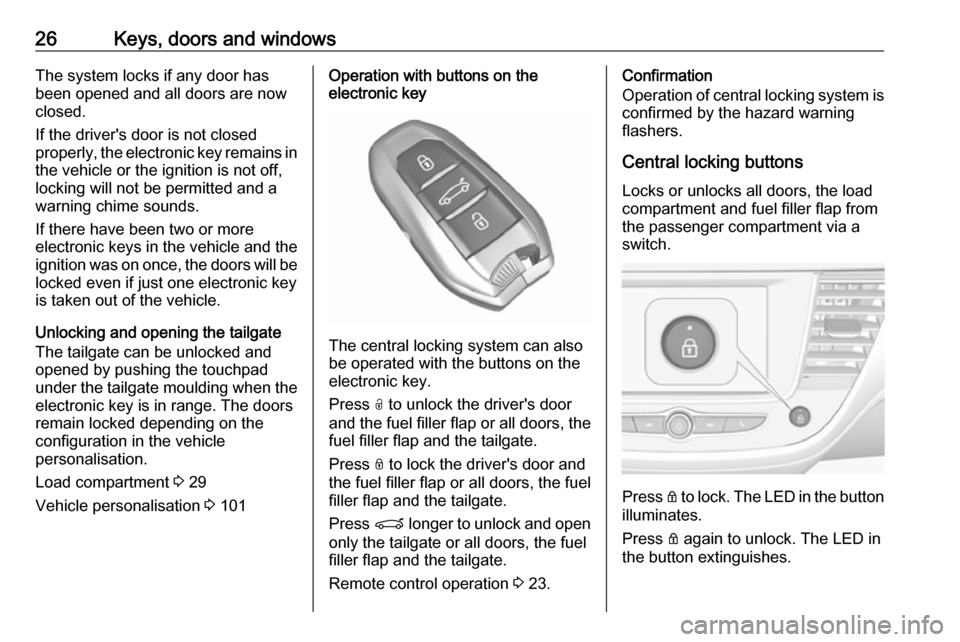
electronic key
The central locking system can also
be operated with the buttons on the
electronic key.
Press O to unlock the driver's door
and the fuel filler flap or all doors, the fuel filler flap and the tailgate.
Press N to lock the driver's door and
the fuel filler flap or all doors, the fuel
filler flap and the tailgate.
Press P longer to unlock and open
only the tailgate or all doors, the fuel
filler flap and the tailgate.
Remote control operation 3 23.
Confirmation
Operation of central locking system is
confirmed by the hazard warning
flashers.
Central locking buttonsLocks or unlocks all doors, the load
compartment and fuel filler flap from
the passenger compartment via a
switch.
Press Q to lock. The LED in the button
illuminates.
Press Q again to unlock. The LED in
the button extinguishes.
Page 34 of 261
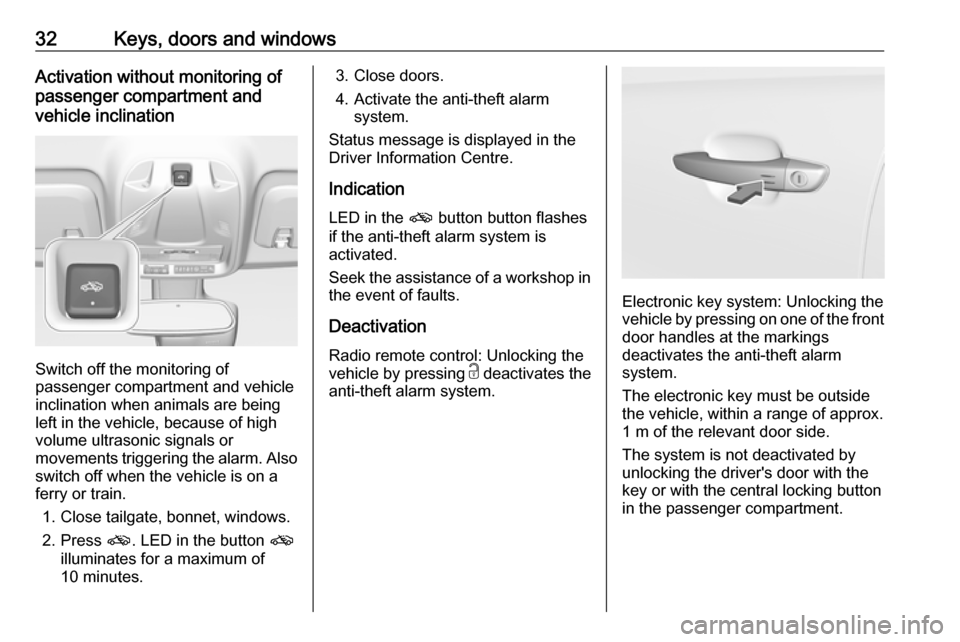
32Keys, doors and windowsActivation without monitoring of
passenger compartment and
vehicle inclination
Switch off the monitoring of
passenger compartment and vehicle
inclination when animals are being
left in the vehicle, because of high
volume ultrasonic signals or
movements triggering the alarm. Also switch off when the vehicle is on a
ferry or train.
1. Close tailgate, bonnet, windows.
2. Press o. LED in the button o
illuminates for a maximum of
10 minutes.
3. Close doors.
4. Activate the anti-theft alarm system.
Status message is displayed in the
Driver Information Centre.
Indication
LED in the o button button flashes
if the anti-theft alarm system is
activated.
Seek the assistance of a workshop in the event of faults.
Deactivation Radio remote control: Unlocking the
vehicle by pressing c deactivates the
anti-theft alarm system.
Electronic key system: Unlocking the
vehicle by pressing on one of the front
door handles at the markings
deactivates the anti-theft alarm
system.
The electronic key must be outside
the vehicle, within a range of approx. 1 m of the relevant door side.
The system is not deactivated by
unlocking the driver's door with the
key or with the central locking button
in the passenger compartment.
Page 85 of 261
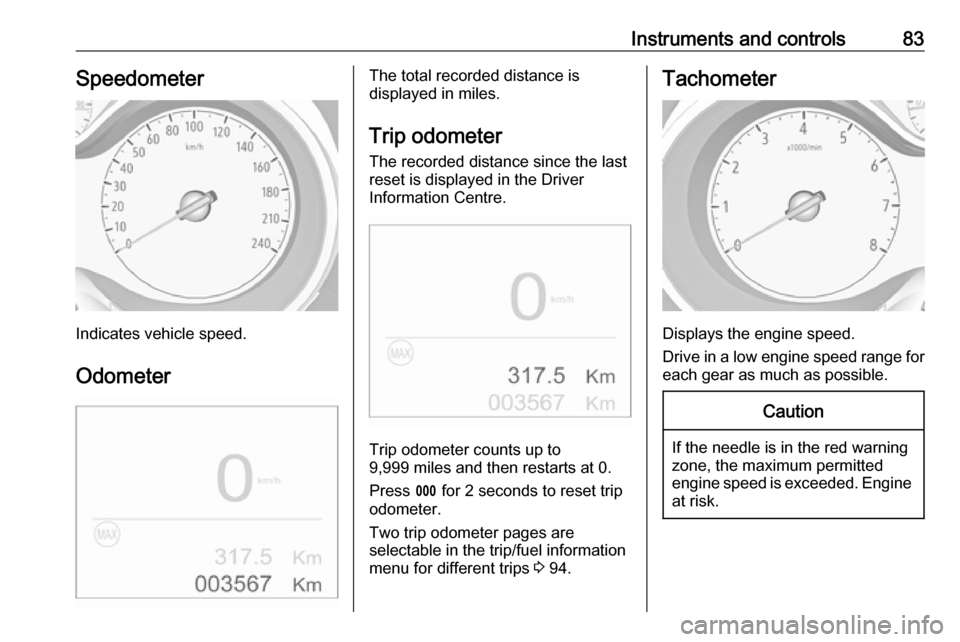
Instruments and controls83Speedometer
Indicates vehicle speed.
Odometer
The total recorded distance is
displayed in miles.
Trip odometer The recorded distance since the last
reset is displayed in the Driver
Information Centre.
Trip odometer counts up to
9,999 miles and then restarts at 0.
Press L for 2 seconds to reset trip
odometer.
Two trip odometer pages are
selectable in the trip/fuel information
menu for different trips 3 94.
Tachometer
Displays the engine speed.
Drive in a low engine speed range for each gear as much as possible.
Caution
If the needle is in the red warning
zone, the maximum permitted
engine speed is exceeded. Engine at risk.
Page 93 of 261
Instruments and controls91Electronic Stability Controland Traction Control system
b illuminates or flashes yellow.
Illuminates
A fault in the system is present.
Continued driving is possible. Driving
stability, however, may deteriorate
depending on road surface
conditions.
Have the cause of the fault remedied
by a workshop.
Flashes
The system is actively engaged.
Engine output may be reduced and the vehicle may be braked
automatically to a small degree.
Electronic Stability Control and
Traction Control system 3 148.
Electronic Stability Control and Traction Control system
off
n illuminates yellow.
The systems are deactivated.Engine coolant temperature
o illuminates red.
Illuminates when the engine is
running
Stop, switch off engine.Caution
Coolant temperature too high.
Check coolant level immediately
3 190.
If there is sufficient coolant, consult a workshop.
Preheating
! illuminates yellow.
Preheating of diesel engine is
activated. Only activates when
outside temperature is low. Start the
engine when control indicator
extinguishes.
Starting the engine 3 134.
Exhaust filter
% or H illuminates yellow.
The exhaust filter requires cleaning.
Continue driving until the control
indicator extinguishes.
Illuminates temporarily Start of saturation of the exhaust filter.
Start cleaning process as soon as
possible by driving at a vehicle speed
of at least 40 mph.
Illuminates constantlyIndication of a low additive level. Seek
the assistance of a workshop.
Exhaust filter 3 139.
AdBlue
Y flashes or illuminates yellow.
Illuminates yellow The remaining driving range is
between 370 mph and 1500 mph.
Page 94 of 261
92Instruments and controlsFlashes yellowThe remaining driving range is
between 0 and 370 mph.
AdBlue level is low. Refill AdBlue
soon to avoid prevention of the
engine start. Up to 10 l of AdBlue can
be added.
AdBlue 3 140.
Deflation detection system
w illuminates or flashes yellow.
Illuminates
Tyre pressure loss in one or more
wheels. Stop immediately and check
tyre pressure.
Flashes Fault in system. Consult a workshop.
Deflation detection system 3 208.
Engine oil pressure I illuminates red.
Illuminates when the ignition is
switched on and extinguishes shortly
after the engine starts.Illuminates when the engine is
runningCaution
Engine lubrication may be
interrupted. This may result in
damage to the engine and / or
locking of the drive wheels.
1. Depress clutch.
2. Select neutral gear.
3. Move out of the flow of traffic as quickly as possible without
impeding other vehicles.
4. Switch off ignition.
9 Warning
When the engine is off,
considerably more force is needed
to brake and steer.
During an Autostop, the brake
servo unit will still be operational.
Do not remove key until vehicle is stationary, otherwise the steeringwheel lock could engage
unexpectedly.
Keep engine turned off and let the
vehicle be towed to a workshop
3 189.
Low fuel o illuminates yellow.
Level in fuel tank is too low.
Refuelling 3 178.
Bleeding the diesel fuel system
3 192.
Autostop D illuminates or flashes green.
Illuminates green
Engine is in an Autostop.
Flashes green
Autostop is temporarily unavailable,
or Autostop mode is invoked
automatically.
Stop-start system 3 136.
Exterior light 8 illuminates green.