stop-start VAUXHALL CROSSLAND X 2020 Owner's Manual
[x] Cancel search | Manufacturer: VAUXHALL, Model Year: 2020, Model line: CROSSLAND X, Model: VAUXHALL CROSSLAND X 2020Pages: 245, PDF Size: 21.85 MB
Page 13 of 245

In brief111Power windows .....................36
2 Exterior mirrors .....................33
3 Cruise control .....................140
Speed limiter ....................... 143
Heated steering wheel .........70
4 Turn lights ........................... 105
Headlight flash ....................103
High beam ........................... 102
High beam assist ...............102
Exit lighting ......................... 108
Parking lights ...................... 106
Buttons for Driver
Information Centre ................89
5 Side air vents ...................... 119
6 Instruments .......................... 79
Driver Information Centre ...... 89
7 Infotainment controls ...........70
8 Windscreen wiper and
washer, rear wiper and
washer ................................. 71
9 Head-up display ....................93
10 Air vents ............................. 11911Hazard warning flashers ....104
12 Info Display .......................... 91
13 Air vent ................................ 119
14 Light sensor ........................ 102
Rain sensor ........................... 71
Sun sensor .......................... 114
15 Central locking system ..........23
16 Glovebox .............................. 61
Fuse box ............................ 193
17 Controls for Info Display
operation ............................... 91
18 Climate control system ........ 110
19 USB port .............................. 74
20 Electronic Stability Control
and Traction Control ...........139
Lane departure warning .....163
Stop-start system ................126
Parking assist ..................... 150
Advanced parking assist ....153
Electric child locks ................ 28
21 Power outlet .......................... 74
22 Selector lever ...................... 133
23 Parking brake ......................13824Power button ....................... 123
25 Ignition switch .....................123
26 Steering wheel adjustment ..70
27 Horn ..................................... 71
28 Bonnet release lever ..........176
29 Storage ................................. 61
Fuse box ............................ 193
30 Head-up display ....................93
31 Light switch ........................ 101
Headlight range
adjustment ......................... 103
Front fog lights ...................105
Rear fog light ...................... 106
Instrument illumination .......107
Page 20 of 245
18In briefStop-start system
If the vehicle is at a low speed or at astandstill and certain conditions are
fulfilled, an Autostop is activated.
An Autostop is indicated by control
indicator D.
Manual transmission: to restart the
engine, depress the clutch pedal
again. Control indicator D
extinguishes.
Automatic transmission: to restart the
engine, release the brake pedal.
Control indicator D extinguishes.
Stop-start system 3 126.
Parking9 Warning
● Do not park the vehicle on an
easily ignitable surface. The
high temperature of the
exhaust system could ignite the
surface.
● Always apply the parking brake. Activate the parking
brake without pressing the
release button. Apply as firmly
as possible on a downhill slope
or uphill slope. Depress brake
pedal at the same time to
reduce operating force.
● Switch off the engine.
● If the vehicle is on a level surface or uphill slope, engage
first gear or set the selector
lever to position P. On an uphill
slope, turn the front wheels
away from the kerb.
If the vehicle is on a downhill
slope, engage reverse gear or
set the selector lever to position
P . Turn the front wheels
towards the kerb.
● Close the windows.
● Remove the ignition key from the ignition switch or switch off
ignition on vehicles with power
button. Turn the steering wheel until the steering wheel lock is
felt to engage.
● Lock the vehicle with e on the
radio remote control.
Or with electronic key system
press marking on front door
handles 3 22.
● Activate the anti-theft alarm system 3 31.
● The engine cooling fans may run
after the engine has been
switched off 3 176.
Caution
After running at high engine
speeds or with high engine loads,
operate the engine briefly at a low load or run in neutral for
Page 46 of 245
44Seats, restraintsAdjustable thigh support
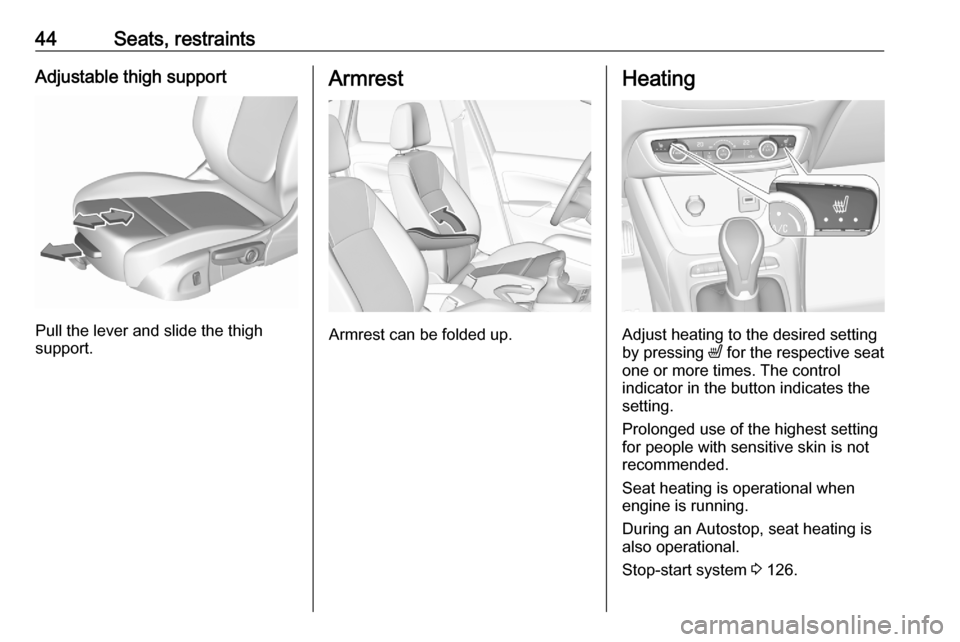
Pull the lever and slide the thigh
support.
Armrest
Armrest can be folded up.
Heating
Adjust heating to the desired setting
by pressing ß for the respective seat
one or more times. The control
indicator in the button indicates the
setting.
Prolonged use of the highest setting
for people with sensitive skin is not
recommended.
Seat heating is operational when
engine is running.
During an Autostop, seat heating is also operational.
Stop-start system 3 126.
Page 72 of 245
70Instruments and controlsControlsSteering wheel adjustment
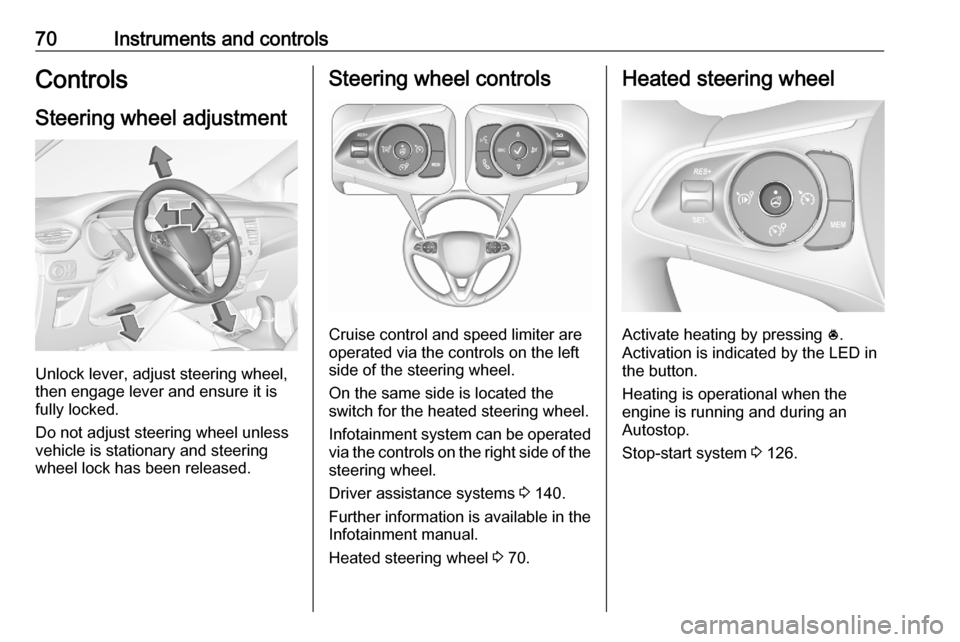
Unlock lever, adjust steering wheel,
then engage lever and ensure it is
fully locked.
Do not adjust steering wheel unless
vehicle is stationary and steering
wheel lock has been released.
Steering wheel controls
Cruise control and speed limiter are
operated via the controls on the left
side of the steering wheel.
On the same side is located the
switch for the heated steering wheel.
Infotainment system can be operated
via the controls on the right side of the
steering wheel.
Driver assistance systems 3 140.
Further information is available in the
Infotainment manual.
Heated steering wheel 3 70.
Heated steering wheel
Activate heating by pressing *.
Activation is indicated by the LED in
the button.
Heating is operational when the
engine is running and during an
Autostop.
Stop-start system 3 126.
Page 76 of 245
74Instruments and controlsClockDate and time are shown in the
Info Display 3 91.
Setting date and time, see
Infotainment manual.
Power outlets
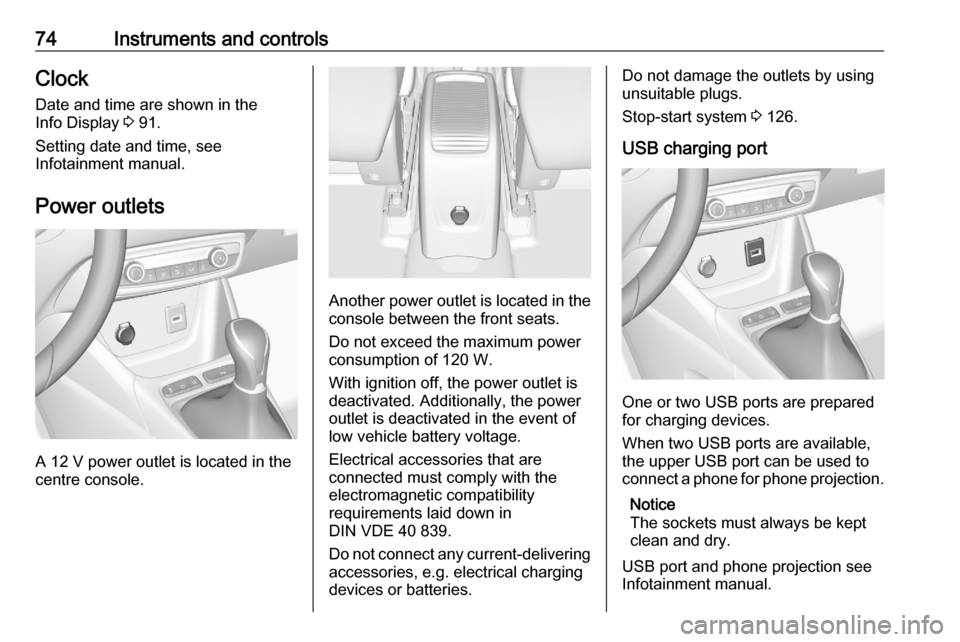
A 12 V power outlet is located in the
centre console.
Another power outlet is located in the
console between the front seats.
Do not exceed the maximum power
consumption of 120 W.
With ignition off, the power outlet is deactivated. Additionally, the poweroutlet is deactivated in the event of
low vehicle battery voltage.
Electrical accessories that are
connected must comply with the
electromagnetic compatibility
requirements laid down in
DIN VDE 40 839.
Do not connect any current-delivering
accessories, e.g. electrical charging
devices or batteries.
Do not damage the outlets by using
unsuitable plugs.
Stop-start system 3 126.
USB charging port
One or two USB ports are prepared
for charging devices.
When two USB ports are available,
the upper USB port can be used to
connect a phone for phone projection.
Notice
The sockets must always be kept
clean and dry.
USB port and phone projection see
Infotainment manual.
Page 89 of 245
Instruments and controls87Illuminates
Tyre pressure loss in one or more
wheels. Stop immediately and check
tyre pressure.
Flashes
Fault in system. Consult a workshop.
Deflation detection system 3 197.
Engine oil pressure I illuminates red.
Illuminates when the ignition is
switched on and extinguishes shortly
after the engine starts.
Illuminates when the engine is
runningCaution
Engine lubrication may be
interrupted. This may result in
damage to the engine and / or
locking of the drive wheels.
1. Select neutral gear.
2. Move out of the flow of traffic as quickly as possible without
impeding other vehicles.
3. Switch off ignition.9 Warning
When the engine is off,
considerably more force is needed
to brake and steer.
During an Autostop, the brake
servo unit will still be operational.
Do not remove key until vehicle is stationary, otherwise the steeringwheel lock could engage
unexpectedly.
Keep engine turned off and let the
vehicle be towed to a workshop
3 177.
Low fuel o illuminates yellow.
Level in fuel tank is too low.
Refuelling 3 167.
Bleeding the diesel fuel system
3 181.
Autostop D illuminates or flashes green.
Illuminates green
Engine is in an Autostop.
Flashes green
Autostop is temporarily unavailable,
or Autostop mode is invoked
automatically.
Stop-start system 3 126.
Exterior light 8 illuminates green.
The exterior lights are on 3 101.
Low beam
9 illuminates green.
Illuminated when low beam is on.
High beam
C illuminates blue.
Page 114 of 245
112Climate controlAir distribution l M K
Press:l:to windscreen and front door
windowsM:to head area and rear seats via
adjustable front air ventsK:to front and rear foot well and
windscreen
Combinations are possible.
Fan speed Z
Adjust the air flow by turning Z to the
desired speed.
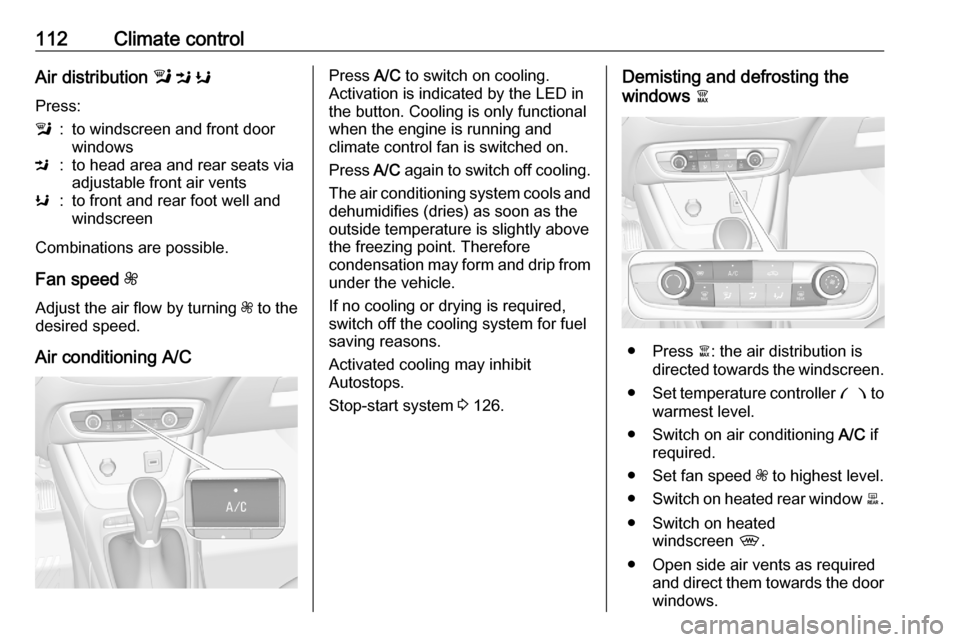
Air conditioning A/C
Press A/C to switch on cooling.
Activation is indicated by the LED in
the button. Cooling is only functional
when the engine is running and
climate control fan is switched on.
Press A/C again to switch off cooling.
The air conditioning system cools and
dehumidifies (dries) as soon as the
outside temperature is slightly above the freezing point. Therefore
condensation may form and drip from under the vehicle.
If no cooling or drying is required,
switch off the cooling system for fuel
saving reasons.
Activated cooling may inhibit
Autostops.
Stop-start system 3 126.Demisting and defrosting the
windows à
● Press à: the air distribution is
directed towards the windscreen.
● Set temperature controller £ to
warmest level.
● Switch on air conditioning A/C if
required.
● Set fan speed Z to highest level.
● Switch on heated rear window b.
● Switch on heated windscreen ,.
● Open side air vents as required and direct them towards the doorwindows.
Page 115 of 245

Climate control113Notice
If à is pressed while the engine is
running, an Autostop will be inhibited
until à is pressed again.
If à is pressed while the engine is in
an Autostop, the engine will restart
automatically.
Stop-start system 3 126.
Air recirculation system 4
Press 4 to activate air recirculation
mode, LED is indicated.
Select air recirculation to assist in
cooling the interior or in blocking
outside odours or exhaust.
Press 4 again to deactivate air
recirculation mode.9 Warning
The exchange of fresh air is
reduced in air recirculation mode.
In operation without cooling, the
air humidity increases, so the
windows may mist up from inside.
The quality of the passenger
compartment air deteriorates,
which may cause the occupants to
feel drowsy.
In warm and very humid ambient air
conditions, the windscreen may mist
up from outside when cold air is
directed towards it. If windscreen
mists up from outside, activate
windscreen wiper and deactivate l.
Maximum cooling
Briefly open the windows so that hot
air can disperse quickly.
● Switch on air conditioning A/C.
● Press 4 for air recirculation
system on.
● Press M for air distribution.
● Set temperature control £ to
coldest level.
● Set fan speed Z to highest level.
● Open all vents.
Heated rear window b 3 37.
Heated exterior mirrors b 3 34.
Heated windscreen , 3 38.
Page 118 of 245

116Climate controlAir distribution l, M , K
Press MENU .
Touch
l:to windscreen and front door
windowsM:to head area and rear seats via
adjustable air ventsK:to front and rear foot well and
windscreen
To return to automatic air distribution,
press AUTO .
Temperature preselection £
Set the preselected temperatures
separately for driver and front
passenger to the desired value using
the left and right controls. The dial on
the passenger side changes the
temperature for the passenger side.
The dial on the driver's side changes
the temperature for the driver's side or for both sides depending on
activation of synchronisation MONO
in the climate settings menu. Press
MENU to enter the menu.
Recommended temperature is 22 °C .
Temperature is indicated in displays
beside the controls and in the climate settings menu.
If the minimum temperature Lo is set,
the climate control system runs at
maximum cooling, if cooling A/C is
switched on.
If the maximum temperature Hi is set,
the climate control system runs at
maximum heating.
Notice
If A/C is switched on, reducing the
set cabin temperature can cause the engine to restart from an Autostop or
inhibit an Autostop.
Stop-start system 3 126.
Dual zone temperature
synchronisation MONO or SYNC
Press MENU to enter the menu.
Touch MONO or SYNC to link
passenger side temperature setting
to the driver side.
When passenger side rotary knob will be adjusted, synchronisation is
deactivated.
Page 120 of 245
118Climate controlDemisting and defrosting the
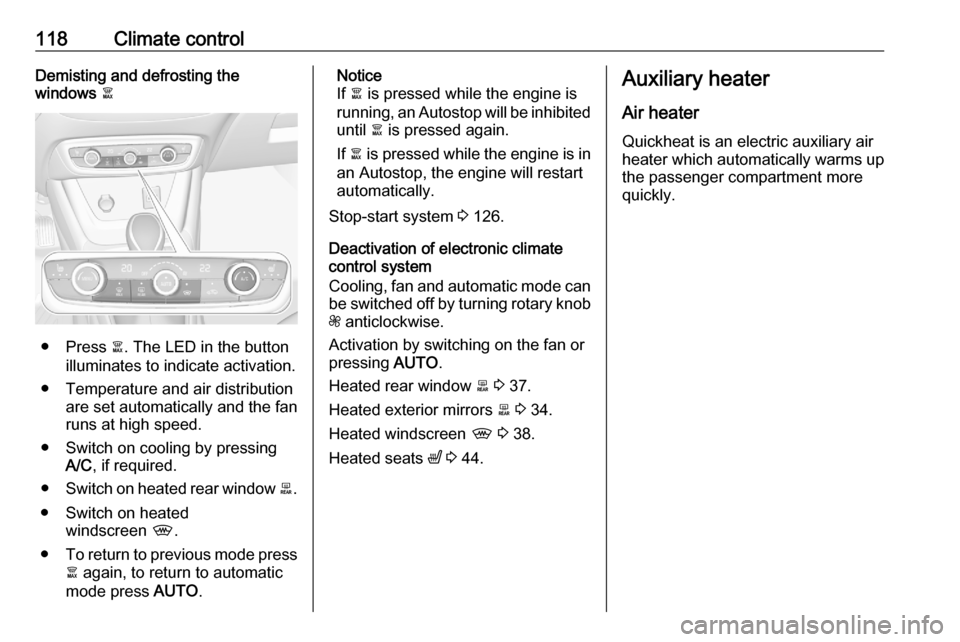
windows à
● Press à. The LED in the button
illuminates to indicate activation.
● Temperature and air distribution are set automatically and the fan
runs at high speed.
● Switch on cooling by pressing A/C , if required.
● Switch on heated rear window b.
● Switch on heated windscreen ,.
● To return to previous mode press
à again, to return to automatic
mode press AUTO.
Notice
If à is pressed while the engine is
running, an Autostop will be inhibited until à is pressed again.
If à is pressed while the engine is in
an Autostop, the engine will restart
automatically.
Stop-start system 3 126.
Deactivation of electronic climate control system
Cooling, fan and automatic mode can
be switched off by turning rotary knob
Z anticlockwise.
Activation by switching on the fan or
pressing AUTO.
Heated rear window b 3 37.
Heated exterior mirrors b 3 34.
Heated windscreen , 3 38.
Heated seats ß 3 44.Auxiliary heater
Air heater
Quickheat is an electric auxiliary air
heater which automatically warms up
the passenger compartment more
quickly.