ECO mode VAUXHALL GRANDLAND X 2018.5 Owner's Manual
[x] Cancel search | Manufacturer: VAUXHALL, Model Year: 2018.5, Model line: GRANDLAND X, Model: VAUXHALL GRANDLAND X 2018.5Pages: 271, PDF Size: 7.61 MB
Page 5 of 271

Introduction3Vehicle specific dataPlease enter your vehicle's data on
the previous page to keep it easily
accessible. This information is
available in the sections "Service and
maintenance" and "Technical data"
as well as on the identification plate.
Introduction
Your vehicle is a designed
combination of advanced technology, safety, environmental friendliness
and economy.
This Owner's Manual provides you
with all the necessary information to
enable you to drive your vehicle
safely and efficiently.
Make sure your passengers are
aware of the possible risk of accident
and injury which may result from
improper use of the vehicle.
You must always comply with the
specific laws and regulations of the
country that you are in. These laws
may differ from the information in this Owner's Manual.
Disregarding the description given in
this manual may affect your warranty.When this Owner's Manual refers to a
workshop visit, we recommend your
Vauxhall Authorised Repairer.
All Vauxhall Authorised Repairers
provide first-class service at
reasonable prices. Experienced
mechanics trained by Vauxhall work according to specific Vauxhall
instructions.
The customer literature pack should
always be kept ready to hand in the
vehicle.
Using this manual ● This manual describes all options
and features available for this
model. Certain descriptions,
including those for display and
menu functions, may not apply to
your vehicle due to model
variant, country specifications,
special equipment or
accessories.
● The "In brief" section will give you
an initial overview.● The table of contents at the beginning of this manual and
within each section shows where the information is located.
● The index will enable you to search for specific information.
● This Owner's Manual depicts left-
hand drive vehicles. Operation is similar for right-hand drive
vehicles.
● The Owner's Manual uses the engine identifier code. The
corresponding sales designation
and engineering code can be
found in the section "Technical
data".
● Directional data, e.g. left or right, or front or back, always relate to
the direction of travel.
● Displays may not support your specific language.
● Display messages and interior labelling are written in bold
letters.
Page 13 of 271

In brief111Power windows .....................39
2 Exterior mirrors .....................37
3 Side air vents ...................... 131
4 Turn and lane-change
signals, headlight flash,
low/high beam, high beam
assist ................................... 118
Exit lighting ......................... 122
Parking lights ...................... 119
Buttons for Driver
Information Centre ..............100
5 Cruise control .....................157
Speed limiter ....................... 160
Heated steering wheel ..........79
6 Instruments .......................... 89
Driver Information Centre .... 100
7 Buttons for Driver
Information Centre ..............100
8 Windscreen wiper and
washer, rear wiper and
washer ................................. 80
9 Power button ....................... 135
10 Centre air vents .................. 13111Hazard warning flashers ....118
12 Info-Display ........................ 102
13 Anti-theft alarm system
status LED ........................... 34
14 Central locking system ..........23
15 Glovebox .............................. 68
16 Controls for Info-Display
operation ............................. 102
17 Climate control system ........ 124
18 USB charging port ................ 84
19 Power outlet .......................... 84
20 Parking assist/Advanced
parking assist .....................174
Lane departure warning .....188
Eco button for stop-start
system ................................. 139
Electronic Stability Control and Traction Control ...........154
Sport mode ......................... 156
21 Manual transmission ..........150
Automatic transmission ......147
22 Electric parking brake .........151
23 Selective ride control ..........15524Ignition switch .....................134
25 Steering wheel adjustment ..79
26 Horn ..................................... 80
27 Storage ................................. 68
28 Bonnet release lever ..........203
29 Light switch ........................ 113
Headlight range
adjustment ......................... 115
Front/rear fog lights ............119
Instrument illumination .......120
Page 26 of 271
24Keys, doors and windowsopened. A precondition is that the
setting is activated in the vehicle
personalisation 3 105.
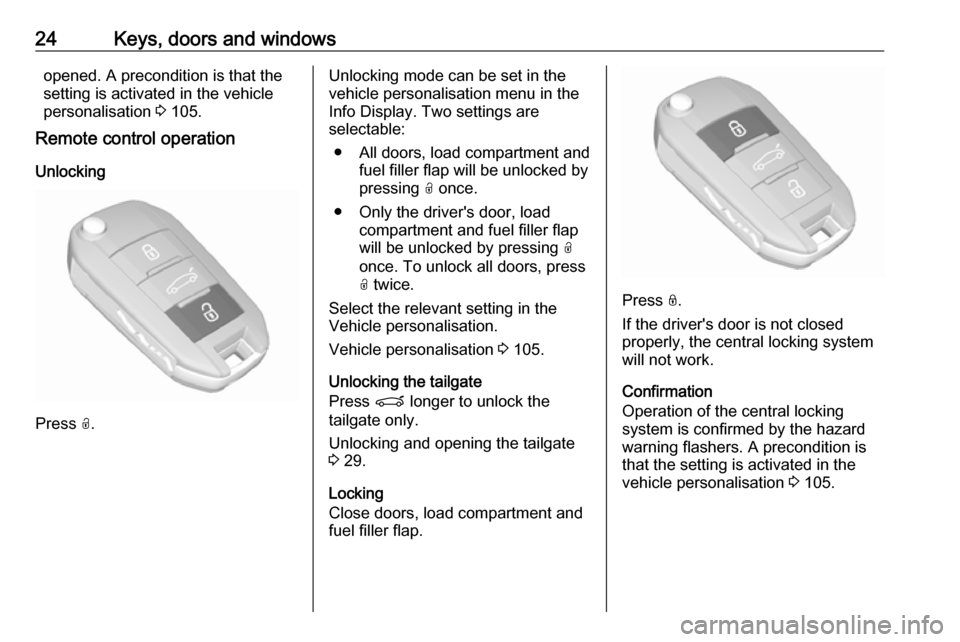
Remote control operation
Unlocking
Press O.
Unlocking mode can be set in the
vehicle personalisation menu in the
Info Display. Two settings are
selectable:
● All doors, load compartment and fuel filler flap will be unlocked by
pressing O once.
● Only the driver's door, load compartment and fuel filler flap
will be unlocked by pressing O
once. To unlock all doors, press O twice.
Select the relevant setting in the Vehicle personalisation.
Vehicle personalisation 3 105.
Unlocking the tailgate
Press P longer to unlock the
tailgate only.
Unlocking and opening the tailgate
3 29.
Locking
Close doors, load compartment and
fuel filler flap.
Press N.
If the driver's door is not closed
properly, the central locking system
will not work.
Confirmation
Operation of the central locking
system is confirmed by the hazard
warning flashers. A precondition is
that the setting is activated in the
vehicle personalisation 3 105.
Page 45 of 271

Keys, doors and windows43After step 3 the sunblind is in
initialising mode without safety
function.
4. Press N gently to the first detent
at the rear until the sunblind is
completely opened.
5. Press N gently to the first detent
at the front until the sunblind is
completely closed.
After this procedure, the sunblind is
initialised with safety function
activated.
When N is pressed firmly to the
second detent during initialising, the
procedure is cancelled.
Page 88 of 271
86Instruments and controlsInductive charging9Warning
Inductive charging can affect the
operation of implanted
pacemakers or other medical
devices. If applicable, seek
medical advice before using the
inductive charging device.
9 Warning
Remove any metal objects from
the charging device before
charging a mobile phone, as these
objects could become very hot.
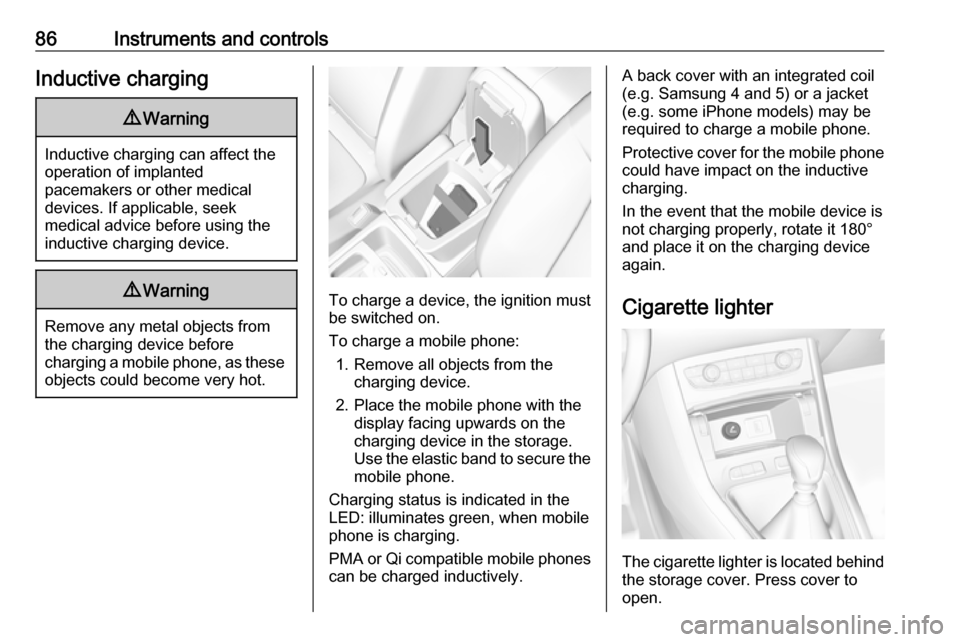
To charge a device, the ignition must
be switched on.
To charge a mobile phone: 1. Remove all objects from the charging device.
2. Place the mobile phone with the display facing upwards on the
charging device in the storage.
Use the elastic band to secure the
mobile phone.
Charging status is indicated in the LED: illuminates green, when mobile
phone is charging.
PMA or Qi compatible mobile phones can be charged inductively.
A back cover with an integrated coil
(e.g. Samsung 4 and 5) or a jacket
(e.g. some iPhone models) may be
required to charge a mobile phone.
Protective cover for the mobile phone
could have impact on the inductive
charging.
In the event that the mobile device is
not charging properly, rotate it 180°
and place it on the charging device
again.
Cigarette lighter
The cigarette lighter is located behind
the storage cover. Press cover to open.
Page 119 of 271
Lighting117Particular LEDs, based on steering
angle and speed, are additionally
triggered to improve lighting in
curves. This function is activated at
speeds from 25 mph to 43 mph.
High beam assist This feature allows the high beam to
function as main driving light at night.
The camera in the windscreen
detects the lights of oncoming or
preceding vehicles. Each LED on
right or left side can be triggered or
faded out particularly according to the traffic situation. This gives the best
light distribution without dazzling
other road users. Once activated,
high beam assist remains active and
switches high beam on and off
depending on surrounding
conditions. The latest setting of the
high beam assist will remain after the ignition is switched on again.High beam assist includes a special
motorway mode. When driving faster
than 71 mph on motorways, the light
beam becomes smaller to avoid
dazzling of oncoming traffic. When
following vehicles ahead or passing,
dazzling for these vehicles is
reduced.
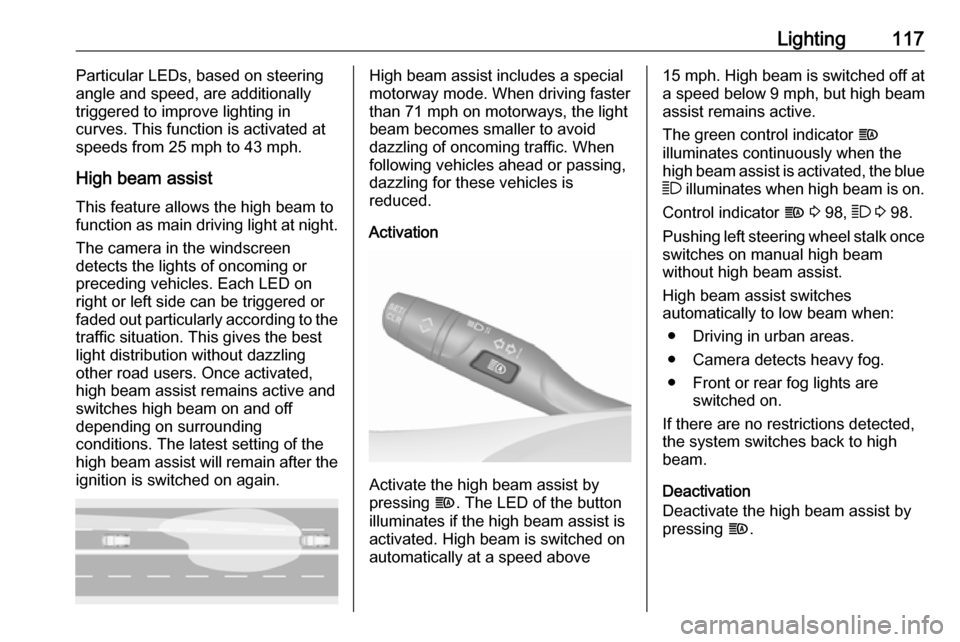
Activation
Activate the high beam assist by
pressing f. The LED of the button
illuminates if the high beam assist is
activated. High beam is switched on automatically at a speed above
15 mph . High beam is switched off at
a speed below 9 mph, but high beam
assist remains active.
The green control indicator f
illuminates continuously when the
high beam assist is activated, the blue 7 illuminates when high beam is on.
Control indicator f 3 98, 7 3 98.
Pushing left steering wheel stalk once
switches on manual high beam
without high beam assist.
High beam assist switches
automatically to low beam when:
● Driving in urban areas.
● Camera detects heavy fog.
● Front or rear fog lights are switched on.
If there are no restrictions detected, the system switches back to high
beam.
Deactivation
Deactivate the high beam assist by
pressing f.
Page 127 of 271
Climate control125Heating will not be fully effective until
the engine has reached normal
operating temperature.
Air distributionl:to windscreen and front door
windowsM:to head area via adjustable air
ventsK:to foot well and windscreen
All combinations are possible.
Fan speed
Adjust the air flow by turning Z to the
desired speed.
clockwise:increaseanticlockwise:decreaseCooling A/C
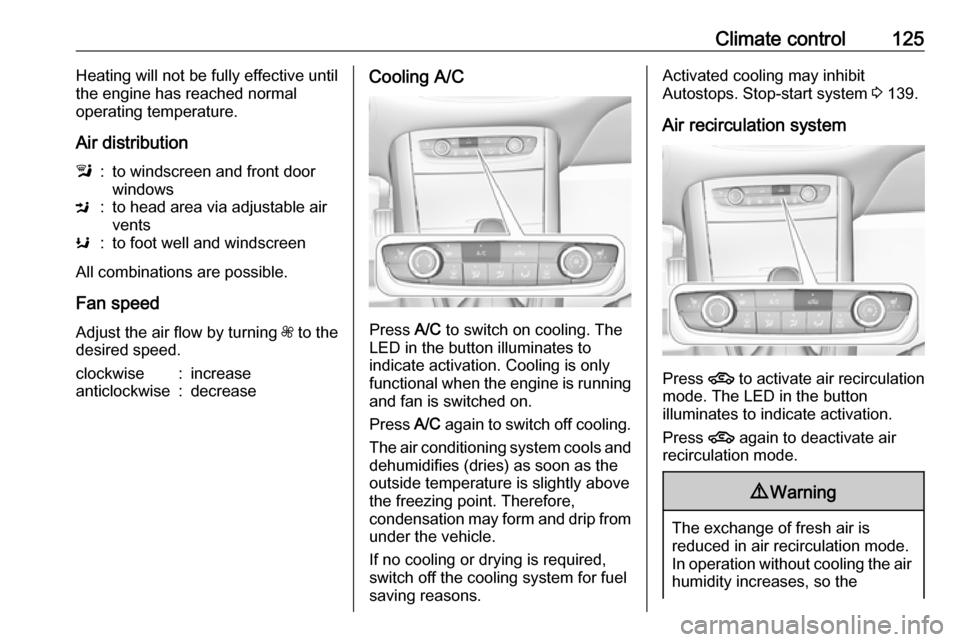
Press A/C to switch on cooling. The
LED in the button illuminates to
indicate activation. Cooling is only
functional when the engine is running and fan is switched on.
Press A/C again to switch off cooling.
The air conditioning system cools and
dehumidifies (dries) as soon as the
outside temperature is slightly above
the freezing point. Therefore,
condensation may form and drip from
under the vehicle.
If no cooling or drying is required,
switch off the cooling system for fuel
saving reasons.
Activated cooling may inhibit
Autostops. Stop-start system 3 139.
Air recirculation system
Press 4 to activate air recirculation
mode. The LED in the button
illuminates to indicate activation.
Press 4 again to deactivate air
recirculation mode.
9 Warning
The exchange of fresh air is
reduced in air recirculation mode.
In operation without cooling the air humidity increases, so the
Page 130 of 271
128Climate controlAutomatic mode AUTO
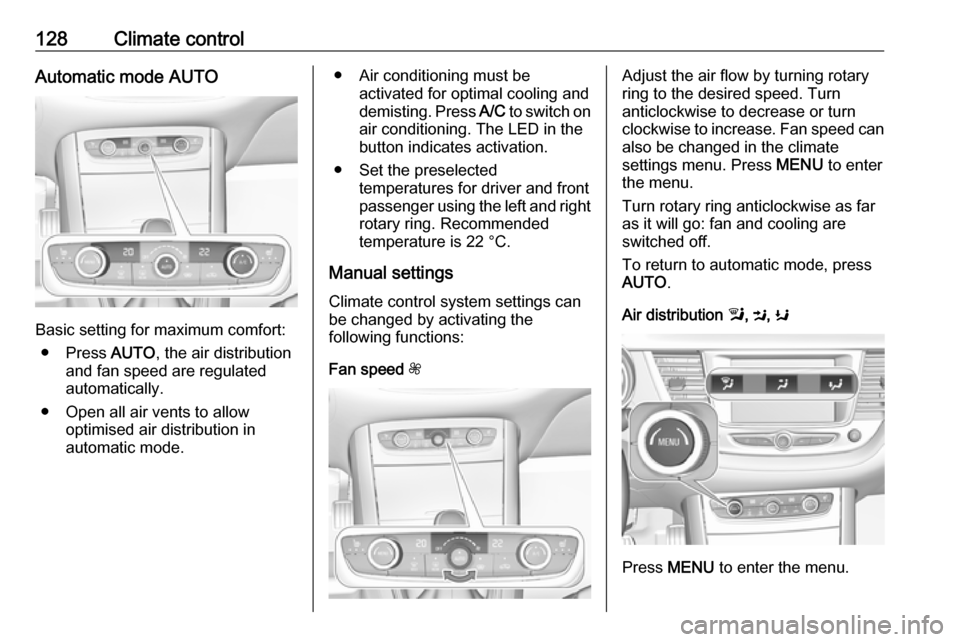
Basic setting for maximum comfort:● Press AUTO, the air distribution
and fan speed are regulated
automatically.
● Open all air vents to allow optimised air distribution in
automatic mode.
● Air conditioning must be activated for optimal cooling and
demisting. Press A/C to switch on
air conditioning. The LED in the
button indicates activation.
● Set the preselected temperatures for driver and front
passenger using the left and right rotary ring. Recommended
temperature is 22 °C.
Manual settings Climate control system settings can
be changed by activating the
following functions:
Fan speed ZAdjust the air flow by turning rotary
ring to the desired speed. Turn
anticlockwise to decrease or turn
clockwise to increase. Fan speed can also be changed in the climate
settings menu. Press MENU to enter
the menu.
Turn rotary ring anticlockwise as far
as it will go: fan and cooling are
switched off.
To return to automatic mode, press
AUTO .
Air distribution l, M , K
Press MENU to enter the menu.
Page 137 of 271
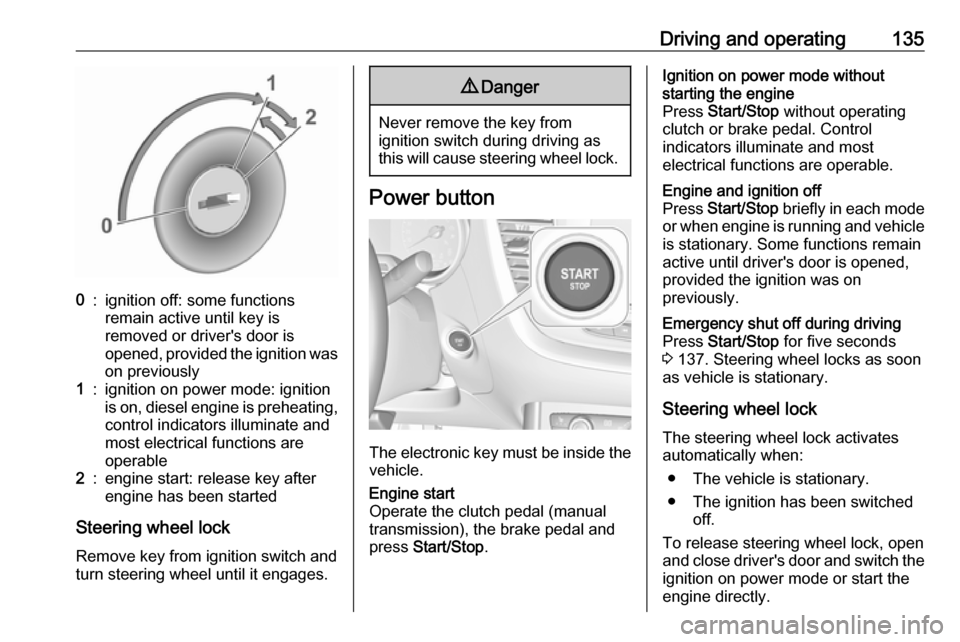
Driving and operating1350:ignition off: some functions
remain active until key is
removed or driver's door is
opened, provided the ignition was
on previously1:ignition on power mode: ignition
is on, diesel engine is preheating, control indicators illuminate and
most electrical functions are
operable2:engine start: release key after
engine has been started
Steering wheel lock
Remove key from ignition switch and
turn steering wheel until it engages.
9 Danger
Never remove the key from
ignition switch during driving as
this will cause steering wheel lock.
Power button
The electronic key must be inside the
vehicle.
Engine start
Operate the clutch pedal (manual
transmission), the brake pedal and
press Start/Stop .Ignition on power mode without
starting the engine
Press Start/Stop without operating
clutch or brake pedal. Control
indicators illuminate and most
electrical functions are operable.Engine and ignition off
Press Start/Stop briefly in each mode
or when engine is running and vehicle
is stationary. Some functions remain
active until driver's door is opened,
provided the ignition was on
previously.Emergency shut off during driving
Press Start/Stop for five seconds
3 137. Steering wheel locks as soon
as vehicle is stationary.
Steering wheel lock
The steering wheel lock activates
automatically when:
● The vehicle is stationary.
● The ignition has been switched off.
To release steering wheel lock, open
and close driver's door and switch the ignition on power mode or start the
engine directly.
Page 142 of 271

140Driving and operatingIndication
An Autostop is indicated by control
indicator D.
During an Autostop, the heating and
brake performance will be
maintained.
Conditions for an Autostop
The stop-start system checks if each
of the following conditions is fulfilled.
● The stop-start system is not manually deactivated.
● The driver's door is closed or the driver's seat belt is fastened.
● The vehicle battery is sufficiently charged and in good condition.
● The engine is warmed up.
● The engine coolant temperature is not too high.
● The engine exhaust temperatureis not too high, e.g. after driving
with high engine load.
● The ambient temperature is not too low.
● The climate control system allows an Autostop.
● The brake vacuum is sufficient.
● The self-cleaning function of the diesel particle filter is not active.
● The vehicle was driven at least at
walking speed since the last
Autostop.
Otherwise an Autostop will be
inhibited.
Notice
The Autostop may be inhibited for
several hours after a battery
replacement or reconnection.
Certain settings of the climate control
system may inhibit an Autostop.
Climate control 3 124.
Immediately after higher speed
driving an Autostop may be inhibited.
New vehicle running-in 3 134.Vehicle battery discharge protection
To ensure reliable engine restarts,
several vehicle battery discharge
protection features are implemented
as part of the stop-start system.
Power saving measures
During an Autostop, several electrical
features such as auxiliary electric
heater or rear window heating are
disabled or switched to a power
saving mode. The fan speed of the
climate control system is reduced to
save power.
Restart of the engine by the driver
Vehicles with manual transmission
Depress the clutch pedal without
depressing the brake pedal to restart
the engine.