instrument panel VAUXHALL GRANDLAND X 2018.5 Owner's Manual
[x] Cancel search | Manufacturer: VAUXHALL, Model Year: 2018.5, Model line: GRANDLAND X, Model: VAUXHALL GRANDLAND X 2018.5Pages: 271, PDF Size: 7.61 MB
Page 12 of 271
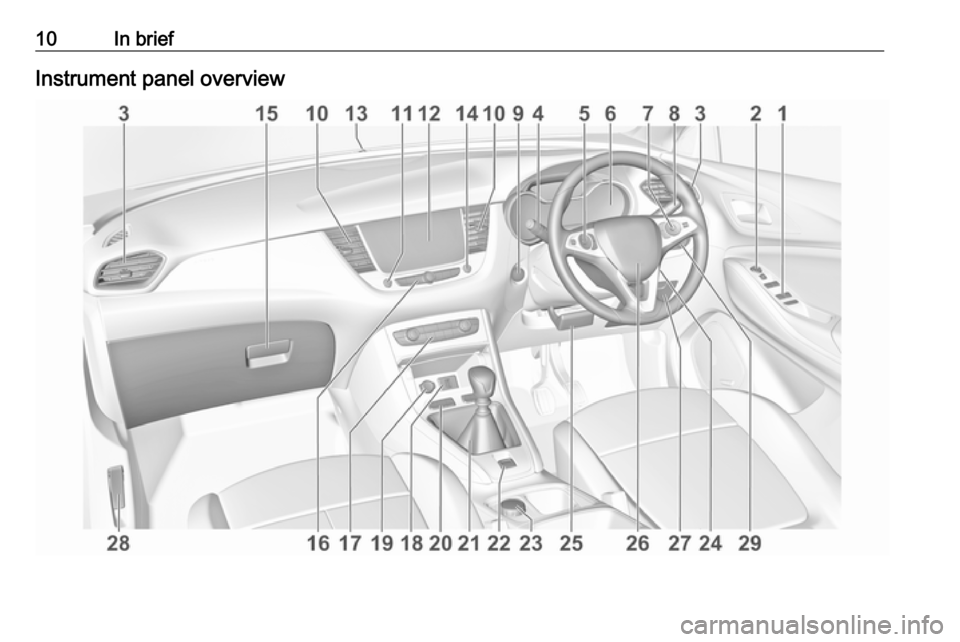
10In briefInstrument panel overview
Page 57 of 271
Seats, restraints55Airbag system
The airbag system consists of a
number of individual systems
depending on the scope of
equipment.
When triggered the airbags inflate
within milliseconds. They also deflate
so quickly that it is often unnoticeable during the collision.9 Warning
The airbag system deploys in an
explosive manner, repairs must be performed by skilled personnel
only.
9 Warning
Adding accessories that change
the vehicle's frame, bumper
system, height, front end or side
sheet metal, may keep the airbag
system from working properly. The operation of the airbag system can
also be affected by changing any
parts of the front seats, seat belts,
airbag sensing and diagnostic
module, steering wheel,
instrument panel, inner door seals including the speakers, any of the
airbag modules, ceiling or pillar
trim, front sensors, side impact
sensors or airbag wiring.
Notice
The airbag systems and belt
pretensioner control electronics are
located in the centre console area.
Do not put any magnetic objects in
this area.
Do not affix any objects onto the
airbag covers and do not cover them with other materials. Have damagedcovers replaced by a workshop.
Each airbag is triggered only once.
Have deployed airbags replaced by
a workshop. Furthermore, it may be
necessary to have the steering
wheel, the instrument panel, parts of
the panelling, the door seals,
handles and the seats replaced.
Do not make any modifications to
the airbag system as this will
invalidate the vehicle operating
permit.
Control indicator v for airbag systems
3 94.
Child restraint systems on front
passenger seat with airbag
systems
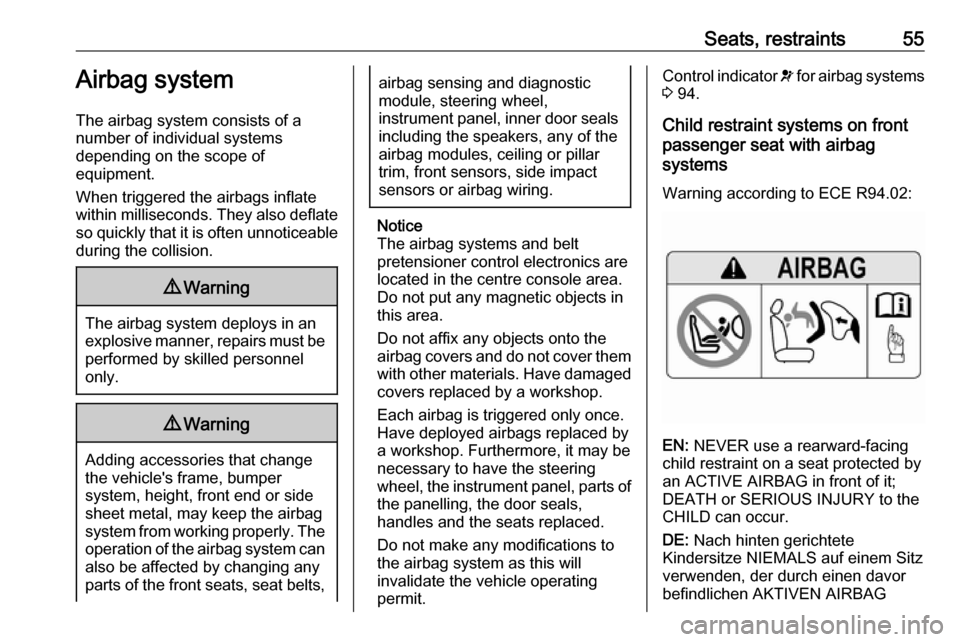
Warning according to ECE R94.02:
EN: NEVER use a rearward-facing
child restraint on a seat protected by
an ACTIVE AIRBAG in front of it;
DEATH or SERIOUS INJURY to the
CHILD can occur.
DE: Nach hinten gerichtete
Kindersitze NIEMALS auf einem Sitz
verwenden, der durch einen davor
befindlichen AKTIVEN AIRBAG
Page 60 of 271
58Seats, restraintsET: ÄRGE kasutage tahapoole
suunatud lapseturvaistet istmel, mille
ees on AKTIIVSE TURVAPADJAGA
kaitstud iste, sest see võib
põhjustada LAPSE SURMA või
TÕSISE VIGASTUSE.
MT: QATT tuża trażżin għat-tfal li
jħares lejn in-naħa ta’ wara fuq sit
protett b’AIRBAG ATTIV quddiemu;
dan jista’ jikkawża l-MEWT jew
ĠRIEĦI SERJI lit-TFAL.
GA: Ná húsáid srian sábháilteachta
linbh cúil RIAMH ar shuíochán a
bhfuil mála aeir ag feidhmiú os a
chomhair. Tá baol BÁIS nó GORTÚ
DONA don PHÁISTE ag baint leis.
Beyond the warning required by
ECE R94.02, for safety reasons a
forward-facing child restraint system
must only be used subject to the
instructions and restrictions in the
table 3 64.
The airbag label is located on both
sides of the front passenger sun visor.
Airbag deactivation 3 60.Front airbag system
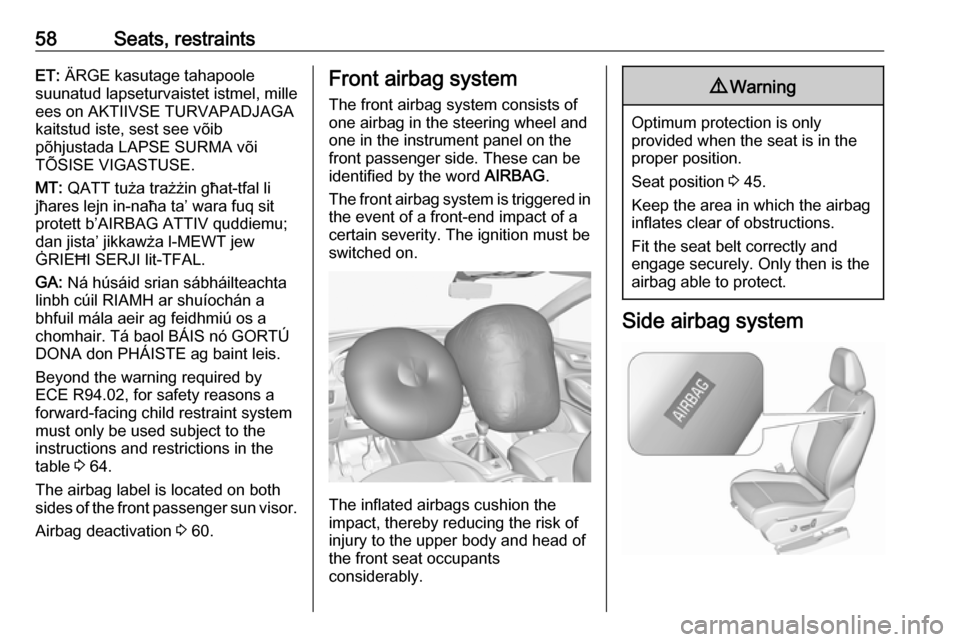
The front airbag system consists of
one airbag in the steering wheel and
one in the instrument panel on the
front passenger side. These can be
identified by the word AIRBAG.
The front airbag system is triggered in
the event of a front-end impact of a
certain severity. The ignition must be
switched on.
The inflated airbags cushion the
impact, thereby reducing the risk of
injury to the upper body and head of
the front seat occupants
considerably.
9 Warning
Optimum protection is only
provided when the seat is in the
proper position.
Seat position 3 45.
Keep the area in which the airbag
inflates clear of obstructions.
Fit the seat belt correctly and
engage securely. Only then is the
airbag able to protect.
Side airbag system
Page 78 of 271
76StorageVehicles without roof railing
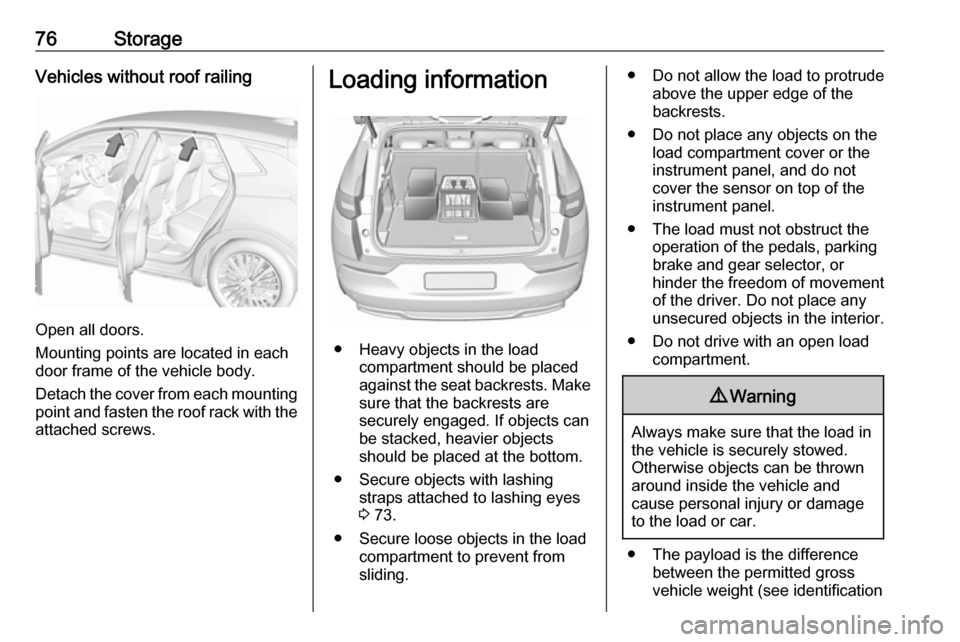
Open all doors.
Mounting points are located in each
door frame of the vehicle body.
Detach the cover from each mounting
point and fasten the roof rack with the attached screws.
Loading information
● Heavy objects in the load compartment should be placed
against the seat backrests. Make
sure that the backrests are
securely engaged. If objects can
be stacked, heavier objects
should be placed at the bottom.
● Secure objects with lashing straps attached to lashing eyes
3 73.
● Secure loose objects in the load compartment to prevent from
sliding.
● Do not allow the load to protrude above the upper edge of the
backrests.
● Do not place any objects on the load compartment cover or theinstrument panel, and do notcover the sensor on top of the
instrument panel.
● The load must not obstruct the operation of the pedals, parking
brake and gear selector, or
hinder the freedom of movement of the driver. Do not place any
unsecured objects in the interior.
● Do not drive with an open load compartment.9Warning
Always make sure that the load in
the vehicle is securely stowed.
Otherwise objects can be thrown
around inside the vehicle and
cause personal injury or damage
to the load or car.
● The payload is the difference between the permitted gross
vehicle weight (see identification
Page 104 of 271
102Instruments and controlsBlank page
No trip / fuel information is displayed.
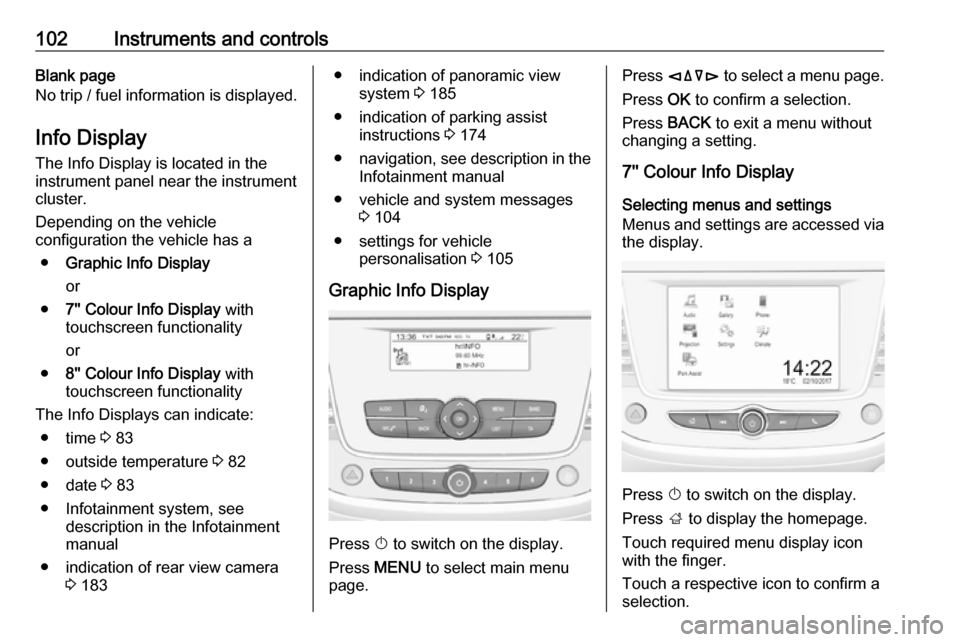
Info Display The Info Display is located in theinstrument panel near the instrument
cluster.
Depending on the vehicle
configuration the vehicle has a
● Graphic Info Display
or
● 7'' Colour Info Display with
touchscreen functionality
or
● 8'' Colour Info Display with
touchscreen functionality
The Info Displays can indicate: ● time 3 83
● outside temperature 3 82
● date 3 83
● Infotainment system, see description in the Infotainment
manual
● indication of rear view camera 3 183● indication of panoramic view
system 3 185
● indication of parking assist instructions 3 174
● navigation, see description in the
Infotainment manual
● vehicle and system messages 3 104
● settings for vehicle personalisation 3 105
Graphic Info Display
Press X to switch on the display.
Press MENU to select main menu
page.
Press èäåé to select a menu page.
Press OK to confirm a selection.
Press BACK to exit a menu without
changing a setting.
7'' Colour Info Display
Selecting menus and settings
Menus and settings are accessed via
the display.
Press X to switch on the display.
Press ; to display the homepage.
Touch required menu display icon
with the finger.
Touch a respective icon to confirm a
selection.
Page 115 of 271
Lighting113LightingExterior lighting.......................... 113
Light switch .............................. 113
Automatic light control .............114
High beam ............................... 114
Headlight flash ......................... 114
Headlight range adjustment ....115
Daytime running lights .............115
LED headlights ........................ 115
Hazard warning flashers ..........118
Turn lights ................................ 118
Front fog lights ......................... 119
Rear fog light ........................... 119
Parking lights ........................... 119
Reversing lights .......................120
Misted light covers ...................120
Interior lighting ........................... 120
Instrument panel illumination control ..................................... 120
Interior lights ............................ 120
Reading lights .......................... 121
Sunvisor lights ......................... 121
Lighting features ........................121
Centre console lighting ............121
Entry lighting ............................ 121Exit lighting.............................. 122
Battery discharge protection ....122Exterior lighting
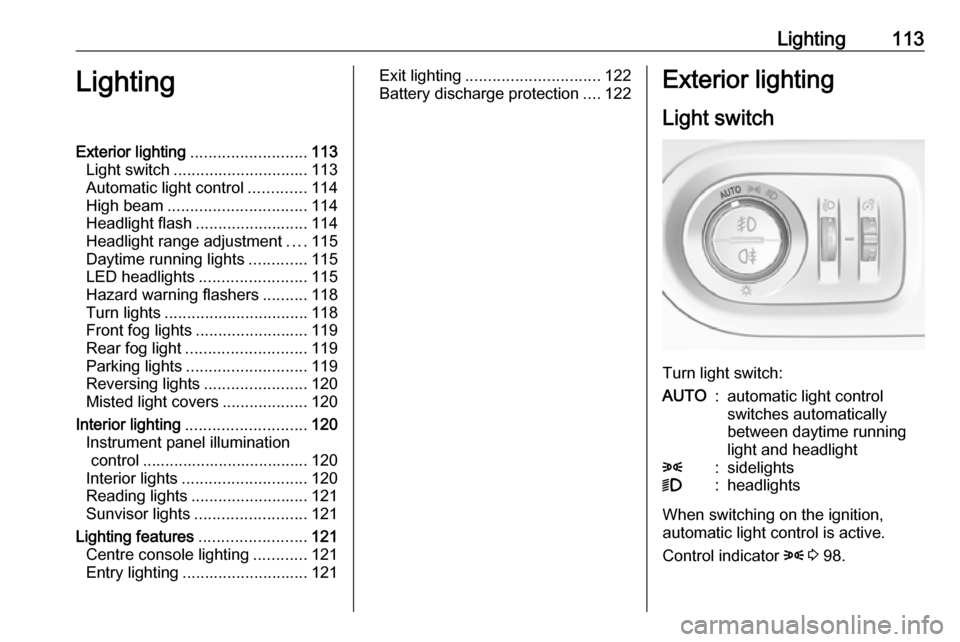
Light switch
Turn light switch:
AUTO:automatic light control
switches automatically
between daytime running
light and headlight8:sidelights9:headlights
When switching on the ignition,
automatic light control is active.
Control indicator 8 3 98.
Page 122 of 271
120LightingReversing lights
The reversing light comes on when
the ignition is on and reverse gear is
selected.
Misted light covers
The inside of the light housing may
mist up briefly in poor, wet and cold weather conditions, in heavy rain or
after washing. The mist disappears
quickly by itself; to help switch on the
headlights.Interior lighting
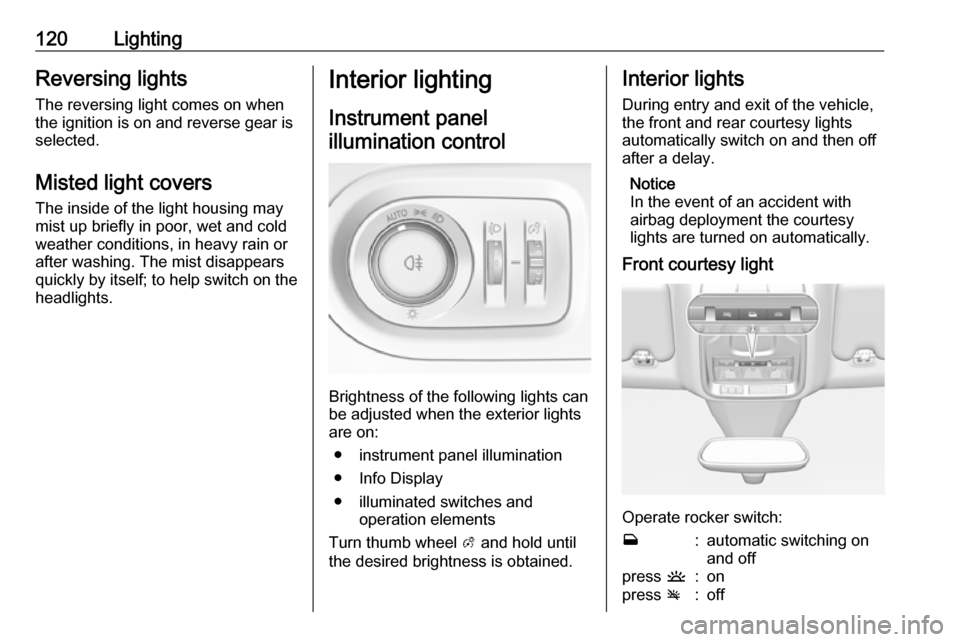
Instrument panelillumination control
Brightness of the following lights can
be adjusted when the exterior lights
are on:
● instrument panel illumination
● Info Display
● illuminated switches and operation elements
Turn thumb wheel A and hold until
the desired brightness is obtained.
Interior lights
During entry and exit of the vehicle,
the front and rear courtesy lights
automatically switch on and then off
after a delay.
Notice
In the event of an accident with
airbag deployment the courtesy
lights are turned on automatically.
Front courtesy light
Operate rocker switch:
w:automatic switching on
and offpress u:onpress v:off
Page 133 of 271
Climate control131Notice
If à is pressed while the engine is
running, an Autostop will be inhibited
until à is pressed again.
If à is pressed while the engine is in
an Autostop, the engine will restart
automatically.
Stop-start system 3 139.
Deactivation of electronic climate control system
Cooling, fan and automatic mode can
be switched off by turning the rotary
ring around the AUTO button
anticlockwise.
Activation by switching on the fan or
pressing AUTO.
Auxiliary heater
Air heater Quickheat is an electric auxiliary air
heater which automatically warms up
the passenger compartment more
quickly.Air vents
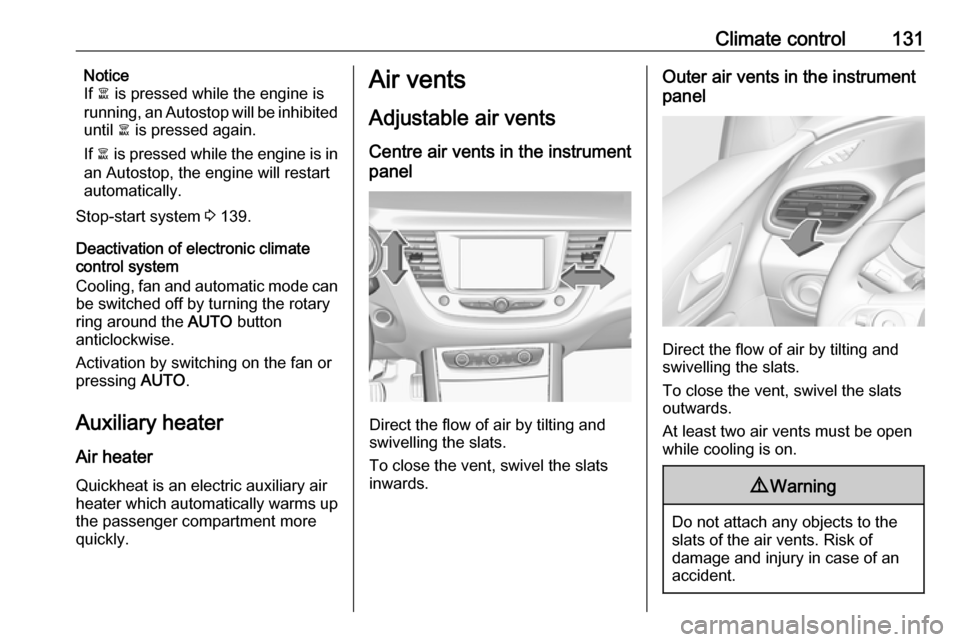
Adjustable air vents Centre air vents in the instrument
panel
Direct the flow of air by tilting and
swivelling the slats.
To close the vent, swivel the slats
inwards.
Outer air vents in the instrument
panel
Direct the flow of air by tilting and
swivelling the slats.
To close the vent, swivel the slats
outwards.
At least two air vents must be open
while cooling is on.
9 Warning
Do not attach any objects to the
slats of the air vents. Risk of
damage and injury in case of an
accident.
Page 170 of 271

168Driving and operatingtake action and depress the brake
pedal, if you need to brake more
quickly.
Hill considerations9 Warning
Do not use the adaptive cruise
control on steep hill roads.
System performance on hills depends
on vehicle speed, vehicle load, traffic
conditions and the road gradient. It
may not detect a vehicle in your path
while driving on hills. On steep hills,
you may have to use the accelerator
pedal to maintain your vehicle speed.
When going downhill you may have to brake to maintain or reduce your
speed.
Note that applying the brake
deactivates the system.
Radar unit
The radar unit is located in the middle of the front bumper.
9 Warning
The radar unit was aligned
carefully during manufacture.
Therefore, in the event of a front-
end impact, do not use the system. The front bumper may appear to
be intact, however the sensor
behind may be affected and react
incorrectly. After an accident,
consult a workshop to verify and
adjust the radar unit position.
Fault
In the event of a fault with the adaptive
cruise control, you are alerted by the
illumination of a warning light and the display of a message in the
instrument panel, accompanied by an
audible signal.
The adaptive cruise control may not
operate correctly if traffic signs do not comply with the Vienna Convention
on Road Signs and Signals.
Have the system checked by a dealer
or a qualified workshop.
As a safety measure, do not use the
system if the brake lights are faulty. Do not use the system if the front
bumper is damaged.
Forward collision alertThe forward collision alert may help to
avoid or reduce the harm caused by
front-end crashes.
The forward collision alert uses the
front camera in the windscreen and a radar unit located behind the front
bumper of the vehicle to detect a
vehicle directly ahead, in your path.
Page 185 of 271

Driving and operating183The LED comes on after a delay when
passing another vehicle slowly.
Operation conditions
The following conditions must be
fulfilled for proper operation:
● all vehicles are moving in the same direction and in adjacent
lanes
● the speed of your vehicle is between 7 and 87 mph
● passing a vehicle with a speed difference of less than 6 mph
● another vehicle is passing with a speed difference of less than
15 mph
● the traffic flow is normal
● driving on a straight or slightly curved road
● the vehicle is not pulling a trailer
No alert will be given in the following
situations:
● in the presence of non-moving objects, e.g. parked vehicles,
barriers, street lamps, road signs
● with vehicles moving in the opposite direction● driving on a winding road or a sharp corner
● when passing or being passed by
a very long vehicle, e.g. lorry,
coach, which is at the same time
detected at the rear in the blind spot angle and present in the
driver's forward field of vision
● in very heavy traffic, vehicles detected in front and behind are
confused with a lorry or a
stationary object
● when passing too quickly
Deactivation
The system is deactivated in the
vehicle personalisation 3 105. B
extinguishes in the instrument cluster. Additionally, an acoustic signal
sounds.
The state of the system is stored when switching off the ignition.
The system is automatically
deactivated when towing an
electrically connected trailer.
Due to adverse weather conditions
such as heavy rain, false detections
may occur.Fault
In the event of a fault, B flashes for a
few moments in the instrument panel,
accompanied by R and a display
message. Contact a dealer or a
qualified workshop to have the
system checked.
Rear view camera
The rear view camera assists the
driver when reversing by displaying a view of the area behind the vehicle.
The view of the camera is displayed
in the Info Display.9 Warning
The rear view camera does not
replace driver vision. Note that
objects that are outside the
camera's field of view and the