park assist VAUXHALL GRANDLAND X 2018.75 User Guide
[x] Cancel search | Manufacturer: VAUXHALL, Model Year: 2018.75, Model line: GRANDLAND X, Model: VAUXHALL GRANDLAND X 2018.75Pages: 271, PDF Size: 7.61 MB
Page 137 of 271

Driving and operating135Driving hints
Control of the vehicle
Never coast with engine not
running
Many systems will not function in this
situation ( e.g. brake servo unit, power
steering). Driving in this manner is a danger to yourself and others.
All systems function during an
Autostop.
Stop-start system 3 139.
Idle boost
If charging of the vehicle battery is
required due to battery condition, the
power output of the generator must be increased. This will be achieved by an idle boost which may be audible.
A message appears in the Driver
Information Centre.
Pedals
To ensure the pedal travel is
uninhibited, there must be no mats in
the area of the pedals.Use only floor mats, which fit properly and are fixed by the retainers on the
driver side.
Steering If power steering assist is lost
because the engine stops or due to a system malfunction, the vehicle can
be steered but may require increased
effort.Starting and operating
New vehicle running-in Do not brake unnecessarily hard for
the first few journeys.
During the first drive, smoke may
occur because of wax and oil
evaporating off the exhaust system. Park the vehicle in the open for a
while after the first drive and avoid
inhaling the fumes.
During the running-in period, fuel and engine oil consumption may be
higher.
Additionally, the cleaning process of
the exhaust filter may take place more
often.
Exhaust filter 3 143.
Autostop may be inhibited to allow
charging of the vehicle battery.
Ignition switch positions Turn key:
Page 148 of 271
146Driving and operatingstations and can be purchased e.g.
at Vauxhall dealers and other retail
outlets.
Since AdBlue has a limited
durability, check the date of expiry
before refilling.
Notice
Refill the tank to a level of at least
5 l to ensure that the new AdBlue
level is being detected.
In case AdBlue refill is not
successfully detected:
1. Continuously drive the vehicle for 10 min making sure that
vehicle speed is always higher
than 12 mph.
2. If AdBlue refill is detected successfully, AdBlue supply-
driven warnings or limitations will
disappear.
If AdBlue refill is still not detected,
seek the assistance of a workshop.
If AdBlue must be refilled at
temperatures below -11 °C, the
refilling of AdBlue may not be
detected by the system. In thisevent, park the vehicle in a space
with a higher ambient temperature
until AdBlue is liquified.
Notice
When unscrewing the protective cap from the filler neck, ammonia fumesmay emerge. Do not inhale as the
fumes have a pungent smell. The
fumes are not harmful by inhalation.
The AdBlue tank should be filled
completely. This must be done if the
warning message regarding
prevention of an engine restart is
already displayed.
The vehicle must be parked on a level surface.
The filler neck for AdBlue is located behind the fuel filler flap, which is
located at right rear side of the
vehicle.
The fuel filler flap can only be opened
if the vehicle is unlocked.
1. Remove key from ignition switch.2. Close all doors to avoid ammonia fumes entering the interior of the
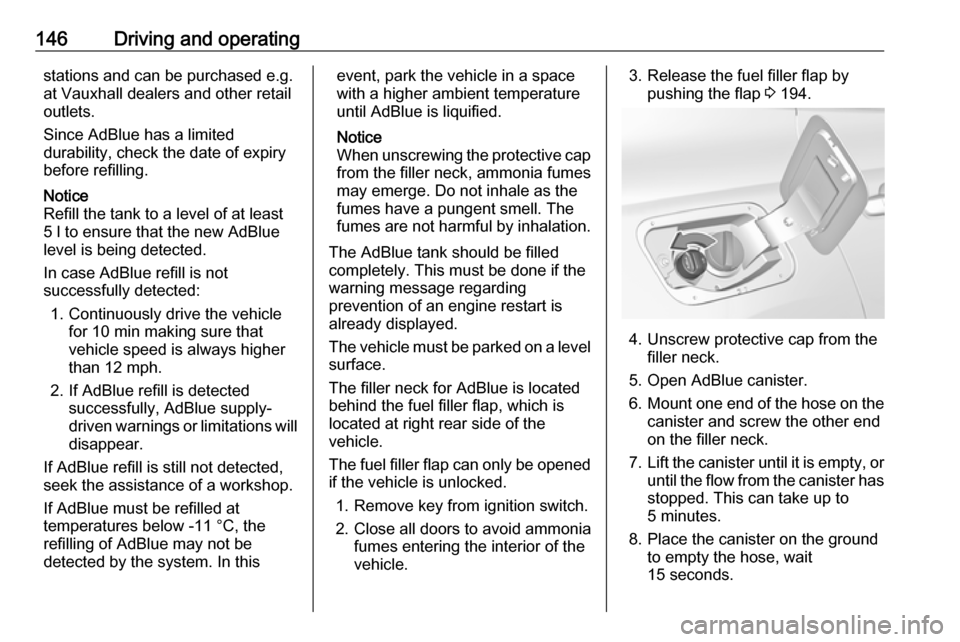
vehicle.3. Release the fuel filler flap by pushing the flap 3 194.
4. Unscrew protective cap from the
filler neck.
5. Open AdBlue canister.
6. Mount one end of the hose on the
canister and screw the other end
on the filler neck.
7. Lift the canister until it is empty, or
until the flow from the canister has stopped. This can take up to
5 minutes.
8. Place the canister on the ground to empty the hose, wait
15 seconds.
Page 153 of 271
Driving and operating151Brakes
The brake system comprises two
independent brake circuits.
If a brake circuit fails, the vehicle can
still be braked using the other brake
circuit. However, braking effect is
achieved only when the brake pedal
is depressed firmly. Considerably
more force is needed for this. The
braking distance is extended. Seek the assistance of a workshop before
continuing the journey.
When the engine is not running, the
support of the brake servo unit
disappears once the brake pedal has
been depressed once or twice.
Braking effect is not reduced, but
braking requires significantly greater
force. It is especially important to bear this in mind when being towed.
Control indicator m 3 95.
Antilock brake system
Antilock brake system (ABS)
prevents the wheels from locking.ABS starts to regulate brake pressure as soon as a wheel shows a tendency to lock. The vehicle remains
steerable, even during hard braking.
ABS control is made apparent
through a pulse in the brake pedal
and the noise of the regulation
process.
For optimum braking, keep the brake
pedal fully depressed throughout the
braking process, despite the fact that
the pedal is pulsating. Do not reduce
the pressure on the pedal.
When braking in an emergency, the
hazard warning flashers are switched
on automatically depending on the
force of deceleration. They are
switched off automatically the first
time you accelerate.
After starting off, the system performs a self-test which may be audible.
Control indicator u 3 96.
Fault9 Warning
If there is a fault in the ABS, the
wheels may be liable to lock due
to braking that is heavier than
normal. The advantages of ABS are no longer available. During
hard braking, the vehicle can no longer be steered and may
swerve.
Have the cause of the fault remedied
by a workshop.
Parking brake
9 Warning
Before leaving the vehicle, check
parking brake status. Control
indicator m must illuminate
constantly.
Page 155 of 271

Driving and operating153Automatic operation
Automatic operation includes
automatic application and automatic
release of the electric parking brake.
The electric parking brake can also be
applied or released manually by using
the switch m.
Automatic application: ● The electric parking brake is automatically applied when the
vehicle is stationary and the
ignition is switched off.
● j illuminates in the instrument
cluster and a display message
pops up to confirm the
application.
Automatic release: ● Parking brake releases automatically after moving off.
● j extinguishes in the instrument
cluster and a display message
pops up to confirm the release.
If the vehicle is equipped with an
automatic transmission and the brake
is not released automatically, make
sure the front doors are correctly
closed.Deactivation of automatic operation 1. Start the engine.
2. If the parking brake is released, apply the parking brake pulling theswitch m.
3. Take your foot off the brake pedal.
4. Press the switch m for at least
10 seconds and maximum
15 seconds.
5. Release the switch m.
6. Press and hold the brake pedal.
7. Pull the switch m for 2 seconds.
The deactivation of the automatic
operation of the electric parking brake
is confirmed by o illuminating in the
instrument cluster 3 95. The electric
parking brake can only be applied and released manually.
To reactivate the automatic
operation, repeat the steps described above.
Functionality check
When the vehicle is not moving, the
electric parking brake might be
applied automatically. This is done to
check the system.Fault
Failure mode of electric parking brake
is indicated by a control indicator j
and by a vehicle message which is
displayed in the Driver Information Centre.
Vehicle messages 3 104.
Apply electric parking brake: pull and hold the switch m for more than
5 seconds. If control indicator m
illuminates, electric parking brake is
applied.
Release electric parking brake: push and hold the switch m for more than
2 seconds. If control indicator m
extinguishes, electric parking brake is
released.
Control indicator m flashes: electric
parking brake is not fully applied or
released. When continuously
flashing, release electric parking
brake and retry applying.
Brake assist If brake pedal is depressed quickly
and forcefully, maximum brake force
is automatically applied.
Page 174 of 271
172Driving and operatinghappens, emergency automatic
braking may engage the electric
parking brake to hold the vehicle at a
stop. To release press the electric
parking brake button or firmly press
the accelerator pedal.9 Warning
Emergency automatic braking is
an emergency crash preparation
feature and is not designed to
avoid crashes. Do not rely on the
system to brake the vehicle.
Emergency automatic braking will
not brake outside of its operating speed range and only responds to
detected vehicles and
pedestrians.
Forward looking brake assist
In addition to the brake preparation
system and emergency automatic
braking, the forward looking brake
assist function makes the brake assist more sensitive. Therefore, pressing
the brake pedal less strongly results
in immediate hard braking. This
function helps the driver brake
quicker and harder before the
imminent collision.9 Warning
Active emergency braking is not
designed to apply hard
autonomous braking or to
automatically avoid a collision. It is designed to reduce the vehicle
speed before a collision. It may not
react to animals. After a sudden
lane change, the system needs a
certain time to detect the next
preceding vehicle.
The complete attention of the
driver is always required while
driving. The driver must always be
ready to take action and apply the brakes and steer to avoid
collisions.
The system is designed to work with
all occupants wearing their seat belts.
Intelligent brake assist
If the vehicle is equipped with radar
sensor, intelligent brake assist may
be available. Intelligent brake assist
provides a boost to braking when the
brake pedal is quickly applied. The
braking is based on the speed of
approach and distance to a vehicle
ahead.
Minor brake pedal pulsations or pedal movement during this time is normal
and the brake pedal should continue to be applied as needed. Intelligent
brake assist will automatically
disengage only when the brake pedal is released.9 Warning
Intelligent brake assist may
increase vehicle braking in
situations when it may not be
necessary. You could block the
flow of traffic. If this occurs, take
your foot off the brake pedal and
then apply the brakes as needed.
Forward collision alert 3 169.
Front pedestrian protection 3 173.
Page 177 of 271
Driving and operating175Parking assist
General information
When attaching a trailer or bicycle
carrier to the trailer hitch, the parking
assist is deactivated.9 Warning
The driver bears full responsibility
for the parking manoeuvre.
Always check the surrounding
area when driving backwards or
forwards while using parking
assist system.
Rear parking assist
The rear parking assist makes
parking easier by measuring the
distance between the vehicle and
rear obstacles. It informs and warns
the driver by giving acoustic signals
and display indication.
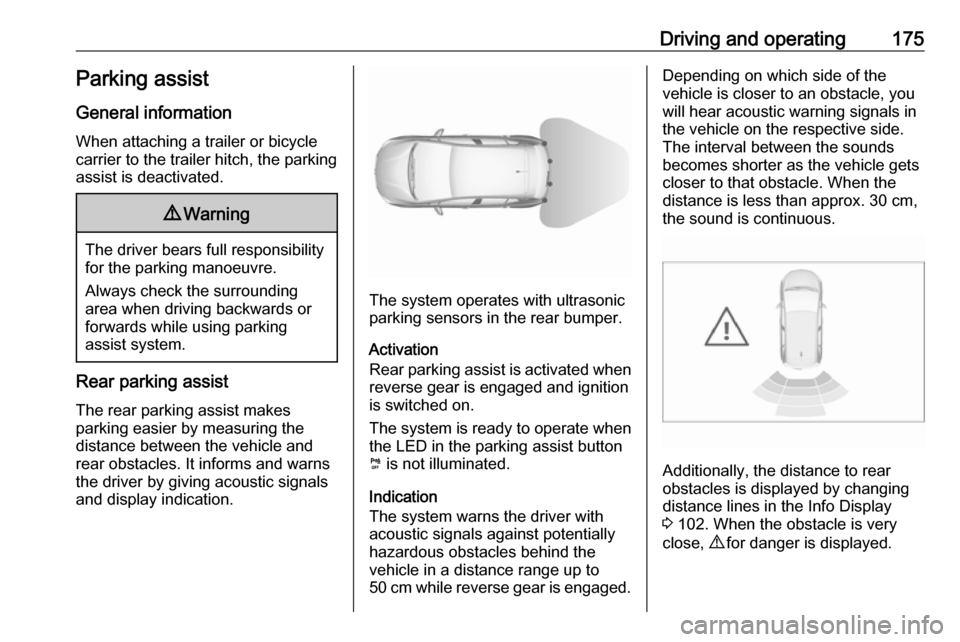
The system operates with ultrasonic
parking sensors in the rear bumper.
Activation
Rear parking assist is activated when reverse gear is engaged and ignition
is switched on.
The system is ready to operate when
the LED in the parking assist button
¼ is not illuminated.
Indication
The system warns the driver with
acoustic signals against potentially
hazardous obstacles behind the
vehicle in a distance range up to
50 cm while reverse gear is engaged.
Depending on which side of the
vehicle is closer to an obstacle, you
will hear acoustic warning signals in
the vehicle on the respective side.
The interval between the sounds
becomes shorter as the vehicle gets
closer to that obstacle. When the
distance is less than approx. 30 cm,
the sound is continuous.
Additionally, the distance to rear
obstacles is displayed by changing
distance lines in the Info Display
3 102. When the obstacle is very
close, 9 for danger is displayed.
Page 178 of 271
176Driving and operatingDeactivation
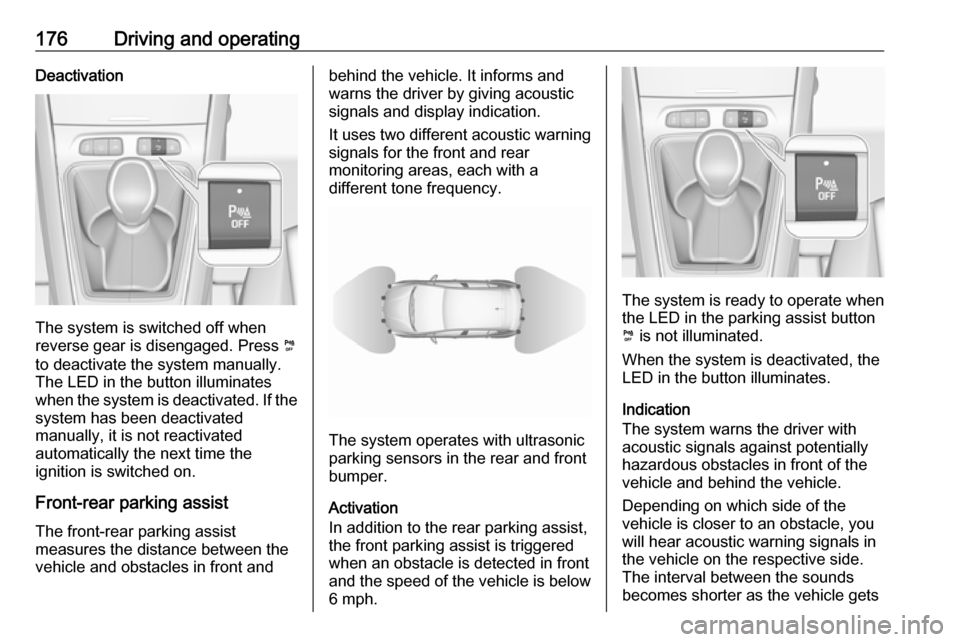
The system is switched off when
reverse gear is disengaged. Press ¼
to deactivate the system manually.
The LED in the button illuminates
when the system is deactivated. If the
system has been deactivated
manually, it is not reactivated
automatically the next time the
ignition is switched on.
Front-rear parking assist
The front-rear parking assist
measures the distance between the
vehicle and obstacles in front and
behind the vehicle. It informs and
warns the driver by giving acoustic
signals and display indication.
It uses two different acoustic warning
signals for the front and rear
monitoring areas, each with a
different tone frequency.
The system operates with ultrasonic
parking sensors in the rear and front
bumper.
Activation
In addition to the rear parking assist,
the front parking assist is triggered
when an obstacle is detected in front
and the speed of the vehicle is below 6 mph.
The system is ready to operate when
the LED in the parking assist button
¼ is not illuminated.
When the system is deactivated, the
LED in the button illuminates.
Indication
The system warns the driver with
acoustic signals against potentially
hazardous obstacles in front of the
vehicle and behind the vehicle.
Depending on which side of the
vehicle is closer to an obstacle, you
will hear acoustic warning signals in the vehicle on the respective side.
The interval between the sounds
becomes shorter as the vehicle gets
Page 179 of 271
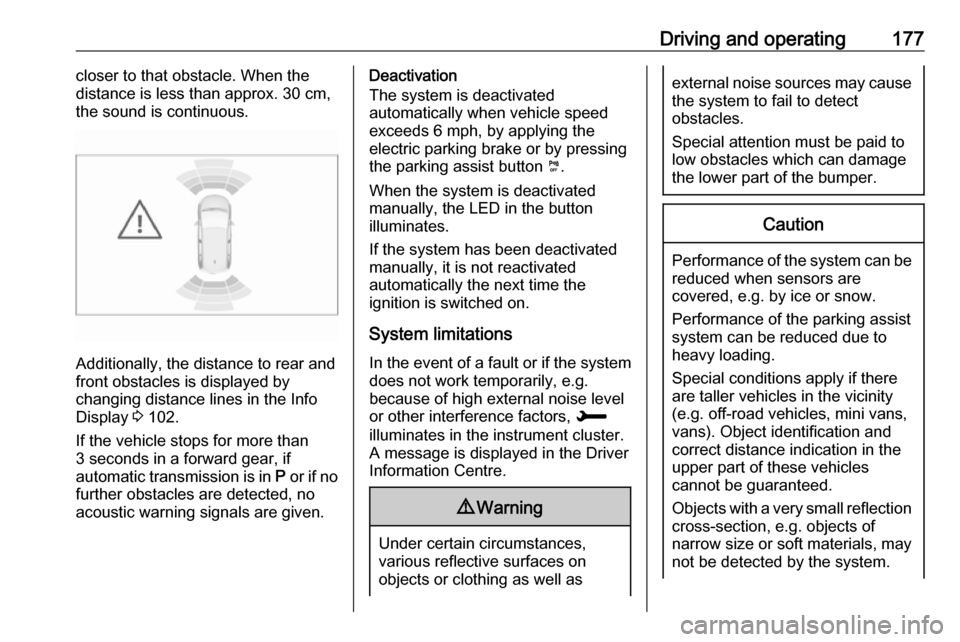
Driving and operating177closer to that obstacle. When the
distance is less than approx. 30 cm,
the sound is continuous.
Additionally, the distance to rear and
front obstacles is displayed by
changing distance lines in the Info Display 3 102.
If the vehicle stops for more than
3 seconds in a forward gear, if
automatic transmission is in P or if no
further obstacles are detected, no
acoustic warning signals are given.
Deactivation
The system is deactivated
automatically when vehicle speed
exceeds 6 mph, by applying the
electric parking brake or by pressing
the parking assist button ¼.
When the system is deactivated
manually, the LED in the button
illuminates.
If the system has been deactivated
manually, it is not reactivated
automatically the next time the
ignition is switched on.
System limitations In the event of a fault or if the system does not work temporarily, e.g.
because of high external noise level
or other interference factors, H
illuminates in the instrument cluster. A message is displayed in the Driver
Information Centre.9 Warning
Under certain circumstances,
various reflective surfaces on
objects or clothing as well as
external noise sources may cause the system to fail to detect
obstacles.
Special attention must be paid to
low obstacles which can damage
the lower part of the bumper.Caution
Performance of the system can be reduced when sensors are
covered, e.g. by ice or snow.
Performance of the parking assist
system can be reduced due to
heavy loading.
Special conditions apply if there
are taller vehicles in the vicinity
(e.g. off-road vehicles, mini vans,
vans). Object identification and correct distance indication in the
upper part of these vehicles
cannot be guaranteed.
Objects with a very small reflection
cross-section, e.g. objects of
narrow size or soft materials, may
not be detected by the system.
Page 180 of 271
178Driving and operatingParking assist systems do not
detect objects outside the
detection range.
Advanced parking assist
9 Warning
The driver bears full responsibility
for accepting the parking slot
suggested by the system and the
parking manoeuvre.
Always check the surrounding
area in all directions when using
the advanced parking assist.
The advanced parking assist
measures a suitable parking slot
while passing, calculates the
trajectory and automatically steers
the vehicle while parking.
Advanced parking assist provides
assistance for the following
manoeuvres:
● entry into a parallel parking slot
● entry into a perpendicular parking
slot
● exit from a parallel parking slot
The driver must control acceleration, braking and gear shifting, while
steering is done automatically. The driver can take control at any time by
gripping the steering wheel.
It may be necessary to move forwards and backwards more than once.
Instructions are given in the Info
Display 3 102.
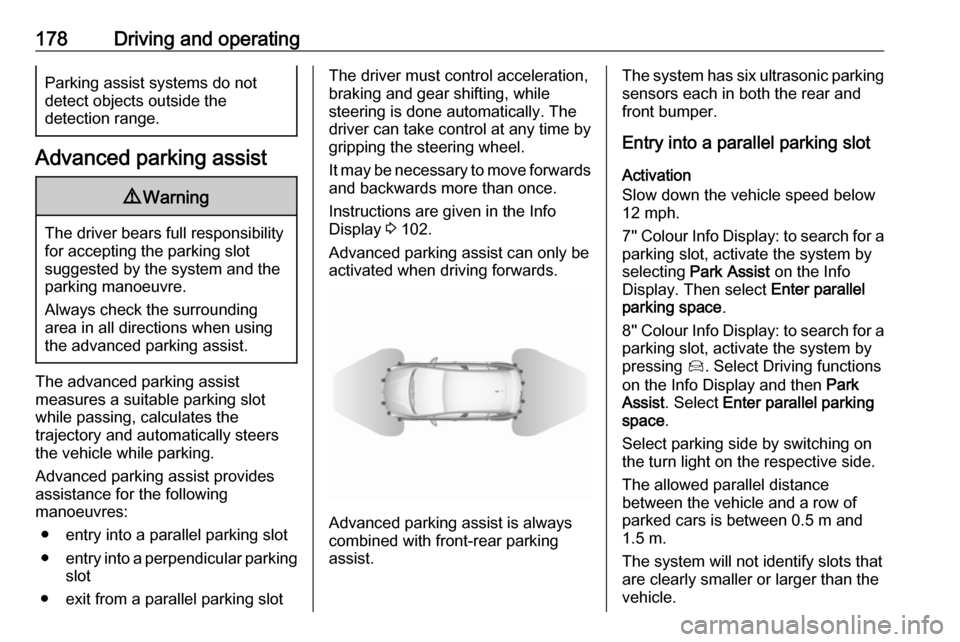
Advanced parking assist can only be activated when driving forwards.
Advanced parking assist is always
combined with front-rear parking assist.
The system has six ultrasonic parking
sensors each in both the rear and
front bumper.
Entry into a parallel parking slot
Activation
Slow down the vehicle speed below
12 mph.
7'' Colour Info Display: to search for a parking slot, activate the system by
selecting Park Assist on the Info
Display. Then select Enter parallel
parking space .
8'' Colour Info Display: to search for a parking slot, activate the system by
pressing Í. Select Driving functions
on the Info Display and then Park
Assist . Select Enter parallel parking
space .
Select parking side by switching on
the turn light on the respective side.
The allowed parallel distance
between the vehicle and a row of
parked cars is between 0.5 m and 1.5 m.
The system will not identify slots that are clearly smaller or larger than the
vehicle.
Page 181 of 271
Driving and operating179
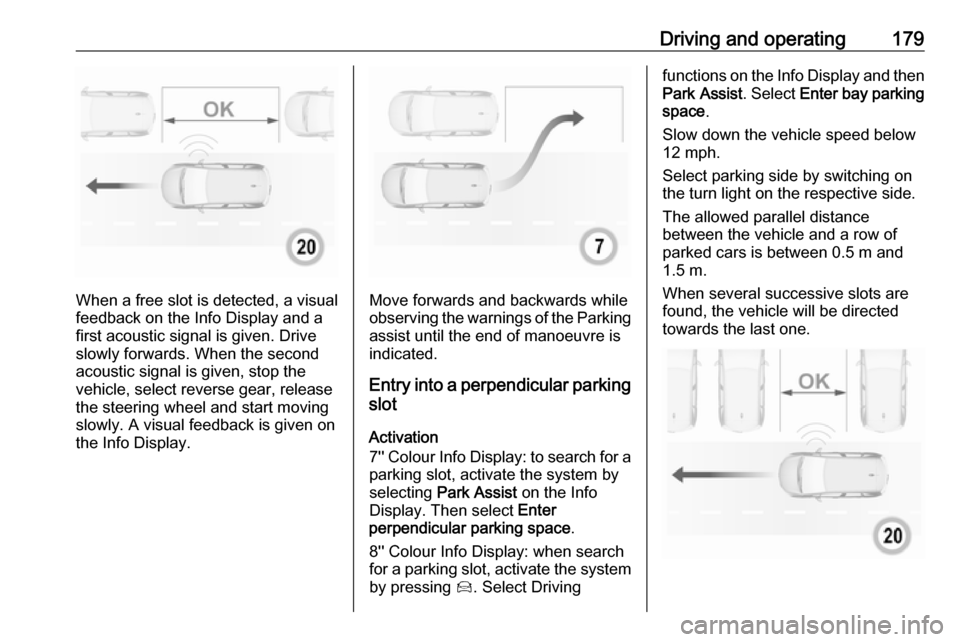
When a free slot is detected, a visual
feedback on the Info Display and a
first acoustic signal is given. Drive
slowly forwards. When the second
acoustic signal is given, stop the
vehicle, select reverse gear, release
the steering wheel and start moving
slowly. A visual feedback is given on
the Info Display.Move forwards and backwards while
observing the warnings of the Parking
assist until the end of manoeuvre is
indicated.
Entry into a perpendicular parking
slot
Activation
7'' Colour Info Display: to search for a parking slot, activate the system by
selecting Park Assist on the Info
Display. Then select Enter
perpendicular parking space .
8'' Colour Info Display: when search
for a parking slot, activate the system by pressing Í. Select Driving
functions on the Info Display and then
Park Assist . Select Enter bay parking
space .
Slow down the vehicle speed below
12 mph.
Select parking side by switching on
the turn light on the respective side.
The allowed parallel distance
between the vehicle and a row of
parked cars is between 0.5 m and
1.5 m.
When several successive slots are found, the vehicle will be directedtowards the last one.