Power VAUXHALL GRANDLAND X 2018 User Guide
[x] Cancel search | Manufacturer: VAUXHALL, Model Year: 2018, Model line: GRANDLAND X, Model: VAUXHALL GRANDLAND X 2018Pages: 263, PDF Size: 7.41 MB
Page 36 of 263
34Keys, doors and windowsRemove all obstacles before
resuming normal power operation.
If the vehicle is equipped with factory- fitted towing equipment and a trailer
is electrically connected, the power
tailgate can only be opened with the
touchpad switch or closed with T in
the open tailgate. Ensure that there
are no obstacles in the moving area.
Overload
If the power tailgate is repeatedly
operated at short intervals, the
function is disabled for some time.
Move tailgate manually into end
position to reset the system.
Initialising power tailgate
If the power tailgate cannot be
operated automatically (e.g. after
disconnecting the vehicle battery), a
warning message is displayed in the
Driver Information Centre.
Activate electronics as follows: 1. Open tailgate manually.
2. Close tailgate manually.
3. Switch on ignition.Seek the assistance of a workshop if
the problem is not solved.
General hints for operating
tailgate9 Danger
Do not drive with the tailgate open
or ajar, e.g. when transporting
bulky objects, since toxic exhaust
gases, which cannot be seen or
smelled, could enter the vehicle.
This can cause unconsciousness
and even death.
Caution
Before opening the tailgate, check overhead obstructions, e.g. a
garage door, to avoid damage to
the tailgate. Always check the
moving area above and behind the
tailgate.
Notice
The installation of certain heavy
accessories onto the tailgate may
affect its ability to remain open.
Notice
The operation of the power tailgate
is disabled under low vehicle battery
conditions. In this case, the tailgate
may not even by manually operable.
Notice
With the power tailgate disabled and all doors unlocked, the tailgate can
only be operated manually. In this
event, manually closing the tailgate
requires significantly greater force.
Notice
At low outside temperatures the
tailgate may not open fully by itself.
In this case lift the tailgate manually
to its normal end position.
Page 42 of 263
40Keys, doors and windowsWindows
Windscreen Windscreen stickers
Do not attach stickers such as toll
road stickers or similar on the
windscreen in the area of the interior
mirror. Otherwise the detection zone
of the sensor and the view area of the camera in the mirror housing could be
restricted.
Windscreen replacementCaution
If the vehicle has a front-looking
camera sensor for the driver
assistance systems, it is very
important that any windscreen
replacement is performed
accurately according to Vauxhall
specifications. Otherwise, these systems may not work properly
and there is a risk of unexpected
behaviour and/or messages from
these systems.
Power windows9 Warning
Take care when operating the
power windows. Risk of injury,
particularly to children.
If there are children on the rear seats, switch on the child safety
system for the power windows.
Keep a close watch on the
windows when closing them.
Ensure that nothing becomes
trapped in them as they move.
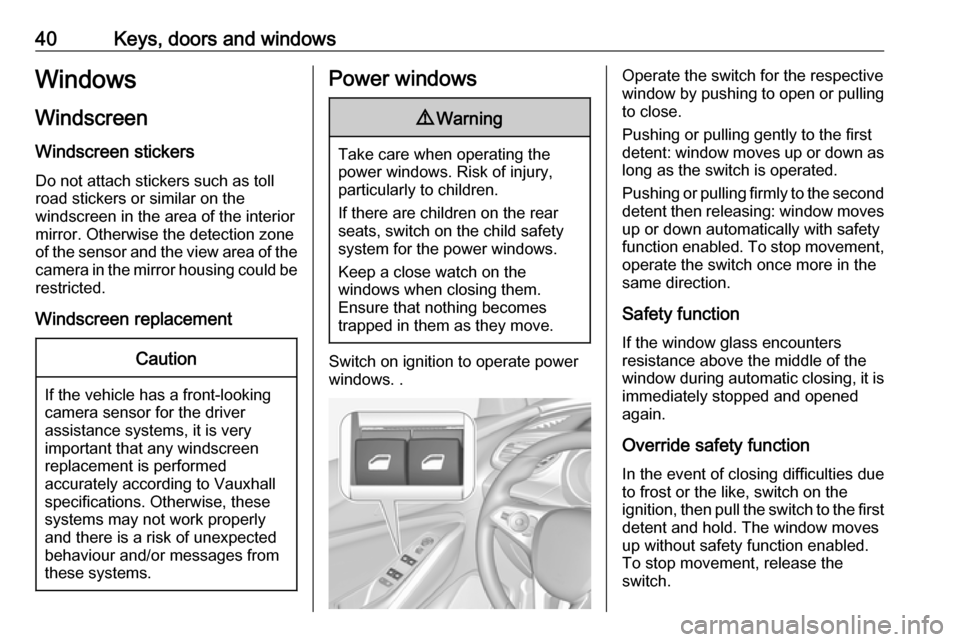
Switch on ignition to operate power
windows. .
Operate the switch for the respective
window by pushing to open or pulling to close.
Pushing or pulling gently to the first
detent: window moves up or down as long as the switch is operated.
Pushing or pulling firmly to the second
detent then releasing: window moves
up or down automatically with safety
function enabled. To stop movement,
operate the switch once more in the
same direction.
Safety function
If the window glass encounters
resistance above the middle of the
window during automatic closing, it is
immediately stopped and opened
again.
Override safety function
In the event of closing difficulties due
to frost or the like, switch on the
ignition, then pull the switch to the first
detent and hold. The window moves
up without safety function enabled.
To stop movement, release the
switch.
Page 43 of 263
Keys, doors and windows41Child safety system for rear
windows
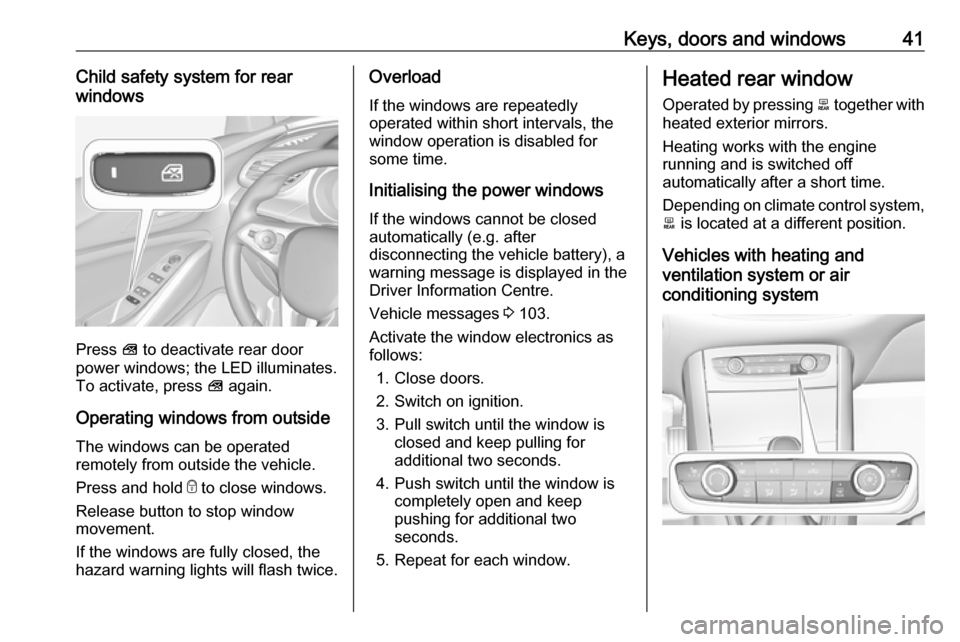
Press V to deactivate rear door
power windows; the LED illuminates.
To activate, press V again.
Operating windows from outside
The windows can be operated
remotely from outside the vehicle.
Press and hold e to close windows.
Release button to stop window
movement.
If the windows are fully closed, the
hazard warning lights will flash twice.
Overload
If the windows are repeatedly
operated within short intervals, the
window operation is disabled for
some time.
Initialising the power windows If the windows cannot be closed
automatically (e.g. after
disconnecting the vehicle battery), a
warning message is displayed in the
Driver Information Centre.
Vehicle messages 3 103.
Activate the window electronics as
follows:
1. Close doors.
2. Switch on ignition.
3. Pull switch until the window is closed and keep pulling for
additional two seconds.
4. Push switch until the window is completely open and keep
pushing for additional two
seconds.
5. Repeat for each window.Heated rear window
Operated by pressing b together with
heated exterior mirrors.
Heating works with the engine
running and is switched off
automatically after a short time.
Depending on climate control system, b is located at a different position.
Vehicles with heating and
ventilation system or air
conditioning system
Page 45 of 263
Keys, doors and windows43Roof
Glass panel
Do not affix any stickers to the roof.
Do not cover the vehicle using a
tarpaulin.
Sunblind
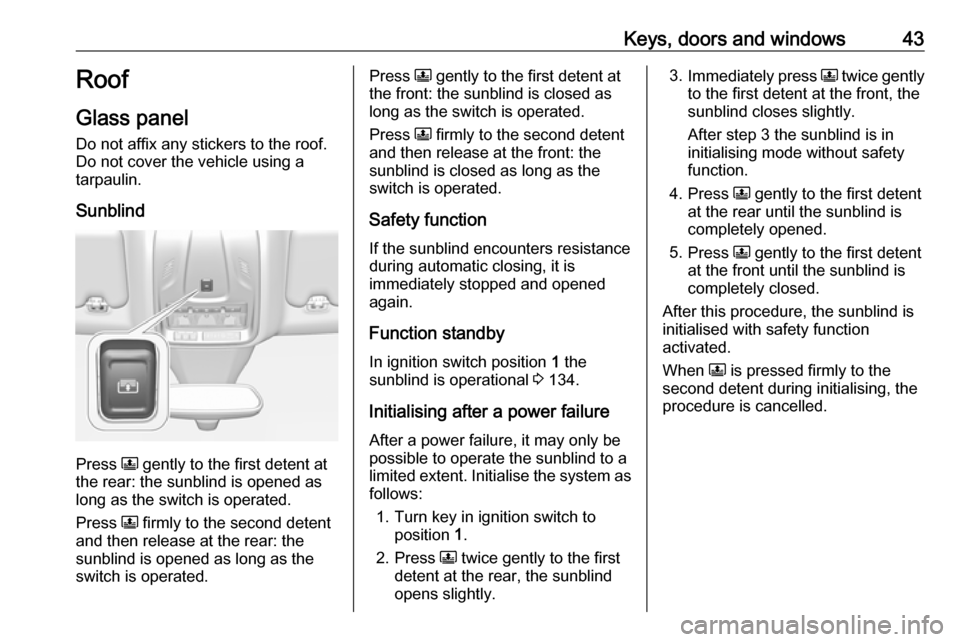
Press N gently to the first detent at
the rear: the sunblind is opened as long as the switch is operated.
Press N firmly to the second detent
and then release at the rear: the
sunblind is opened as long as the
switch is operated.
Press N gently to the first detent at
the front: the sunblind is closed as
long as the switch is operated.
Press N firmly to the second detent
and then release at the front: the
sunblind is closed as long as the
switch is operated.
Safety function
If the sunblind encounters resistance during automatic closing, it is
immediately stopped and opened
again.
Function standby In ignition switch position 1 the
sunblind is operational 3 134.
Initialising after a power failure
After a power failure, it may only be
possible to operate the sunblind to a limited extent. Initialise the system as follows:
1. Turn key in ignition switch to position 1.
2. Press N twice gently to the first
detent at the rear, the sunblind
opens slightly.3. Immediately press N twice gently
to the first detent at the front, the
sunblind closes slightly.
After step 3 the sunblind is in
initialising mode without safety
function.
4. Press N gently to the first detent
at the rear until the sunblind is
completely opened.
5. Press N gently to the first detent
at the front until the sunblind is
completely closed.
After this procedure, the sunblind is
initialised with safety function
activated.
When N is pressed firmly to the
second detent during initialising, the
procedure is cancelled.
Page 46 of 263
44Seats, restraintsSeats, restraintsHead restraints............................ 44
Active head restraints ................45
Front seats ................................... 45
Seat position .............................. 45
Manual seat adjustment ............46
Power seat adjustment ..............48
Armrest ...................................... 50
Heating ...................................... 50
Ventilating .................................. 51
Rear seats ................................... 51
Armrest ...................................... 51
Heating ...................................... 51
Seat belts ..................................... 52
Three-point seat belt .................53
Airbag system .............................. 55
Front airbag system ...................58
Side airbag system ....................59
Curtain airbag system ...............59
Airbag deactivation ....................60
Child restraints ............................. 61
Child restraint systems ..............61
Child restraint installation locations ................................... 64Head restraints
Position9 Warning
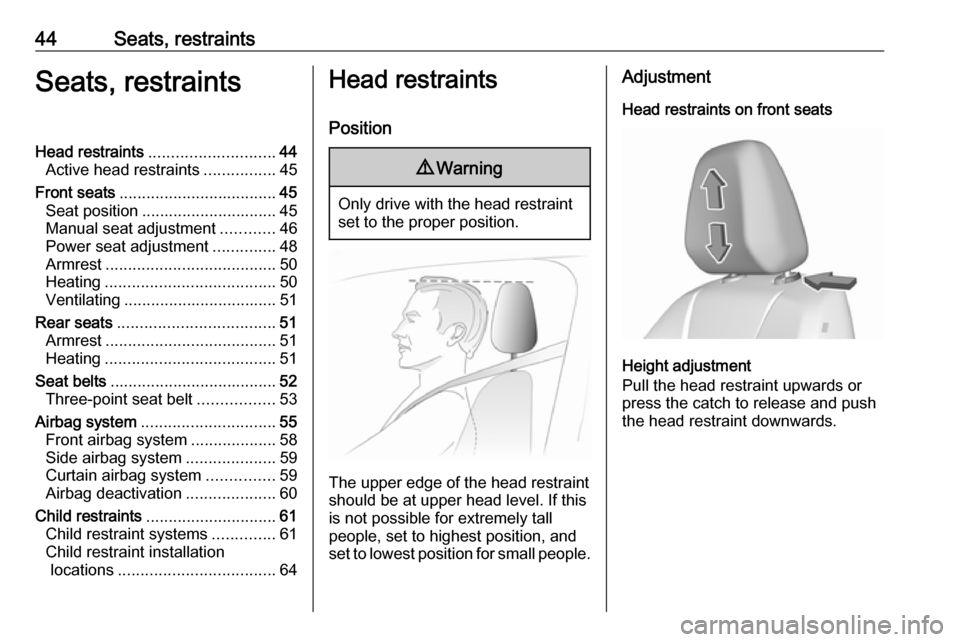
Only drive with the head restraint
set to the proper position.
The upper edge of the head restraint
should be at upper head level. If this
is not possible for extremely tall
people, set to highest position, and
set to lowest position for small people.
Adjustment
Head restraints on front seats
Height adjustment
Pull the head restraint upwards or
press the catch to release and push the head restraint downwards.
Page 50 of 263
48Seats, restraintsLumbar support
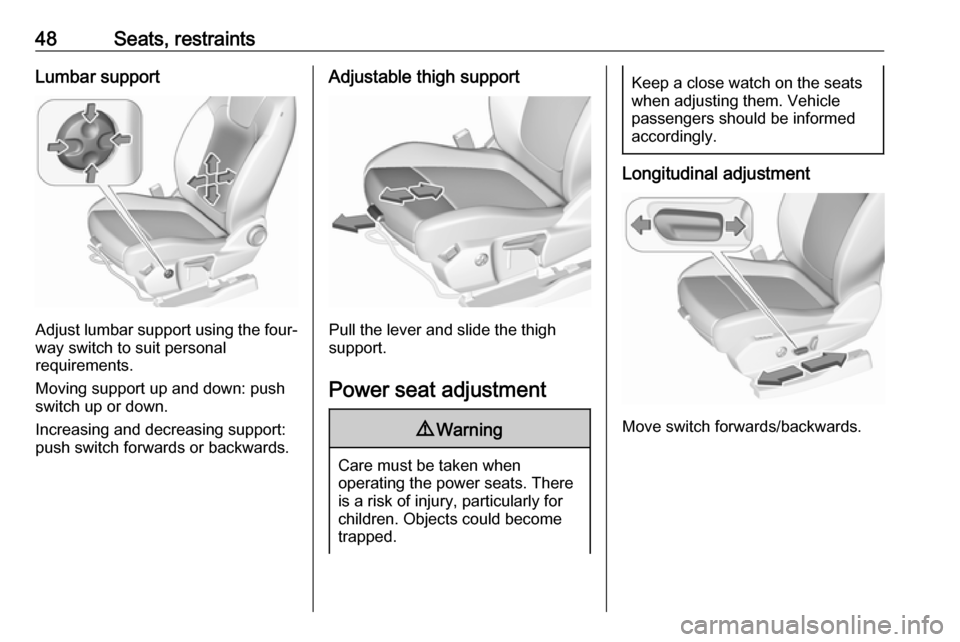
Adjust lumbar support using the four-way switch to suit personal
requirements.
Moving support up and down: push switch up or down.
Increasing and decreasing support:
push switch forwards or backwards.
Adjustable thigh support
Pull the lever and slide the thigh
support.
Power seat adjustment
9 Warning
Care must be taken when
operating the power seats. There
is a risk of injury, particularly for
children. Objects could become
trapped.
Keep a close watch on the seats
when adjusting them. Vehicle
passengers should be informed
accordingly.
Longitudinal adjustment
Move switch forwards/backwards.
Page 51 of 263
Seats, restraints49Seat height
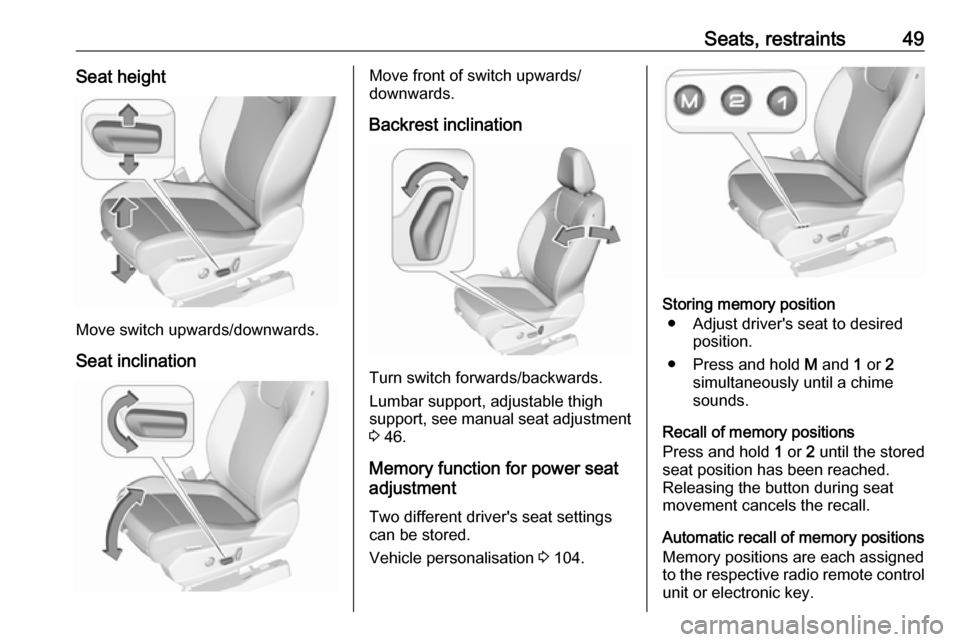
Move switch upwards/downwards.
Seat inclination
Move front of switch upwards/
downwards.
Backrest inclination
Turn switch forwards/backwards.
Lumbar support, adjustable thigh
support, see manual seat adjustment 3 46.
Memory function for power seat
adjustment
Two different driver's seat settings
can be stored.
Vehicle personalisation 3 104.
Storing memory position
● Adjust driver's seat to desired position.
● Press and hold M and 1 or 2
simultaneously until a chime sounds.
Recall of memory positions
Press and hold 1 or 2 until the stored
seat position has been reached.
Releasing the button during seat
movement cancels the recall.
Automatic recall of memory positions
Memory positions are each assigned
to the respective radio remote control
unit or electronic key.
Page 52 of 263
50Seats, restraintsThe stored positions are
automatically recalled when the
ignition is switched on.
To stop recall movement, press one
of the memory or power seat controls.
Safety function
If the driver's seat encounters
resistance during movement, the
recall may stop. After removing the
obstruction, press and hold the
appropriate memory position button for two seconds. Try recalling the
memory position again. If the recall
does not operate, consult a
workshop.
Overload
If the seat setting is electrically
overloaded, the power supply is
automatically cut-off for a short time.
Notice
After an accident in which airbags
have been deployed, the memory
function for each position button will
be deactivated.Armrest
Base armrest
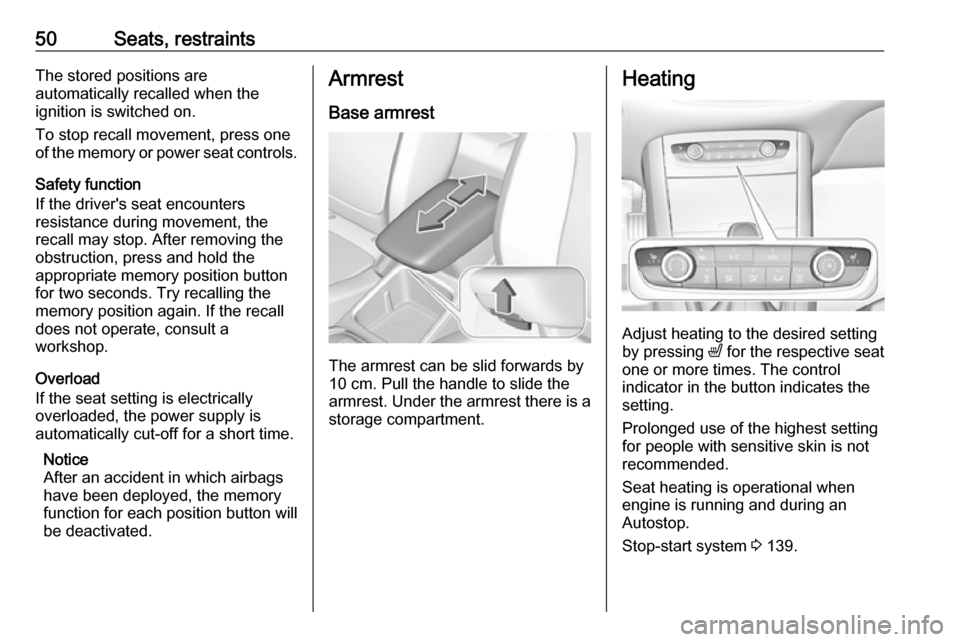
The armrest can be slid forwards by
10 cm. Pull the handle to slide the
armrest. Under the armrest there is a storage compartment.
Heating
Adjust heating to the desired setting
by pressing ß for the respective seat
one or more times. The control
indicator in the button indicates the
setting.
Prolonged use of the highest setting
for people with sensitive skin is not
recommended.
Seat heating is operational when
engine is running and during an
Autostop.
Stop-start system 3 139.
Page 72 of 263
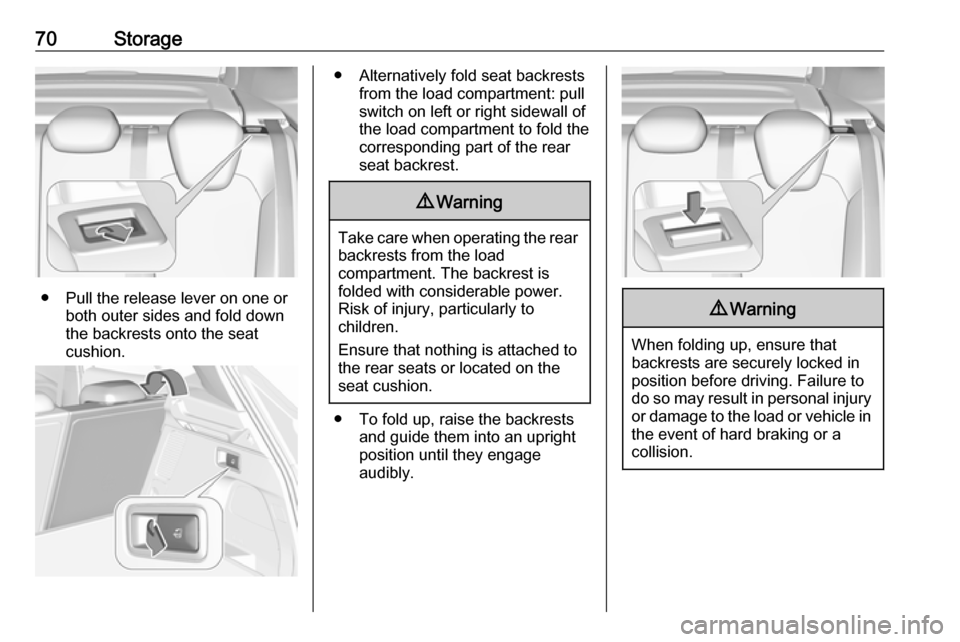
70Storage
● Pull the release lever on one orboth outer sides and fold down
the backrests onto the seat
cushion.
● Alternatively fold seat backrests from the load compartment: pullswitch on left or right sidewall of
the load compartment to fold the
corresponding part of the rear
seat backrest.9 Warning
Take care when operating the rear
backrests from the load
compartment. The backrest is
folded with considerable power.
Risk of injury, particularly to
children.
Ensure that nothing is attached to
the rear seats or located on the
seat cushion.
● To fold up, raise the backrests and guide them into an upright
position until they engage
audibly.
9 Warning
When folding up, ensure that
backrests are securely locked in
position before driving. Failure to
do so may result in personal injury or damage to the load or vehicle in the event of hard braking or a
collision.
Page 80 of 263

78Instruments and controlsInstruments and
controlsControls ....................................... 79
Steering wheel adjustment ........79
Steering wheel controls .............79
Heated steering wheel ...............79
Horn ........................................... 80
Windscreen wiper/washer .........80
Rear window wiper/washer .......82
Outside temperature ..................82
Clock ......................................... 83
Power outlets ............................. 84
Inductive charging .....................85
Cigarette lighter ......................... 86
Ashtrays .................................... 86
Warning lights, gauges and indi‐ cators ........................................... 87
Instrument cluster ......................87
Speedometer ............................. 89
Odometer .................................. 90
Trip odometer ............................ 90
Tachometer ............................... 90
Fuel gauge ................................ 91
Engine coolant temperature gauge ....................................... 91
Service display .......................... 91Control indicators ......................92
Turn signal ................................. 93
Seat belt reminder .....................93
Airbag and belt tensioners .........93
Airbag deactivation ....................94
Charging system .......................94
Malfunction indicator light ..........94
Stop engine ............................... 94
System check ............................ 95
Brake and clutch system ...........95
Electric parking brake ................95
Electric parking brake fault ........95
Antilock brake system (ABS) .....95
Gear shifting .............................. 96
Lane departure warning ............96
Lane keep assist .......................96
Electronic Stability Control and Traction Control system ...........96
Engine coolant temperature ......96
Preheating ................................. 97
Diesel particle filter ....................97
AdBlue ....................................... 97
Deflation detection system ........97
Engine oil pressure ....................97
Low fuel ..................................... 98
Autostop .................................... 98
Exterior light .............................. 98
High beam ................................. 98
High beam assist .......................98
LED headlights .......................... 98Fog light..................................... 98
Rear fog light ............................. 98
Rain sensor ............................... 98
Cruise control ............................ 99
Adaptive cruise control ..............99
Vehicle detected ahead .............99
Speed limiter ............................. 99
Door open .................................. 99
Information displays .....................99
Driver Information Centre ..........99
Info display .............................. 101
Vehicle messages ......................103
Warning chimes .......................103
Battery voltage ........................ 104
Vehicle personalisation ..............104
Telematics service .....................108
OnStar ..................................... 108