engine light VAUXHALL GRANDLAND X 2020 User Guide
[x] Cancel search | Manufacturer: VAUXHALL, Model Year: 2020, Model line: GRANDLAND X, Model: VAUXHALL GRANDLAND X 2020Pages: 283, PDF Size: 21.87 MB
Page 115 of 283
Lighting113Tail lightsTail lights are illuminated together
with low / high beam and sidelights.
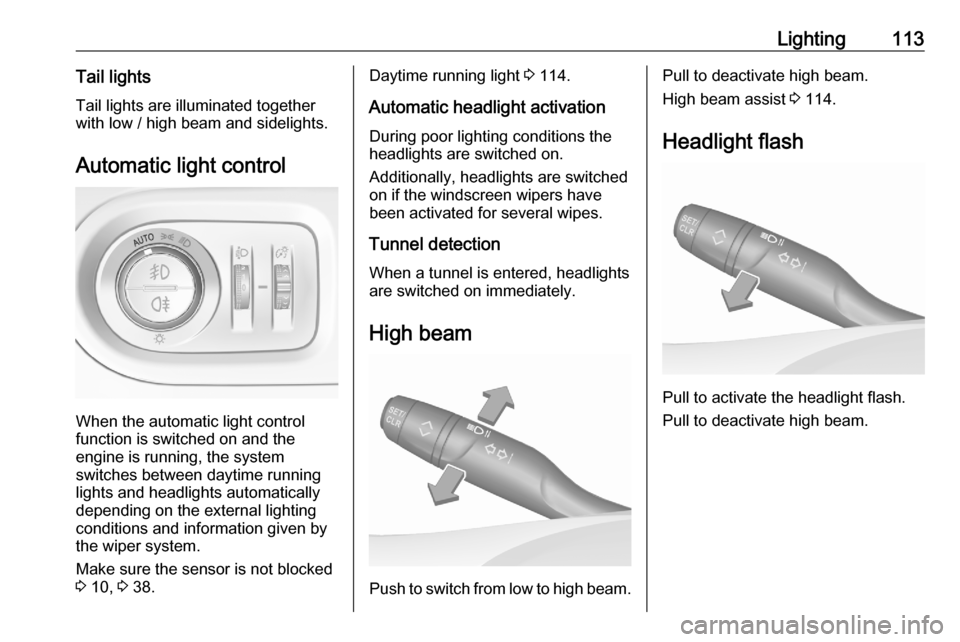
Automatic light control
When the automatic light control
function is switched on and the
engine is running, the system
switches between daytime running
lights and headlights automatically
depending on the external lighting
conditions and information given by
the wiper system.
Make sure the sensor is not blocked
3 10, 3 38.
Daytime running light 3 114.
Automatic headlight activation During poor lighting conditions the
headlights are switched on.
Additionally, headlights are switched
on if the windscreen wipers have
been activated for several wipes.
Tunnel detection
When a tunnel is entered, headlights
are switched on immediately.
High beam
Push to switch from low to high beam.
Pull to deactivate high beam.
High beam assist 3 114.
Headlight flash
Pull to activate the headlight flash.
Pull to deactivate high beam.
Page 116 of 283
114LightingHeadlight range adjustment
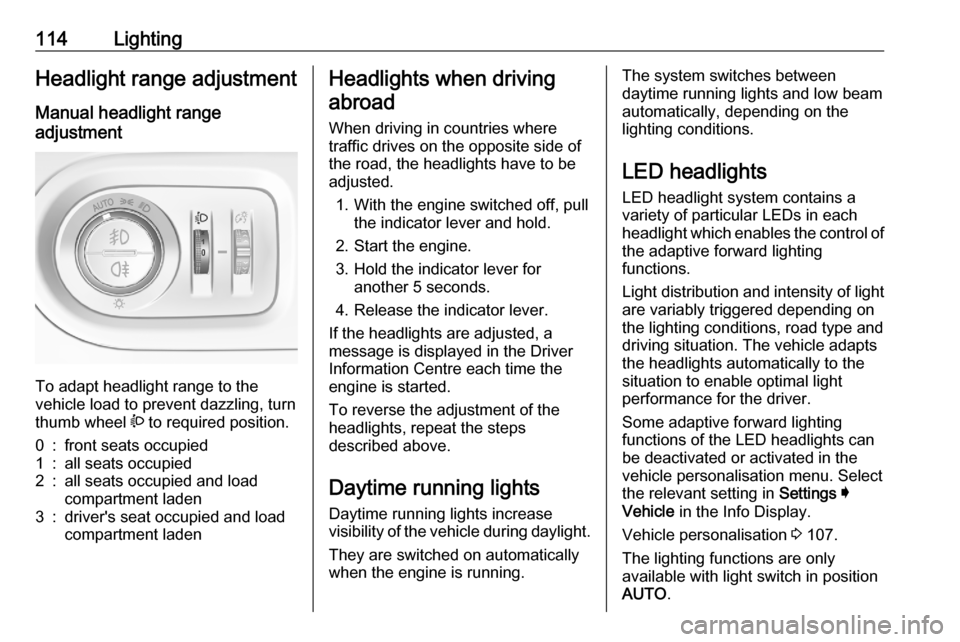
Manual headlight range
adjustment
To adapt headlight range to the
vehicle load to prevent dazzling, turn
thumb wheel ? to required position.
0:front seats occupied1:all seats occupied2:all seats occupied and load
compartment laden3:driver's seat occupied and load
compartment ladenHeadlights when driving
abroad
When driving in countries where
traffic drives on the opposite side of
the road, the headlights have to be
adjusted.
1. With the engine switched off, pull the indicator lever and hold.
2. Start the engine.
3. Hold the indicator lever for another 5 seconds.
4. Release the indicator lever.
If the headlights are adjusted, a
message is displayed in the Driver
Information Centre each time the
engine is started.
To reverse the adjustment of the
headlights, repeat the steps
described above.
Daytime running lightsDaytime running lights increase
visibility of the vehicle during daylight.
They are switched on automatically
when the engine is running.The system switches between
daytime running lights and low beam
automatically, depending on the
lighting conditions.
LED headlights
LED headlight system contains a
variety of particular LEDs in each
headlight which enables the control of the adaptive forward lighting
functions.
Light distribution and intensity of light
are variably triggered depending on
the lighting conditions, road type and
driving situation. The vehicle adapts
the headlights automatically to the
situation to enable optimal light
performance for the driver.
Some adaptive forward lighting
functions of the LED headlights can
be deactivated or activated in the
vehicle personalisation menu. Select
the relevant setting in Settings I
Vehicle in the Info Display.
Vehicle personalisation 3 107.
The lighting functions are only
available with light switch in position
AUTO .
Page 126 of 283
124Climate controlHeating will not be fully effective until
the engine has reached normal
operating temperature.
Air distributionl:to windscreen and front door
windowsM:to head area via adjustable air
ventsK:to foot well and windscreen
All combinations are possible.
Fan speed
Adjust the air flow by turning Z to the
desired speed.
clockwise:increaseanticlockwise:decreaseCooling A/C
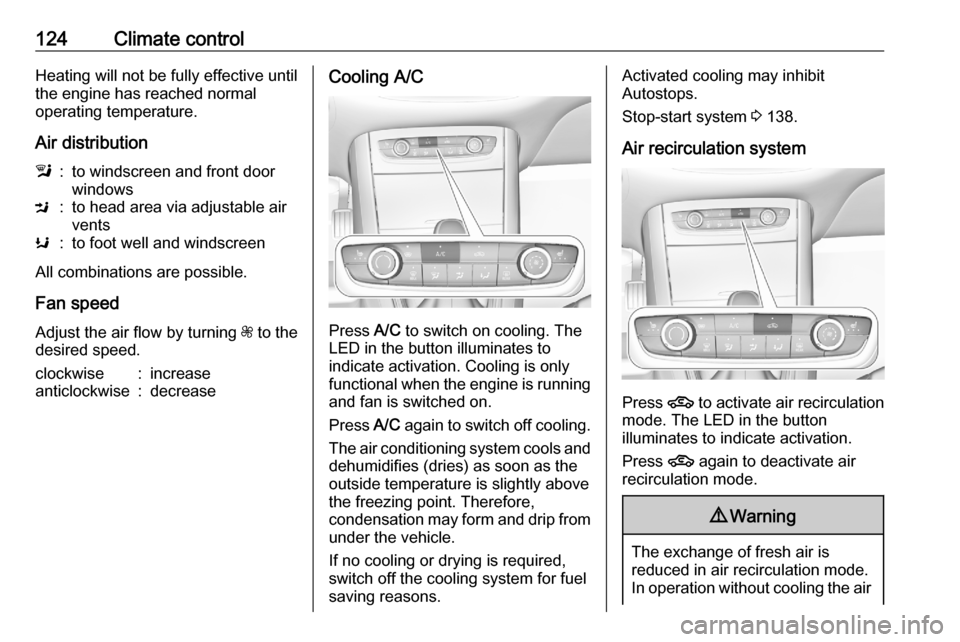
Press A/C to switch on cooling. The
LED in the button illuminates to
indicate activation. Cooling is only
functional when the engine is running and fan is switched on.
Press A/C again to switch off cooling.
The air conditioning system cools and
dehumidifies (dries) as soon as the
outside temperature is slightly above
the freezing point. Therefore,
condensation may form and drip from
under the vehicle.
If no cooling or drying is required,
switch off the cooling system for fuel
saving reasons.
Activated cooling may inhibit
Autostops.
Stop-start system 3 138.
Air recirculation system
Press 4 to activate air recirculation
mode. The LED in the button
illuminates to indicate activation.
Press 4 again to deactivate air
recirculation mode.
9 Warning
The exchange of fresh air is
reduced in air recirculation mode.
In operation without cooling the air
Page 139 of 283
Driving and operating137Turn key briefly to position 2 and
release after engine has been
started.
Manual transmission: during an
Autostop, the engine can be started
by depressing the clutch pedal
3 138.
Automatic transmission: during an
Autostop, the engine can be started
by releasing the brake pedal 3 138.
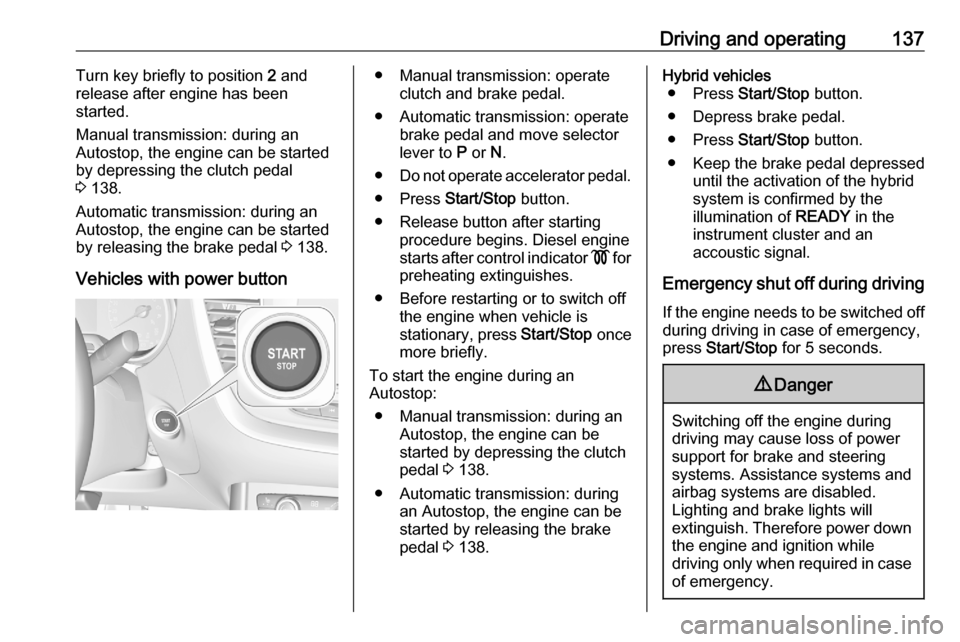
Vehicles with power button● Manual transmission: operate clutch and brake pedal.
● Automatic transmission: operate brake pedal and move selector
lever to P or N.
● Do not operate accelerator pedal.
● Press Start/Stop button.
● Release button after starting procedure begins. Diesel engine
starts after control indicator ! for
preheating extinguishes.
● Before restarting or to switch off the engine when vehicle is
stationary, press Start/Stop once
more briefly.
To start the engine during an
Autostop:
● Manual transmission: during an Autostop, the engine can be
started by depressing the clutch
pedal 3 138.
● Automatic transmission: during an Autostop, the engine can be
started by releasing the brake
pedal 3 138.Hybrid vehicles
● Press Start/Stop button.
● Depress brake pedal.
● Press Start/Stop button.
● Keep the brake pedal depressed until the activation of the hybrid
system is confirmed by the
illumination of READY in the
instrument cluster and an
accoustic signal.
Emergency shut off during driving
If the engine needs to be switched off during driving in case of emergency,
press Start/Stop for 5 seconds.9Danger
Switching off the engine during
driving may cause loss of power
support for brake and steering
systems. Assistance systems and
airbag systems are disabled.
Lighting and brake lights will
extinguish. Therefore power down the engine and ignition while
driving only when required in case of emergency.
Page 140 of 283
138Driving and operatingStarting the vehicle at low
temperatures
Starting the engine without additional
heaters is possible down to -25 °С for diesel engines and -30 °C for petrol
engines. Required is an engine oil
with the correct viscosity, the correct
fuel, performed services and a
sufficiently charged vehicle battery.
With temperatures below -30 °C the
automatic transmission requires a
warming phase of approx. 5 minutes.
The selector lever must be in position P .
Turbo engine warm-up Upon start-up, engine available
torque may be limited for a short time,
especially when the engine
temperature is cold. The limitation is
to allow the lubrication system to fully protect the engine.
Overrun cut-off
The fuel supply is automatically cut off
during overrun, i.e. when the vehicle
is driven with a gear engaged but accelerator pedal is released.Depending on driving conditions, the
overrun cut-off may be deactivated.
Stop-start system
The stop-start system helps to save
fuel and to reduce the exhaust
emissions. When conditions allow, it
switches off the engine as soon as the vehicle is at a low speed or at a
standstill, e.g. at a traffic light or in a
traffic jam.
Activation
The stop-start system is available as soon as the engine is started, the
vehicle starts-off and the conditions
as stated below in this section are
fulfilled.
The system is ready to operate when
the LED in the button Ò is not
illuminated. To activate the system
when the system is deactivated,
press Ó.
If the stop-start system is temporarily not available and the button Ò is
pressed, the LED in the button
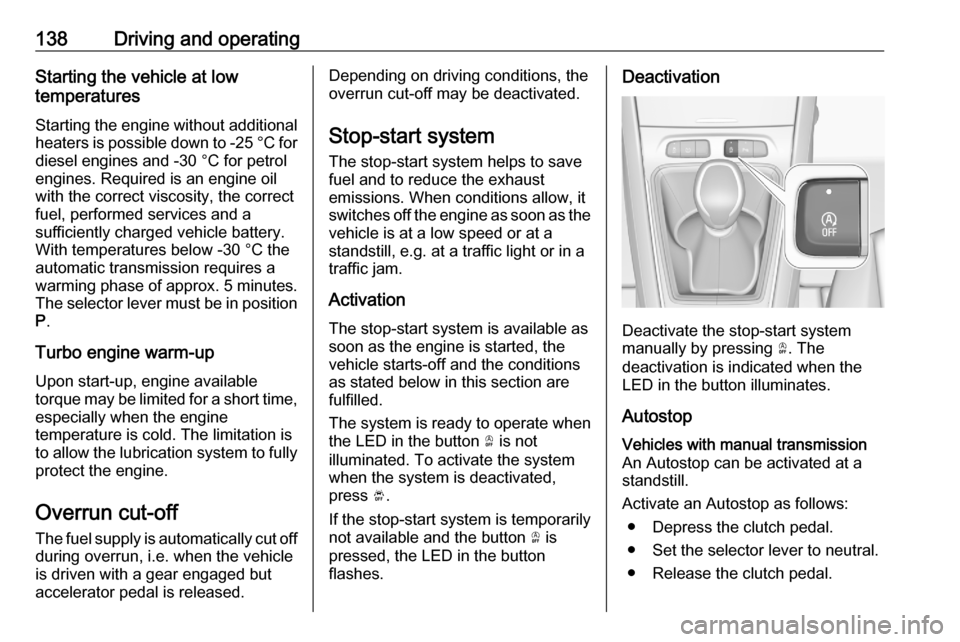
flashes.Deactivation
Deactivate the stop-start system
manually by pressing Ò. The
deactivation is indicated when the
LED in the button illuminates.
Autostop
Vehicles with manual transmission
An Autostop can be activated at a
standstill.
Activate an Autostop as follows: ● Depress the clutch pedal.
● Set the selector lever to neutral.
● Release the clutch pedal.
Page 155 of 283
Driving and operating153Fault9Warning
If there is a fault in the ABS, the
wheels may be liable to lock due
to braking that is heavier than
normal. The advantages of ABS are no longer available. During
hard braking, the vehicle can no longer be steered and may
swerve.
Have the cause of the fault remedied
by a workshop.
Parking brake
9 Warning
Before leaving the vehicle, check
parking brake status. Control
indicator j illuminate constantly
when electric parking brake is
applied.
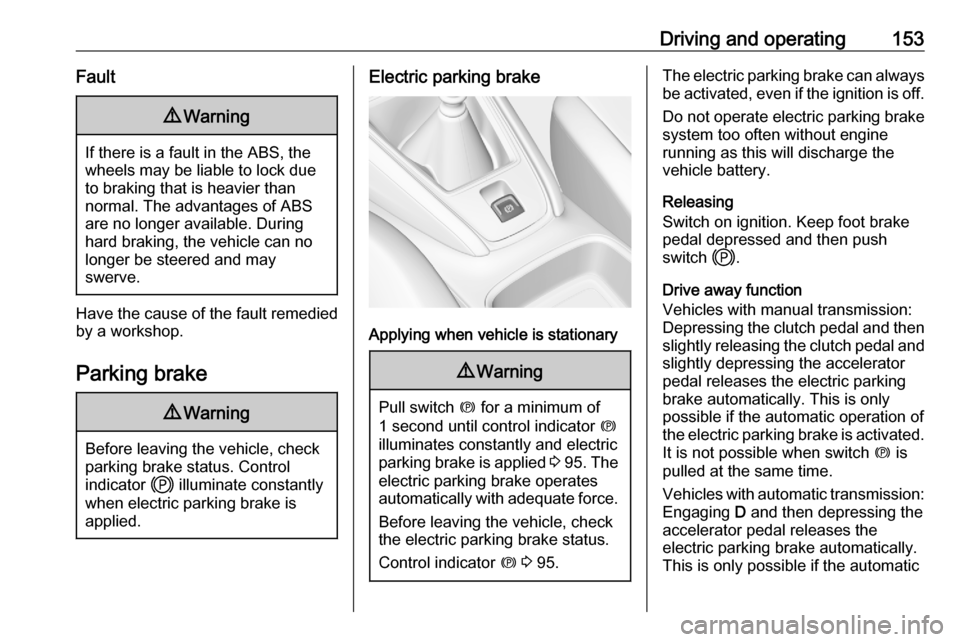
Electric parking brake
Applying when vehicle is stationary
9 Warning
Pull switch m for a minimum of
1 second until control indicator m
illuminates constantly and electric
parking brake is applied 3 95 . The
electric parking brake operates automatically with adequate force.
Before leaving the vehicle, check
the electric parking brake status.
Control indicator m 3 95.
The electric parking brake can always
be activated, even if the ignition is off.
Do not operate electric parking brake
system too often without engine
running as this will discharge the
vehicle battery.
Releasing
Switch on ignition. Keep foot brake
pedal depressed and then push
switch j.
Drive away function
Vehicles with manual transmission:
Depressing the clutch pedal and then slightly releasing the clutch pedal and
slightly depressing the accelerator
pedal releases the electric parking
brake automatically. This is only
possible if the automatic operation of
the electric parking brake is activated. It is not possible when switch m is
pulled at the same time.
Vehicles with automatic transmission: Engaging D and then depressing the
accelerator pedal releases the
electric parking brake automatically.
This is only possible if the automatic
Page 177 of 283

Driving and operating175● the sensor in the windscreen orthe radar unit behind the front
bumper are blocked by snow, ice, slush, mud, dirt etc.
● the windscreen is damaged or affected by foreign objects, e.g.
stickers
Complete attention is always required
while driving, and you should be
ready to take action and apply the
brakes and / or steer the vehicle to
avoid crashes.
We recommend to deactivate the
system in the vehicle personalisation
in the following cases:
● when towing a trailer or caravan
● when carrying long objects on roof bars or a roof rack
● when the vehicle is being towed with the engine running
● when a spare wheel is fitted that is smaller than the other wheels
● before using an automatic car wash with the engine running
● before placing the vehicle on a rolling road in a workshop● if the windscreen has beendamaged close to the camera
● if the front bumper has been damaged
● if the brake lights are not working
Fault
In case the system requires a service, a message is displayed in the Driver
Information Centre.
If the system does not work as it
should do, vehicle messages are
displayed in the Driver Information
Centre.
Vehicle messages 3 106.
Front pedestrian protection
Front pedestrian protection may help
to avoid or reduce the harm caused
by front-end crashes with pedestrians when driving forward.
The system uses the front camera in
the windscreen and a radar unit in the
front bumper to detect a pedestrian
directly ahead in your path.Front pedestrian protection can
detect and alert to pedestrians in a
forward gear at speeds between
3 mph and 37 mph. Additionally front
pedestrian protection can provide a
boost to braking or automatically
brake the vehicle.
During nighttime driving, system
performance is limited.9 Danger
Front pedestrian braking does not
provide an alert or automatically
brake the vehicle, unless it detects
a pedestrian.
The system may not detect
pedestrians, including children,
when the pedestrian is not directly ahead, not fully visible, not
standing upright, or when part of a
group.
Front pedestrian protection includes:
● detecting front pedestrian ahead● front pedestrian alert
Front pedestrian protection is
activated together with forward
collision alert.
Page 184 of 283
182Driving and operatingExiting a parallel parking slot
Activation
7'' Colour Info Display: when exiting a parallel parking slot, activate the
system by selecting Park Assist on
the Info Display. Then select Exit
parallel parking space .
8'' Colour Info Display: when exiting a parallel parking slot, activate the
system by pressing Í. Select Driving
functions on the Info Display and then
Park Assist . Select Exit parallel
parking space .
Select exit side by switching on the
respective turn light.
Engage reverse or forward gear,
release the steering wheel and start
moving without exceeding 3 mph.
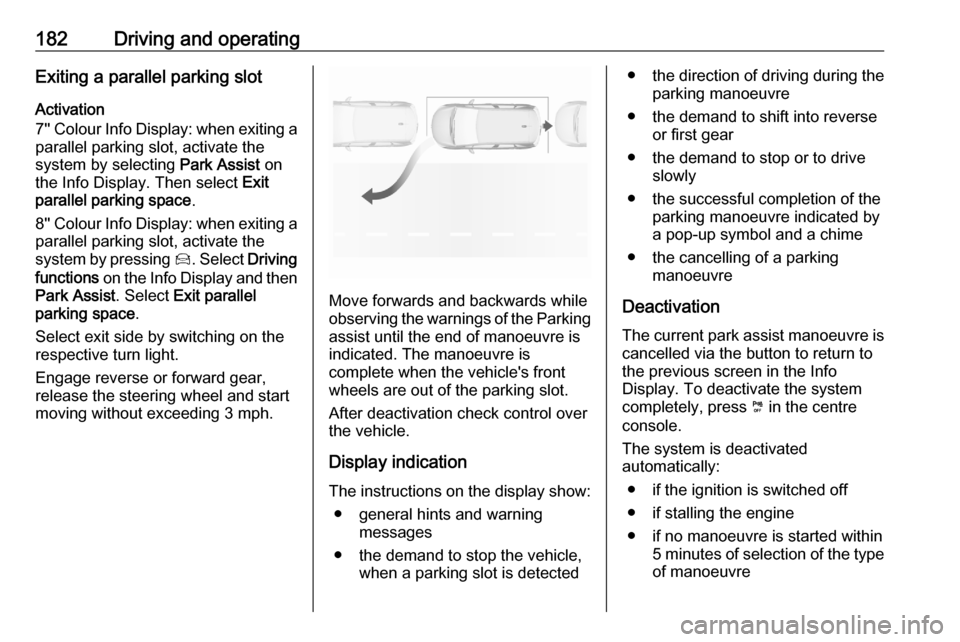
Move forwards and backwards while
observing the warnings of the Parking
assist until the end of manoeuvre is
indicated. The manoeuvre is
complete when the vehicle's front
wheels are out of the parking slot.
After deactivation check control over
the vehicle.
Display indication The instructions on the display show: ● general hints and warning messages
● the demand to stop the vehicle, when a parking slot is detected
●the direction of driving during the
parking manoeuvre
● the demand to shift into reverse or first gear
● the demand to stop or to drive slowly
● the successful completion of the parking manoeuvre indicated by
a pop-up symbol and a chime
● the cancelling of a parking manoeuvre
Deactivation The current park assist manoeuvre is
cancelled via the button to return to
the previous screen in the Info
Display. To deactivate the system
completely, press ¼ in the centre
console.
The system is deactivated
automatically:
● if the ignition is switched off
● if stalling the engine
● if no manoeuvre is started within 5 minutes of selection of the typeof manoeuvre
Page 203 of 283
Driving and operating201Grounding instructionsThis product must be grounded. If this
product should malfunction or break
down, grounding provides a path of
least resistance for electric current to
reduce the risk of electric shock. This product is equipped with a cord that
has a grounding conductor. The plug
must be plugged into an appropriate
outlet that is properly installed and
grounded in accordance with all local
codes and ordinances.9 Warning
Improper connection of the charge
cord ground may cause electrical
shock. Check with a qualified
electrician if there is doubt as to
whether the charge circuit is
properly grounded. Do not modify
the plug provided with the product.
If it will not fit the electrical outlet,
have a proper electrical outlet
installed by a qualified electrician.
Fuel
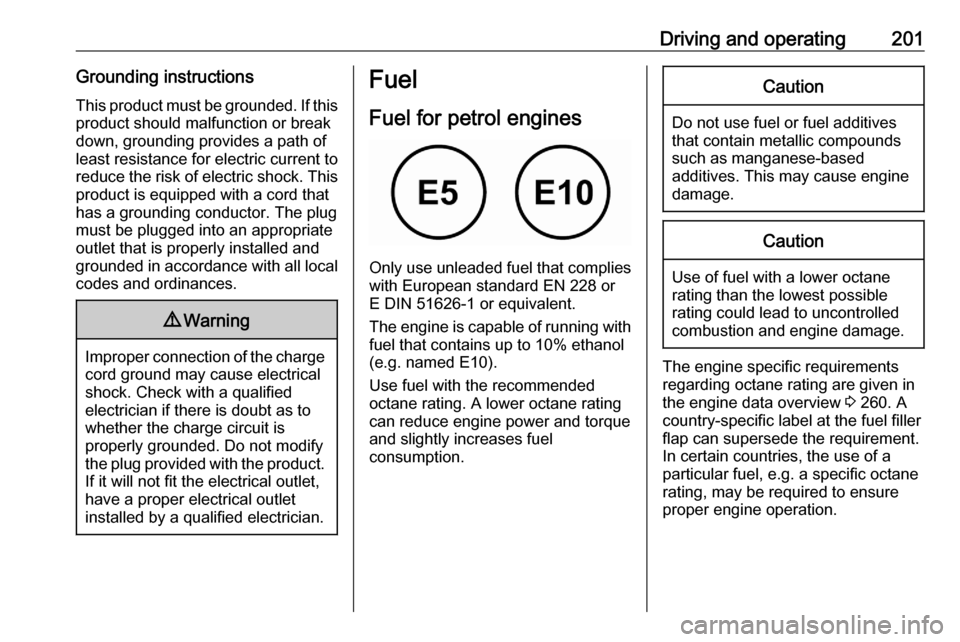
Fuel for petrol engines
Only use unleaded fuel that complies
with European standard EN 228 or
E DIN 51626-1 or equivalent.
The engine is capable of running with
fuel that contains up to 10% ethanol
(e.g. named E10).
Use fuel with the recommended octane rating. A lower octane rating can reduce engine power and torque
and slightly increases fuel
consumption.
Caution
Do not use fuel or fuel additives
that contain metallic compounds
such as manganese-based
additives. This may cause engine
damage.
Caution
Use of fuel with a lower octane
rating than the lowest possible
rating could lead to uncontrolled combustion and engine damage.
The engine specific requirements
regarding octane rating are given in
the engine data overview 3 260. A
country-specific label at the fuel filler
flap can supersede the requirement.
In certain countries, the use of a
particular fuel, e.g. a specific octane
rating, may be required to ensure
proper engine operation.
Page 206 of 283
204Driving and operating
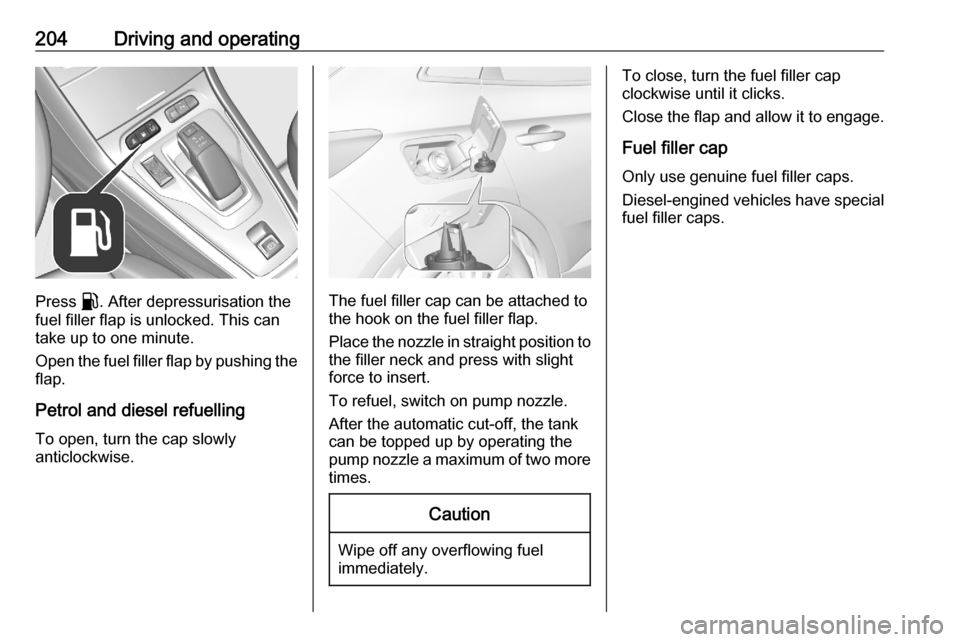
Press r. After depressurisation the
fuel filler flap is unlocked. This can
take up to one minute.
Open the fuel filler flap by pushing the flap.
Petrol and diesel refuelling
To open, turn the cap slowly
anticlockwise.The fuel filler cap can be attached to the hook on the fuel filler flap.
Place the nozzle in straight position to the filler neck and press with slight
force to insert.
To refuel, switch on pump nozzle.
After the automatic cut-off, the tank can be topped up by operating the
pump nozzle a maximum of two more
times.
Caution
Wipe off any overflowing fuel
immediately.
To close, turn the fuel filler cap
clockwise until it clicks.
Close the flap and allow it to engage.
Fuel filler cap
Only use genuine fuel filler caps.
Diesel-engined vehicles have special fuel filler caps.