display VAUXHALL GRANDLAND X 2020 Owner's Guide
[x] Cancel search | Manufacturer: VAUXHALL, Model Year: 2020, Model line: GRANDLAND X, Model: VAUXHALL GRANDLAND X 2020Pages: 283, PDF Size: 21.87 MB
Page 121 of 283
Lighting119Parking lights
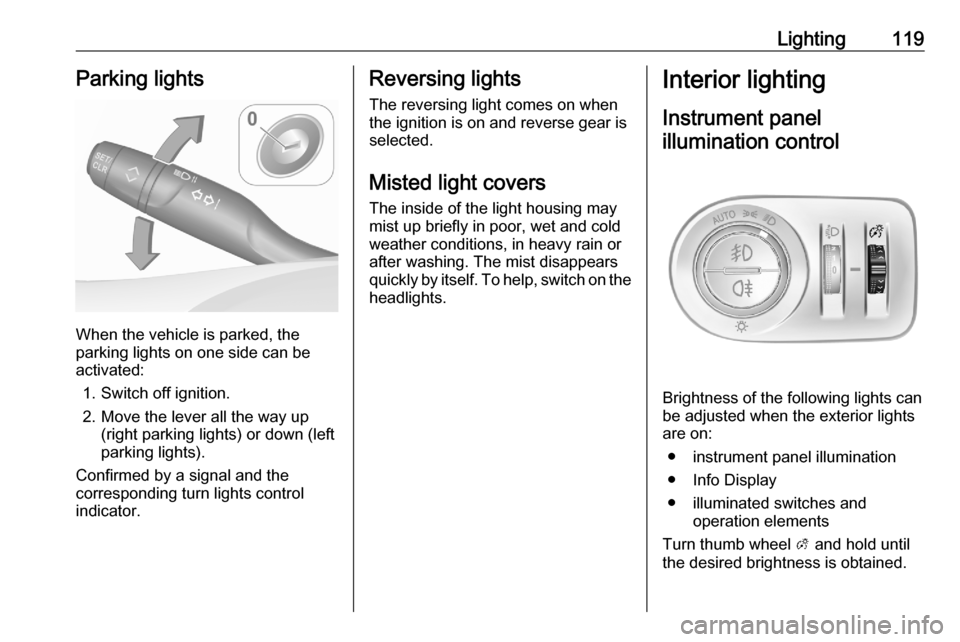
When the vehicle is parked, the
parking lights on one side can be
activated:
1. Switch off ignition.
2. Move the lever all the way up (right parking lights) or down (left
parking lights).
Confirmed by a signal and the
corresponding turn lights control
indicator.
Reversing lights
The reversing light comes on when
the ignition is on and reverse gear is
selected.
Misted light covers
The inside of the light housing may
mist up briefly in poor, wet and cold weather conditions, in heavy rain or
after washing. The mist disappears
quickly by itself. To help, switch on the headlights.Interior lighting
Instrument panel illumination control
Brightness of the following lights can
be adjusted when the exterior lights
are on:
● instrument panel illumination
● Info Display
● illuminated switches and operation elements
Turn thumb wheel A and hold until
the desired brightness is obtained.
Page 125 of 283
Climate control123Demisting and defrosting
● Press à: the air distribution is
directed towards the windscreen.
● Set temperature controller £ to
warmest level.
● Set fan speed Z to highest level.
● Switch on heated rear window b.
● Open side air vents as required and direct them towards the doorwindows.
Heated rear window, windscreen and exterior mirrors b 3 40.
Heated seats ß 3 50.
Air conditioning system
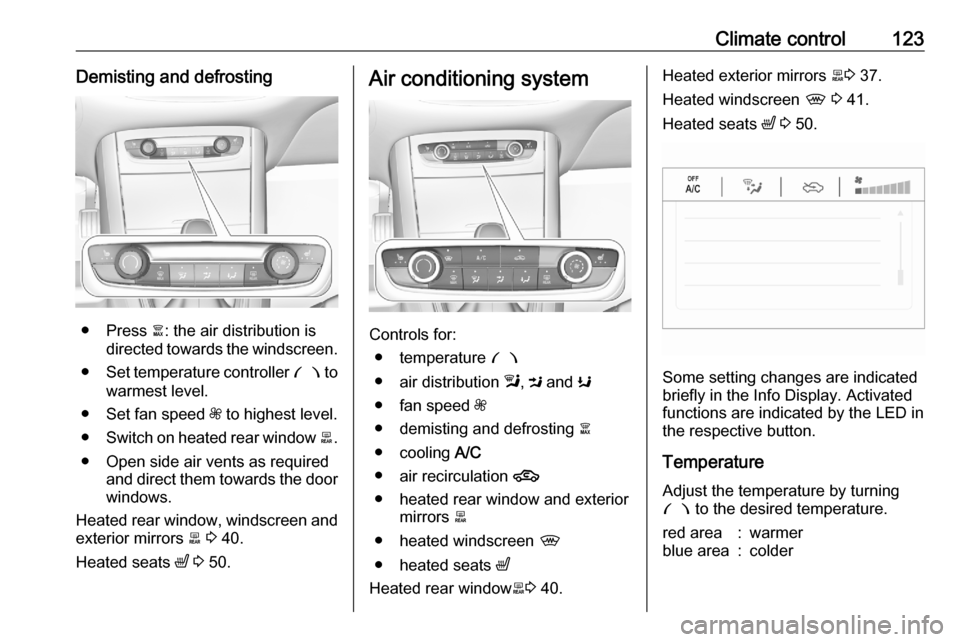
Controls for:
● temperature £
● air distribution l, M and K
● fan speed Z
● demisting and defrosting à
● cooling A/C
● air recirculation 4
● heated rear window and exterior mirrors b
● heated windscreen ,
● heated seats ß
Heated rear window b3 40.
Heated exterior mirrors b3 37.
Heated windscreen , 3 41.
Heated seats ß 3 50.
Some setting changes are indicated
briefly in the Info Display. Activated
functions are indicated by the LED in
the respective button.
Temperature
Adjust the temperature by turning
£ to the desired temperature.
red area:warmerblue area:colder
Page 128 of 283
126Climate controlElectronic climate controlsystem
The dual zone climate control allows
different temperatures for driver side
and front passenger side.
In automatic mode, temperature, fan
speed and air distribution are
regulated automatically.
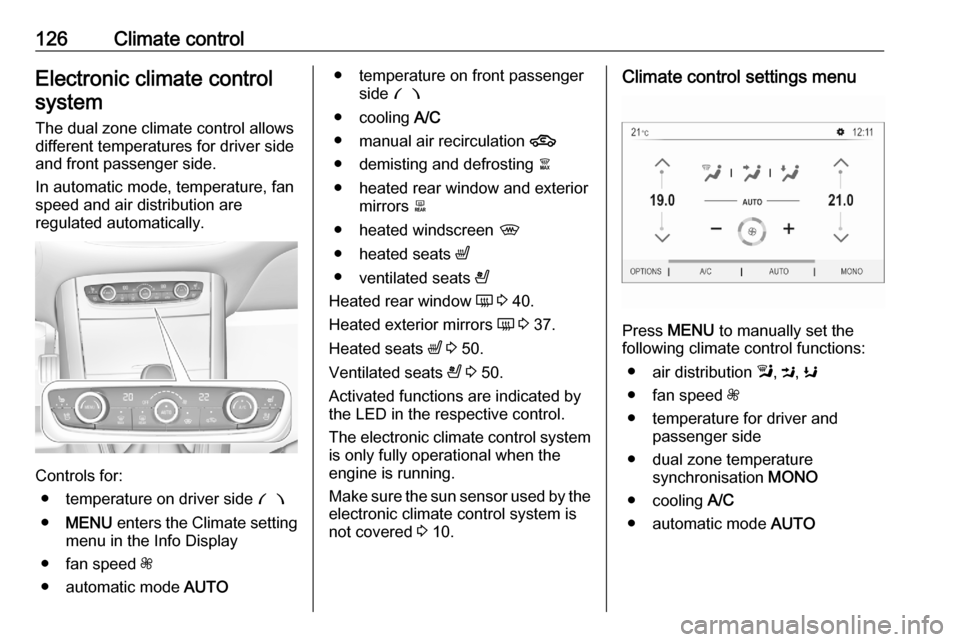
Controls for:
● temperature on driver side £
● MENU enters the Climate setting
menu in the Info Display
● fan speed Z
● automatic mode AUTO
● temperature on front passenger
side £
● cooling A/C
● manual air recirculation 4
● demisting and defrosting à
● heated rear window and exterior mirrors b
● heated windscreen ,
● heated seats ß
● ventilated seats A
Heated rear window Ü 3 40.
Heated exterior mirrors Ü 3 37.
Heated seats ß 3 50.
Ventilated seats A 3 50.
Activated functions are indicated by the LED in the respective control.
The electronic climate control system
is only fully operational when the
engine is running.
Make sure the sun sensor used by the
electronic climate control system is
not covered 3 10.Climate control settings menu
Press MENU to manually set the
following climate control functions:
● air distribution l, M , K
● fan speed Z
● temperature for driver and passenger side
● dual zone temperature synchronisation MONO
● cooling A/C
● automatic mode AUTO
Page 129 of 283
Climate control127Climate setting menu can also be
displayed:
● by selecting Climate on the
7'' Colour Info Display or
● by pressing Í and then selecting
Climate from the menu on the
8'' Colour Info Display.
Automatic mode AUTO
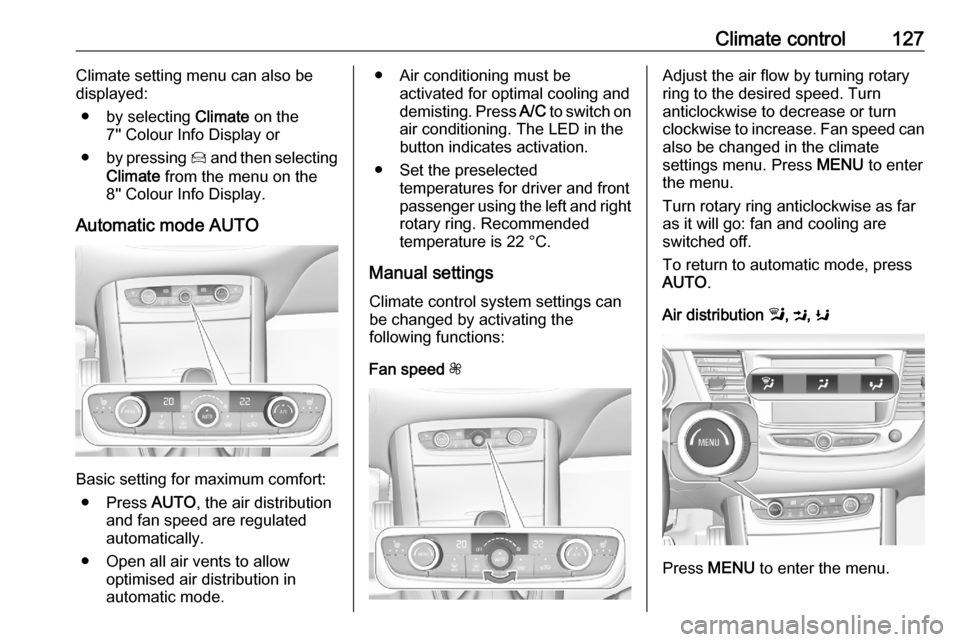
Basic setting for maximum comfort: ● Press AUTO, the air distribution
and fan speed are regulated
automatically.
● Open all air vents to allow optimised air distribution in
automatic mode.
● Air conditioning must be activated for optimal cooling and
demisting. Press A/C to switch on
air conditioning. The LED in the
button indicates activation.
● Set the preselected temperatures for driver and front
passenger using the left and right rotary ring. Recommended
temperature is 22 °C.
Manual settings Climate control system settings can
be changed by activating the
following functions:
Fan speed ZAdjust the air flow by turning rotary
ring to the desired speed. Turn
anticlockwise to decrease or turn
clockwise to increase. Fan speed can also be changed in the climate
settings menu. Press MENU to enter
the menu.
Turn rotary ring anticlockwise as far
as it will go: fan and cooling are
switched off.
To return to automatic mode, press
AUTO .
Air distribution l, M , K
Press MENU to enter the menu.
Page 130 of 283
128Climate controlTouch in the Colour Info Display:l:to windscreen and front door
windowsM:to head area and rear seats via
adjustable air ventsK:to front and rear foot well and
windscreen
To return to automatic air distribution,
press AUTO .
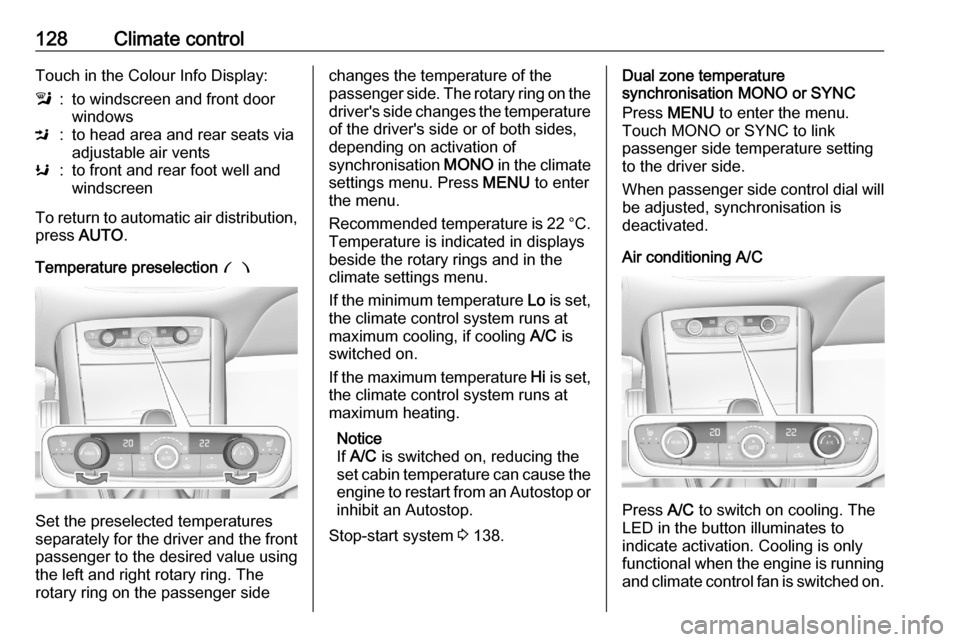
Temperature preselection £
Set the preselected temperatures
separately for the driver and the front
passenger to the desired value using
the left and right rotary ring. The
rotary ring on the passenger side
changes the temperature of the
passenger side. The rotary ring on the driver's side changes the temperature
of the driver's side or of both sides,
depending on activation of
synchronisation MONO in the climate
settings menu. Press MENU to enter
the menu.
Recommended temperature is 22 °C .
Temperature is indicated in displays beside the rotary rings and in the
climate settings menu.
If the minimum temperature Lo is set,
the climate control system runs at maximum cooling, if cooling A/C is
switched on.
If the maximum temperature Hi is set,
the climate control system runs at maximum heating.
Notice
If A/C is switched on, reducing the
set cabin temperature can cause the
engine to restart from an Autostop or inhibit an Autostop.
Stop-start system 3 138.Dual zone temperature
synchronisation MONO or SYNC
Press MENU to enter the menu.
Touch MONO or SYNC to link
passenger side temperature setting
to the driver side.
When passenger side control dial will be adjusted, synchronisation is
deactivated.
Air conditioning A/C
Press A/C to switch on cooling. The
LED in the button illuminates to
indicate activation. Cooling is only
functional when the engine is running and climate control fan is switched on.
Page 132 of 283
130Climate controlNotice
If à is pressed while the engine is
running, an Autostop will be inhibited until à is pressed again.
If à is pressed while the engine is in
an Autostop, the engine will restart
automatically.
Stop-start system 3 138.
Deactivation of electronic climate control system
Cooling, fan and automatic mode can
be switched off by turning the rotary
ring around the AUTO button
anticlockwise.
Activation by switching on the fan or
pressing AUTO.
Heated rear window, windscreen and exterior mirrors b 3 40.
Heated seats ß 3 50.Auxiliary heater
Air heater
Quickheat is an electric auxiliary air
heater which automatically warms up
the passenger compartment more
quickly.
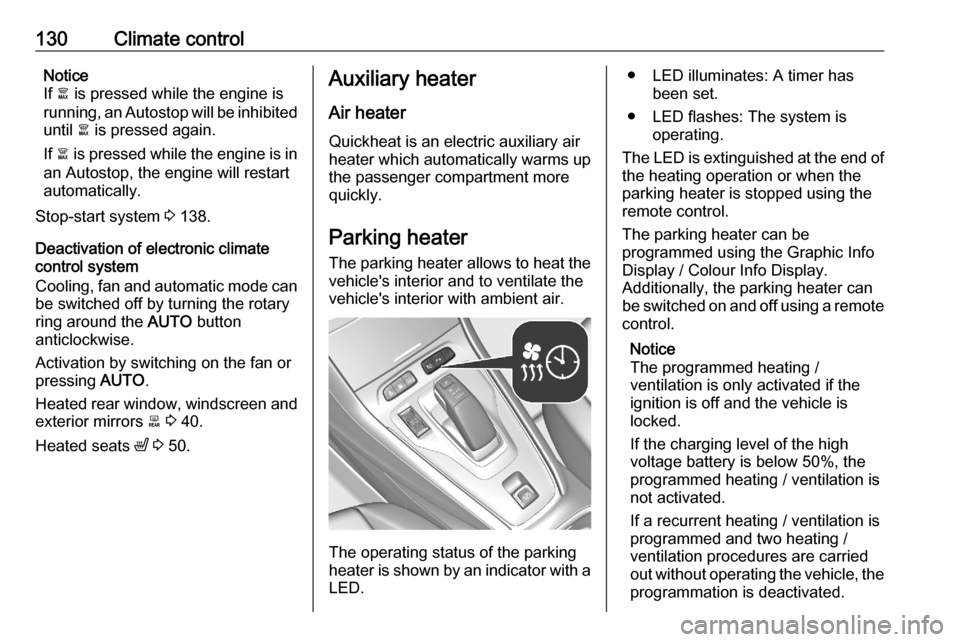
Parking heater
The parking heater allows to heat the
vehicle's interior and to ventilate the
vehicle's interior with ambient air.
The operating status of the parking
heater is shown by an indicator with a LED.
● LED illuminates: A timer has been set.
● LED flashes: The system is operating.
The LED is extinguished at the end of
the heating operation or when the
parking heater is stopped using the
remote control.
The parking heater can be
programmed using the Graphic Info
Display / Colour Info Display.
Additionally, the parking heater can
be switched on and off using a remote control.
Notice
The programmed heating /
ventilation is only activated if the
ignition is off and the vehicle is
locked.
If the charging level of the high
voltage battery is below 50%, the
programmed heating / ventilation is
not activated.
If a recurrent heating / ventilation is
programmed and two heating /
ventilation procedures are carried
out without operating the vehicle, the
programmation is deactivated.
Page 133 of 283
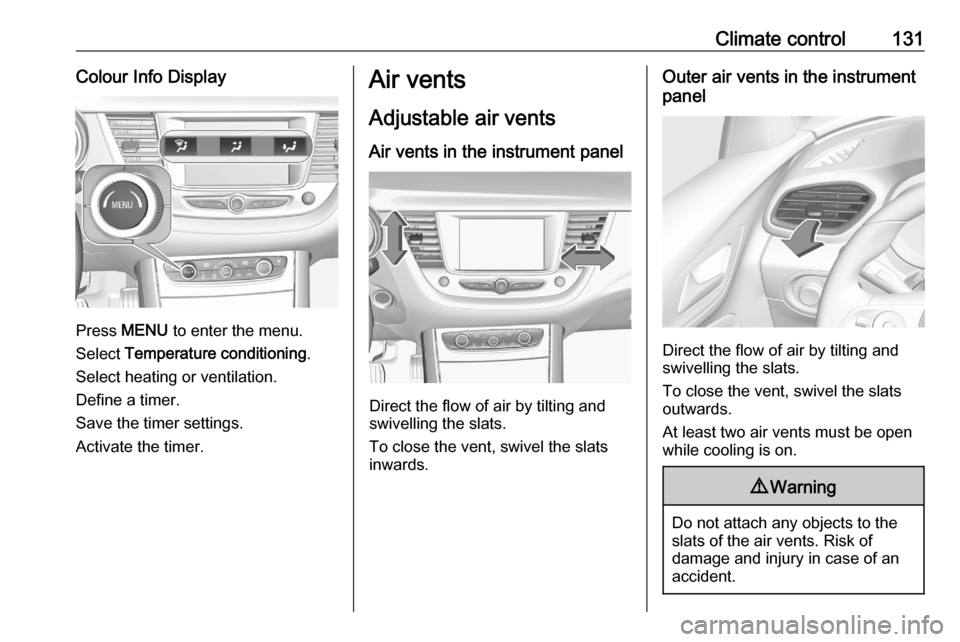
Climate control131Colour Info Display
Press MENU to enter the menu.
Select Temperature conditioning .
Select heating or ventilation.
Define a timer.
Save the timer settings.
Activate the timer.
Air vents
Adjustable air ventsAir vents in the instrument panel
Direct the flow of air by tilting and
swivelling the slats.
To close the vent, swivel the slats
inwards.
Outer air vents in the instrument
panel
Direct the flow of air by tilting and
swivelling the slats.
To close the vent, swivel the slats
outwards.
At least two air vents must be open
while cooling is on.
9 Warning
Do not attach any objects to the
slats of the air vents. Risk of
damage and injury in case of an
accident.
Page 135 of 283

Driving and operating133Driving and
operatingDriving hints ............................... 134
Control of the vehicle ...............134
Steering ................................... 134
Starting and operating ...............134
New vehicle running-in ............134
Ignition switch positions ...........134
Power button ........................... 135
Starting the engine ..................136
Overrun cut-off ........................ 138
Stop-start system ....................138
Parking .................................... 140
Engine exhaust .......................... 141
Exhaust filter ............................ 141
Catalytic converter ...................142
AdBlue ..................................... 142
Automatic transmission electri‐
fied ............................................. 146
Automatic transmission ..............147
Transmission display ...............147
Gear selection ......................... 147
Manual mode ........................... 148
Electronic driving programmes 149Fault ........................................ 149
Interruption of power supply ....149
Manual transmission ..................150
Drive systems ............................ 151
Drive modes ............................ 151
All-wheel drive ......................... 151
Brakes ........................................ 152
Antilock brake system .............152
Parking brake .......................... 153
Brake assist ............................. 155
Hill start assist ......................... 155
Regenerative braking ..............155
Ride control systems .................156
Electronic Stability Control and Traction Control system .........156
Selective ride control ...............157
Sport mode .............................. 158
Driver assistance systems .........159
Cruise control .......................... 159
Speed limiter ........................... 162
Adaptive cruise control ............164
Forward collision alert .............170
Active emergency braking .......172
Front pedestrian protection .....175
Parking assist .......................... 176
Advanced parking assist .........179
Side blind spot alert .................184
Panoramic view system ...........185
Rear view camera ...................188Lane departure warning ..........190
Lane keep assist .....................191
Driver alert ............................... 193
Charging .................................... 194
Programmable charging ..........197
Charging status .......................198
Charge cord ............................. 198
Fuel ............................................ 201
Fuel for petrol engines .............201
Fuel for diesel engines ............202
Refuelling ................................ 203
Trailer hitch ................................ 205
General information .................205
Driving characteristics and towing tips .............................. 205
Trailer towing ........................... 205
Towing equipment ...................206
Trailer stability assist ...............208
Page 138 of 283
136Driving and operating9Warning
If the vehicle battery is discharged,
the vehicle must not be towed,
tow-started or jump-started as the
steering wheel lock cannot be
disengaged.
Operation on vehicles with
electronic key system in case of
failure
If either the electronic key fails or the
battery of the electronic key is weak,
a message may be displayed in the
Driver Information Centre.
Hold the electronic key with buttons
outside at the marking on the steering column cover as shown in the
illustration.
Operate the clutch pedal (manual
transmission), the brake pedal and
press Start/Stop .
This option is intended for
emergencies only. Replace the
electronic key battery as soon as
possible 3 22.
For unlocking or locking the doors,
see fault in radio remote control unit
or electronic key system 3 23.Starting the engine
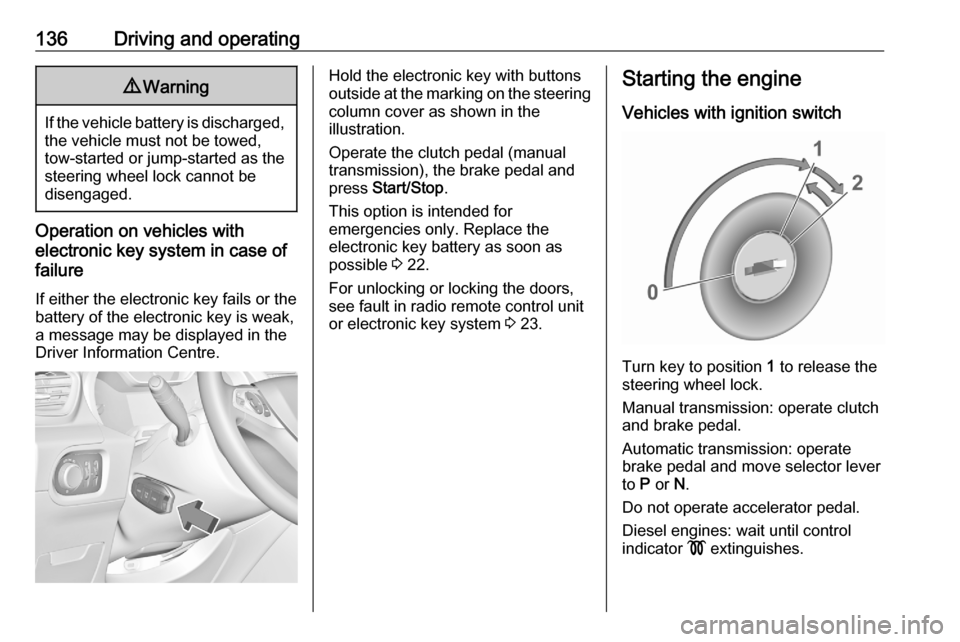
Vehicles with ignition switch
Turn key to position 1 to release the
steering wheel lock.
Manual transmission: operate clutch
and brake pedal.
Automatic transmission: operate
brake pedal and move selector lever
to P or N.
Do not operate accelerator pedal.
Diesel engines: wait until control
indicator ! extinguishes.
Page 145 of 283
Driving and operating143Caution
Avoid contact of the paintwork withAdBlue.
In case of contact, rinse off with water.
AdBlue freezes at a temperature of
approx. -11 °C. As the vehicle is
equipped with an AdBlue preheater,
the emissions reduction at low
temperatures is ensured. The AdBlue
preheater works automatically.
Notice
Frozen and again liquefied AdBlue is usable without quality loss.
The typical AdBlue consumption is
approx. 0.85 l per 600 miles, but can
also be higher depending on driving
behaviour (e.g. high load or towing).
Level warnings
Depending on the calculated range of AdBlue, different messages are
displayed in the Driver Information
Centre. The messages and the
restrictions are a legal requirement.
1. The first possible warning is Top
up emissions additive: Starting
prevented in 1500 mi .
When switching on the ignition,
this warning will show up once
briefly with the calculated range.
Additionally, control indicator u
will illuminate and a chime will
sound. Driving is possible without
any restrictions.
When driving, the message is
displayed every 200 miles until
the additive tank has been
topped-up.
2. The next warning level is entered with a range below 350 miles. The
message with the current range
will always be displayed when
ignition is switched on.
Additionally, control indicator u
will flash and a chime will sound. Refill AdBlue before entering the
next warning level.
When driving, the message is
displayed every 30 seconds untilthe additive tank has been
topped-up.
3. The last warning level is entered when the AdBlue tank is empty.
Restart of the engine is not
possible. The following warning
message will be displayed:
Top up emissions additive:
Starting prevented
Additionally, control indicator u
will flash and a chime will sound.
Refill the tank to a level of at least 5 l of AdBlue, otherwise restarting
of the engine is not possible.
High emission warnings In the event of a fault with the
emissions control system, different
messages are displayed in the Driver
Information Centre. The messages
and the restrictions are a legal
requirement.
1. If a fault is detected for the first time, the warning Emissions fault
is displayed.
Additionally, control indicators u,
C and Z will illuminate and a