VAUXHALL INSIGNIA 2014 Repair Manual
Manufacturer: VAUXHALL, Model Year: 2014, Model line: INSIGNIA, Model: VAUXHALL INSIGNIA 2014Pages: 321, PDF Size: 8.83 MB
Page 61 of 321

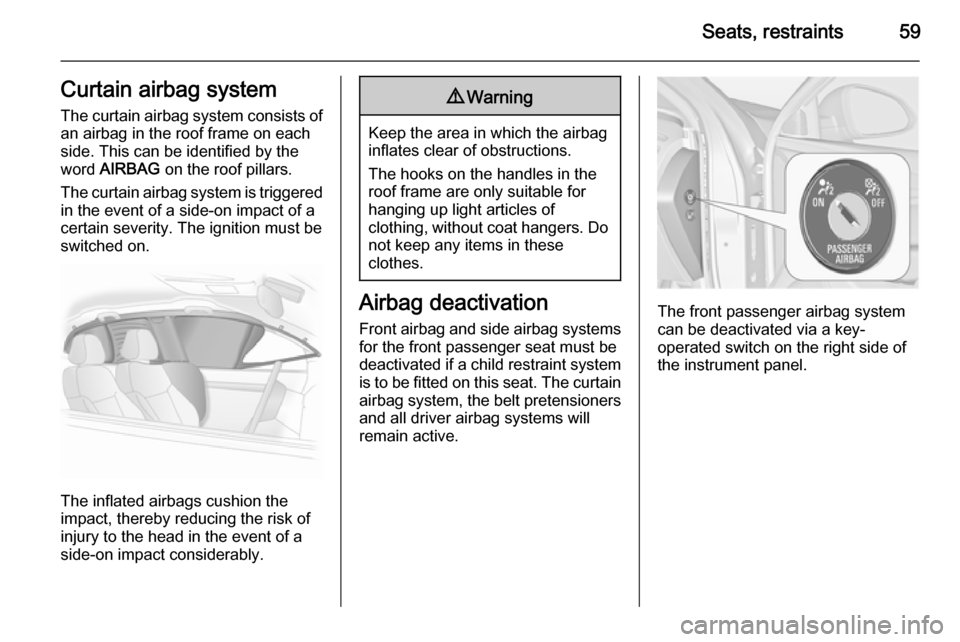
Seats, restraints59Curtain airbag system
The curtain airbag system consists of an airbag in the roof frame on each
side. This can be identified by the
word AIRBAG on the roof pillars.
The curtain airbag system is triggered in the event of a side-on impact of a
certain severity. The ignition must be
switched on.
The inflated airbags cushion the
impact, thereby reducing the risk of
injury to the head in the event of a
side-on impact considerably.
9 Warning
Keep the area in which the airbag
inflates clear of obstructions.
The hooks on the handles in the
roof frame are only suitable for
hanging up light articles of
clothing, without coat hangers. Do not keep any items in these
clothes.
Airbag deactivation
Front airbag and side airbag systems for the front passenger seat must be
deactivated if a child restraint system
is to be fitted on this seat. The curtain
airbag system, the belt pretensioners and all driver airbag systems will
remain active.The front passenger airbag system
can be deactivated via a key-
operated switch on the right side of the instrument panel.
Page 62 of 321

60Seats, restraints
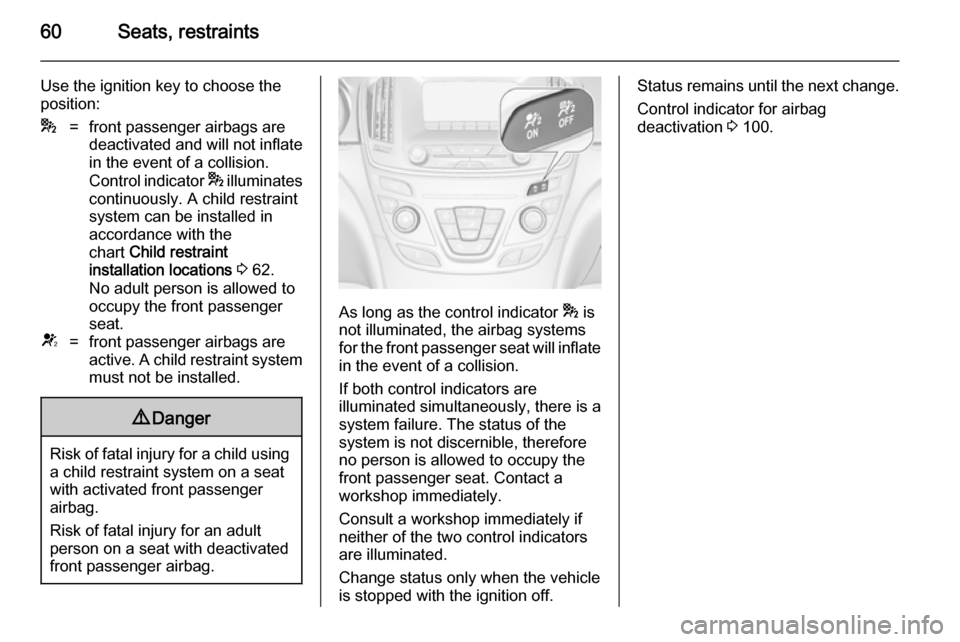
Use the ignition key to choose the
position:*=front passenger airbags are
deactivated and will not inflate in the event of a collision.
Control indicator * illuminates
continuously. A child restraint
system can be installed in
accordance with the
chart Child restraint
installation locations 3 62.
No adult person is allowed to
occupy the front passenger
seat.V=front passenger airbags are
active. A child restraint system
must not be installed.9 Danger
Risk of fatal injury for a child using
a child restraint system on a seat
with activated front passenger
airbag.
Risk of fatal injury for an adult
person on a seat with deactivated
front passenger airbag.
As long as the control indicator * is
not illuminated, the airbag systems
for the front passenger seat will inflate in the event of a collision.
If both control indicators are
illuminated simultaneously, there is a
system failure. The status of the
system is not discernible, therefore
no person is allowed to occupy the
front passenger seat. Contact a
workshop immediately.
Consult a workshop immediately if
neither of the two control indicators
are illuminated.
Change status only when the vehicle is stopped with the ignition off.
Status remains until the next change.
Control indicator for airbag
deactivation 3 100.
Page 63 of 321

Seats, restraints61Child restraintsChild restraint systems
We recommend the Vauxhall child restraint system which is tailored
specifically to the vehicle.
When a child restraint system is being used, pay attention to the following
usage and installation instructions and also those supplied with the child
restraint system.
Always comply with local or national
regulations. In some countries, the
use of child restraint systems is
forbidden on certain seats.9 Danger
When using a child restraint
system on the front passenger
seat, the airbag systems for the
front passenger seat must be
deactivated; if not, the triggering of the airbags poses a risk of fatal
injury to the child.
This is especially the case if rear-
facing child restraint systems are
used on the front passenger seat.
Airbag deactivation 3 59.
Selecting the right system The rear seats are the most
convenient location to fasten a child restraint system.
Children should travel facing
rearwards in the vehicle as long as
possible. This makes sure that the child's backbone, which is still very
weak, is under less strain in the event of an accident.
Suitable are restraint systems that
comply with ECE 44-03 or
ECE 44-04. Check local laws and
regulations for mandatory use of child
restraint systems.
Ensure that the child restraint system to be installed is compatible with the
vehicle type.
Ensure that the mounting location of
the child restraint system within the
vehicle is correct.
Allow children to enter and exit the
vehicle only on the side facing away
from the traffic.
When the child restraint system is not in use, secure the seat with a seat beltor remove it from the vehicle.
Notice
Do not stick anything on the child
restraint systems and do not cover
them with any other materials.
A child restraint system which has
been subjected to stress in an
accident must be replaced.
Page 64 of 321

62Seats, restraintsChild restraint installation locationsPermissible options for fitting a child restraint system
Weight and age class
On front passenger seat
On rear outboard seatsOn rear centre seat
activated airbagdeactivated airbagGroup 0: up to 10 kg
or approx. 10 monthsXU 1U 2U2Group 0+: up to 13 kg
or approx. 2 yearsXU 1U2U2Group I: 9 to 18 kg
or approx. 8 months to 4 yearsXU 1U2U2Group II: 15 to 25 kg
or approx. 3 to 7 yearsXXUUGroup III: 22 to 36 kg
or approx. 6 to 12 yearsXXUU1=Only if front passenger seat airbag system is deactivated. If the child restraint system is being secured using a three- point seat belt, move seat height adjustment to uppermost position and ensure that vehicle safety belt runs forwards
from the upper anchorage point. Adjust seat backrest inclination as far as necessary to a vertical position to ensure
that the belt is tight on the buckle side.2=Seat available with ISOFIX and Top-Tether mounting brackets 3 65.U=Universal suitability in conjunction with three-point seat belt.X=No child restraint system permitted in this weight class.
Page 65 of 321

Seats, restraints63
Permissible options for fitting an ISOFIX child restraint systemWeight classSize classFixtureOn front passenger seatOn rear outboard seatsOn rear centre seatGroup 0: up to 10 kgEISO/R1XILILGroup 0+: up to 13 kgEISO/R1XILILDISO/R2XILILCISO/R3XILILGroup I: 9 to 18 kgDISO/R2XILILCISO/R3XILILBISO/F2XIL, IUFIL, IUFB1ISO/F2XXIL, IUFIL, IUFAISO/F3XIL, IUFIL, IUFIL=Suitable for particular ISOFIX restraint systems of the 'specific-vehicle', 'restricted' or 'semi-universal' categories.The ISOFIX restraint system must be approved for the specific vehicle type.IUF=Suitable for ISOFIX forward-facing child restraint systems of universal category approved for use in this weight class.X=No ISOFIX child restraint system approved in this weight class.
Page 66 of 321

64Seats, restraints
ISOFIX size class and seat deviceA – ISO/F3=Forward-facing child restraint system for children of maximum size in the weight class 9 to 18 kg.B – ISO/F2=Forward-facing child restraint system for smaller children in the weight class 9 to 18 kg.B1 – ISO/F2X=Forward-facing child restraint system for smaller children in the weight class 9 to 18 kg.C – ISO/R3=Rear-facing child restraint system for children of maximum size in the weight class up to 18 kg.D – ISO/R2=Rear-facing child restraint system for smaller children in the weight class up to 18 kg.E – ISO/R1=Rear-facing child restraint system for young children in the weight class up to 13 kg.
Page 67 of 321

Seats, restraints65ISOFIX child restraint
systems
Fasten vehicle-approved ISOFIX
child restraint systems to the ISOFIX
mounting brackets. Specific vehicle
ISOFIX child restraint system
positions are marked in the table by
IL 3 62.
No more than two ISOFIX child
restraint systems can be installed on
the rear seats at the same time,
though not right next to each other.
ISOFIX mounting brackets are
indicated by a logo ISOFIX on the
backrest.
Top-tether fastening eyes
The vehicle has three fastening eyes
on the backside of the rear backrests
or in the area behind the head
restraints.
Top-Tether fastening eyes are
marked with the symbol : for a child
seat.
Open the flap of the required
fastening eye, marked by the child
seat symbol.
In addition to the ISOFIX mounting,
fasten the Top-Tether strap to the
Top-Tether fastening eyes. The strap
must run between the two guide rods
of the head restraint.
ISOFIX child restraint systems of
universal category positions are
marked in the table by IUF 3 62.
Page 68 of 321

66StorageStorageStorage compartments................66
Load compartment .......................68
Roof rack system .........................78
Loading information .....................79Storage compartments9Warning
Do not store heavy or sharp
objects in the storage
compartments. Otherwise, the
storage compartment lid could
open and vehicle occupants could be injured by objects being thrown
around in the event of hard
braking, a sudden change in
direction or an accident.
Glovebox
The glovebox features a pen holder
and a coin holder.
The glovebox should be closed whilst driving.
Cupholders
Cupholders are located in the centre
console.
Page 69 of 321

Storage67
Additional cupholders are located in
the rear armrest. Fold down armrest.
Front storage
A storage compartment is located
next to the steering wheel.
Armrest storage Storage in the front armrest
Push button to fold up the armrest.
Storage in the rear armrest
Fold down armrest and open cover.
Close cover before folding the
armrest up.
Page 70 of 321

68StorageLoad compartmentFolding down rear seat
backrests
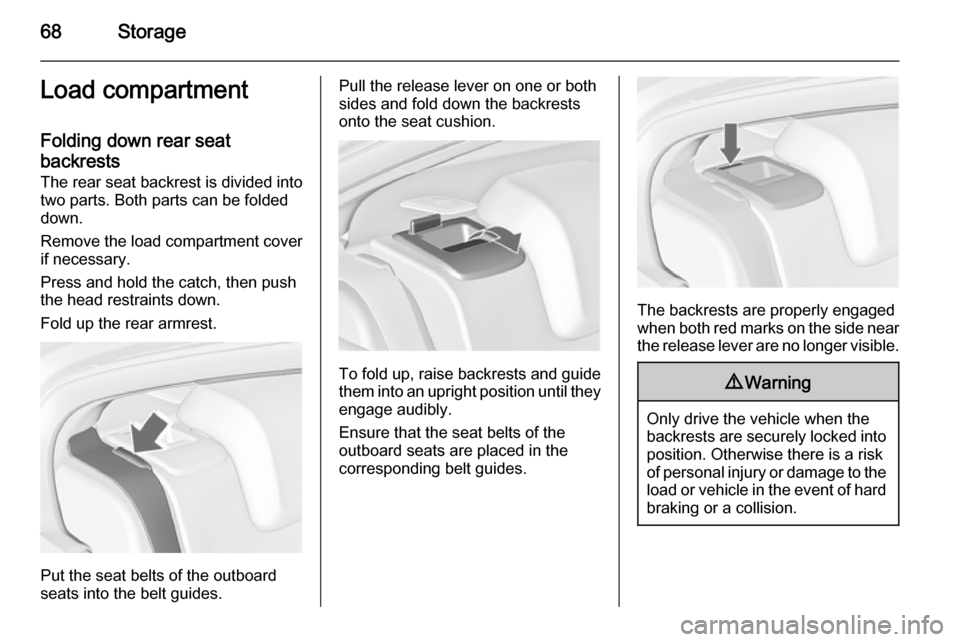
The rear seat backrest is divided into
two parts. Both parts can be folded
down.
Remove the load compartment cover if necessary.
Press and hold the catch, then push
the head restraints down.
Fold up the rear armrest.
Put the seat belts of the outboard
seats into the belt guides.
Pull the release lever on one or both
sides and fold down the backrests
onto the seat cushion.
To fold up, raise backrests and guide them into an upright position until they
engage audibly.
Ensure that the seat belts of the
outboard seats are placed in the corresponding belt guides.
The backrests are properly engaged
when both red marks on the side near the release lever are no longer visible.
9 Warning
Only drive the vehicle when the
backrests are securely locked into position. Otherwise there is a risk
of personal injury or damage to the
load or vehicle in the event of hard braking or a collision.