fuel VAUXHALL INSIGNIA 2015.5 User Guide
[x] Cancel search | Manufacturer: VAUXHALL, Model Year: 2015.5, Model line: INSIGNIA, Model: VAUXHALL INSIGNIA 2015.5Pages: 331, PDF Size: 9.08 MB
Page 113 of 331

Instruments and controls111
Illuminates yellowThe distance to a preceding moving
vehicle gets too small or when
approaching another vehicle too
rapidly.
Forward collision alert 3 187,
Adaptive cruise control 3 180.
Speed limiter L illuminates white or green.
Illuminates white The system is on.
Illuminates green
Speed limiter is active. Set speed is
indicated near L symbol.
Speed limiter 3 179.
Traffic sign assistant L displays detected traffic signs as
control indicator.
Traffic sign assistant 3 205.Door open
h illuminates red.
A door or the tailgate is open.Information displays
Driver Information Centre The Driver Information Centre (DIC)
is located in the instrument cluster.
Depending on the version and the
instrument cluster, the DIC is
available as Baselevel display,
Midlevel display or Uplevel display.
DIC indicates depending on the
equipment:
■ overall and trip odometer
■ vehicle information
■ trip/fuel information
■ economic information
■ performance information
■ vehicle and warning messages
■ audio and infotainment information
■ phone information
■ navigation information
■ vehicle settings
Page 115 of 331
Instruments and controls113
■Phone Menu
■ Navigation Menu
■ Settings Menu
Some of the displayed functions differ
when the vehicle is being driven or at a standstill. Some functions are only
available when the vehicle is being
driven.
Uplevel instrument cluster can be
displayed as Sport mode or Tour
mode. See below: Settings Menu,
Display Themes.
Vehicle personalisation 3 122.
Memorised settings 3 23.
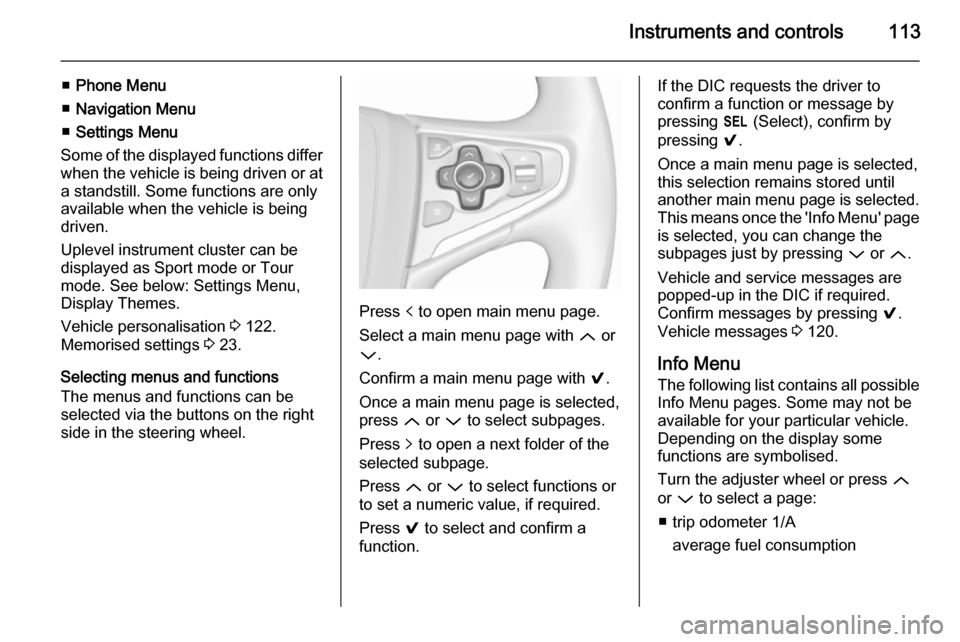
Selecting menus and functions
The menus and functions can be
selected via the buttons on the right
side in the steering wheel.
Press p to open main menu page.
Select a main menu page with Q or
P .
Confirm a main menu page with 9.
Once a main menu page is selected, press Q or P to select subpages.
Press q to open a next folder of the
selected subpage.
Press Q or P to select functions or
to set a numeric value, if required.
Press 9 to select and confirm a
function.
If the DIC requests the driver to
confirm a function or message by
pressing H (Select), confirm by
pressing 9.
Once a main menu page is selected, this selection remains stored until
another main menu page is selected.
This means once the 'Info Menu' page
is selected, you can change the
subpages just by pressing P or Q.
Vehicle and service messages are
popped-up in the DIC if required.
Confirm messages by pressing 9.
Vehicle messages 3 120.
Info Menu The following list contains all possible Info Menu pages. Some may not be
available for your particular vehicle.
Depending on the display some
functions are symbolised.
Turn the adjuster wheel or press Q
or P to select a page:
■ trip odometer 1/A average fuel consumption
Page 116 of 331

114Instruments and controls
average speed
■ trip odometer 2/B average fuel consumption
average speed
■ digital speed
■ fuel range
■ fuel range LPG
■ instantaneous fuel consumption
■ remaining oil life
■ tyre pressure
■ gasoline fuel level LPG fuel level
■ timer
■ traffic sign assistant
■ following distance
■ battery voltage
■ Top consumers
■ Economy trend
■ Eco index
■ blank page
On Baselevel display, the pages
"Remaining Oil Life", "Tyre Pressure",
"Traffic Sign Assistant" and"Following distance indication" are
displayed in the Settings Menu X .
Select by pressing MENU.
On Baselevel display, the pages "Top consumers", "Economy trend" and
"Eco index" are displayed in the Eco
Menu s . Select by pressing
MENU .
Trip odometer 1/A and 2/B
Trip odometer displays the current
distance since a certain reset.
Trip odometer counts up to a distance
of 2,000 miles then restarts at 0.
To reset on Baselevel display, press
the SET/CLR button for a few
seconds, on Midlevel and Uplevel
display, press > and confirm with 9.
The information of trip odometer page
1/A and 2/B can be reset separately
for odometer, average consumption
and average speed while the
respective display is active.
Average fuel consumption
Display of average consumption. The measurement can be reset at any
time and starts with a default value.To reset on Baselevel display, press
the SET/CLR button for a few
seconds, on Midlevel and Uplevel
display, press > and confirm with 9.
On vehicles with LPG engines, average consumption is indicated for
the currently selected mode, LPG or
Petrol.
Average speed
Display of average speed. The
measurement can be reset at any
time.
To reset on Baselevel display, press
the SET/CLR button for a few
seconds, on Midlevel and Uplevel
display, press > and confirm with 9.
Digital speed
Digital display of the instantaneous
speed.
Fuel range
Range is calculated from current fuel
tank content and current
consumption. The display shows
average values.
After refuelling, the range is updated
automatically after a brief delay.
Page 117 of 331

Instruments and controls115
When the fuel level in the tank is low,
a message appears on the display
and the control indicator i or Y in the
fuel gauge illuminates.
When the tank has to be refuelled
immediately, a warning message
appears and remains on the display.
Additionally, the control indicator i
or Y in the fuel gauge flashes 3 109.
Fuel range LPG version
Display of approximate fuel range
available with the remaining fuel in
each respective fuel tank of Petrol
and LPG fuel, along with a total range
of both fuel types together. Switch
between the modes by pressing the SET/CLR button or 9.
Instantaneous fuel consumption
Display of the instantaneous
consumption.
On vehicles with LPG engines,
instantaneous consumption is
indicated for the currently selected
mode, LPG or Petrol.Remaining oil life
Indicates an estimate of the oil's
useful life. The number in % means the remaining of current oil life 3 102.
Tire pressure
Checks tyre pressure of all wheels
during driving 3 251.
Gasoline fuel level/LPG fuel level
Displays the fuel level for the fuel not
currently being used (Petrol or LPG).
A dedicated DIC cluster gauge shows the fuel level for the fuel currently
being used.
Timer
To start and stop press 9. To reset,
press > and confirm Reset.
Traffic sign assistant
Displays the detected traffic signs for
the current route section 3 205.
Following distance
Displays the distance in seconds to a preceding moving vehicle 3 190. If
Adaptive cruise control is active this
page shows the following distance
setting instead.Battery voltage
Displays the vehicle battery voltage.
Top consumers
List of top comfort consumers
currently switched on is displayed in
descending order. Fuel saving
potential is indicated. A switched-off
consumer disappears from the list
and the consumption value will be
updated.
During sporadic driving conditions,
the engine will activate the rear
window defog automatically to
increase the engine load. In this
event, the rear window defog is
indicated as one of the top
consumers, without activation by the
driver.
Economy trend
Displays the average consumption
development over a distance of
50 miles. Filled segments display the consumption in 5 mile steps and
shows the effect of topography or
driving behaviour on fuel
consumption.
Page 118 of 331

116Instruments and controls
Economy index
The current fuel consumption is
indicated on an economic scale. For
economical driving adapt your driving style to keep the indicator within the
Eco area. Indicator outside the Eco
area means higher fuel consumption.
On Baselevel display, the current consumption value is indicated.
Shift indication : On Baselevel display
the current gear is indicated inside an
arrow. The figure above recommends upshifting for fuel saving reasons.
Blank page
Shows a blank page without any
information.
Performance Menu Performance menu is only viewable
on Uplevel display.
The following list contains all possible Performance Menu pages. Some
may not be available for your
particular vehicle.
Press Q or P to select a page:
■ performance page
■ g-force indication■ friction bubble
■ acceleration and braking
■ lap timer
Depending on settings of the Uplevel
display, "Oil temperature", "Oil
pressure" or "Battery voltage" can be
also indicated left or right from the
speedometer.
Performace page
Indicates oil temperature in degrees
Celsius.
Indicates the oil pressure in kPa.
Indicates the current absolute amount of the turbo boost being added.
G-force indication
Indicates the force of vehicle
performance. The amount of positive/
negative longitudinal force and lateral force will be displayed. The g-force
value unit will be calculated and
displayed as a numerical value.Friction bubble
A four quadrant visual display,
indicative of the four corners of the
car, with a "bubble" showing where
the most inertia is being exerted on
the vehicle.
Acceleration and braking
Displays the percentage amount of
brake or accelerator pressure applied by the driver as a bar graph around
the outer perimeter of the DIC area.
The left side is for acceleration and
the right side is for braking.
Lap timer
The lap timer function measures the
time that has passed since the last
time the user started or stopped the lap timer through ignition cycles.
Timer values are displayed from
hours to tenths of a second. Start and
stop the timer by pressing 9 button.
Current and Previous lap times are displayed accurate to the tenth of a second. Gain or loss time is indicated
in ss.s format.
Page 142 of 331
140Climate control
If no cooling or drying is required,
switch off the cooling system for fuel
saving reasons. Activated cooling
might inhibit Autostops.
Stop-start system 3 157.
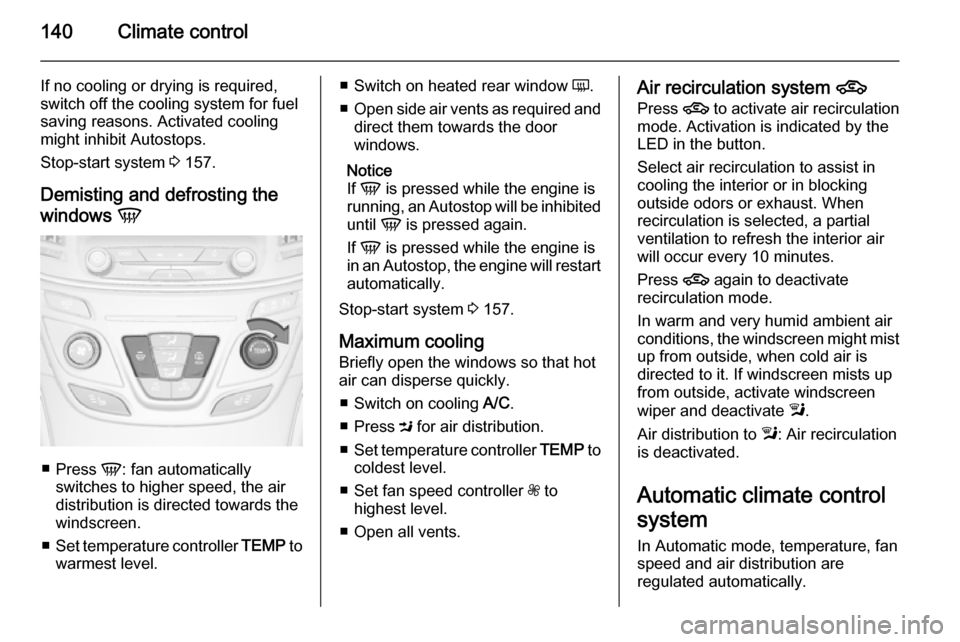
Demisting and defrosting the
windows V
■
Press V: fan automatically
switches to higher speed, the air
distribution is directed towards the
windscreen.
■ Set temperature controller TEMP to
warmest level.
■ Switch on heated rear window Ü.
■ Open side air vents as required and
direct them towards the door
windows.
Notice
If V is pressed while the engine is
running, an Autostop will be inhibited
until V is pressed again.
If V is pressed while the engine is
in an Autostop, the engine will restart
automatically.
Stop-start system 3 157.
Maximum cooling
Briefly open the windows so that hot
air can disperse quickly.
■ Switch on cooling A/C.
■ Press M for air distribution.
■ Set temperature controller TEMP to
coldest level.
■ Set fan speed controller Z to
highest level.
■ Open all vents.Air recirculation system 4
Press 4 to activate air recirculation
mode. Activation is indicated by the
LED in the button.
Select air recirculation to assist in
cooling the interior or in blocking
outside odors or exhaust. When
recirculation is selected, a partial
ventilation to refresh the interior air
will occur every 10 minutes.
Press 4 again to deactivate
recirculation mode.
In warm and very humid ambient air
conditions, the windscreen might mist up from outside, when cold air is
directed to it. If windscreen mists up
from outside, activate windscreen
wiper and deactivate l.
Air distribution to l: Air recirculation
is deactivated.
Automatic climate control
system
In Automatic mode, temperature, fan
speed and air distribution are
regulated automatically.
Page 145 of 331
Climate control143
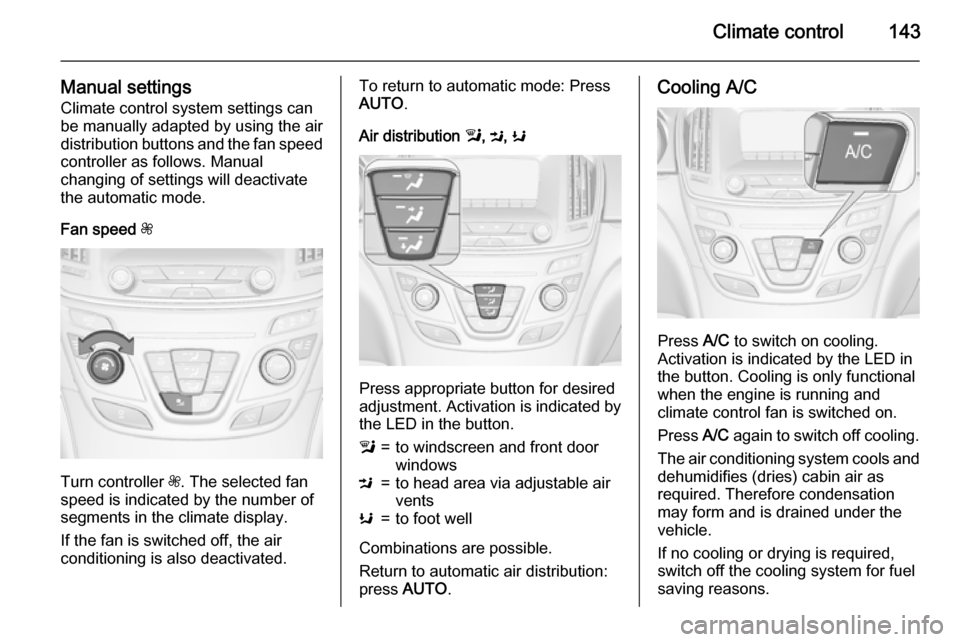
Manual settingsClimate control system settings can
be manually adapted by using the air
distribution buttons and the fan speed controller as follows. Manual
changing of settings will deactivate
the automatic mode.
Fan speed Z
Turn controller Z. The selected fan
speed is indicated by the number of segments in the climate display.
If the fan is switched off, the air
conditioning is also deactivated.
To return to automatic mode: Press AUTO .
Air distribution l, M , K
Press appropriate button for desired
adjustment. Activation is indicated by the LED in the button.
l=to windscreen and front door
windowsM=to head area via adjustable air
ventsK=to foot well
Combinations are possible.
Return to automatic air distribution:
press AUTO .
Cooling A/C
Press A/C to switch on cooling.
Activation is indicated by the LED in
the button. Cooling is only functional
when the engine is running and
climate control fan is switched on.
Press A/C again to switch off cooling.
The air conditioning system cools and
dehumidifies (dries) cabin air as
required. Therefore condensation
may form and is drained under the
vehicle.
If no cooling or drying is required,
switch off the cooling system for fuel
saving reasons.
Page 150 of 331
148Climate control
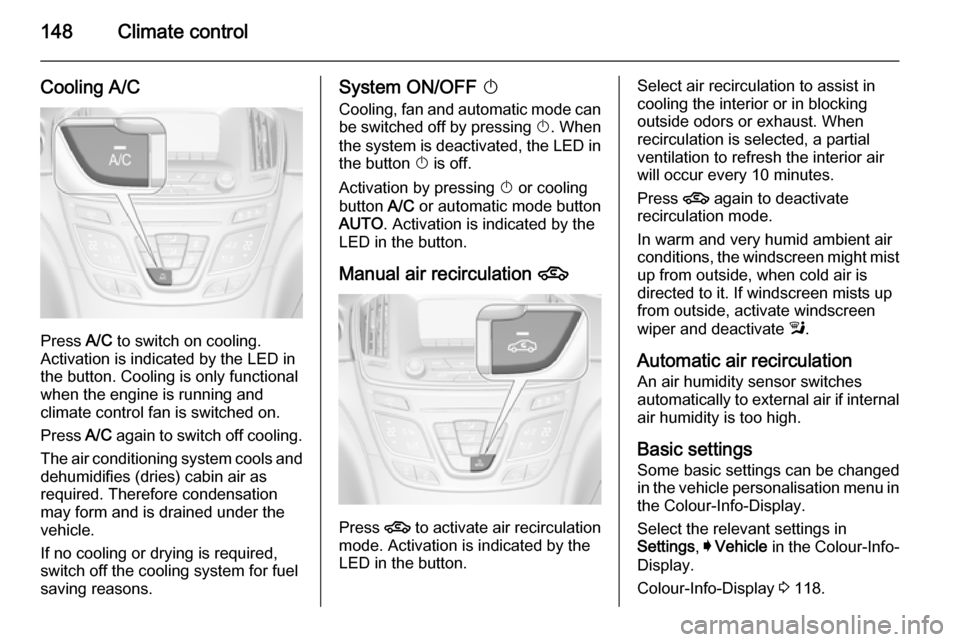
Cooling A/C
Press A/C to switch on cooling.
Activation is indicated by the LED in
the button. Cooling is only functional
when the engine is running and
climate control fan is switched on.
Press A/C again to switch off cooling.
The air conditioning system cools and
dehumidifies (dries) cabin air as
required. Therefore condensation
may form and is drained under the
vehicle.
If no cooling or drying is required,
switch off the cooling system for fuel
saving reasons.
System ON/OFF X
Cooling, fan and automatic mode can
be switched off by pressing X. When
the system is deactivated, the LED in the button X is off.
Activation by pressing X or cooling
button A/C or automatic mode button
AUTO . Activation is indicated by the
LED in the button.
Manual air recirculation 4
Press 4 to activate air recirculation
mode. Activation is indicated by the
LED in the button.
Select air recirculation to assist in cooling the interior or in blocking
outside odors or exhaust. When
recirculation is selected, a partial
ventilation to refresh the interior air
will occur every 10 minutes.
Press 4 again to deactivate
recirculation mode.
In warm and very humid ambient air
conditions, the windscreen might mist up from outside, when cold air is
directed to it. If windscreen mists up
from outside, activate windscreen
wiper and deactivate l.
Automatic air recirculation An air humidity sensor switches
automatically to external air if internal air humidity is too high.
Basic settingsSome basic settings can be changedin the vehicle personalisation menu in
the Colour-Info-Display.
Select the relevant settings in
Settings , I Vehicle in the Colour-Info-
Display.
Colour-Info-Display 3 118.
Page 154 of 331
152Driving and operatingDriving and operatingDriving hints............................... 152
Starting and operating ...............153
Engine exhaust .......................... 160
Automatic transmission .............. 164
Manual transmission ..................168
Drive systems ............................ 169
Brakes ........................................ 169
Ride control systems .................172
Driver assistance systems .........177
Fuel ............................................ 210
Trailer hitch ................................ 218Driving hints
Control of the vehicleNever coast with engine not
running (except during Autostop)
Many systems will not function in this
situation ( e.g. brake servo unit, power
steering). Driving in this manner is a
danger to yourself and others. All
systems function during an Autostop,
but there will be a controlled reduction
in power steering assist and vehicle
speed is reduced.
Stop-start system 3 157.
Pedals
To ensure the pedal travel is
uninhibited, there must be no mats in the area of the pedals.Steering
If power steering assist is lost
because the engine stops or due to a
system malfunction, the vehicle can
be steered but may require increased
effort.
Control indicator c 3 107.Caution
Vehicles equipped with hydraulic
power steering:
If the steering wheel is turned until it reaches the end of its travel, and
is held in that position for more
than 15 seconds, damage may
occur to the power steering
system and there may be loss of
power steering assist.
Page 155 of 331
Driving and operating153Starting and operating
New vehicle running-in Do not brake unnecessarily hard for
the first few journeys.
During the first drive, smoke may
occur because of wax and oil
evaporating off the exhaust system.
Park the vehicle in the open for a
while after the first drive and avoid
inhaling the fumes.
During the running-in period fuel and
engine oil consumption may be
higher and the cleaning process of the diesel particle filter may take
place more often.
Diesel particle filter 3 160.
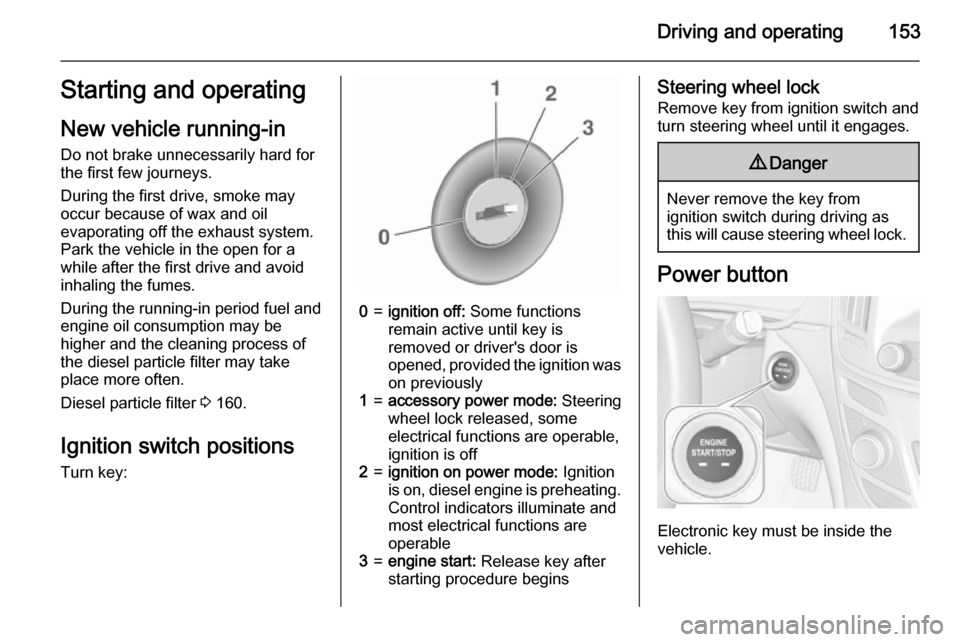
Ignition switch positions
Turn key:0=ignition off: Some functions
remain active until key is removed or driver's door is
opened, provided the ignition was
on previously1=accessory power mode: Steering
wheel lock released, some
electrical functions are operable,
ignition is off2=ignition on power mode: Ignition
is on, diesel engine is preheating. Control indicators illuminate and
most electrical functions are
operable3=engine start: Release key after
starting procedure beginsSteering wheel lock
Remove key from ignition switch and
turn steering wheel until it engages.9 Danger
Never remove the key from
ignition switch during driving as
this will cause steering wheel lock.
Power button
Electronic key must be inside the
vehicle.