ignition VAUXHALL INSIGNIA 2015.5 Workshop Manual
[x] Cancel search | Manufacturer: VAUXHALL, Model Year: 2015.5, Model line: INSIGNIA, Model: VAUXHALL INSIGNIA 2015.5Pages: 331, PDF Size: 9.08 MB
Page 165 of 331

Driving and operating163
Requests to have the exhaust systemchecked and finally the
announcement to prevent an engine
restart are displayed. These
restrictions are a legal requirement.
Seek your workshop for assistance.
Refilling AdBlueCaution
Only use AdBlue that complies
with European standards
DIN 70 070 and ISO 22241-1.
Do not use additives.
Do not dilute AdBlue.
Otherwise the selective catalytic
reduction system could be
damaged.
Notice
Only use the designated AdBlue canisters for refilling, to prevent a
topping-up of too much AdBlue.
Additionally, the fumes in the tank
are captured in the canister and do
not emerge.
Since AdBlue has a limited
durability, check the date of expiry
before refilling.
Notice
A volume of at least 5 litres of AdBlue must be added when refilling.
Otherwise the refilling of AdBlue
may not be detected by the system.
If AdBlue must be refilled at
temperatures below -11 °C, the
refilling of AdBlue may not be
detected by the system. In this case, park the vehicle in a space with a
higher ambient temperature until
AdBlue is liquefied.
Notice
When unscrewing the protective cap
from the filler neck, ammonia fumes may emerge. Do not inhale as the
fumes have a pungent smell. The
fumes are not harmful by inhalation.
The vehicle must be parked on a level surface.
The filler neck for AdBlue is located behind the fuel filler flap.
The fuel filler flap is located at right rear side of the vehicle.The fuel filler flap can only be opened
if the vehicle is unlocked.
1. Remove key from ignition lock.
2. Close all doors to avoid ammonia fumes entering the interior of the
vehicle.
3. Pull fuel filler flap at the recess and open 3 213.
4. Unscrew protective cap from the
filler neck.
5. Open AdBlue canister.
6. Mount one end of the hose on the
canister and screw the other end
on the filler neck.
7. Lift the canister until it is empty.
Page 167 of 331
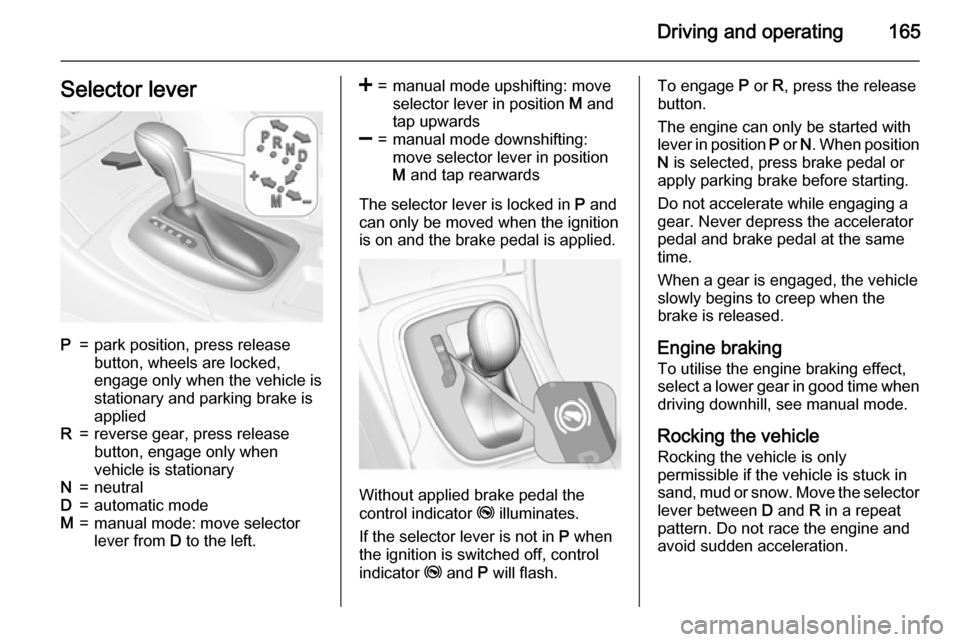
Driving and operating165Selector leverP=park position, press release
button, wheels are locked,
engage only when the vehicle is
stationary and parking brake is
appliedR=reverse gear, press release
button, engage only when
vehicle is stationaryN=neutralD=automatic modeM=manual mode: move selector
lever from D to the left.<=manual mode upshifting: move
selector lever in position M and
tap upwards]=manual mode downshifting:
move selector lever in position
M and tap rearwards
The selector lever is locked in P and
can only be moved when the ignition
is on and the brake pedal is applied.
Without applied brake pedal the
control indicator j illuminates.
If the selector lever is not in P when
the ignition is switched off, control
indicator j and P will flash.
To engage P or R, press the release
button.
The engine can only be started with
lever in position P or N. When position
N is selected, press brake pedal or
apply parking brake before starting.
Do not accelerate while engaging a
gear. Never depress the accelerator
pedal and brake pedal at the same
time.
When a gear is engaged, the vehicle
slowly begins to creep when the
brake is released.
Engine braking To utilise the engine braking effect,
select a lower gear in good time when
driving downhill, see manual mode.
Rocking the vehicle
Rocking the vehicle is only
permissible if the vehicle is stuck in
sand, mud or snow. Move the selector
lever between D and R in a repeat
pattern. Do not race the engine and
avoid sudden acceleration.
Page 168 of 331
166Driving and operating
Parking
Apply the parking brake and engage
P .
The ignition key can only be removed when the selector lever is in position
P .
Manual mode
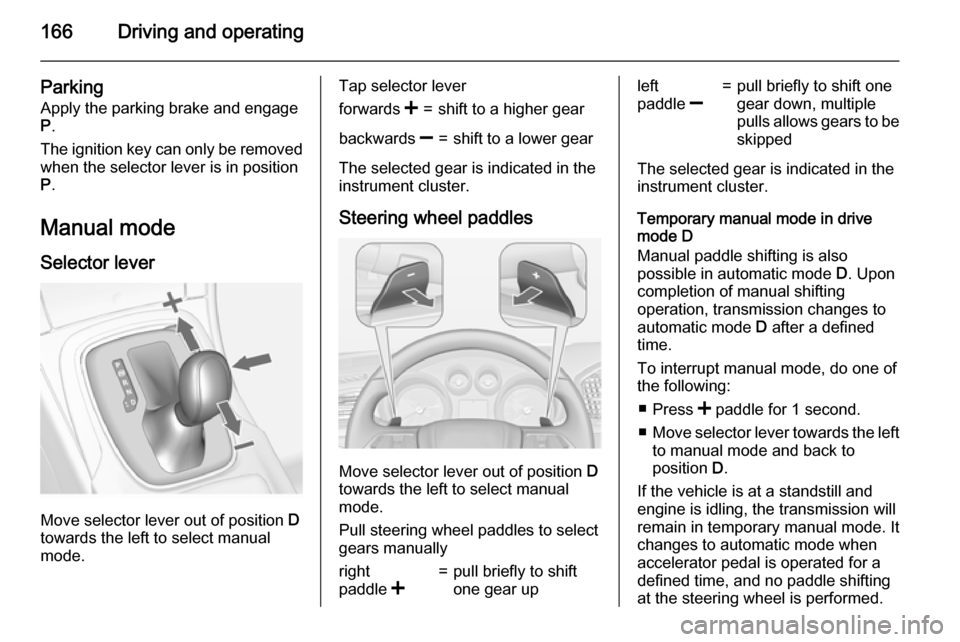
Selector lever
Move selector lever out of position D
towards the left to select manual
mode.
Tap selector leverforwards <=shift to a higher gearbackwards ]=shift to a lower gear
The selected gear is indicated in the
instrument cluster.
Steering wheel paddles
Move selector lever out of position D
towards the left to select manual
mode.
Pull steering wheel paddles to select
gears manually
right
paddle <=pull briefly to shift
one gear upleft
paddle ]=pull briefly to shift one
gear down, multiple
pulls allows gears to be
skipped
The selected gear is indicated in the
instrument cluster.
Temporary manual mode in drive
mode D
Manual paddle shifting is also
possible in automatic mode D. Upon
completion of manual shifting
operation, transmission changes to
automatic mode D after a defined
time.
To interrupt manual mode, do one of
the following:
■ Press < paddle for 1 second.
■ Move selector lever towards the left
to manual mode and back to
position D.
If the vehicle is at a standstill and
engine is idling, the transmission will remain in temporary manual mode. It
changes to automatic mode when
accelerator pedal is operated for a
defined time, and no paddle shifting
at the steering wheel is performed.
Page 170 of 331
168Driving and operatingInterruption of power
supply In the event of an interruption of
power supply, the selector lever
cannot be moved out of the P
position. The ignition key cannot be
removed from the ignition switch.
If the vehicle battery is discharged,
start the vehicle using jump leads
3 262.
If the vehicle battery is not the cause
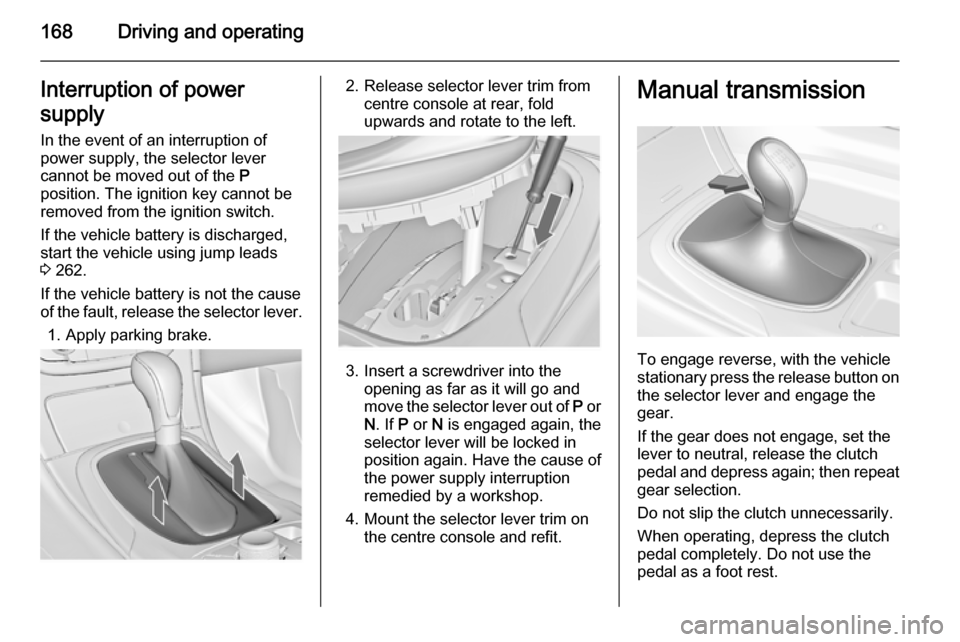
of the fault, release the selector lever.
1. Apply parking brake.2. Release selector lever trim from centre console at rear, fold
upwards and rotate to the left.
3. Insert a screwdriver into the opening as far as it will go and
move the selector lever out of P or
N . If P or N is engaged again, the
selector lever will be locked in
position again. Have the cause of
the power supply interruption
remedied by a workshop.
4. Mount the selector lever trim on the centre console and refit.
Manual transmission
To engage reverse, with the vehicle
stationary press the release button on the selector lever and engage the
gear.
If the gear does not engage, set the
lever to neutral, release the clutch
pedal and depress again; then repeat
gear selection.
Do not slip the clutch unnecessarily.
When operating, depress the clutch
pedal completely. Do not use the
pedal as a foot rest.
Page 173 of 331

Driving and operating171To reduce the operating forces of
the parking brake, depress the
foot brake at the same time.
Control indicator R 3 106.
Electric parking brake
Applying when vehicle is stationary
9 Warning
Pull switch m for approx.
one second, the electric parking
brake operates automatically with
adequate force. For maximum
force, e.g. parking with trailer or on
inclines, pull switch m twice.
The electric parking brake is
applied when control indicator m
illuminates 3 106.
The electric parking brake can always
be activated, even if the ignition is off.
Do not operate electric parking brake
system too often without engine
running as this will discharge the
vehicle battery.
Before leaving the vehicle, check the electric parking brake status. Control
indicator m 3 106.
Releasing
Switch on ignition. Keep foot brake
pedal depressed and then push
switch m.
Drive away function
Depressing clutch pedal (manual
transmission) or engaging drive gear
(automatic transmission) and then
depressing the accelerator pedal
releases the electric parking brake
automatically. This is not possible
when the switch is pulled at the same
time.
This function also helps driving away
on inclines.
Aggressive drive away may reduce
life time of wear parts.
Dynamic braking when vehicle is
moving
When the vehicle is moving and the
switch m is kept pulled, the electric
parking brake system will decelerate the vehicle, but will not apply
statically.
As soon as the switch m is released,
dynamic braking will be stopped.
Automatic applying
If the vehicle is equipped with
Automatic transmission and Adaptive
cruise control is active, electric
parking brake is applied automatically when vehicle is stopped by the
system for more than 2 minutes.
Parking brake releases automatically
after moving off.
Page 175 of 331
Driving and operating1739Warning
Do not let this special safety
feature tempt you into taking risks
when driving.
Adapt speed to the road
conditions.
Control indicator b 3 108.
Deactivation
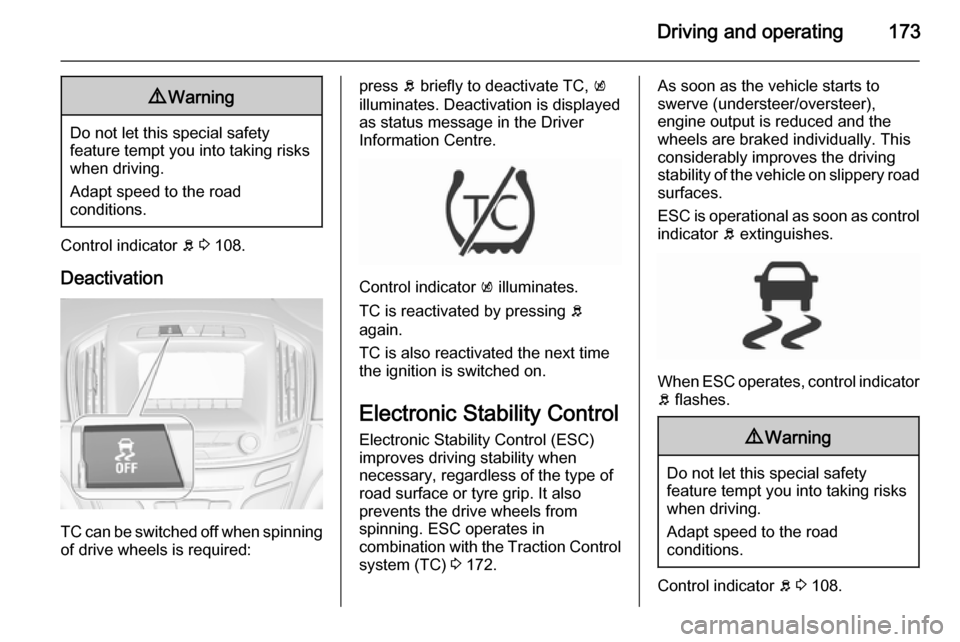
TC can be switched off when spinning of drive wheels is required:
press b briefly to deactivate TC, k
illuminates. Deactivation is displayed
as status message in the Driver
Information Centre.
Control indicator k illuminates.
TC is reactivated by pressing b
again.
TC is also reactivated the next time
the ignition is switched on.
Electronic Stability Control Electronic Stability Control (ESC)
improves driving stability when
necessary, regardless of the type of
road surface or tyre grip. It also
prevents the drive wheels from
spinning. ESC operates in
combination with the Traction Control system (TC) 3 172.
As soon as the vehicle starts to
swerve (understeer/oversteer),
engine output is reduced and the
wheels are braked individually. This
considerably improves the driving
stability of the vehicle on slippery road
surfaces.
ESC is operational as soon as control indicator b extinguishes.
When ESC operates, control indicator
b flashes.
9 Warning
Do not let this special safety
feature tempt you into taking risks
when driving.
Adapt speed to the road
conditions.
Control indicator b 3 108.
Page 176 of 331
174Driving and operating
Deactivation
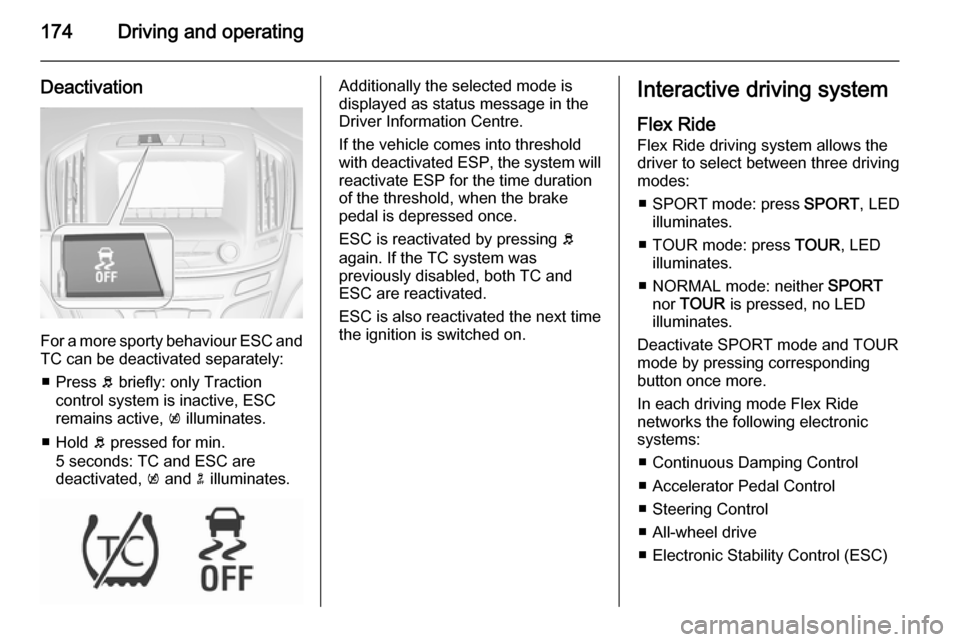
For a more sporty behaviour ESC and
TC can be deactivated separately:
■ Press b briefly: only Traction
control system is inactive, ESC
remains active, k illuminates.
■ Hold b pressed for min.
5 seconds: TC and ESC are
deactivated, k and n illuminates.
Additionally the selected mode is
displayed as status message in the
Driver Information Centre.
If the vehicle comes into threshold
with deactivated ESP, the system will reactivate ESP for the time duration
of the threshold, when the brake pedal is depressed once.
ESC is reactivated by pressing b
again. If the TC system was
previously disabled, both TC and
ESC are reactivated.
ESC is also reactivated the next time
the ignition is switched on.Interactive driving system
Flex Ride Flex Ride driving system allows thedriver to select between three driving
modes:
■ SPORT mode: press SPORT, LED
illuminates.
■ TOUR mode: press TOUR, LED
illuminates.
■ NORMAL mode: neither SPORT
nor TOUR is pressed, no LED
illuminates.
Deactivate SPORT mode and TOUR
mode by pressing corresponding
button once more.
In each driving mode Flex Ride networks the following electronic
systems:
■ Continuous Damping Control
■ Accelerator Pedal Control
■ Steering Control
■ All-wheel drive
■ Electronic Stability Control (ESC)
Page 180 of 331

178Driving and operating
Activation
Accelerate to the desired speed and
turn thumb wheel to SET/-: the
current speed is stored and
maintained. Control indicator m in
instrument cluster illuminates green.
Set speed is indicated on midlevel or
uplevel display near m symbol.
Accelerator pedal can be released.
Vehicle speed can be increased by depressing the accelerator pedal.
When the accelerator pedal is
released, the previously stored speed
is resumed.
Cruise control remains activated
while gearshifting.
Increase speed
With cruise control active, hold thumb
wheel turned to RES/+ or briefly turn
to RES/+ repeatedly: speed
increases continuously or in small
increments.
Alternatively accelerate to the desired speed and store by turning to SET/-.
Reduce speed
With cruise control active, hold thumb wheel turned to SET/- or briefly turn to
SET/- repeatedly: speed decreases
continuously or in small increments.
Deactivation
Press y; control indicator m in
instrument cluster illuminates white.
Cruise control is deactivated. Last
stored speed remains in memory for
later speed resume.
Automatic deactivation: ■ Vehicle speed is below approx. 20 mph.
■ Vehicle speed is above approx. 125 mph.
■ The brake pedal is depressed.■ The clutch pedal is depressed for a
few seconds.
■ The selector lever is in N.
■ The engine speed is in a very low range.
■ The Traction Control system or Electronic Stability Control is
operating.
■ The forward collision alert has been
triggered.
Resume stored speed
Turn thumb wheel to RES/+ at a
speed above 20 mph. The stored
speed will be obtained.
Switching off Press m; control indicator m in
instrument cluster extinguishes. The
stored speed is deleted.
Pressing L for activating speed
limiter or switching off the ignition also switches off cruise control and
deletes the stored speed.
Page 182 of 331

180Driving and operating
Deactivation
Press y: speed limiter is deactivated
and the vehicle can be driven without
speed limit.
The limited speed is stored and a
corresponding message appears in
the Driver Information Centre.
Resume limit speed
Turn thumb wheel to RES/+. The
stored speed limit will be obtained.
Switching off
Press L, the speed limit indication in
the Driver Information Centre
extinguishes. The stored speed is
deleted.
By pressing m to activate cruise
control or adaptive cruise control or
by switching off the ignition, speed
limiter is also deactivated and the
stored speed is deleted.Adaptive cruise control
Adaptive cruise control (ACC) is an
enhancement to traditional cruise
control with the additional feature of maintaining a certain distance behind the vehicle ahead.
Adaptive cruise control automatically
decelerates the vehicle when
approaching a slower moving vehicle. It then adjusts the vehicle speed to
follow the vehicle ahead at the
selected following distance. The
vehicle speed increases or decreases
to follow the vehicle in front, but will
not exceed the set speed. It may
apply limited braking with activated
brake lights.
The adaptive cruise control can store and maintain speeds over approx.
15 mph. If following a vehicle ahead
driving slower than 15 mph, the
slower speed will be set. On vehicles
with automatic transmission, the
system brakes to a stop.
Adaptive cruise control uses a radar
sensor to detect the vehicles ahead.
If no vehicle is detected in the driving
path, the adaptive cruise control will
behave like a traditional cruise
control.
For safety reasons, the system
cannot be activated before the brake
pedal or clutch pedal has been
depressed once since switching on
ignition.
Adaptive cruise control is mainly
advised to be used on long straight
roads like highways or country roads
with steady traffic. Do not use the
system if it is not advisable to
maintain a constant speed.
Control indicator A 3 110, m 3 110,
C 3 110.
Page 185 of 331
Driving and operating183lever to park position P and switch
off the ignition before leaving the
vehicle.
Setting the following distance
When adaptive cruise control detects a slower moving vehicle in the drivingpath, it will adjust the vehicle speed to
maintain the following distance
selected by the driver.
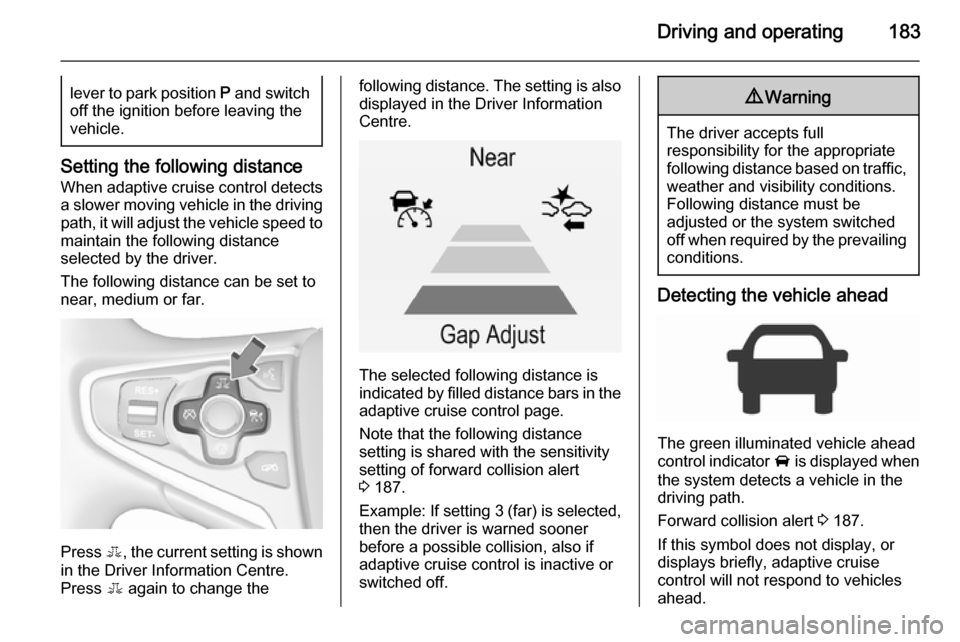
The following distance can be set to
near, medium or far.
Press E, the current setting is shown
in the Driver Information Centre.
Press E again to change the
following distance. The setting is also
displayed in the Driver Information
Centre.
The selected following distance is
indicated by filled distance bars in the
adaptive cruise control page.
Note that the following distance
setting is shared with the sensitivity
setting of forward collision alert
3 187.
Example: If setting 3 (far) is selected,
then the driver is warned sooner
before a possible collision, also if
adaptive cruise control is inactive or
switched off.
9 Warning
The driver accepts full
responsibility for the appropriate
following distance based on traffic, weather and visibility conditions.
Following distance must be
adjusted or the system switched
off when required by the prevailing
conditions.
Detecting the vehicle ahead
The green illuminated vehicle ahead
control indicator A is displayed when
the system detects a vehicle in the driving path.
Forward collision alert 3 187.
If this symbol does not display, or displays briefly, adaptive cruise
control will not respond to vehicles
ahead.