tailgate VAUXHALL INSIGNIA 2016 User Guide
[x] Cancel search | Manufacturer: VAUXHALL, Model Year: 2016, Model line: INSIGNIA, Model: VAUXHALL INSIGNIA 2016Pages: 327, PDF Size: 9.26 MB
Page 35 of 327

Keys, doors and windows33smelled, could enter the vehicle.
This can cause unconsciousness and even death.Caution
Before opening the tailgate, check overhead obstructions, such as a
garage door, to avoid damage to
the tailgate. Always check the
moving area above and behind the
tailgate.
Notice
Power tailgate: If the lifters of the
open tailgate lose pressure, the
tailgate falls a bit and will then be
stopped by the system. Following
the tailgate will be power opened
and closed. During this the tail lights will flash and a chime will sound.
After closing, the tailgate may not be operated until it has been serviced
by a workshop.
Notice
The operation of the power tailgate
is disabled under low vehicle battery
conditions. In this case, the tailgate
may not even by manually operable.
Notice
With the power tailgate disabled and
all doors unlocked, the tailgate can
only be operated manually. In this
event, manually closing the tailgate
requires significantly greater force.
Notice
At low outside temperatures the
tailgate may not open fully by itself.
In this case lift the tailgate manually
to its normal end position.
Notice
The installation of certain heavy
accessories onto the tailgate may
affect its ability to remain open.Vehicle security
Anti-theft locking system9 Warning
Do not use the system if there are
people in the vehicle! The doorscannot be unlocked from the
inside.
The system deadlocks all the doors. All doors must be closed and the
electronic key must not remain in the
vehicle. Otherwise the system cannot
be activated.
If the ignition was on, the driver's door
must be opened and closed once so
that the vehicle can be secured.
Unlocking the vehicle disables the
mechanical anti-theft locking system.
This is not possible with the central
locking button in the passenger
compartment.
Page 36 of 327
34Keys, doors and windowsActivating
Radio remote control or electronic
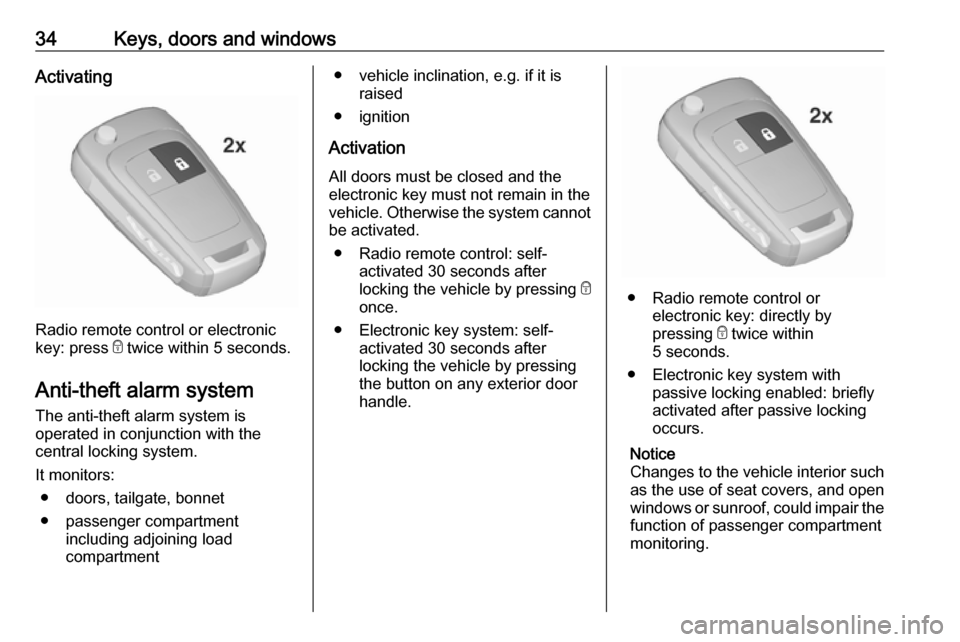
key: press e twice within 5 seconds.
Anti-theft alarm system The anti-theft alarm system is
operated in conjunction with the
central locking system.
It monitors: ● doors, tailgate, bonnet
● passenger compartment including adjoining load
compartment
● vehicle inclination, e.g. if it is raised
● ignition
Activation All doors must be closed and the
electronic key must not remain in the
vehicle. Otherwise the system cannot
be activated.
● Radio remote control: self- activated 30 seconds after
locking the vehicle by pressing e
once.
● Electronic key system: self- activated 30 seconds after
locking the vehicle by pressing the button on any exterior door
handle.
● Radio remote control or electronic key: directly by
pressing e twice within
5 seconds.
● Electronic key system with passive locking enabled: briefly
activated after passive locking
occurs.
Notice
Changes to the vehicle interior such
as the use of seat covers, and open
windows or sunroof, could impair the
function of passenger compartment
monitoring.
Page 37 of 327
Keys, doors and windows35Activation without monitoring of
passenger compartment and
vehicle inclination
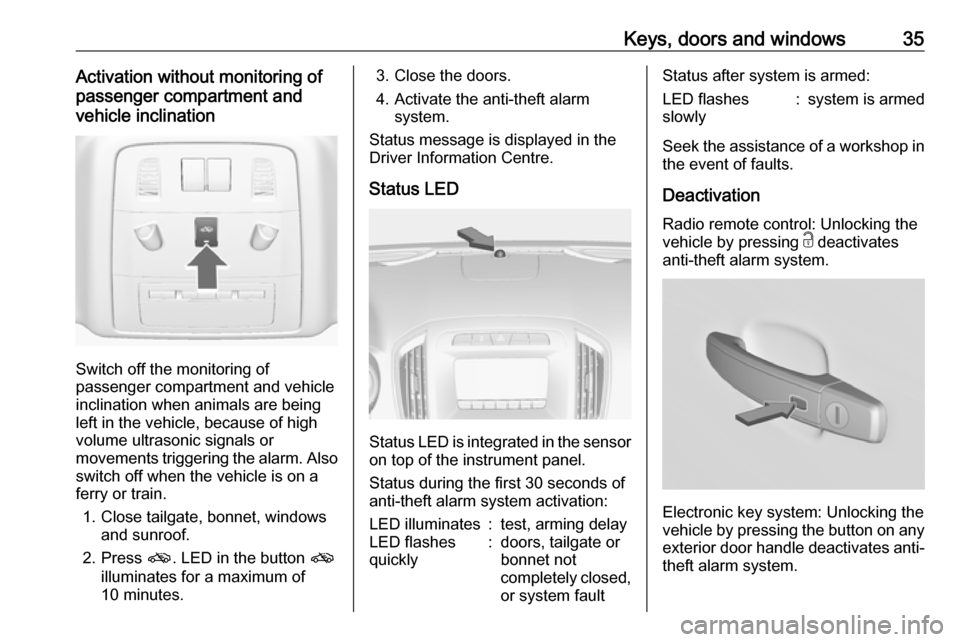
Switch off the monitoring of
passenger compartment and vehicle
inclination when animals are being
left in the vehicle, because of high
volume ultrasonic signals or
movements triggering the alarm. Also switch off when the vehicle is on a
ferry or train.
1. Close tailgate, bonnet, windows and sunroof.
2. Press o. LED in the button o
illuminates for a maximum of
10 minutes.
3. Close the doors.
4. Activate the anti-theft alarm system.
Status message is displayed in the
Driver Information Centre.
Status LED
Status LED is integrated in the sensor
on top of the instrument panel.
Status during the first 30 seconds of
anti-theft alarm system activation:
LED illuminates:test, arming delayLED flashes
quickly:doors, tailgate or
bonnet not
completely closed,
or system faultStatus after system is armed:LED flashes
slowly:system is armed
Seek the assistance of a workshop in
the event of faults.
Deactivation
Radio remote control: Unlocking the
vehicle by pressing c deactivates
anti-theft alarm system.
Electronic key system: Unlocking the
vehicle by pressing the button on any
exterior door handle deactivates anti-
theft alarm system.
Page 75 of 327
Storage73
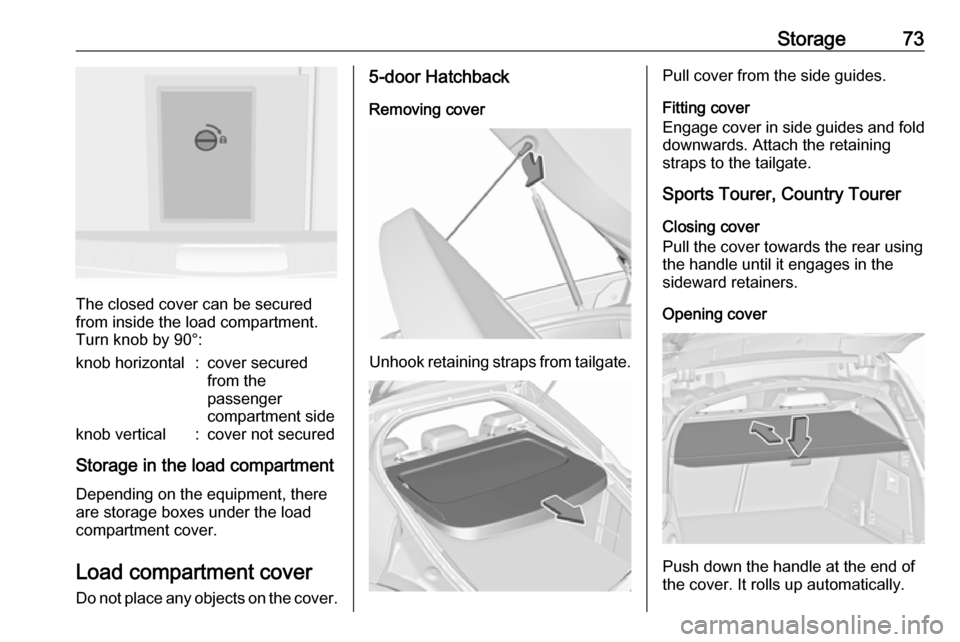
The closed cover can be secured
from inside the load compartment.
Turn knob by 90°:
knob horizontal:cover secured
from the
passenger
compartment sideknob vertical:cover not secured
Storage in the load compartment
Depending on the equipment, there
are storage boxes under the load
compartment cover.
Load compartment cover
Do not place any objects on the cover.
5-door Hatchback
Removing cover
Unhook retaining straps from tailgate.
Pull cover from the side guides.
Fitting cover
Engage cover in side guides and fold
downwards. Attach the retaining
straps to the tailgate.
Sports Tourer, Country Tourer
Closing cover
Pull the cover towards the rear using the handle until it engages in the
sideward retainers.
Opening cover
Push down the handle at the end of
the cover. It rolls up automatically.
Page 76 of 327
74StorageRemoving cover
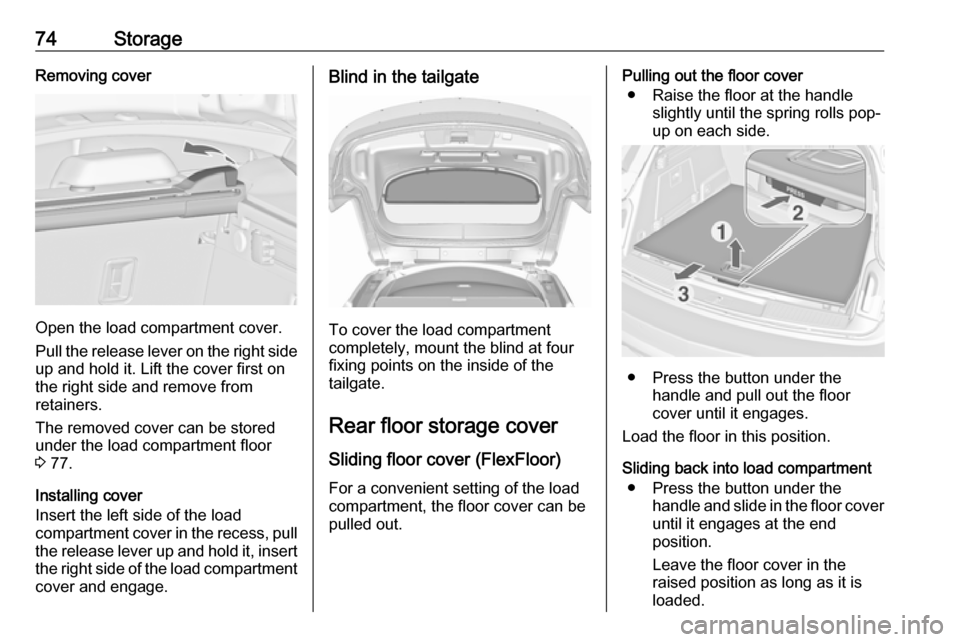
Open the load compartment cover.
Pull the release lever on the right side
up and hold it. Lift the cover first on
the right side and remove from
retainers.
The removed cover can be stored
under the load compartment floor 3 77.
Installing cover
Insert the left side of the load
compartment cover in the recess, pull
the release lever up and hold it, insert the right side of the load compartment
cover and engage.
Blind in the tailgate
To cover the load compartment
completely, mount the blind at four
fixing points on the inside of the
tailgate.
Rear floor storage cover Sliding floor cover (FlexFloor) For a convenient setting of the load
compartment, the floor cover can be
pulled out.
Pulling out the floor cover
● Raise the floor at the handle slightly until the spring rolls pop-
up on each side.
● Press the button under the
handle and pull out the floor
cover until it engages.
Load the floor in this position.
Sliding back into load compartment ● Press the button under the handle and slide in the floor cover
until it engages at the end
position.
Leave the floor cover in the
raised position as long as it is loaded.
Page 77 of 327
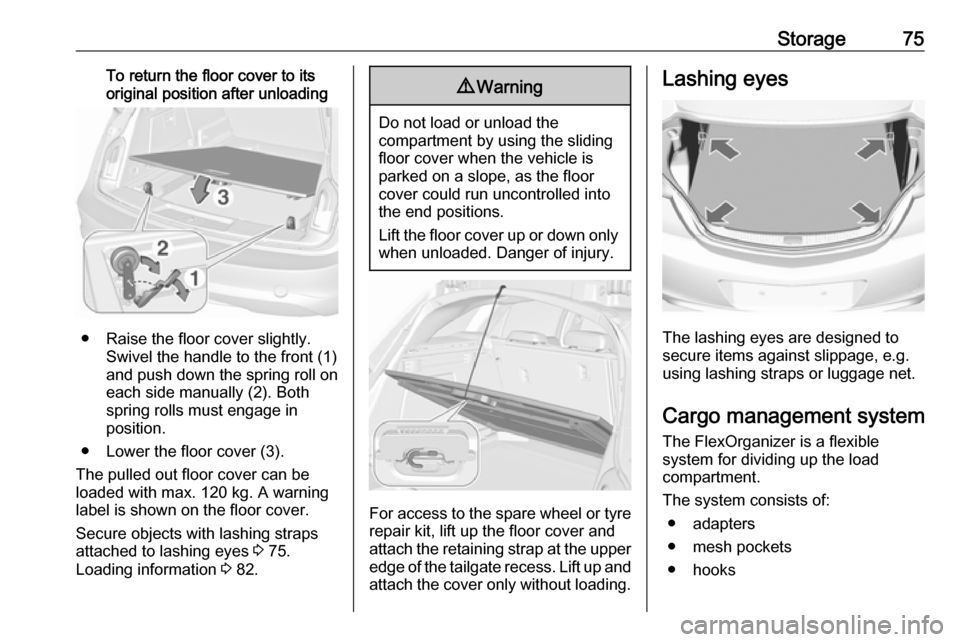
Storage75To return the floor cover to its
original position after unloading
● Raise the floor cover slightly. Swivel the handle to the front (1)
and push down the spring roll on
each side manually (2). Both
spring rolls must engage in
position.
● Lower the floor cover (3).
The pulled out floor cover can be
loaded with max. 120 kg. A warning
label is shown on the floor cover.
Secure objects with lashing straps
attached to lashing eyes 3 75.
Loading information 3 82.
9
Warning
Do not load or unload the
compartment by using the sliding
floor cover when the vehicle is
parked on a slope, as the floor
cover could run uncontrolled into the end positions.
Lift the floor cover up or down only
when unloaded. Danger of injury.
For access to the spare wheel or tyre repair kit, lift up the floor cover and
attach the retaining strap at the upper
edge of the tailgate recess. Lift up and
attach the cover only without loading.
Lashing eyes
The lashing eyes are designed to
secure items against slippage, e.g.
using lashing straps or luggage net.
Cargo management system The FlexOrganizer is a flexible
system for dividing up the load
compartment.
The system consists of: ● adapters
● mesh pockets
● hooks
Page 82 of 327
80StoragePut the load compartment cover into
the hollow with the upper side
downwards and with the release lever
in the front right edge.
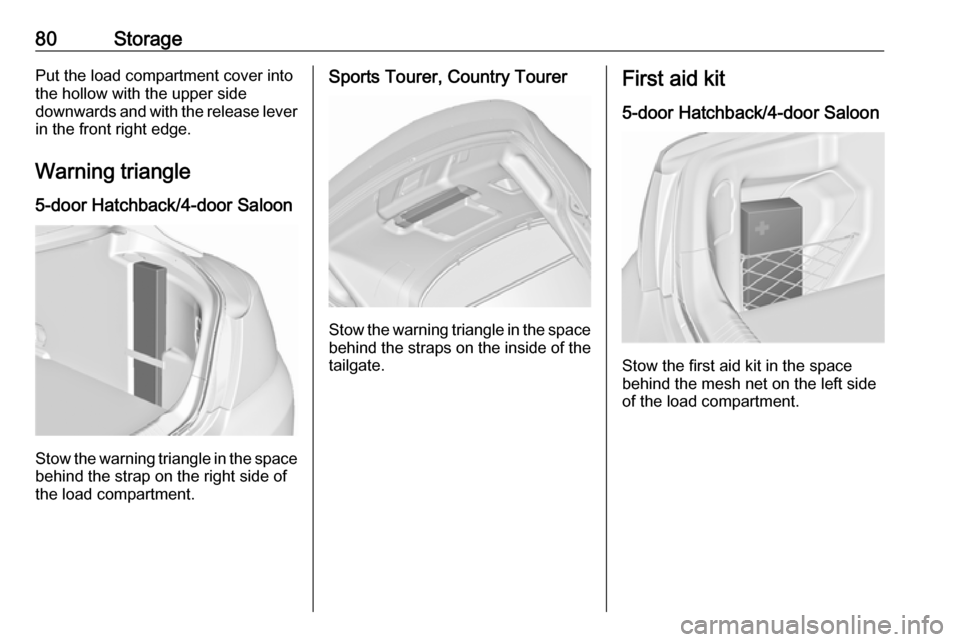
Warning triangle
5-door Hatchback/4-door Saloon
Stow the warning triangle in the space
behind the strap on the right side of
the load compartment.
Sports Tourer, Country Tourer
Stow the warning triangle in the space
behind the straps on the inside of the
tailgate.
First aid kit
5-door Hatchback/4-door Saloon
Stow the first aid kit in the space
behind the mesh net on the left side
of the load compartment.
Page 83 of 327
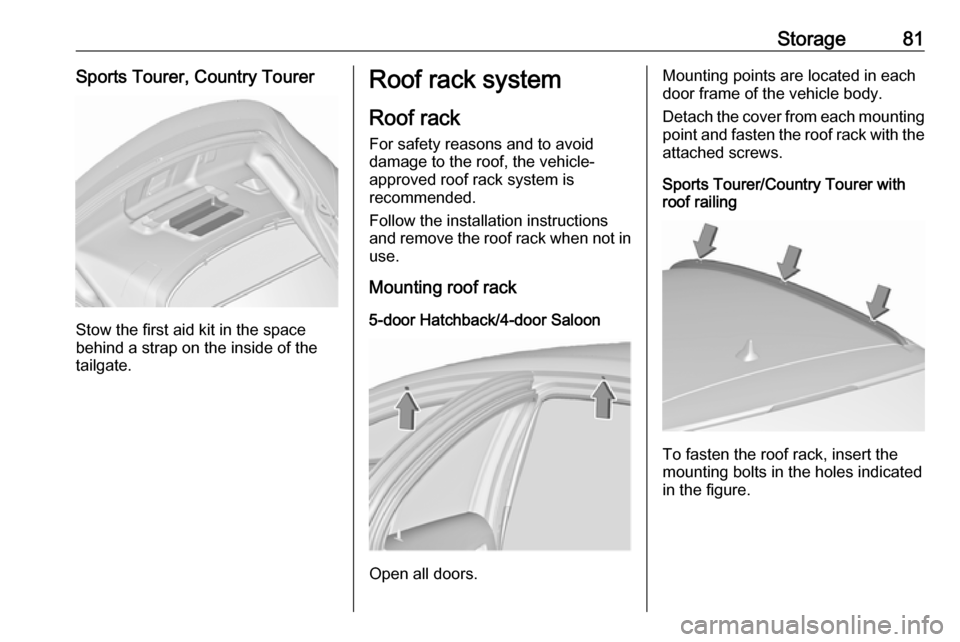
Storage81Sports Tourer, Country Tourer
Stow the first aid kit in the space
behind a strap on the inside of the
tailgate.
Roof rack system
Roof rack For safety reasons and to avoiddamage to the roof, the vehicle-
approved roof rack system is
recommended.
Follow the installation instructions and remove the roof rack when not in
use.
Mounting roof rack
5-door Hatchback/4-door Saloon
Open all doors.
Mounting points are located in each
door frame of the vehicle body.
Detach the cover from each mounting
point and fasten the roof rack with the attached screws.
Sports Tourer/Country Tourer with roof railing
To fasten the roof rack, insert the
mounting bolts in the holes indicated
in the figure.
Page 112 of 327

110Instruments and controlsIlluminates green
Adaptive cruise control is active. Set
speed is indicated near C or m
symbol.
Adaptive cruise control 3 183.
Vehicle detected ahead
A illuminates green or yellow.
Illuminates green
A vehicle ahead is detected in the
same lane.
Illuminates yellow The distance to a preceding moving
vehicle gets too small or when
approaching another vehicle too
rapidly.
Forward collision alert 3 190,
Adaptive cruise control 3 183.
Speed limiter
L illuminates white or green.
Illuminates white The system is on.Illuminates green
Speed limiter is active. Set speed is
indicated near L symbol.
Speed limiter 3 182.
Traffic sign assistant
L displays detected traffic signs as
control indicator.
Traffic sign assistant 3 208.
Door open h illuminates red.
A door or the tailgate is open.Information displays
Driver Information Centre The Driver Information Centre is
located in the instrument cluster.
Depending on the version and the
instrument cluster, the Driver
Information Centre is available as
Baselevel display, Midlevel display or Uplevel display.
Driver Information Centre indicates
depending on the equipment:
● overall and trip odometer
● vehicle information
● trip/fuel information
● economic information
● performance information
● vehicle and warning messages ● audio and infotainment information
● phone information
● navigation information
● vehicle settings
Page 122 of 327

120Instruments and controls● vehicle battery status
● selective catalytic reduction, diesel exhaust fluid (DEF),
AdBlue 3 164
Messages in the
Colour-Info-Display
Some important messages may
appear additionally in the
Colour-Info-Display. Press the
multifunction knob to confirm a
message. Some messages only pop-
up for a few seconds.
Warning chimes
When starting the engine or whilst driving
Only one warning chime will sound at a time.
The warning chime regarding not
fastened seat belts has priority over
any other warning chime.
● If seat belt is not fastened.
● If a door or the tailgate is not fully
closed when starting off.● If a certain speed is exceeded with parking brake applied.
● If adaptive cruise control deactivates automatically.
● If approaching a vehicle ahead too closely.
● If a programmed speed or speed
limit is exceeded.
● If a warning message appears in the Driver Information Centre.
● If the electronic key is not in the passenger compartment.
● If the parking assist detects an object.
● If an unintended lane change occurs.
● If the diesel particle filter has reached the maximum filling
level.
● If AdBlue needs to be refilled.
When the vehicle is parked and/or the driver's door is opened
● With exterior lights on.
● If the trailer hitch is not engaged.During an Autostop
● If the driver's door is opened.
Battery voltage
When the vehicle battery voltage is
running low, a warning message will
appear in the Driver Information
Centre.
1. Switch off any electrical consumers which are not requiredfor a safe ride, e.g. seat heating,
heated rear window or other main consumers.
2. Charge the vehicle battery by driving continuously for a while or
by using a charging device.
The warning message will disappear
after the engine has been started
twice without a voltage drop.
If the vehicle battery cannot be
recharged, have the cause of the fault
remedied by a workshop.