display VAUXHALL INSIGNIA 2018.5 Workshop Manual
[x] Cancel search | Manufacturer: VAUXHALL, Model Year: 2018.5, Model line: INSIGNIA, Model: VAUXHALL INSIGNIA 2018.5Pages: 327, PDF Size: 9.2 MB
Page 148 of 327

146LightingIllustration shows rear reading light.Sunvisor lights
Illuminates when the cover is opened.Lighting features
Centre console lighting Spotlight incorporated in the interior
lighting comes on when headlights
are switched on.
Entry lighting Welcome lighting
The following lights are switched on
for a short time by unlocking the
vehicle with the electronic key:
● headlights
● puddle lights in both outside mirrors
● tail lights
● number plate lights
● instrument panel light
● interior lights
Some functions are only operable
when it is dark outside to facilitate
locating the vehicle.
The lighting switches off immediately
when the ignition is switched on.
Starting off 3 17.This function can be activated or
deactivated in the vehicle
personalisation.
Select the relevant setting in Settings,
I Vehicle in the Info-Display.
Info-Display 3 120.
Vehicle personalisation 3 126.
The settings can be saved for the key
being used 3 24.
The following lights will additionally
switch on when the driver's door is
opened:
● illumination of some switches
● Driver Information Centre
● door pocket lights
Exit lighting The following lights will switch on
when the ignition is switched off:
● interior lights
● instrument panel light
● puddle lights in both outside mirrors
Page 149 of 327
Lighting147They will switch off automatically after
a delay. This function works only in
the dark. Theatre lighting is activated
if the driver's door is opened during
this time.
Path lighting
Headlights, tail lights and number
plate lights illuminate the surrounding area for an adjustable time after
leaving the vehicle.
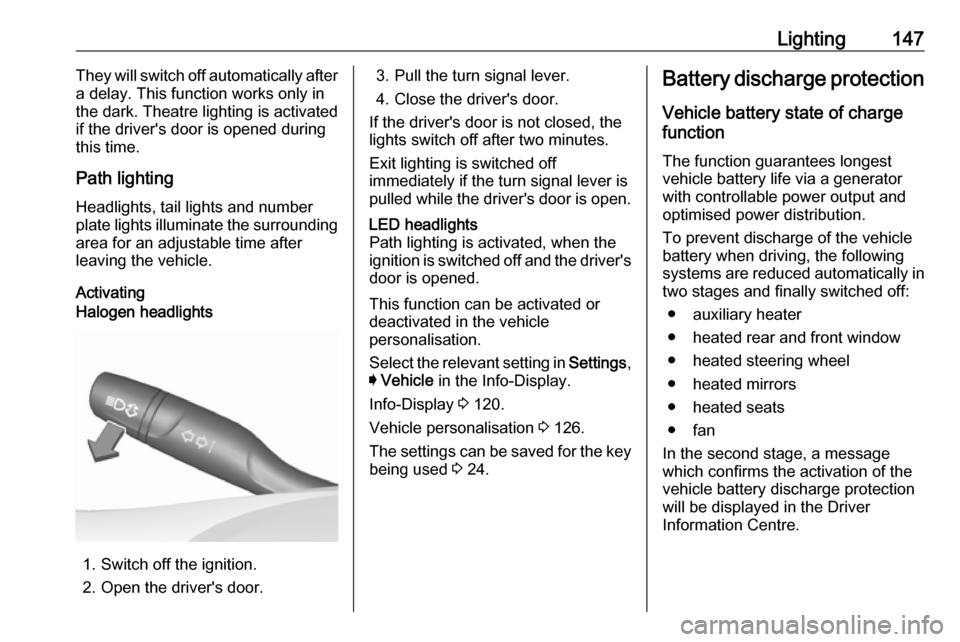
ActivatingHalogen headlights
1. Switch off the ignition.
2. Open the driver's door.
3. Pull the turn signal lever.
4. Close the driver's door.
If the driver's door is not closed, the
lights switch off after two minutes.
Exit lighting is switched off
immediately if the turn signal lever is pulled while the driver's door is open.LED headlights
Path lighting is activated, when the
ignition is switched off and the driver's door is opened.
This function can be activated or
deactivated in the vehicle
personalisation.
Select the relevant setting in Settings,
I Vehicle in the Info-Display.
Info-Display 3 120.
Vehicle personalisation 3 126.
The settings can be saved for the key being used 3 24.
Battery discharge protection
Vehicle battery state of charge
function
The function guarantees longest
vehicle battery life via a generator
with controllable power output and
optimised power distribution.
To prevent discharge of the vehicle
battery when driving, the following
systems are reduced automatically in two stages and finally switched off:
● auxiliary heater
● heated rear and front window
● heated steering wheel
● heated mirrors
● heated seats
● fan
In the second stage, a message
which confirms the activation of the
vehicle battery discharge protection
will be displayed in the Driver
Information Centre.
Page 151 of 327

Climate control149Climate controlClimate control systems.............149
Air conditioning system ...........149
Electronic climate control system .................................... 152
Auxiliary heater ........................158
Air vents ..................................... 158
Adjustable air vents .................158
Fixed air vents ......................... 159
Maintenance .............................. 159
Air intake ................................. 159
Air conditioning regular operation ................................ 160
Service .................................... 160Climate control systems
Air conditioning system
Illustration shows functions which
may not be available for your
particular vehicle.
Controls for: ● Fan speed E
● Temperature TEMP
● Air distribution w, x and y
● Air conditioning A/C
● Demisting and defrosting á
● Air recirculation n
● External air 5
● Heated rear window and exterior
mirrors b
● Heated windscreen ,
● Heated seats ß
Some changes of settings are
indicated briefly in the Info-Display.
Activated functions are indicated by
the LED in the respective button.
Fan speed E
Adjust the air flow by turning Z to the
desired speed.clockwise:increaseanti-clockwise:decrease
Temperature TEMP
Adjust the temperature by turningTEMP to the desired temperature.
red area:warmerblue area:colder
Heating will not be fully effective until
the engine has reached normal
operating temperature.
Page 155 of 327
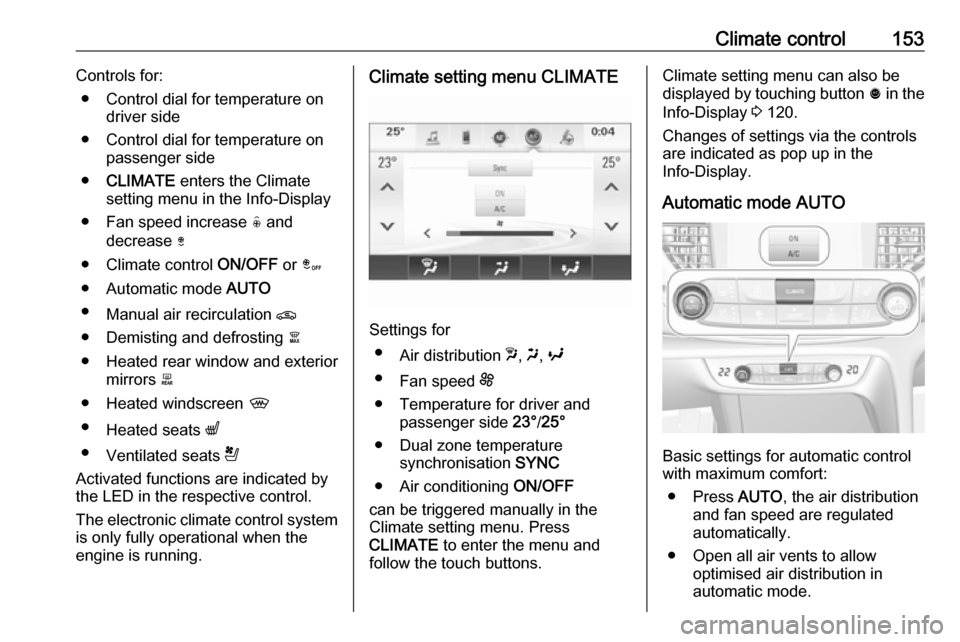
Climate control153Controls for:● Control dial for temperature on driver side
● Control dial for temperature on passenger side
● CLIMATE enters the Climate
setting menu in the Info-Display
● Fan speed increase ( and
decrease )
● Climate control ON/OFF or â
● Automatic mode AUTO
● Manual air recirculation n
● Demisting and defrosting à
● Heated rear window and exterior mirrors b
● Heated windscreen ,
● Heated seats q
● Ventilated seats r
Activated functions are indicated by the LED in the respective control.
The electronic climate control system
is only fully operational when the
engine is running.Climate setting menu CLIMATE
Settings for
● Air distribution w, x , y
● Fan speed E
● Temperature for driver and passenger side 23°/25°
● Dual zone temperature synchronisation SYNC
● Air conditioning ON/OFF
can be triggered manually in the
Climate setting menu. Press
CLIMATE to enter the menu and
follow the touch buttons.
Climate setting menu can also be
displayed by touching button ã in the
Info-Display 3 120.
Changes of settings via the controls
are indicated as pop up in the
Info-Display.
Automatic mode AUTO
Basic settings for automatic control
with maximum comfort:
● Press AUTO, the air distribution
and fan speed are regulated
automatically.
● Open all air vents to allow optimised air distribution in
automatic mode.
Page 156 of 327
154Climate control● Cooling must be activated in theclimate setting menu for optimalcooling and demisting. Press
Climate to enter the menu and
follow the touch button to switch on air conditioning A/C.
● Set the preselected temperatures separately for
driver and front passenger using
the left and right control dials.
Recommended temperature is
22 °C. Temperature is indicated
briefly in displays beside the
control dials and in the climate
setting menu.
● Air recirculation mode n should
be deactivated. When
deactivated the LED in the button is not illuminated.
Manual settings
Climate control system settings can
be changed by activating the
following functions as described
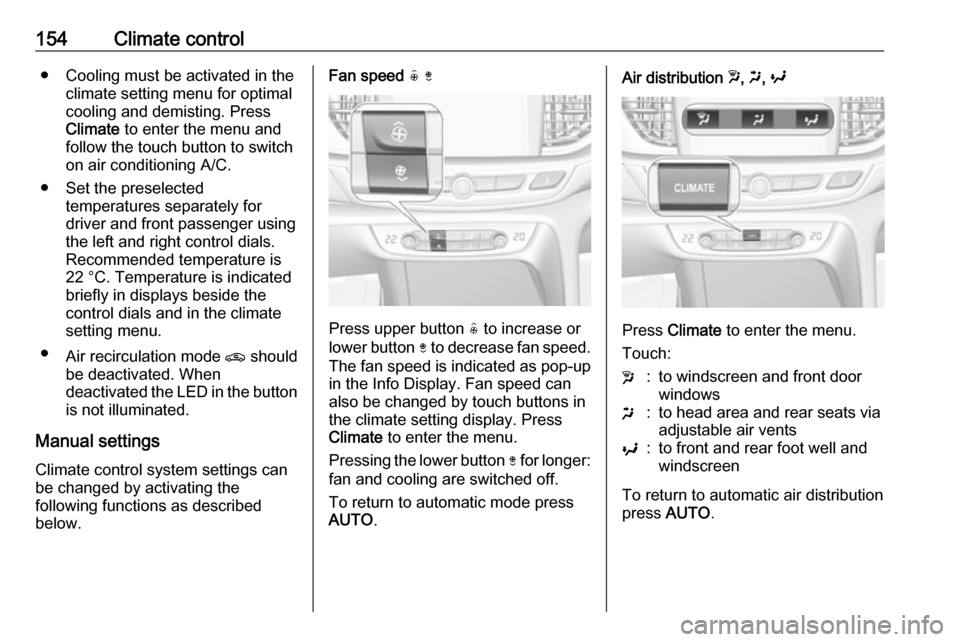
below.Fan speed ( )
Press upper button ( to increase or
lower button ) to decrease fan speed.
The fan speed is indicated as pop-up in the Info Display. Fan speed can
also be changed by touch buttons in
the climate setting display. Press
Climate to enter the menu.
Pressing the lower button ) for longer:
fan and cooling are switched off.
To return to automatic mode press
AUTO .
Air distribution w, x , y
Press Climate to enter the menu.
Touch:
w:to windscreen and front door
windowsx:to head area and rear seats via
adjustable air ventsy:to front and rear foot well and
windscreen
To return to automatic air distribution
press AUTO .
Page 157 of 327
Climate control155Temperature preselection
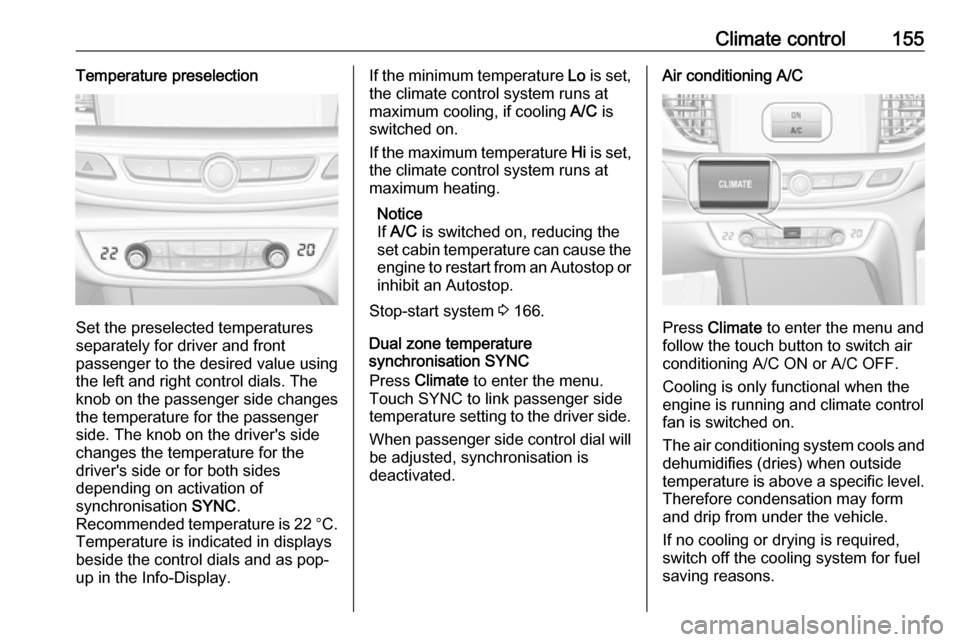
Set the preselected temperatures
separately for driver and front
passenger to the desired value using
the left and right control dials. The
knob on the passenger side changes
the temperature for the passenger
side. The knob on the driver's side
changes the temperature for the
driver's side or for both sides
depending on activation of
synchronisation SYNC.
Recommended temperature is 22 °C .
Temperature is indicated in displays
beside the control dials and as pop-
up in the Info-Display.
If the minimum temperature Lo is set,
the climate control system runs at maximum cooling, if cooling A/C is
switched on.
If the maximum temperature Hi is set,
the climate control system runs at maximum heating.
Notice
If A/C is switched on, reducing the
set cabin temperature can cause the engine to restart from an Autostop or
inhibit an Autostop.
Stop-start system 3 166.
Dual zone temperature
synchronisation SYNC
Press Climate to enter the menu.
Touch SYNC to link passenger side
temperature setting to the driver side.
When passenger side control dial will be adjusted, synchronisation is
deactivated.Air conditioning A/C
Press Climate to enter the menu and
follow the touch button to switch air
conditioning A/C ON or A/C OFF.
Cooling is only functional when the
engine is running and climate control
fan is switched on.
The air conditioning system cools and
dehumidifies (dries) when outside
temperature is above a specific level. Therefore condensation may form
and drip from under the vehicle.
If no cooling or drying is required,
switch off the cooling system for fuel
saving reasons.
Page 160 of 327
158Climate controlBasic settingsFollowing settings can be changed in
the Personalisation menu in the
Info-Display:
● fan speed regulation in automatic
mode.
● settings of automatic rear window
heating.
● settings of automatic windscreen
dehumidification
● settings of automatic seat heating
Vehicle personalisation 3 126.
Heated rear window and exterior
mirrors b
3 41
Heated windscreen ,
3 41.
Heated seats q
3 53.
Ventilated seats r
3 53Auxiliary heater
Air heater
Quickheat is an electric auxiliary air
heater which automatically warms up
the passenger compartment more
quickly.Air vents
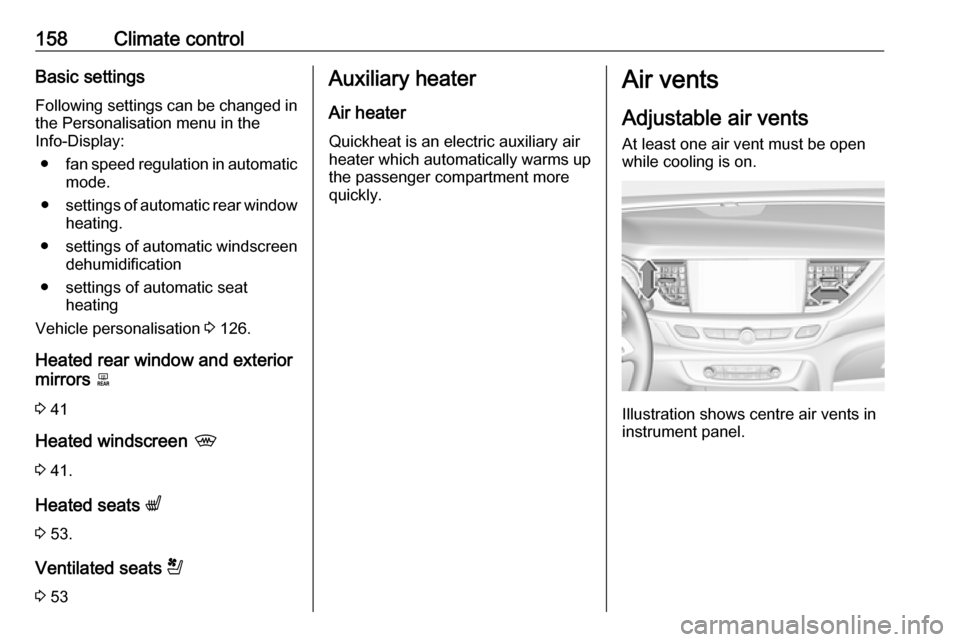
Adjustable air vents At least one air vent must be open
while cooling is on.
Illustration shows centre air vents in
instrument panel.
Page 166 of 327
164Driving and operatingOperation on vehicles with
electronic key system in case of
failure
If either the electronic key fails or the
battery of the electronic key is weak,
the Driver Information Centre may
display No Remote Detected or
Replace Battery in Remote Key when
you try to start the vehicle.
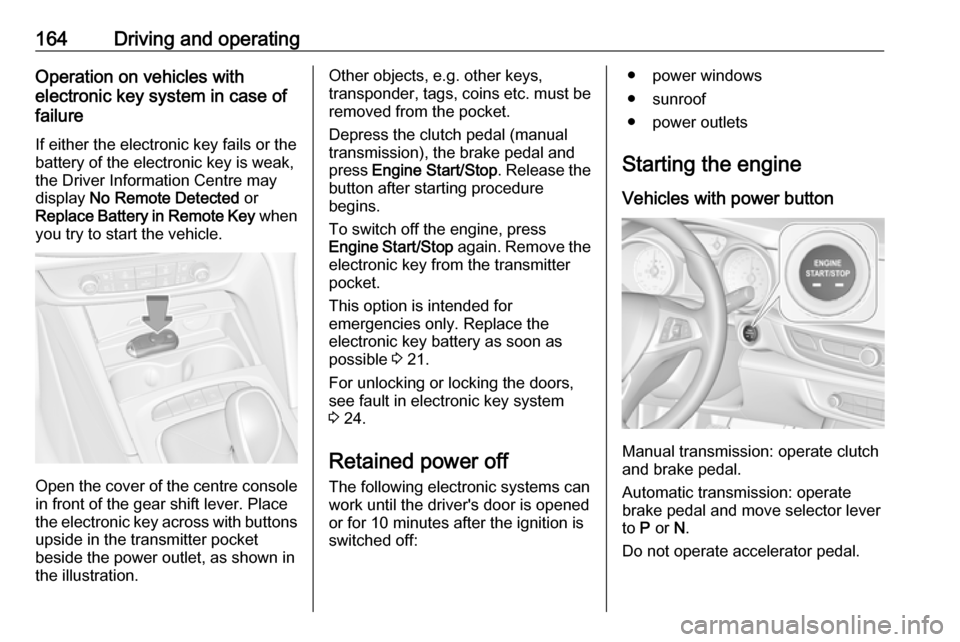
Open the cover of the centre console
in front of the gear shift lever. Place
the electronic key across with buttons
upside in the transmitter pocket
beside the power outlet, as shown in
the illustration.
Other objects, e.g. other keys,
transponder, tags, coins etc. must be removed from the pocket.
Depress the clutch pedal (manual
transmission), the brake pedal and
press Engine Start/Stop . Release the
button after starting procedure
begins.
To switch off the engine, press
Engine Start/Stop again. Remove the
electronic key from the transmitter
pocket.
This option is intended for
emergencies only. Replace the
electronic key battery as soon as
possible 3 21.
For unlocking or locking the doors,
see fault in electronic key system
3 24.
Retained power off
The following electronic systems can
work until the driver's door is opened
or for 10 minutes after the ignition is
switched off:● power windows
● sunroof
● power outlets
Starting the engine
Vehicles with power button
Manual transmission: operate clutch
and brake pedal.
Automatic transmission: operate
brake pedal and move selector lever
to P or N.
Do not operate accelerator pedal.
Page 170 of 327

168Driving and operatingVehicles with automatic transmission
Release the brake pedal or move selector lever out of D into N or P to
restart the engine.
Restart of the engine by the stop- start system
The selector lever must be in neutral to enable an automatic restart.
If one of the following conditions
occurs during an Autostop, the
engine will be restarted automatically
by the stop-start system:
● The stop-start system is manually deactivated.
● The bonnet is opened.
● The driver's seat belt is unfastened and the driver's door
is opened.
● The engine temperature is too low.
● The charging level of the vehicle battery is below a defined level.
● The brake vacuum is not sufficient.
● The vehicle is driven at least at walking speed.● The climate control systemrequests an engine start.
● The air conditioning is manually switched on.
If the bonnet is not fully closed, a warning message is displayed in the
Driver Information Centre.
If an electrical accessory, e.g. a
portable CD player, is connected to
the power outlet, a brief power drop
during the restart might be noticeable.
Parking9 Warning
● Do not park the vehicle on an
easily ignitable surface. The
high temperature of the
exhaust system could ignite the
surface.
● Always apply the parking brake. Pull switch m for
approx. one second and check
if the control indicator m
illuminates.
The electric parking brake is applied when control indicator
m illuminates 3 108.
● Switch off the engine. ● If the vehicle is on a level surface or uphill slope, engage
first gear or set the selector
lever to position P before
switching off ignition. On an
uphill slope, turn the front
wheels away from the kerb.
If the vehicle is on a downhill
slope, engage reverse gear or
set the selector lever to position P before switching off ignition.
Turn the front wheels towards
the kerb.
● Close the windows and the sunroof.
● Switch off ignition with power button. Turn the steering wheel
until the steering wheel lock is
felt to engage.
Page 173 of 327
Driving and operating171AdBlue
General information
The selective catalytic reduction
(BlueInjection) is a method to
substantially reduce the nitrogen
oxides in the exhaust emission. This
is achieved by injecting a Diesel
Exhaust Fluid (DEF) into the exhaust
system. The ammonia released by
the fluid reacts with nitrous gases
(NO x) from the exhaust and turns it
into nitrogen and water.
The designation of this fluid is AdBlue
® . It is a non-toxic, non-flammable,
colourless and odourless fluid which
consists of 32% urea and 68% water.9Warning
Avoid contact of your eyes or skin
with AdBlue.
In case of eye or skin contact,
rinse off with water.
Caution
Avoid contact of the paintwork with AdBlue.
In case of contact, rinse off with water.
AdBlue freezes at a temperature of
approx. -11 °C. As the vehicle is
equipped with an AdBlue pre-heater,
the emissions reduction at low
temperatures is ensured. The AdBlue
pre-heater works automatically.
The typical AdBlue consumption is
approx. two litres per 600 miles, but
can also be higher depending on
driving behaviour (e.g. high load or
towing).
AdBlue tank
At a remaining volume of approx.
five litres, there is a liquid level switch. Warning messages are displayed
only below that threshold. Tank
volume 3 302.
Level warnings
Depending on the calculated range of
AdBlue, different messages are
displayed in the Driver Information
Centre. The messages and the
restrictions are a legal requirement.
The first possible warning is AdBlue
Range: 1500 mi .
This warning will show up once briefly with the calculated range. Driving is
possible without any restrictions.
The next warning level is entered with
a range below 1090 miles. The
message with the current range will
always be displayed when ignition is
switched on and needs to be
confirmed 3 113 . Refill AdBlue before
entering the next warning level.
At an AdBlue range below 560 miles,
the following warning messages are
alternately displayed and cannot be
dismissed:
● AdBlue Low Refill Now
● Engine Restart Prevented in 560
miles .
Additionally, control indicator Y
flashes continuously.