Automatic light VAUXHALL INSIGNIA 2018 Owner's Manual
[x] Cancel search | Manufacturer: VAUXHALL, Model Year: 2018, Model line: INSIGNIA, Model: VAUXHALL INSIGNIA 2018Pages: 323, PDF Size: 9.25 MB
Page 13 of 323

In brief111Power windows .....................38
2 Exterior mirrors .....................35
3 Central locking system ..........21
4 Side air vents ...................... 157
5 Cruise control .....................186
Speed limiter ....................... 188
Adaptive cruise control .......189
Forward collision alert .........197
6 Turn and lane-change
signals, headlight flash,
low/high beam, high beam
assist ................................... 141
Exit lighting ......................... 145
Parking lights ...................... 142
Buttons for Driver
Information Centre ..............112
7 Instruments ........................ 101
Driver Information Centre .... 112
8 Buttons for Driver
Information Centre ..............112
9 Head-up display ..................12110Windscreen wiper and
washer, headlight washer,
rear wiper and washer .........88
11 Centre air vents .................. 157
12 Hazard warning flashers ....141
13 Info-Display ........................ 119
14 Anti-theft alarm system
status LED ........................... 32
15 Electronic Stability Control . 182
Traction Control system .....181
16 Glovebox .............................. 71
17 Controls for Info-Display
operation ............................. 119
18 Climate control system ........ 148
19 Storage ................................. 71
20 Sport/Tour mode ................183
Parking assist/Advanced
parking assist .....................206
Lane keep assist ................228
Eco button for stop-start
system ................................. 165
21 Manual transmission ..........177
Automatic transmission ......17322Electric parking brake .........179
23 Power switch ....................... 162
24 Steering wheel adjustment ..87
25 Horn ..................................... 88
26 Bonnet release lever ..........239
27 Fuse box ............................ 259
28 Light switch ........................ 134
Headlight range
adjustment ......................... 137
Front/rear fog lights ............142
Instrument illumination .......143
29 Head-up display ..................121
Page 14 of 323
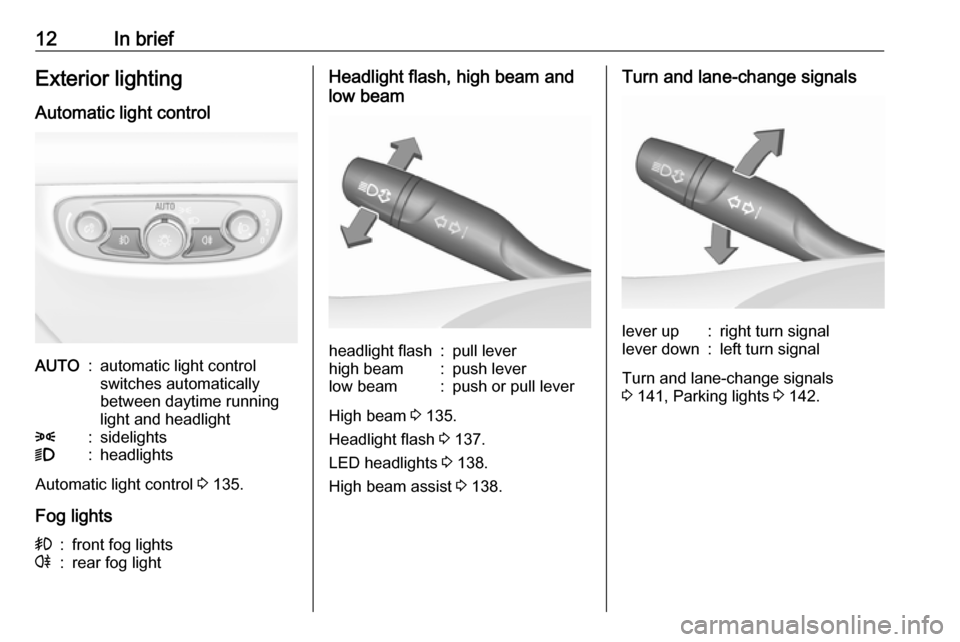
12In briefExterior lighting
Automatic light controlAUTO:automatic light control
switches automatically
between daytime running
light and headlight8:sidelights9:headlights
Automatic light control 3 135.
Fog lights
>:front fog lightsr:rear fog lightHeadlight flash, high beam and
low beamheadlight flash:pull leverhigh beam:push leverlow beam:push or pull lever
High beam 3 135.
Headlight flash 3 137.
LED headlights 3 138.
High beam assist 3 138.
Turn and lane-change signalslever up:right turn signallever down:left turn signal
Turn and lane-change signals
3 141, Parking lights 3 142.
Page 19 of 323
In brief17Starting offCheck before starting off ● Tyre pressure and condition 3 262, 3 300.
● Engine oil level and fluid levels 3 240.
● All windows, mirrors, exterior lighting and number plates are
free from dirt, snow and ice and
are operational.
● Proper position of mirrors, seats, and seat belts 3 35, 3 45,
3 55.
● Brake function at low speed, particularly if the brakes are wet.
Starting the engine ● Manual transmission: operate clutch and brake pedal.
● Automatic transmission: operate brake pedal and move selector
lever to P or N.
● Do not operate accelerator pedal.
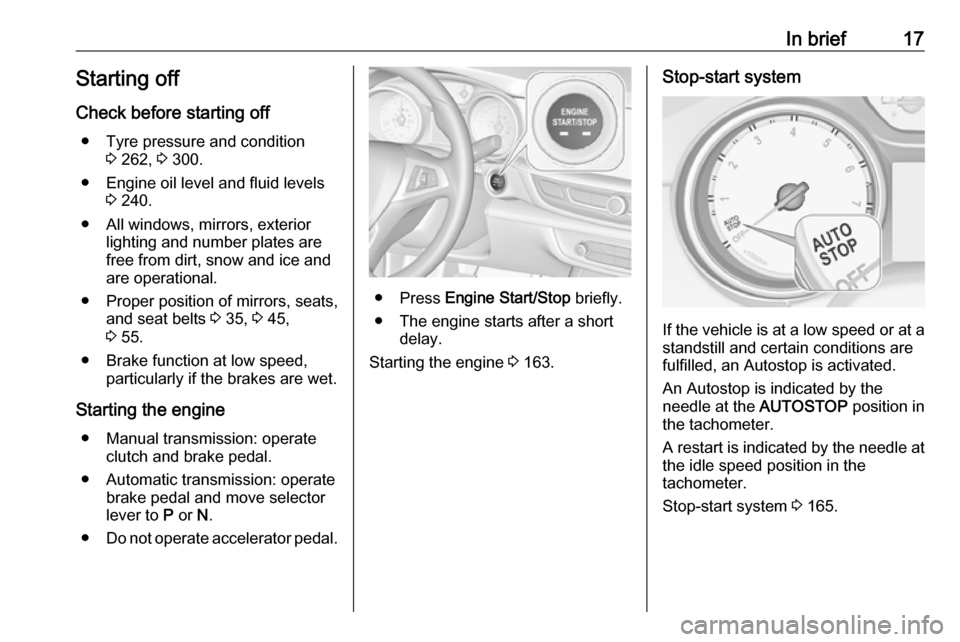
● Press Engine Start/Stop briefly.
● The engine starts after a short delay.
Starting the engine 3 163.
Stop-start system
If the vehicle is at a low speed or at a
standstill and certain conditions are
fulfilled, an Autostop is activated.
An Autostop is indicated by the
needle at the AUTOSTOP position in
the tachometer.
A restart is indicated by the needle at
the idle speed position in the
tachometer.
Stop-start system 3 165.
Page 23 of 323

Keys, doors and windows212. Insert the key blade again forapprox. 6 mm and turn the key to
open the housing. Further
insertion of the key blade can
damage the housing.
3. Remove and replace battery. Use
CR 2032 or equivalent battery.
Pay attention to the installation
position.
4. Close the housing and insert key blade.
Batteries do not belong in household
waste. They must be disposed of at an appropriate recycling collection
point.
Fault
If the central locking cannot be
operated or the engine cannot be
started, the cause may be one of the
following:
● Fault in electronic key.
● Electronic key is out of reception range.
● The battery voltage is too low.● Overload of the central locking system by operating at frequent
intervals, the power supply is
interrupted for a short time.
● Interference from higher-power radio waves from other sources.
To rectify the cause of the fault,
change the position of the electronic
key.
Manual unlocking 3 21.
Memorised settings
Whenever the ignition is switched off, the following settings are
automatically memorised by the
electronic key:
● automatic climate control
● lighting
● Infotainment system
● central locking system
● Sport mode settings
● comfort settings
The saved settings are automatically
used the next time the ignition is
switched on with the memorised
electronic key 3 19.A precondition is that Personalisation
by Driver is activated in the personal
settings of the Info-Display. This must
be set for each electronic key which is used. The status change is available
only after locking and unlocking the
vehicle.
The assigned memory position of the
power seat is automatically recalled
when switching on ignition and Auto
Memory Recall is activated in the
Info-Display for the memorised
electronic key.
Power seat 3 48.
Vehicle personalisation 3 125.
Central locking system
Unlocks and locks doors, load
compartment and fuel filler flap.
A pull on an interior door handle
unlocks the respective door. Pulling
the handle once more opens the door.
Notice
In the event of an accident in which
airbags or belt pretensioners are
deployed, the vehicle is
automatically unlocked.
Page 30 of 323
28Keys, doors and windowstrapped during operating and no
one is standing within the moving
area.
The power tailgate can be operated
by:
● Pressing X twice on the
electronic key. To prevent
unintended opening of the
tailgate, X must be pressed
longer than during locking or
unlocking.
● Handsfree operation with motion sensor below the rear bumper.
● The touchpad switch under the exterior tailgate moulding andC in the open tailgate.
● The switch C on the inside of
the driver's door.
On vehicles with automatic
transmission, the tailgate can only be operated when the vehicle is
stationary and with selector lever in P.
The turn signal lights flash and a
chime sounds when the power
tailgate is operating.
Notice
Operating the power tailgate does
not operate the central locking
system. To open the tailgate with the
button on the electronic key, or with
the touchpad switch under the
tailgate moulding or via handsfree
operation, it is not necessary to
unlock the vehicle. A precondition is
that the electronic key is outside the
vehicle, within a range of approx.
one metre of the tailgate.
Do not leave the electronic key in the load compartment.
Lock the vehicle after closing if it was
unlocked previously.
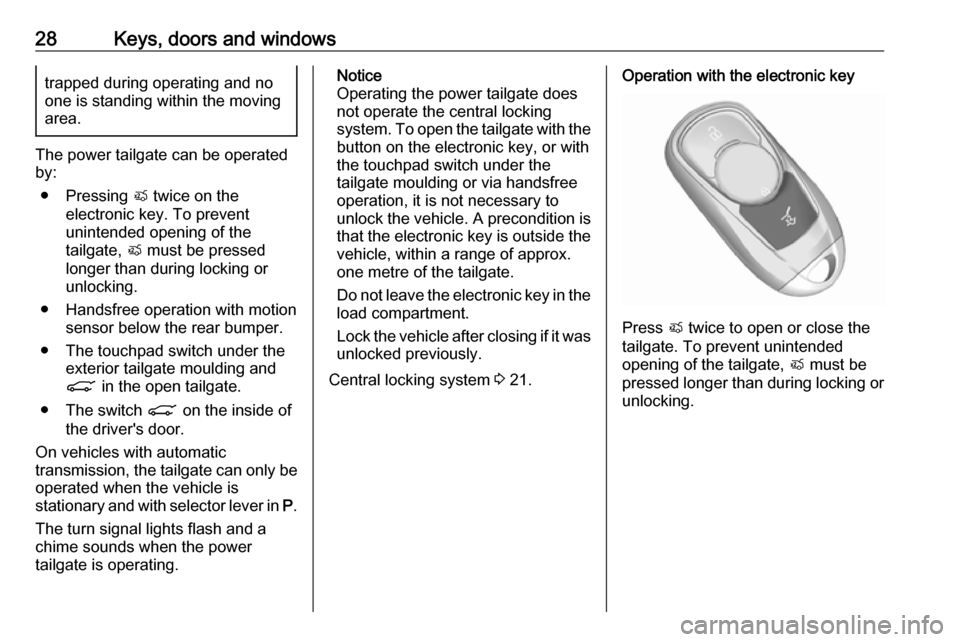
Central locking system 3 21.Operation with the electronic key
Press X twice to open or close the
tailgate. To prevent unintended
opening of the tailgate, X must be
pressed longer than during locking or unlocking.
Page 33 of 323
Keys, doors and windows31
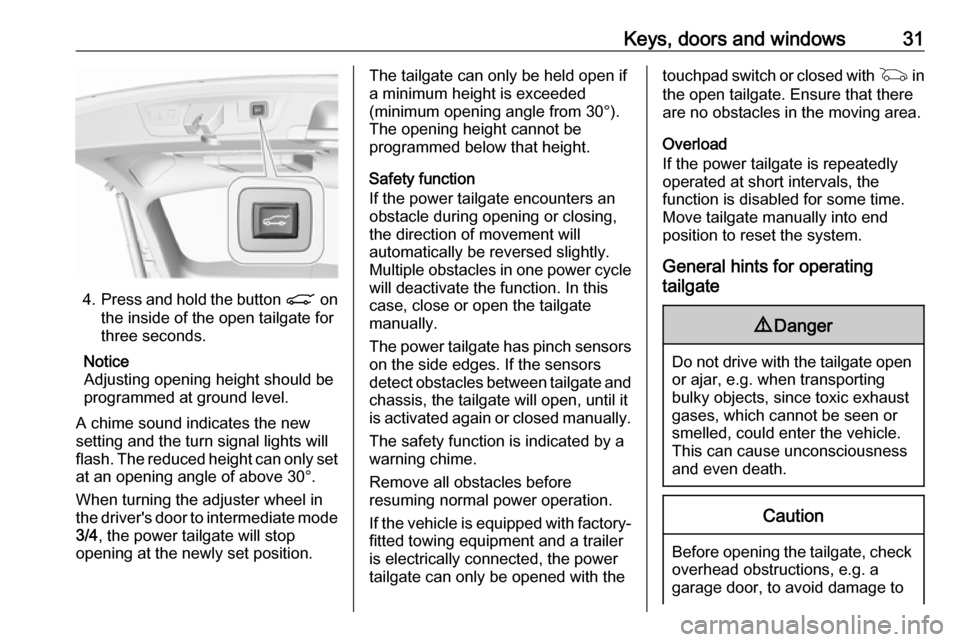
4.Press and hold the button C on
the inside of the open tailgate for
three seconds.
Notice
Adjusting opening height should be
programmed at ground level.
A chime sound indicates the new
setting and the turn signal lights will
flash. The reduced height can only set at an opening angle of above 30°.
When turning the adjuster wheel in
the driver's door to intermediate mode 3/4 , the power tailgate will stop
opening at the newly set position.
The tailgate can only be held open if a minimum height is exceeded
(minimum opening angle from 30°).
The opening height cannot be
programmed below that height.
Safety function
If the power tailgate encounters an obstacle during opening or closing,
the direction of movement will
automatically be reversed slightly.
Multiple obstacles in one power cycle
will deactivate the function. In this
case, close or open the tailgate
manually.
The power tailgate has pinch sensors
on the side edges. If the sensors
detect obstacles between tailgate and chassis, the tailgate will open, until it
is activated again or closed manually.
The safety function is indicated by a
warning chime.
Remove all obstacles before
resuming normal power operation.
If the vehicle is equipped with factory-
fitted towing equipment and a trailer
is electrically connected, the power
tailgate can only be opened with thetouchpad switch or closed with G in
the open tailgate. Ensure that there
are no obstacles in the moving area.
Overload
If the power tailgate is repeatedly
operated at short intervals, the
function is disabled for some time.
Move tailgate manually into end
position to reset the system.
General hints for operating
tailgate9 Danger
Do not drive with the tailgate open
or ajar, e.g. when transporting
bulky objects, since toxic exhaust
gases, which cannot be seen or
smelled, could enter the vehicle.
This can cause unconsciousness
and even death.
Caution
Before opening the tailgate, check overhead obstructions, e.g. a
garage door, to avoid damage to
Page 38 of 323
36Keys, doors and windowsSelect the relevant exterior mirror by
pushing í for left mirror or ì for right
mirror. LED in button indicates the
selection.
Then swivel the control to adjust the
mirror.
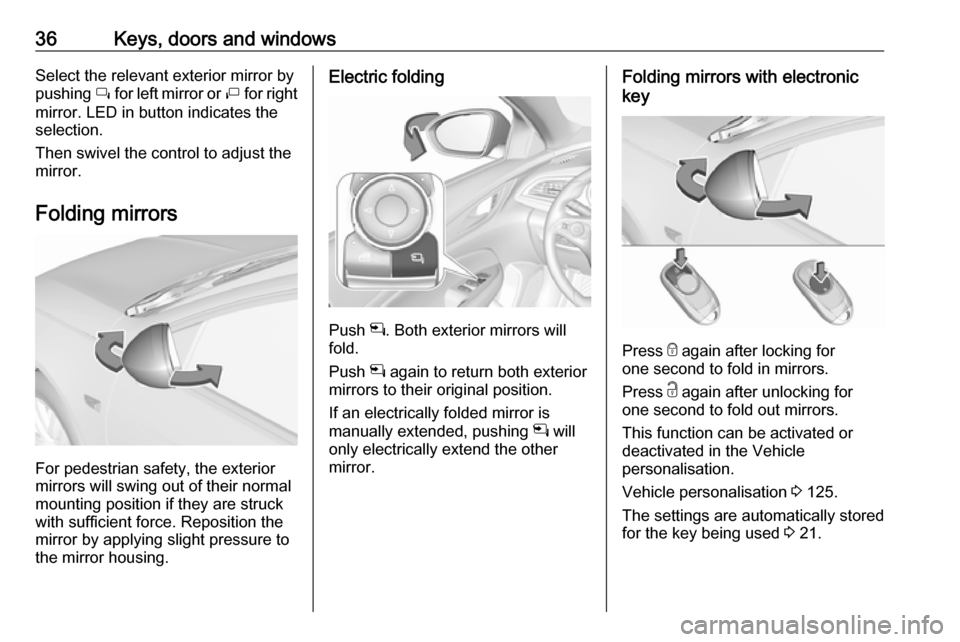
Folding mirrors
For pedestrian safety, the exterior
mirrors will swing out of their normal
mounting position if they are struck
with sufficient force. Reposition the mirror by applying slight pressure tothe mirror housing.
Electric folding
Push n. Both exterior mirrors will
fold.
Push n again to return both exterior
mirrors to their original position.
If an electrically folded mirror is
manually extended, pushing n will
only electrically extend the other mirror.
Folding mirrors with electronic
key
Press e again after locking for
one second to fold in mirrors.
Press c again after unlocking for
one second to fold out mirrors.
This function can be activated or
deactivated in the Vehicle
personalisation.
Vehicle personalisation 3 125.
The settings are automatically stored
for the key being used 3 21.
Page 42 of 323
40Keys, doors and windows
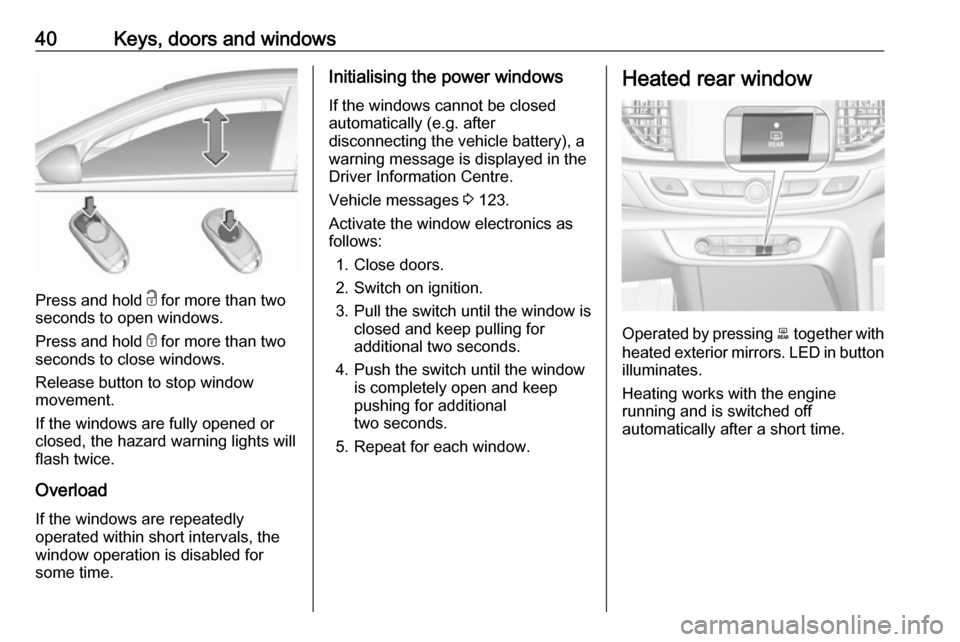
Press and hold c for more than two
seconds to open windows.
Press and hold e for more than two
seconds to close windows.
Release button to stop window
movement.
If the windows are fully opened or
closed, the hazard warning lights will
flash twice.
Overload
If the windows are repeatedly
operated within short intervals, the
window operation is disabled for
some time.
Initialising the power windows
If the windows cannot be closed
automatically (e.g. after
disconnecting the vehicle battery), a
warning message is displayed in the
Driver Information Centre.
Vehicle messages 3 123.
Activate the window electronics as
follows:
1. Close doors.
2. Switch on ignition.
3. Pull the switch until the window is closed and keep pulling for
additional two seconds.
4. Push the switch until the window is completely open and keep
pushing for additional
two seconds.
5. Repeat for each window.Heated rear window
Operated by pressing b together with
heated exterior mirrors. LED in button illuminates.
Heating works with the engine
running and is switched off
automatically after a short time.
Page 54 of 323
52Seats, restraintsHeating
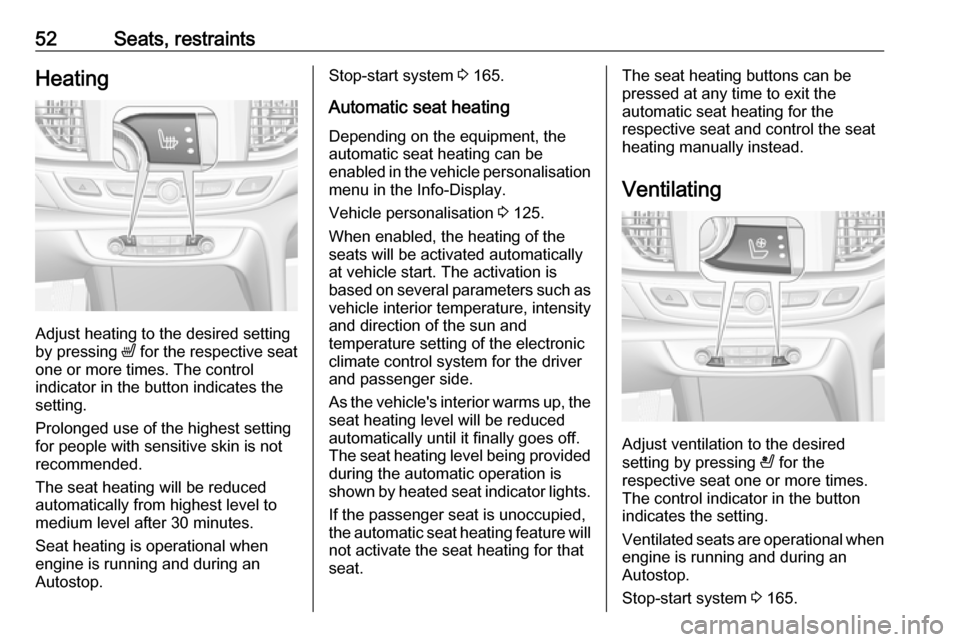
Adjust heating to the desired setting
by pressing ß for the respective seat
one or more times. The control
indicator in the button indicates the
setting.
Prolonged use of the highest setting
for people with sensitive skin is not
recommended.
The seat heating will be reduced
automatically from highest level to
medium level after 30 minutes.
Seat heating is operational when
engine is running and during an
Autostop.
Stop-start system 3 165.
Automatic seat heating Depending on the equipment, the
automatic seat heating can be
enabled in the vehicle personalisation
menu in the Info-Display.
Vehicle personalisation 3 125.
When enabled, the heating of the
seats will be activated automatically
at vehicle start. The activation is
based on several parameters such as vehicle interior temperature, intensity
and direction of the sun and
temperature setting of the electronic
climate control system for the driver
and passenger side.
As the vehicle's interior warms up, the
seat heating level will be reduced
automatically until it finally goes off. The seat heating level being provided during the automatic operation is
shown by heated seat indicator lights.
If the passenger seat is unoccupied,
the automatic seat heating feature will not activate the seat heating for that
seat.The seat heating buttons can be
pressed at any time to exit the
automatic seat heating for the
respective seat and control the seat heating manually instead.
Ventilating
Adjust ventilation to the desired
setting by pressing A for the
respective seat one or more times.
The control indicator in the button
indicates the setting.
Ventilated seats are operational when
engine is running and during an
Autostop.
Stop-start system 3 165.
Page 123 of 323

Instruments and controls121Valet mode
Some functions of the Driver
Information Centre and the Info-
Display can be limited for some
drivers. The load compartment is
being locked and cannot be unlocked.
For more information, see
Infotainment manual.
Head-up display The head-up display shows driver
information concerning the
instrument cluster onto the
windscreen on the driver's side.
The information appears as an image
projected from a lense in the
instrument panel onto the windscreen
directly ahead in driver's view. The
image appears focused out toward
the front of the vehicle.
Depending on the equipment head-
up display can indicate:
● general driving information
● alerts from driver assistance systems
● automatic transmission selector lever position● gear shift indication
● audio/phone information
● turn-by-turn navigation information if equipped with
navigation infotainment.
There are three controls above the
light switch to operate the head-up display.
Display views
Different views are selectable in the
head-up display by pressing /
button. Each press will change the
display view.
Speed view
Indicates
● speedometer: digital indication of
speed
● traffic signs: indication of speed limits
Performance View
Indicates
● speedometer: digital indication of
speed
● tachometer: engine speed in round per minute
● automatic transmission: selector lever position