ECO mode VAUXHALL INSIGNIA 2019 User Guide
[x] Cancel search | Manufacturer: VAUXHALL, Model Year: 2019, Model line: INSIGNIA, Model: VAUXHALL INSIGNIA 2019Pages: 345, PDF Size: 9.61 MB
Page 170 of 345
168Climate control● Cooling must be activated in theclimate setting menu for optimalcooling and demisting. Press
Climate to enter the menu and
follow the touch button to switch on air conditioning A/C.
● Set the preselected temperatures separately for
driver and front passenger using
the left and right control dials.
Recommended temperature is
22 °C. Temperature is indicated
briefly in displays beside the
control dials and in the climate
setting menu.
● Air recirculation mode n should
be deactivated. When
deactivated the LED in the button is not illuminated.
Manual settings Climate control system settings can
be changed by activating the
following functions as described
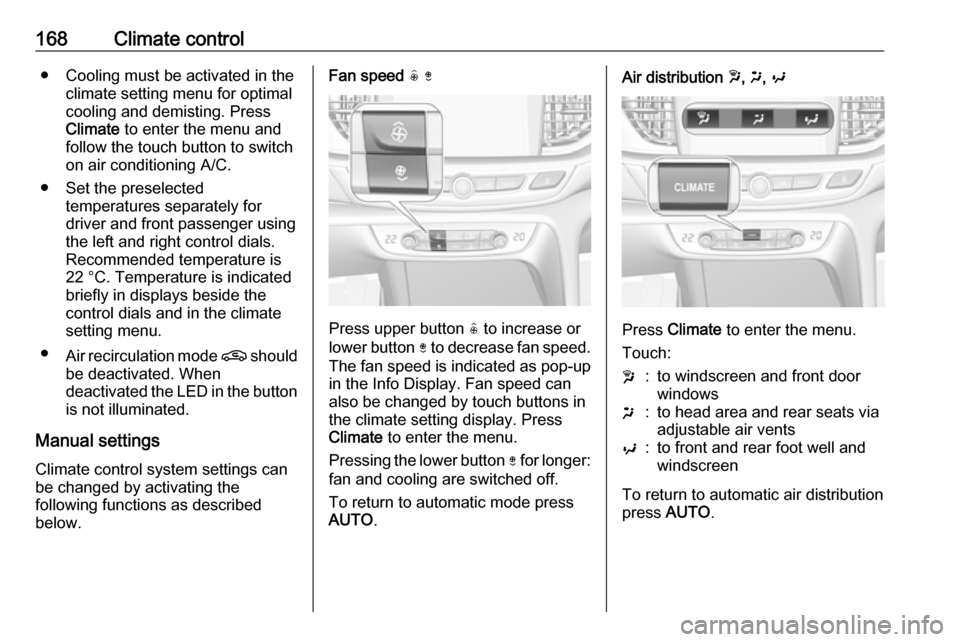
below.Fan speed ( )
Press upper button ( to increase or
lower button ) to decrease fan speed.
The fan speed is indicated as pop-up in the Info Display. Fan speed can
also be changed by touch buttons in
the climate setting display. Press
Climate to enter the menu.
Pressing the lower button ) for longer:
fan and cooling are switched off.
To return to automatic mode press
AUTO .
Air distribution w, x , y
Press Climate to enter the menu.
Touch:
w:to windscreen and front door
windowsx:to head area and rear seats via
adjustable air ventsy:to front and rear foot well and
windscreen
To return to automatic air distribution
press AUTO .
Page 179 of 345
Driving and operating177Power button
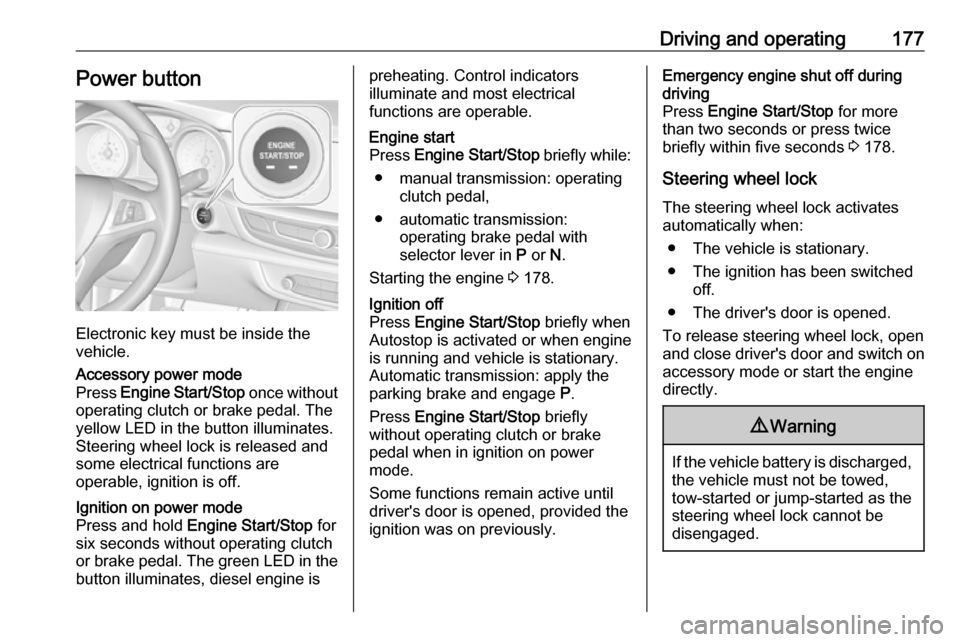
Electronic key must be inside the
vehicle.
Accessory power mode
Press Engine Start/Stop once without
operating clutch or brake pedal. The yellow LED in the button illuminates.
Steering wheel lock is released and
some electrical functions are
operable, ignition is off.Ignition on power mode
Press and hold Engine Start/Stop for
six seconds without operating clutch
or brake pedal. The green LED in the button illuminates, diesel engine ispreheating. Control indicators
illuminate and most electrical
functions are operable.Engine start
Press Engine Start/Stop briefly while:
● manual transmission: operating clutch pedal,
● automatic transmission: operating brake pedal with
selector lever in P or N.
Starting the engine 3 178.Ignition off
Press Engine Start/Stop briefly when
Autostop is activated or when engine is running and vehicle is stationary.
Automatic transmission: apply the
parking brake and engage P.
Press Engine Start/Stop briefly
without operating clutch or brake pedal when in ignition on power
mode.
Some functions remain active until
driver's door is opened, provided the
ignition was on previously.Emergency engine shut off during
driving
Press Engine Start/Stop for more
than two seconds or press twice
briefly within five seconds 3 178.
Steering wheel lock The steering wheel lock activates
automatically when:
● The vehicle is stationary.
● The ignition has been switched off.
● The driver's door is opened.
To release steering wheel lock, open
and close driver's door and switch on accessory mode or start the engine
directly.9 Warning
If the vehicle battery is discharged,
the vehicle must not be towed,
tow-started or jump-started as the
steering wheel lock cannot be
disengaged.
Page 189 of 345
Driving and operating187The vehicle must be parked on a level
surface.
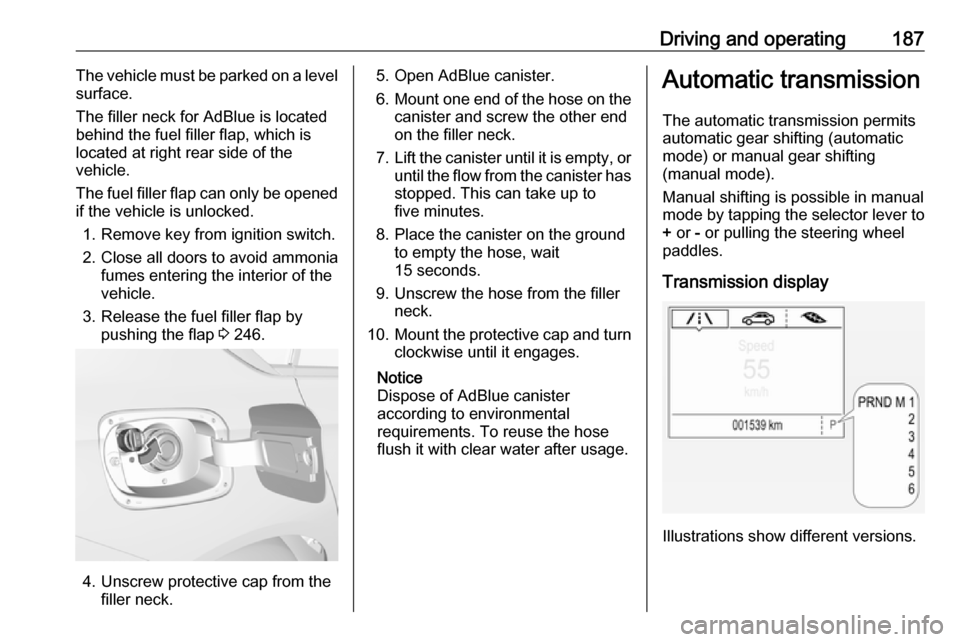
The filler neck for AdBlue is located
behind the fuel filler flap, which is located at right rear side of the
vehicle.
The fuel filler flap can only be opened if the vehicle is unlocked.
1. Remove key from ignition switch.2. Close all doors to avoid ammonia fumes entering the interior of the
vehicle.
3. Release the fuel filler flap by pushing the flap 3 246.
4. Unscrew protective cap from the
filler neck.
5. Open AdBlue canister.
6. Mount one end of the hose on the
canister and screw the other end
on the filler neck.
7. Lift the canister until it is empty, or
until the flow from the canister has stopped. This can take up to
five minutes.
8. Place the canister on the ground to empty the hose, wait
15 seconds.
9. Unscrew the hose from the filler neck.
10. Mount the protective cap and turn
clockwise until it engages.
Notice
Dispose of AdBlue canister
according to environmental
requirements. To reuse the hose
flush it with clear water after usage.Automatic transmission
The automatic transmission permits
automatic gear shifting (automatic
mode) or manual gear shifting
(manual mode).
Manual shifting is possible in manual
mode by tapping the selector lever to + or - or pulling the steering wheel
paddles.
Transmission display
Illustrations show different versions.
Page 192 of 345

190Driving and operatingThe selected gear is indicated in the
instrument cluster.
Temporary manual mode in drive
mode D
Manual paddle shifting is also
possible in automatic mode D. Upon
completion of manual shifting
operation, transmission changes to
automatic mode D after a defined
time.
To interrupt manual mode and return
to D, do one of the following:
● Press + paddle for 1 second.
● Move selector lever towards the left to manual mode and back toposition D.
If the vehicle is at a standstill and
engine is idling, the transmission will remain in temporary manual mode. It
changes to automatic mode when
accelerator pedal is operated for a
defined time, and no paddle shifting
at the steering wheel is performed.
General
If a higher gear is selected when
vehicle speed is too low, or a lower
gear when vehicle speed is too high,the shift is not executed. This can
cause a message in the Driver
Information Centre.
In manual mode, no automatic
shifting to a higher gear takes place
at high engine revolutions, except
activating the kickdown function.
Gear shift indication
The symbol R or S with a number
beside it is indicated when gear
shifting is recommended for fuel
saving reasons.
Shift indication appears only in
manual mode.
Electronic driving programmes ● When SPORT mode is engaged,
the vehicle shifts at higher engine
speeds (unless cruise control is
on). SPORT mode 3 199.
● Special programmes automatically adapt the shiftingpoints when driving up inclines or down hills.
● In snowy or icy conditions or on other slippery surfaces, the
electronic transmission controlenables the driver to manually
select first, second or third gear
for starting off.
Kickdown
Pressing down the accelerator pedal
beyond the kickdown detent will lead
to maximum acceleration even in manual mode. The transmission
shifts to a lower gear depending on
engine speed and shifts to a higher
gear at high engine revolutions.
Overheat protection
In the event of transmission-
overheating due to high outside
temperatures or sporty driving style, the torque and the maximum speed of
the engine can be temporarily
reduced.
Fault
In the event of a fault a vehicle
message is displayed in the Driver
Information Centre. Vehicle
messages 3 122.
6-gear automatic transmission:
electronic transmission control
enables only fourth gear; 8-gear
automatic transmission: electronic
Page 197 of 345

Driving and operating195Dynamic braking when vehicle is
moving
When the vehicle is moving and the
switch m is kept pulled, the electric
parking brake system will decelerate
the vehicle, but will not apply
statically.
As soon as the switch m is released,
dynamic braking will be stopped.
Automatic applying
If the vehicle is equipped with
automatic transmission and adaptive cruise control is active, electric
parking brake is applied automatically when vehicle is stopped by the
system for more than two minutes.
Parking brake releases automatically
after moving off.
Functionality check
When the vehicle is not moving, the
electric parking brake might be
applied automatically. This is done to
check the system.Fault
Failure mode of electric parking brake
is indicated by a control indicator j
and by a vehicle message which is
displayed in the Driver Information
Centre. Vehicle messages 3 122.
Apply electric parking brake: pull and
hold the switch m for more than
five seconds. If control indicator m
illuminates, electric parking brake is
applied.
Release electric parking brake: push
and hold the switch m for more than
two seconds. If control indicator m
extinguishes, electric parking brake is
released.
Control indicator m flashes: electric
parking brake is not fully applied or released. When continuously
flashing, release electric parking
brake and retry applying.
Brake assist If brake pedal is depressed quickly
and forcefully, maximum brake force
is automatically applied.Operation of brake assist might
become apparent by a pulse in the
brake pedal and a greater resistance
when depressing the brake pedal.
Maintain steady pressure on the
brake pedal as long as full braking is
required. Maximum brake force is
automatically reduced when brake
pedal is released.
Hill start assist The system helps preventing
unintended movement when driving
away on inclines.
When releasing the brake pedal after
stopping on an incline, brakes remain
on for further two seconds. The
brakes release automatically as soon as the vehicle begins to accelerate.
The hill start assist will not activate if
one of the following conditions
occurs:
● forward gear is engaged when facing downhill.
● reverse gear is engaged when facing uphill.
Page 228 of 345
226Driving and operating
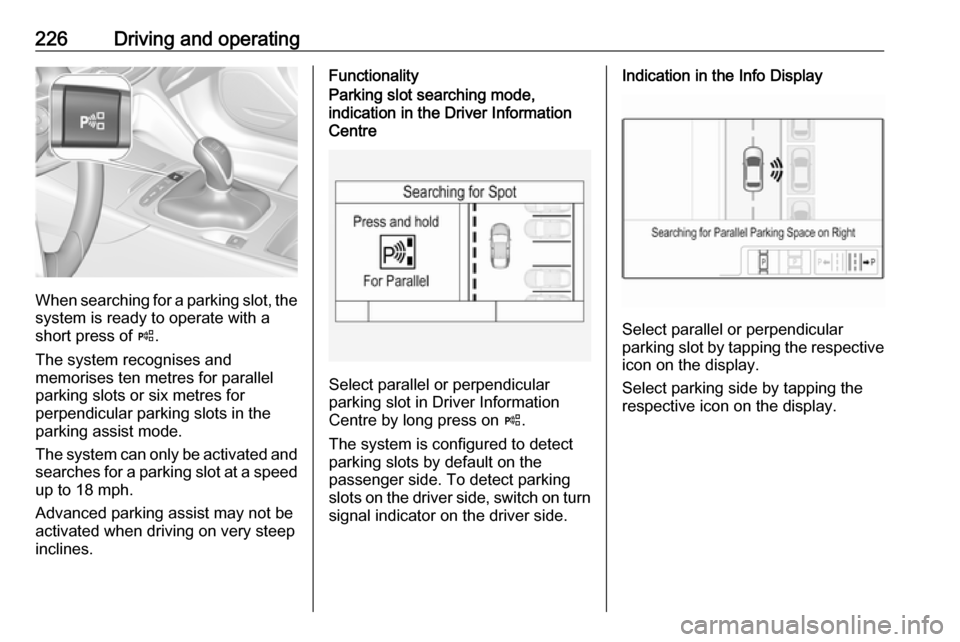
When searching for a parking slot, the
system is ready to operate with a
short press of (.
The system recognises and
memorises ten metres for parallel
parking slots or six metres for
perpendicular parking slots in the
parking assist mode.
The system can only be activated and searches for a parking slot at a speed
up to 18 mph.
Advanced parking assist may not be
activated when driving on very steep
inclines.
FunctionalityParking slot searching mode,
indication in the Driver Information
Centre
Select parallel or perpendicular
parking slot in Driver Information
Centre by long press on (.
The system is configured to detect parking slots by default on the
passenger side. To detect parking
slots on the driver side, switch on turn
signal indicator on the driver side.
Indication in the Info Display
Select parallel or perpendicular
parking slot by tapping the respective icon on the display.
Select parking side by tapping the
respective icon on the display.
Page 279 of 345
Vehicle care277GSi with Michelin Pilot Super Sport or
Pilot Sport 4 S tyres
This model is factory-fitted with high
performance sports tyres, which have
a reduced performance at low
temperature.9 Danger
Use winter tyres at temperatures
below 0 °C, otherwise damage of
the high performance sports tyres
is possible.
Tyre designations
E.g. 215/60 R 16 95 V
215:tyre width, mm60:cross-section ratio (tyre height
to tyre width), %R:belt type: RadialRF:type: RunFlat16:wheel diameter, inches95:load index e.g. 95 is equivalent
to 690 kgV:speed code letter
Speed code letter:
Q:up to 100 mphS:up to 112 mphT:up to 118 mphH:up to 130 mphV:up to 150 mphW:up to 168 mph
Choose a tyre appropriate for the
maximum speed of your vehicle.
The maximum speed is achievable at kerb weight with driver (75 kg) plus
125 kg payload. Optional equipment
could reduce the maximum speed of
the vehicle.
Performance 3 309.
Directional tyres
Directional tyres should be mounted
so that they rotate in the correct
direction. The proper rotation
direction is indicated by a symbol
(e.g. an arrow) on the sidewall.
Tyre pressure
Check the pressure of cold tyres at
least every 14 days and before any
long journey. Do not forget the spare
wheel. This also applies to vehicles
with tyre pressure monitoring system.
Tyre pressure 3 317.
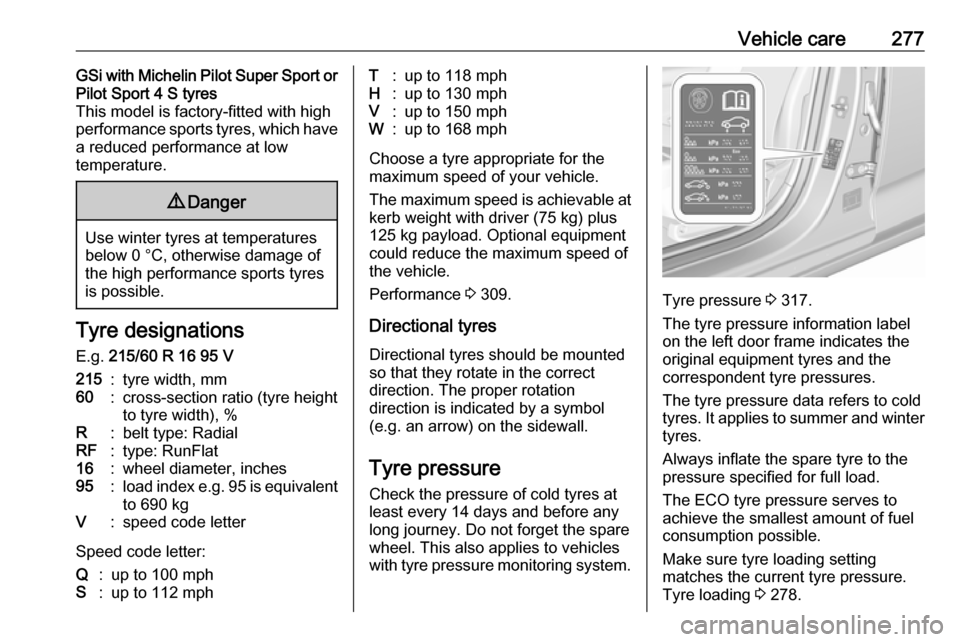
The tyre pressure information label
on the left door frame indicates the
original equipment tyres and the
correspondent tyre pressures.
The tyre pressure data refers to cold
tyres. It applies to summer and winter tyres.
Always inflate the spare tyre to the
pressure specified for full load.
The ECO tyre pressure serves to
achieve the smallest amount of fuel
consumption possible.
Make sure tyre loading setting
matches the current tyre pressure.
Tyre loading 3 278.
Page 314 of 345
![VAUXHALL INSIGNIA 2019 User Guide 312Technical dataVehicle weight
Kerb weight, basic model without any optional equipmentGrand SportEngineManual transmissionAutomatic transmission[kg]B15XHL1440/1456 7)–B15XHT1441/1472 7)1472D16SHT� VAUXHALL INSIGNIA 2019 User Guide 312Technical dataVehicle weight
Kerb weight, basic model without any optional equipmentGrand SportEngineManual transmissionAutomatic transmission[kg]B15XHL1440/1456 7)–B15XHT1441/1472 7)1472D16SHT�](/img/38/19495/w960_19495-313.png)
312Technical dataVehicle weight
Kerb weight, basic model without any optional equipmentGrand SportEngineManual transmissionAutomatic transmission[kg]B15XHL1440/1456 7)–B15XHT1441/1472 7)1472D16SHT–8)–4)8)[kg]D16DTI1503–D16DTH15031520D20DTH15821613D20DTH
AWD 9)1683–D20DTR–1733/1772 10)7)
ECO
9) All wheel drive
10) GSi
48) Value was not available at time of printing.Value was not available at time of printing.
Optional equipment and accessories increase the kerb weight.
Loading information 3 84.
Page 315 of 345
![VAUXHALL INSIGNIA 2019 User Guide Technical data313Kerb weight, basic model without any optional equipmentSports TourerEngineManual transmissionAutomatic transmission[kg]B15XHL1487–B15XHT1487/15037)1522D16SHT–4)8)–4)8)[kg]D16DTI VAUXHALL INSIGNIA 2019 User Guide Technical data313Kerb weight, basic model without any optional equipmentSports TourerEngineManual transmissionAutomatic transmission[kg]B15XHL1487–B15XHT1487/15037)1522D16SHT–4)8)–4)8)[kg]D16DTI](/img/38/19495/w960_19495-314.png)
Technical data313Kerb weight, basic model without any optional equipmentSports TourerEngineManual transmissionAutomatic transmission[kg]B15XHL1487–B15XHT1487/15037)1522D16SHT–4)8)–4)8)[kg]D16DTI1522–D16DTH15671582D20DTH16331666D20DTH
AWD 9)1716–D20DTR–1772/1807 10)7)
ECO
9) All wheel drive
10) GSi
48) Value was not available at time of printing.Value was not available at time of printing.
Optional equipment and accessories increase the kerb weight.
Loading information 3 84.
Page 342 of 345

340Speech recognition.....................157
Speed limiter....................... 110, 202
Speedometer ............................. 100
Starting and operating ................176
Starting off ................................... 17
Starting the engine ....................178
Steering ...................................... 176
Steering wheel adjustment ......9, 87
Steering wheel controls .......87, 144
Stop-start system........................ 180
Storage ......................................... 72
Storage compartments .................72
Sunglasses storage .....................73
Sunroof ........................................ 42
Sunvisor lights ........................... 141
Sun visors .................................... 42
Symbols ......................................... 4
System settings .......................... 148
T
Tachometer ............................... 102
Tail lights ................................... 264
Three-point seat belt .................... 56
Tools .......................................... 275
Tow bar....................................... 248
Towing ................................ 248, 293
Towing another vehicle .............294
Towing equipment .....................250
Towing hitch installation dimensions ............................. 322Towing the vehicle .....................293
Traction Control system ............. 196
Traction Control system off......... 108
Traffic programme ......................152
Traffic sign assistant ...........110, 238
Trailer coupling ........................... 248
Trailer stability assist .................251
Trailer towing ............................. 249
Transmission ............................... 16
Tread depth ............................... 281
Trip odometer ............................ 101
Turn lights .......................... 104, 138
Tyre chains ................................ 282
Tyre designations ......................277
Tyre pressure ............................ 277
Tyre pressure monitoring system ............................. 108, 278
Tyre pressures ........................... 317
Tyre repair kit ............................. 282
U
Upholstery .................................. 297
Uplevel display ........................... 111
Usage ......................................... 159
USB port ............................... 92, 152
User profiles ............................... 151
Using smartphone applications ..162
Using this manual ..........................3V
Valet mode ................................. 117
Vehicle battery ........................... 258
Vehicle checks............................ 254
Vehicle data ................................ 304
Vehicle data recording and privacy ..................................... 331
Vehicle detected ahead ..............110
Vehicle dimensions .................... 315
Vehicle Identification Number ....302
Vehicle jack ................................ 275
Vehicle messages .....................122
Vehicle personalisation .............123
Vehicle security ............................ 33
Vehicle specific data ......................3
Vehicle storage ........................... 253
Vehicle tools ............................... 275
Vehicle unlocking ........................... 6 Vehicle weight ........................... 312
Ventilating ..................................... 53
Voice pass-thru application 157, 159
Voice prompts............................. 159
Voice recognition ........................157
W
Warning chimes .........................122
Warning lights ............................. 100
Warning triangle .......................... 82
Washer and wiper systems .........13
Washer fluid ............................... 257