instrument panel VAUXHALL MERIVA 2014.5 Owner's Manual
[x] Cancel search | Manufacturer: VAUXHALL, Model Year: 2014.5, Model line: MERIVA, Model: VAUXHALL MERIVA 2014.5Pages: 237, PDF Size: 7.59 MB
Page 12 of 237
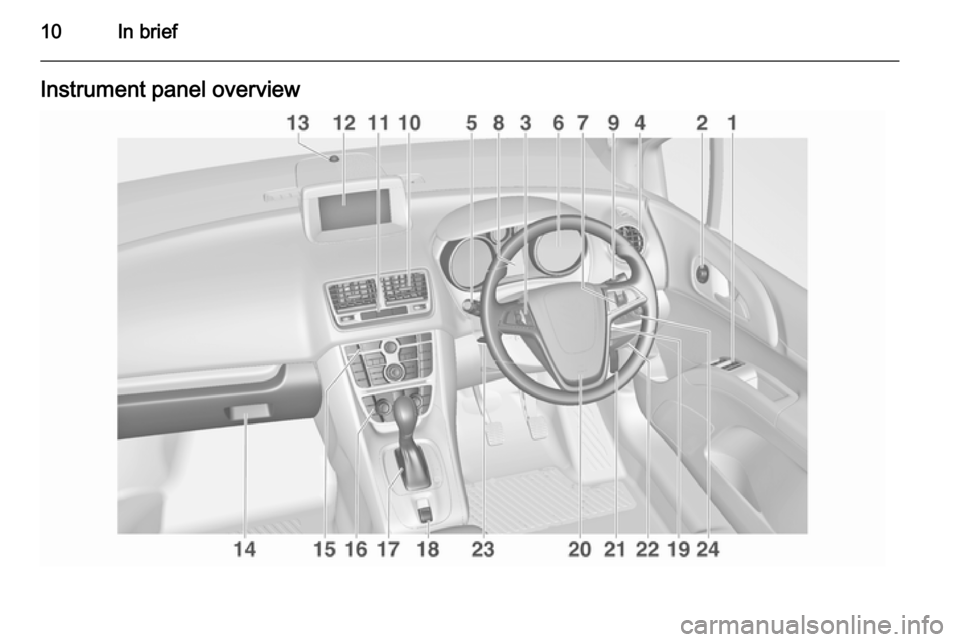
10In briefInstrument panel overview
Page 50 of 237
48Seats, restraintsAirbag systemThe airbag system consists of a
number of individual systems
depending on the scope of
equipment.
When triggered the airbags inflate
within milliseconds. They also deflate
so quickly that it is often unnoticeable during the collision.9 Warning
If handled improperly the airbag
systems can be triggered in an
explosive manner.
Notice
The airbag systems and belt
pretensioner control electronics are
located in the centre console area.
Do not put any magnetic objects in
this area.
Do not stick anything on the airbag
covers and do not cover them with
other materials.
Each airbag is triggered only once.
Have deployed airbags replaced by
a workshop. Furthermore, it might be necessary to have the steering
wheel, the instrument panel, parts of
the panelling, the door seals,
handles and the seats replaced.
Do not make any modifications to
the airbag system as this will
invalidate the vehicle type approval.
When the airbags inflate, escaping
hot gases may cause burns.
Control indicator v for airbag systems
3 93.
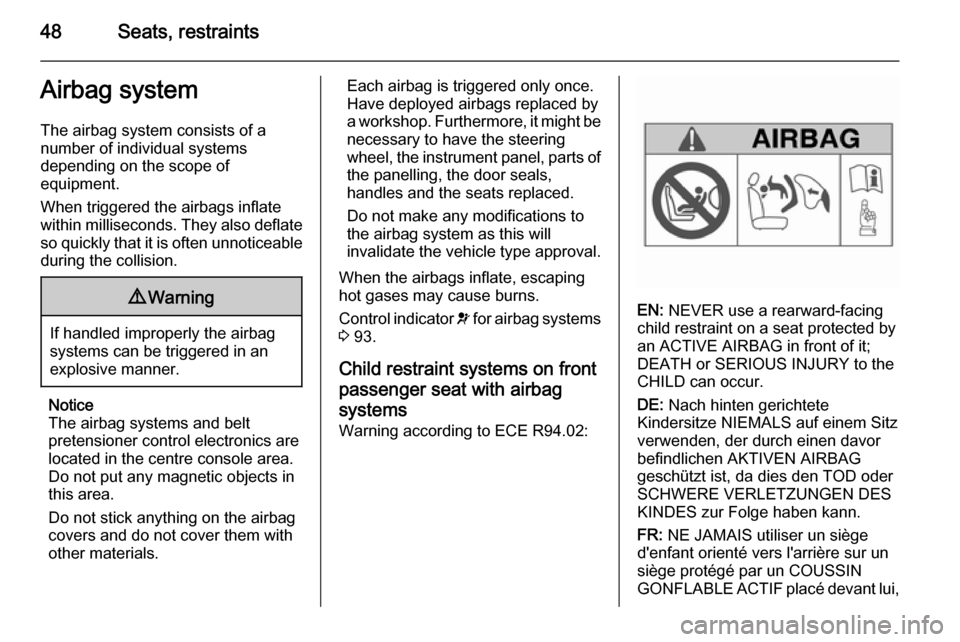
Child restraint systems on front passenger seat with airbag
systems Warning according to ECE R94.02:
EN: NEVER use a rearward-facing
child restraint on a seat protected by
an ACTIVE AIRBAG in front of it;
DEATH or SERIOUS INJURY to the
CHILD can occur.
DE: Nach hinten gerichtete
Kindersitze NIEMALS auf einem Sitz
verwenden, der durch einen davor
befindlichen AKTIVEN AIRBAG
geschützt ist, da dies den TOD oder
SCHWERE VERLETZUNGEN DES
KINDES zur Folge haben kann.
FR: NE JAMAIS utiliser un siège
d'enfant orienté vers l'arrière sur un
siège protégé par un COUSSIN
GONFLABLE ACTIF placé devant lui,
Page 53 of 237
Seats, restraints51
AKTĪVU DROŠĪBAS SPILVENU, jo
pretējā gadījumā BĒRNS var gūt SMAGAS TRAUMAS vai IET BOJĀ.
ET: ÄRGE kasutage tahapoole
suunatud lapseturvaistet istmel, mille
ees on AKTIIVSE TURVAPADJAGA
kaitstud iste, sest see võib
põhjustada LAPSE SURMA või
TÕSISE VIGASTUSE.
MT: QATT tuża trażżin għat-tfal li
jħares lejn in-naħa ta’ wara fuq sit
protett b’AIRBAG ATTIV quddiemu;
dan jista’ jikkawża l-MEWT jew
ĠRIEĦI SERJI lit-TFAL.
Beyond the warning required by
ECE R94.02, for safety reasons
never use a forward-facing child
restraint system on the passenger
seat with an active front airbag.9 Danger
Do not use a child restraint system
on the passenger seat with active
front airbag.
The airbag label is located on both
sides of the front passenger sun visor.
Airbag deactivation 3 53.
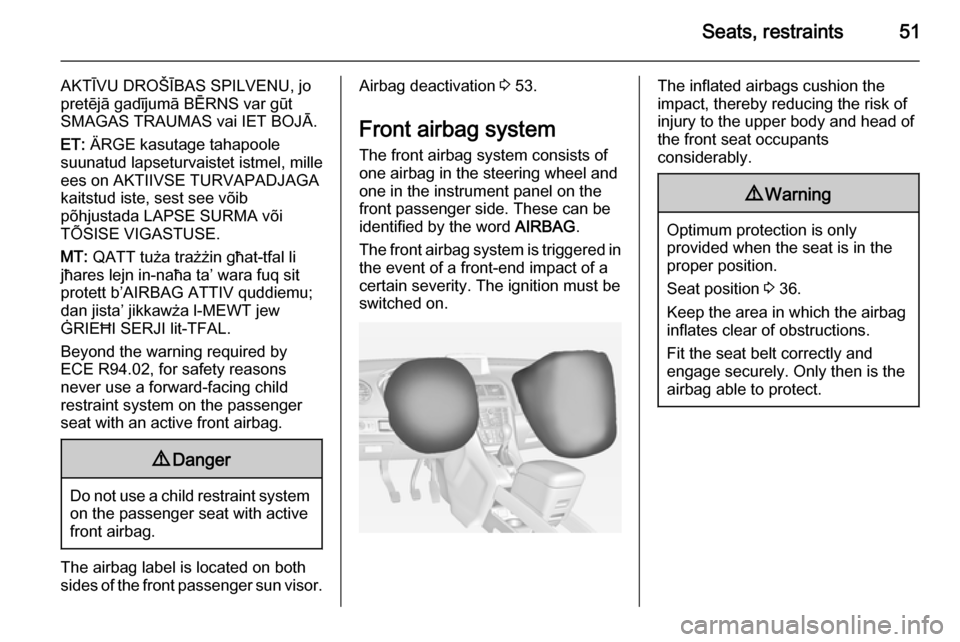
Front airbag system The front airbag system consists of
one airbag in the steering wheel and
one in the instrument panel on the
front passenger side. These can be
identified by the word AIRBAG.
The front airbag system is triggered in the event of a front-end impact of a
certain severity. The ignition must be
switched on.The inflated airbags cushion the
impact, thereby reducing the risk of
injury to the upper body and head of
the front seat occupants
considerably.9 Warning
Optimum protection is only
provided when the seat is in the
proper position.
Seat position 3 36.
Keep the area in which the airbag
inflates clear of obstructions.
Fit the seat belt correctly and
engage securely. Only then is the
airbag able to protect.
Page 55 of 237
Seats, restraints539Warning
Keep the area in which the airbag
inflates clear of obstructions.
The hooks in the roof frame are
only suitable for hanging up light
articles of clothing, without coat
hangers. Do not keep any items in these clothes.
Airbag deactivation
The front passenger airbag system
must be deactivated if a child restraint system is to be fitted on this seat. The
side airbag and curtain airbag
systems, the belt pretensioners and
all driver airbag systems will remain
active.
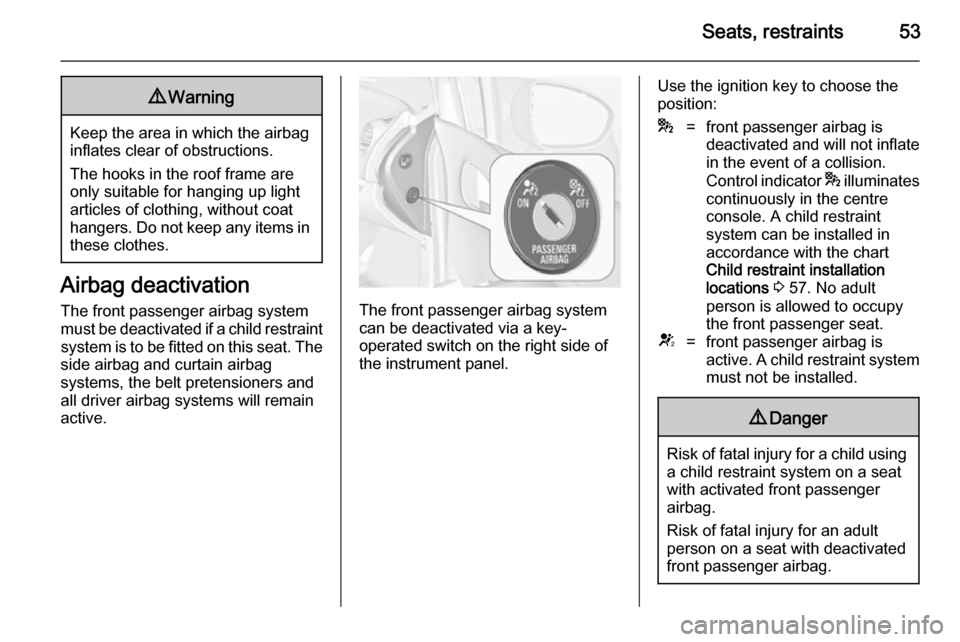
The front passenger airbag system can be deactivated via a key-
operated switch on the right side of the instrument panel.
Use the ignition key to choose the
position:*=front passenger airbag is
deactivated and will not inflate in the event of a collision.
Control indicator * illuminates
continuously in the centre
console. A child restraint
system can be installed in
accordance with the chart
Child restraint installation
locations 3 57. No adult
person is allowed to occupy
the front passenger seat.V=front passenger airbag is
active. A child restraint system
must not be installed.9 Danger
Risk of fatal injury for a child using
a child restraint system on a seat
with activated front passenger
airbag.
Risk of fatal injury for an adult
person on a seat with deactivated
front passenger airbag.
Page 82 of 237

80Storage
■ Use the hook at the left sidewall ofthe load compartment for hanging
up carrier bags. Pull out the hook.
Maximum load: 3 kg.
■ Secure loose objects in the load compartment to prevent them from
sliding.
■ When transporting objects in the load compartment, the backrests of
the rear seats must not be angled
forward.
■ Do not allow the load to protrude above the upper edge of the
backrests.
■ Do not place any objects on the load compartment cover or the
instrument panel, and do not cover
the sensor on top of the instrument panel.
■ The load must not obstruct the operation of the pedals, parking
brake and gear selector, or hinder
the freedom of movement of the
driver. Do not place any unsecured objects in the interior.
■ Do not drive with an open load compartment.9 Warning
Always make sure that the load in
the vehicle is securely stowed.
Otherwise objects can be thrown
around inside the vehicle and
cause personal injury or damage
to the load or vehicle.
■ The payload is the difference between the permitted gross
vehicle weight (see identification
plate 3 211) and the EC kerb
weight.
To calculate the payload, enter the
data for your vehicle in the Weights
table at the front of this manual.
The EC kerb weight includes
weights for the driver (68 kg),
luggage (7 kg) and all fluids (tank
90 % full).
Optional equipment and
accessories increase the kerb
weight.
■ Driving with a roof load increases the sensitivity of the vehicle to
cross-winds and has a detrimental
effect on vehicle handling due to
the vehicle's higher centre of
gravity. Distribute the load evenly
and secure it properly with retaining
straps. Adjust the tyre pressure and vehicle speed according to the load
conditions. Check and retighten the straps frequently.
Do not drive faster than 75 mph.
The permissible roof load is 60 kg. The roof load is the combined
weight of the roof rack and the load.
Page 103 of 237
Instruments and controls101
◆Unit1 : Great Britain
◆ Unit2 : United States
◆ Unit3 : Europe
■ Tire Pressure System : 3 189
■ Remaining Oil Life : 3 90
■ Speed Warning : If exceeding the
preset speed, a warning chime will
be activated
■ Language : Displayed language can
be changed if the vehicle is not
equipped with a radio
Selection and indication can be
different between Midlevel- and
Uplevel-Display.
Trip/Fuel Information Menu Press the MENU button to select the
Trip/Fuel Information Menu .
Turn the adjuster wheel to select one
of the submenus:
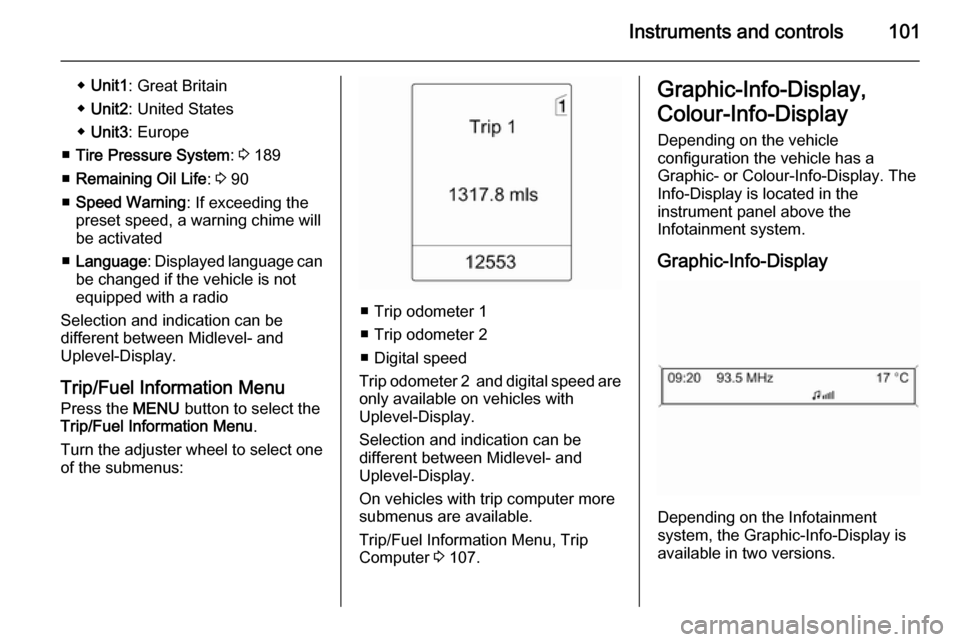
■ Trip odometer 1
■ Trip odometer 2
■ Digital speed
Trip odometer 2 and digital speed are
only available on vehicles with
Uplevel-Display.
Selection and indication can be
different between Midlevel- and
Uplevel-Display.
On vehicles with trip computer more
submenus are available.
Trip/Fuel Information Menu, Trip
Computer 3 107.
Graphic-Info-Display,
Colour-Info-Display Depending on the vehicle
configuration the vehicle has a
Graphic- or Colour-Info-Display. The
Info-Display is located in the
instrument panel above the
Infotainment system.
Graphic-Info-Display
Depending on the Infotainment
system, the Graphic-Info-Display is
available in two versions.
Page 121 of 237

Lighting119Interior lighting
Instrument panel
illumination control
Brightness of the following lights can
be adjusted when the exterior lights
are on:
■ Instrument panel illumination
■ Info-Display
■ Illuminated switches and operation elements
Turn thumb wheel A until the required
brightness is obtained.
On vehicles with light sensor the
brightness can only be adjusted when the exterior lights are on and the light
sensor detects night conditions.
Interior lights
During entry and exit of the vehicle,
the front and rear courtesy lights
automatically switch on and then off
after a delay.
Notice
In the event of an accident with
airbag deployment the courtesy
lights are turned on automatically.
Front courtesy lightOperate rocker switch:w=automatic switching on
and off.press u=on.press v=off.
Rear courtesy lights
Illuminate in conjunction with the front
courtesy light depending on rocker
switch position.
Page 122 of 237
120LightingReading lights
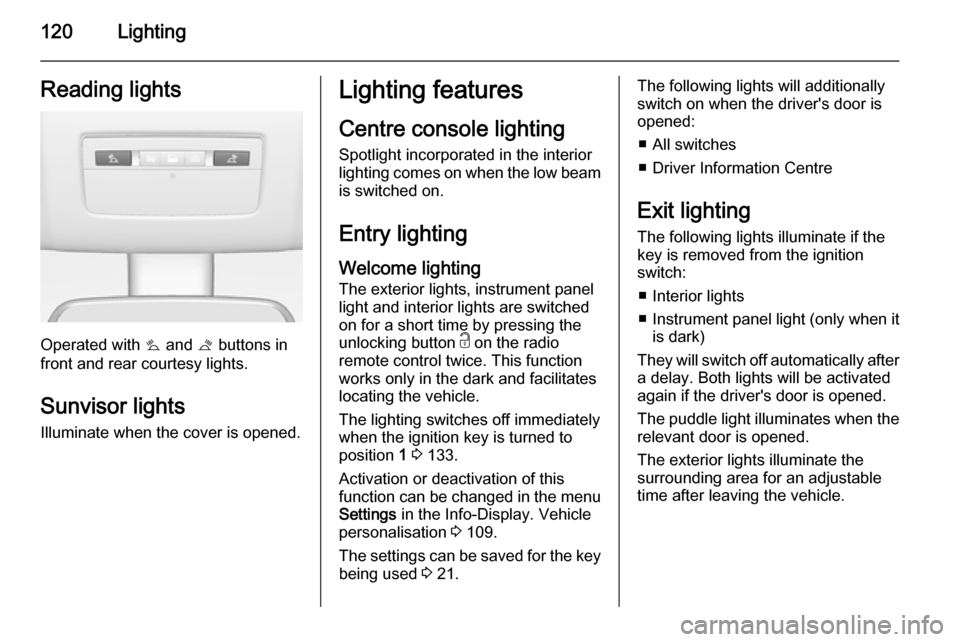
Operated with s and t buttons in
front and rear courtesy lights.
Sunvisor lights
Illuminate when the cover is opened.
Lighting features
Centre console lighting
Spotlight incorporated in the interior
lighting comes on when the low beam
is switched on.
Entry lighting Welcome lighting
The exterior lights, instrument panel
light and interior lights are switched
on for a short time by pressing the
unlocking button c on the radio
remote control twice. This function
works only in the dark and facilitates
locating the vehicle.
The lighting switches off immediately
when the ignition key is turned to
position 1 3 133.
Activation or deactivation of this
function can be changed in the menu Settings in the Info-Display. Vehicle
personalisation 3 109.
The settings can be saved for the key
being used 3 21.The following lights will additionally
switch on when the driver's door is
opened:
■ All switches
■ Driver Information Centre
Exit lighting
The following lights illuminate if the
key is removed from the ignition
switch:
■ Interior lights
■ Instrument panel light (only when it
is dark)
They will switch off automatically after
a delay. Both lights will be activated
again if the driver's door is opened.
The puddle light illuminates when the relevant door is opened.
The exterior lights illuminate the
surrounding area for an adjustable time after leaving the vehicle.
Page 184 of 237
182Vehicle care
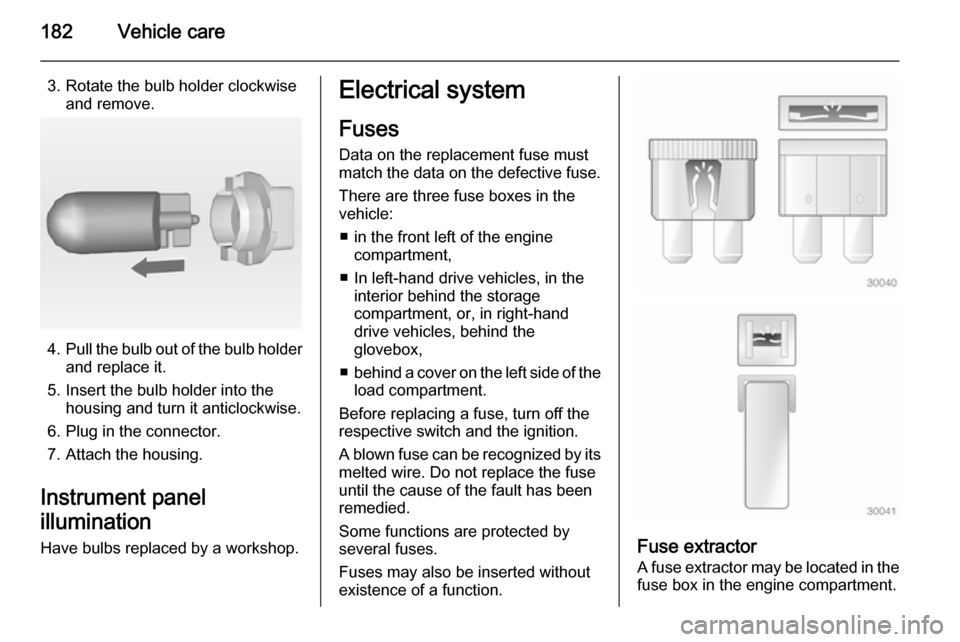
3. Rotate the bulb holder clockwiseand remove.
4. Pull the bulb out of the bulb holder
and replace it.
5. Insert the bulb holder into the housing and turn it anticlockwise.
6. Plug in the connector.
7. Attach the housing.
Instrument panel
illumination
Have bulbs replaced by a workshop.
Electrical system
Fuses
Data on the replacement fuse must
match the data on the defective fuse.
There are three fuse boxes in the
vehicle:
■ in the front left of the engine compartment,
■ In left-hand drive vehicles, in the interior behind the storage
compartment, or, in right-hand
drive vehicles, behind the
glovebox,
■ behind a cover on the left side of the
load compartment.
Before replacing a fuse, turn off the
respective switch and the ignition.
A blown fuse can be recognized by its
melted wire. Do not replace the fuse
until the cause of the fault has been
remedied.
Some functions are protected by
several fuses.
Fuses may also be inserted without
existence of a function.
Fuse extractor
A fuse extractor may be located in the fuse box in the engine compartment.
Page 187 of 237
Vehicle care185
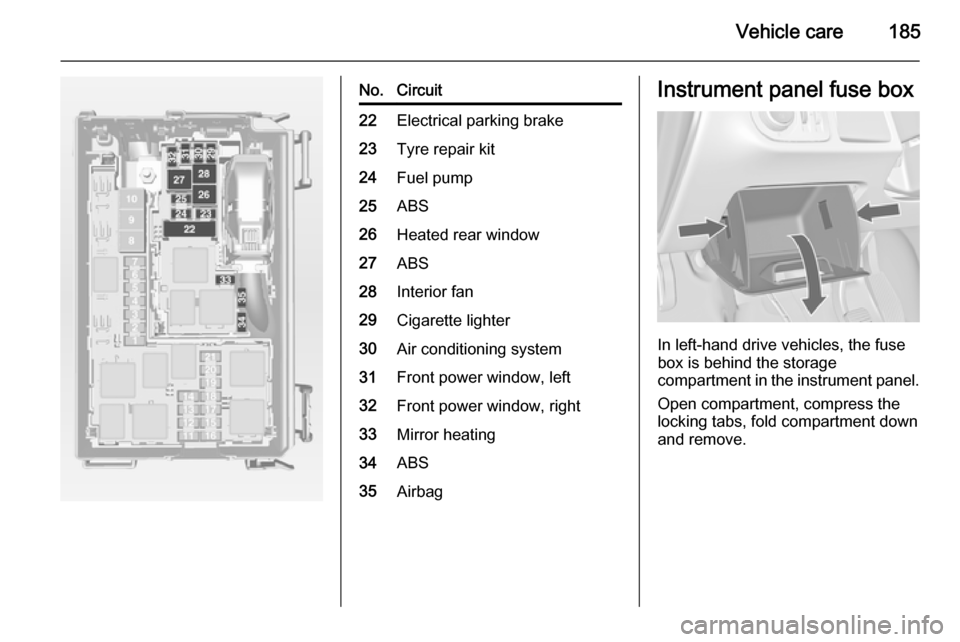
No.Circuit22Electrical parking brake23Tyre repair kit24Fuel pump25ABS26Heated rear window27ABS28Interior fan29Cigarette lighter30Air conditioning system31Front power window, left32Front power window, right33Mirror heating34ABS35AirbagInstrument panel fuse box
In left-hand drive vehicles, the fuse
box is behind the storage
compartment in the instrument panel.
Open compartment, compress the
locking tabs, fold compartment down and remove.