tow VAUXHALL MERIVA 2015.5 Owner's Manual
[x] Cancel search | Manufacturer: VAUXHALL, Model Year: 2015.5, Model line: MERIVA, Model: VAUXHALL MERIVA 2015.5Pages: 247, PDF Size: 7.83 MB
Page 20 of 247

18In briefkey. Turn the front wheels
towards the kerb.
■ Close the windows.
■ Remove the ignition key. Turn the steering wheel until the
steering wheel lock is felt to
engage.
For vehicles with automatic
transmission, the key can only
be removed when the selector
lever is in position P.
■
Lock the vehicle by pressing e on
the radio remote control.
■ Activate the anti-theft alarm system
3 27.
■ The engine cooling fans may run after the engine has been switched
off 3 169.
Caution
After running at high engine
speeds or with high engine loads,
operate the engine briefly at a low load or run in neutral for
approx. 30 seconds before
switching off, in order to protect
the turbocharger.
Keys, locks 3 19, Laying the vehicle
up for a long period of time 3 168.
Page 51 of 247

Seats, restraints49
sous peine d'infliger des
BLESSURES GRAVES, voire
MORTELLES à l'ENFANT.
ES: NUNCA utilice un sistema de
retención infantil orientado hacia
atrás en un asiento protegido por un
AIRBAG FRONTAL ACTIVO. Peligro de MUERTE o LESIONES GRAVES
para el NIÑO.
RU: ЗАПРЕЩАЕТСЯ
устанавливать детское
удерживающее устройство лицом
назад на сиденье автомобиля,
оборудованном фронтальной
подушкой безопасности, если
ПОДУШКА НЕ ОТКЛЮЧЕНА! Это
может привести к СМЕРТИ или
СЕРЬЕЗНЫМ ТРАВМАМ
РЕБЕНКА.
NL: Gebruik NOOIT een achterwaarts
gericht kinderzitje op een stoel met een ACTIEVE AIRBAG ervoor, om
DODELIJK of ERNSTIG LETSEL van het KIND te voorkomen.DA: Brug ALDRIG en bagudvendt
autostol på et forsæde med AKTIV
AIRBAG, BARNET kan komme i
LIVSFARE eller komme ALVORLIGT
TIL SKADE.
SV: Använd ALDRIG en bakåtvänd
barnstol på ett säte som skyddas med en framförvarande AKTIV AIRBAG.
DÖDSFALL eller ALLVARLIGA
SKADOR kan drabba BARNET.
FI: ÄLÄ KOSKAAN sijoita taaksepäin
suunnattua lasten turvaistuinta
istuimelle, jonka edessä on
AKTIIVINEN TURVATYYNY, LAPSI
VOI KUOLLA tai VAMMAUTUA
VAKAVASTI.
NO: Bakovervendt
barnesikringsutstyr må ALDRI brukes
på et sete med AKTIV
KOLLISJONSPUTE foran, da det kan føre til at BARNET utsettes for
LIVSFARE og fare for ALVORLIGE
SKADER.
PT: NUNCA use um sistema de
retenção para crianças voltado para
trás num banco protegido com um AIRBAG ACTIVO na frente domesmo, poderá ocorrer a PERDA DE
VIDA ou FERIMENTOS GRAVES na CRIANÇA.
IT: Non usare mai un sistema di
sicurezza per bambini rivolto
all'indietro su un sedile protetto da
AIRBAG ATTIVO di fronte ad esso:
pericolo di MORTE o LESIONI
GRAVI per il BAMBINO!
EL: ΠΟΤΕ μη χρησιμοποιείτε παιδικό
κάθισμα ασφαλείας με φορά προς τα
πίσω σε κάθισμα που προστατεύεται
από μετωπικό ΕΝΕΡΓΟ ΑΕΡΟΣΑΚΟ,
διότι το παιδί μπορεί να υποστεί
ΘΑΝΑΣΙΜΟ ή ΣΟΒΑΡΟ
ΤΡΑΥΜΑΤΙΣΜΟ.
PL: NIE WOLNO montować fotelika
dziecięcego zwróconego tyłem do
kierunku jazdy na fotelu, przed
którym znajduje się WŁĄCZONA
PODUSZKA POWIETRZNA.
Niezastosowanie się do tego
zalecenia może być przyczyną
ŚMIERCI lub POWAŻNYCH
OBRAŻEŃ u DZIECKA.
Page 75 of 247

Storage73
Push the clamping lever down and
pull both lamp supports out of the
recesses.
Fold in the lamp supports on the
backs of the tail lamps.
First place the front tail lamp ( 1), then
the rear tail lamp ( 2) in the recesses
and push down as far as possible. Push cables all the way into all guides
in order to prevent damage.
Open the tailgate.
Push the release lever up and hold.
Lift the system slightly and push it into the bumper until it engages.
Release lever must return to original
position.
9 Warning
If the system cannot be correctly
engaged, please seek the
assistance of a workshop.
Load compartment
Folding down rear seat backrests The rear seat backrest is divided into
three parts. All parts can be folded
down and lowered individually to
increase the size of the load
compartment.9 Warning
Do not stow objects under or
behind the seats. The objects
might be damaged and prevent
the guide rails from locking
properly.
A completely flat load bay is created if the rear seat backrests are folded
down.
Page 77 of 247

Storage75Rear storage
On the left side of the load
compartment there is a stowage
compartment.
Turn the fastener anticlockwise and
fold down the cover.
Load compartment cover
Do not place any objects on the cover.
Removing the cover
Unhook retaining straps from tailgate.
Lift cover at the rear and push it
upwards at the front.
Remove the cover.
Stowing the cover
Unhook retaining straps from tailgate.
Lift cover at the rear and push it
upwards out of the side guides at the
front.
Stow the cover behind the rear seats.
Fitting the cover Engage cover in side guides and fold
downwards. Attach retaining straps to tailgate.
Page 78 of 247

76StorageRear floor storage cover
The rear floor cover can be raised.
Fold it up and lift the load
compartment cover slightly.
Pull out the hook at the left sidewall of
the load compartment to hold the rear floor cover upright.
Double load-bay floor
The double load-bay floor can be
inserted in the load compartment in
two positions:
■ directly above the cover for the spare wheel well or the rear floor
cover,
■ in the upper openings in the load compartment.
To remove, lift the load-bay floor
using the recess and pull backwards.
To insert, push the load-bay floor
forwards into the corresponding
guide, then lower.If mounted in the upper position, the
space between the load-bay floor and
the spare wheel well cover can be
used as a stowage compartment.
In this position, if the rear seat
backrests are folded forwards, an
almost completely flat load bay is
created.
In the upper position, the double load-
bay floor is able to withstand a
maximum load of 100 kg. In the lower position, the double load-bay floor is
able to withstand the maximum
permissible load.
In models with a tyre repair kit, the
spare wheel recess may be used as an additional stowage compartment.
Tyre repair kit 3 199.
Page 80 of 247

78Storage
Stowage
Place tensioning straps as shown in
illustration and align with safety net.
Roll the upper net rod down to
approximately over the middle.
Place the upper net rod over the tensioning straps next to the lower net
rod. The hooks on the upper net rod
must point away from the lower net
rod.
Fasten Velcro tape tightly about the
net next to the length adjusters. The
length adjusters and net rods must lie flat next to each other.
Stow safety net in the space between
the double load-bay floor in the load
compartment. Rear floor storage
cover 3 76.
Folding tray
Located in the front seat backrests.
Open by pulling upwards until it
engages.
Fold away by pressing down past the resistance point.
Do not place any heavy objects on the
folding tray.
Warning triangle
Stow the warning triangle in the space
at the rear side of the load
compartment.
Page 81 of 247

Storage79First aid kit
Stow the first aid kit and the high
visibility vest under the driver's seat.
Use the straps.
Depending on the vehicle, a box is
located under the driver's seat. Pull handle and fold down the cover.
Maximum load: 1.5 kg.
Roof rack system
Roof rack For safety reasons and to avoid
damage to the roof, the vehicle
approved roof rack system is
recommended. For further
information contact your workshop.
Follow the installation instructions
and remove the roof rack when not in
use.
Detach the cover from each mounting
point.
Page 82 of 247

80StorageLoading information
■ Heavy objects in the loadcompartment should be placedagainst the seat backrests. Ensure
that the backrests are securely
engaged. If objects can be stacked, heavier objects should be placed at
the bottom.
■ Secure objects with lashing straps attached to the lashing eyes 3 77.
■ Use the hook at the left sidewall of
the load compartment for hanging
up carrier bags. Pull out the hook.
Maximum load: 3 kg.
■ Secure loose objects in the load compartment to prevent them from
sliding.
■ When transporting objects in the load compartment, the backrests ofthe rear seats must not be angled
forward.
■ Do not allow the load to protrude above the upper edge of the
backrests.
■ Do not place any objects on the load compartment cover or the
instrument panel, and do not cover
the sensor on top of the instrument
panel.
■ The load must not obstruct the operation of the pedals, parking
brake and gear selector, or hinder the freedom of movement of thedriver. Do not place any unsecured objects in the interior.
■ Do not drive with an open load compartment.9 Warning
Always make sure that the load in
the vehicle is securely stowed.
Otherwise objects can be thrown
around inside the vehicle and
cause personal injury or damage
to the load or vehicle.
■ The payload is the difference between the permitted gross
vehicle weight (see identification
plate 3 221) and the EC kerb
weight.
Page 123 of 247

Lighting121Rear fog lights
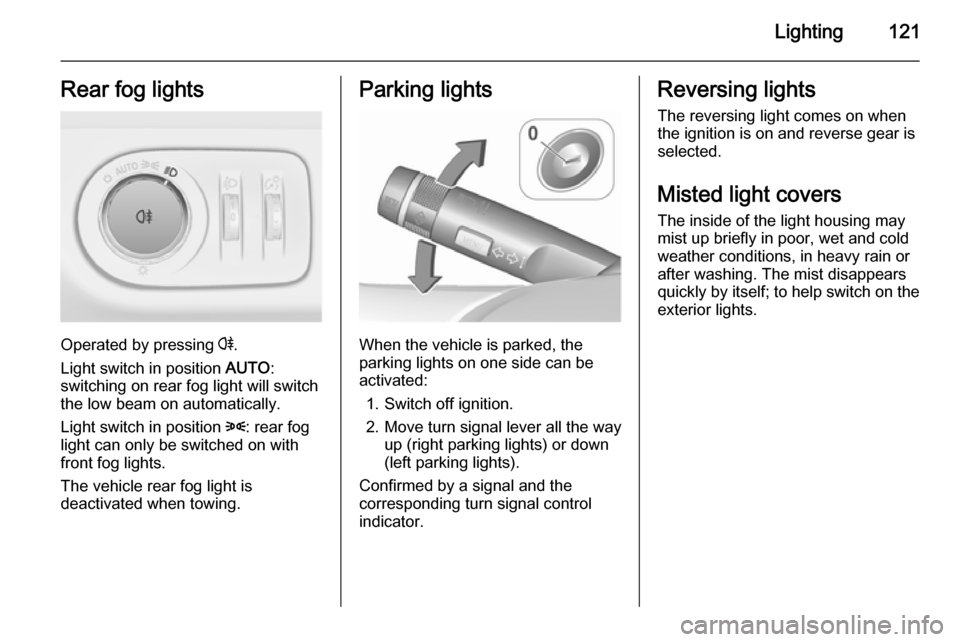
Operated by pressing r.
Light switch in position AUTO:
switching on rear fog light will switch
the low beam on automatically.
Light switch in position 8: rear fog
light can only be switched on with
front fog lights.
The vehicle rear fog light is
deactivated when towing.
Parking lights
When the vehicle is parked, the
parking lights on one side can be
activated:
1. Switch off ignition.
2. Move turn signal lever all the way up (right parking lights) or down
(left parking lights).
Confirmed by a signal and the
corresponding turn signal control
indicator.
Reversing lights
The reversing light comes on when
the ignition is on and reverse gear is
selected.
Misted light covers The inside of the light housing may
mist up briefly in poor, wet and cold weather conditions, in heavy rain or
after washing. The mist disappears
quickly by itself; to help switch on the
exterior lights.
Page 127 of 247

Climate control125Climate controlClimate control systems ............. 125
Air vents ..................................... 132
Maintenance .............................. 133Climate control systems
Heating and ventilation
system
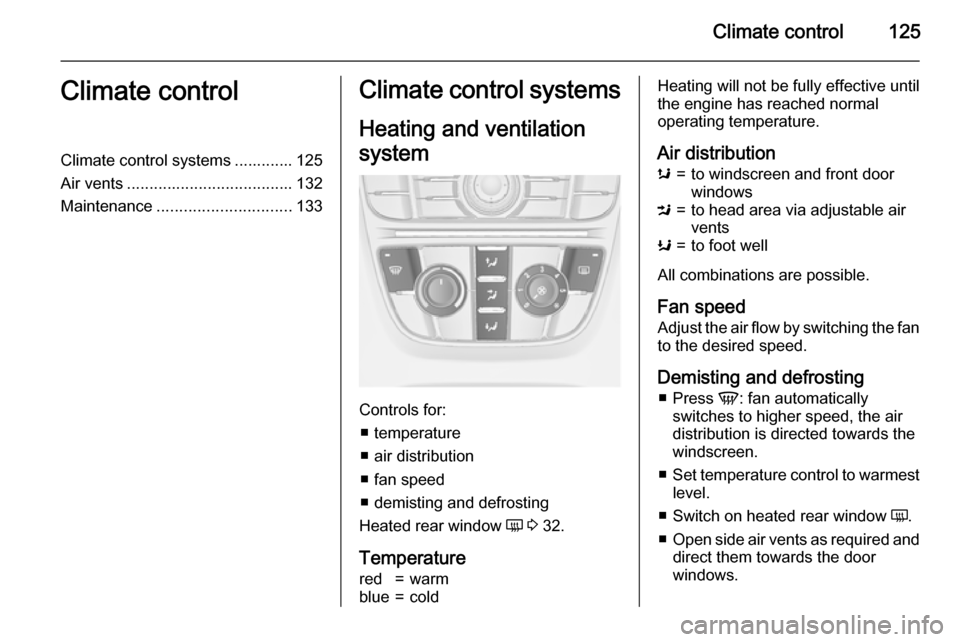
Controls for: ■ temperature
■ air distribution
■ fan speed
■ demisting and defrosting
Heated rear window Ü 3 32.
Temperature
red=warmblue=coldHeating will not be fully effective until
the engine has reached normal
operating temperature.
Air distributions=to windscreen and front door
windowsM=to head area via adjustable air
ventsK=to foot well
All combinations are possible.
Fan speed
Adjust the air flow by switching the fan to the desired speed.
Demisting and defrosting ■ Press V: fan automatically
switches to higher speed, the air
distribution is directed towards the
windscreen.
■ Set temperature control to warmest
level.
■ Switch on heated rear window Ü.
■ Open side air vents as required and
direct them towards the door
windows.