turn signal VAUXHALL MERIVA 2015 User Guide
[x] Cancel search | Manufacturer: VAUXHALL, Model Year: 2015, Model line: MERIVA, Model: VAUXHALL MERIVA 2015Pages: 245, PDF Size: 7.76 MB
Page 110 of 245
108Instruments and controlsTrip computerThe menus and functions can be
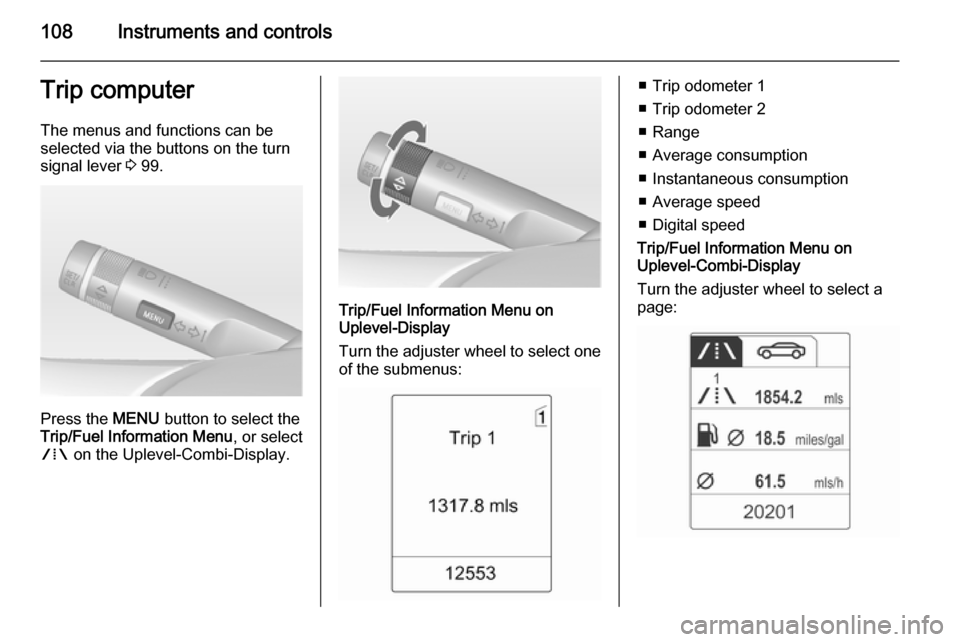
selected via the buttons on the turn signal lever 3 99.
Press the MENU button to select the
Trip/Fuel Information Menu , or select
W on the Uplevel-Combi-Display.
Trip/Fuel Information Menu on
Uplevel-Display
Turn the adjuster wheel to select one of the submenus:
■ Trip odometer 1
■ Trip odometer 2
■ Range
■ Average consumption
■ Instantaneous consumption
■ Average speed
■ Digital speed
Trip/Fuel Information Menu on
Uplevel-Combi-Display
Turn the adjuster wheel to select a
page:
Page 112 of 245
110Instruments and controls
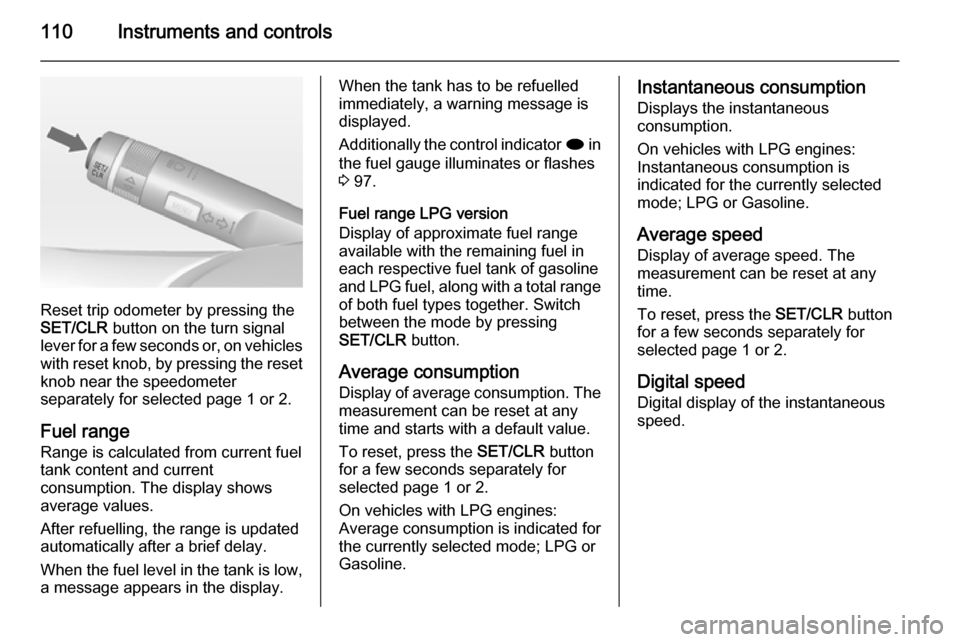
Reset trip odometer by pressing the
SET/CLR button on the turn signal
lever for a few seconds or, on vehicles
with reset knob, by pressing the reset
knob near the speedometer
separately for selected page 1 or 2.
Fuel range
Range is calculated from current fuel
tank content and current
consumption. The display shows
average values.
After refuelling, the range is updated
automatically after a brief delay.
When the fuel level in the tank is low,
a message appears in the display.
When the tank has to be refuelled
immediately, a warning message is
displayed.
Additionally the control indicator i in
the fuel gauge illuminates or flashes
3 97.
Fuel range LPG version
Display of approximate fuel range
available with the remaining fuel in
each respective fuel tank of gasoline
and LPG fuel, along with a total range
of both fuel types together. Switch
between the mode by pressing
SET/CLR button.
Average consumption
Display of average consumption. The measurement can be reset at any
time and starts with a default value.
To reset, press the SET/CLR button
for a few seconds separately for
selected page 1 or 2.
On vehicles with LPG engines:
Average consumption is indicated for
the currently selected mode; LPG or
Gasoline.Instantaneous consumption
Displays the instantaneous
consumption.
On vehicles with LPG engines:
Instantaneous consumption is
indicated for the currently selected
mode; LPG or Gasoline.
Average speed
Display of average speed. The
measurement can be reset at any
time.
To reset, press the SET/CLR button
for a few seconds separately for
selected page 1 or 2.
Digital speed
Digital display of the instantaneous
speed.
Page 120 of 245
118Lighting
Vehicles with Adaptive Forward
Lighting
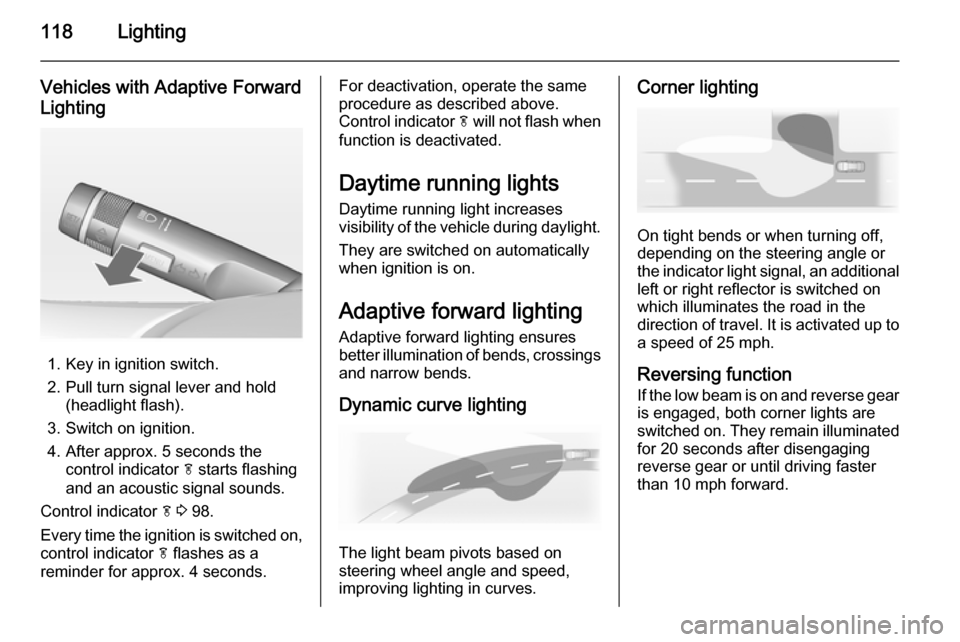
1. Key in ignition switch.
2. Pull turn signal lever and hold (headlight flash).
3. Switch on ignition.
4. After approx. 5 seconds the control indicator f starts flashing
and an acoustic signal sounds.
Control indicator f 3 98.
Every time the ignition is switched on,
control indicator f flashes as a
reminder for approx. 4 seconds.
For deactivation, operate the same
procedure as described above.
Control indicator f will not flash when
function is deactivated.
Daytime running lights
Daytime running light increases
visibility of the vehicle during daylight.
They are switched on automatically
when ignition is on.
Adaptive forward lighting
Adaptive forward lighting ensures
better illumination of bends, crossings
and narrow bends.
Dynamic curve lighting
The light beam pivots based on
steering wheel angle and speed,
improving lighting in curves.
Corner lighting
On tight bends or when turning off,
depending on the steering angle or
the indicator light signal, an additional left or right reflector is switched on
which illuminates the road in the
direction of travel. It is activated up to
a speed of 25 mph.
Reversing function If the low beam is on and reverse gear is engaged, both corner lights are
switched on. They remain illuminated
for 20 seconds after disengaging
reverse gear or until driving faster than 10 mph forward.
Page 121 of 245
Lighting119Hazard warning flashers
Operated with the ¨ button.
In the event of an accident with airbag
deployment the hazard warning
flashers are activated automatically.
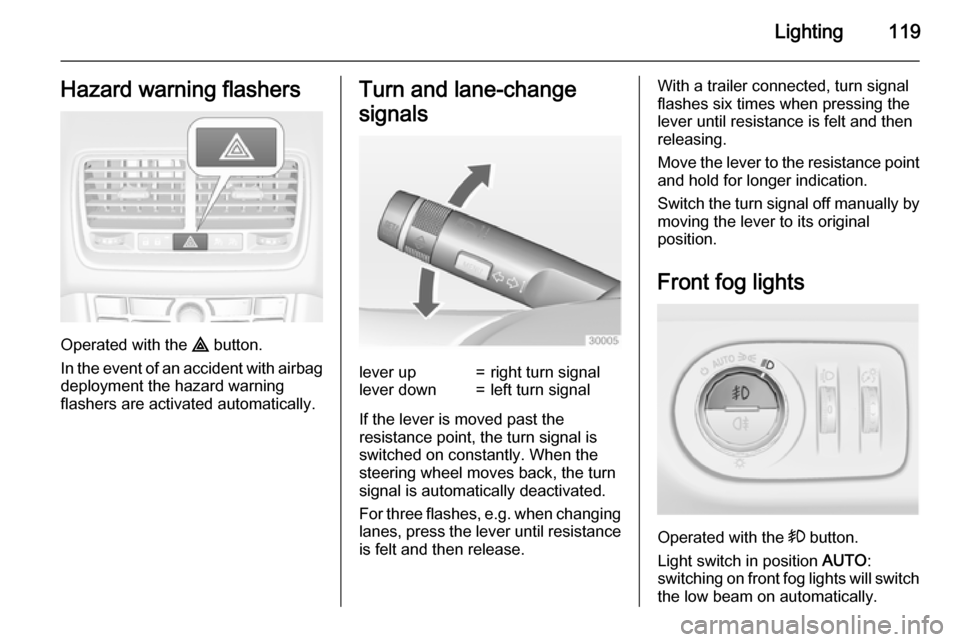
Turn and lane-change
signalslever up=right turn signallever down=left turn signal
If the lever is moved past the
resistance point, the turn signal is
switched on constantly. When the
steering wheel moves back, the turn
signal is automatically deactivated.
For three flashes, e.g. when changing lanes, press the lever until resistance
is felt and then release.
With a trailer connected, turn signal
flashes six times when pressing the
lever until resistance is felt and then
releasing.
Move the lever to the resistance point
and hold for longer indication.
Switch the turn signal off manually by moving the lever to its original
position.
Front fog lights
Operated with the > button.
Light switch in position AUTO:
switching on front fog lights will switch the low beam on automatically.
Page 122 of 245
120LightingRear fog lights
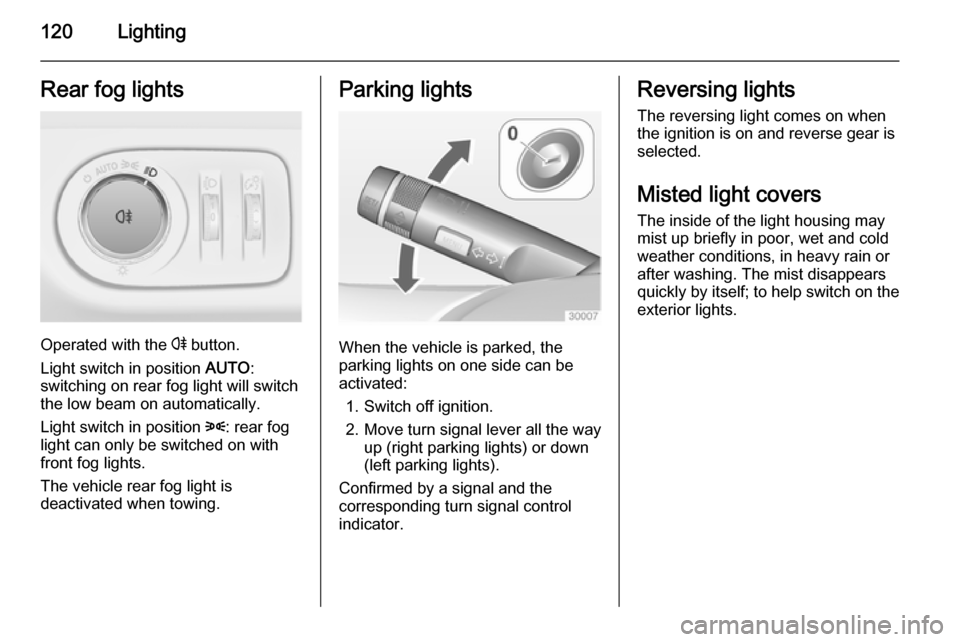
Operated with the r button.
Light switch in position AUTO:
switching on rear fog light will switch
the low beam on automatically.
Light switch in position 8: rear fog
light can only be switched on with
front fog lights.
The vehicle rear fog light is
deactivated when towing.
Parking lights
When the vehicle is parked, the
parking lights on one side can be
activated:
1. Switch off ignition.
2. Move turn signal lever all the way up (right parking lights) or down
(left parking lights).
Confirmed by a signal and the
corresponding turn signal control
indicator.
Reversing lights
The reversing light comes on when
the ignition is on and reverse gear is
selected.
Misted light covers The inside of the light housing may
mist up briefly in poor, wet and cold weather conditions, in heavy rain or
after washing. The mist disappears
quickly by itself; to help switch on the
exterior lights.
Page 125 of 245
Lighting123
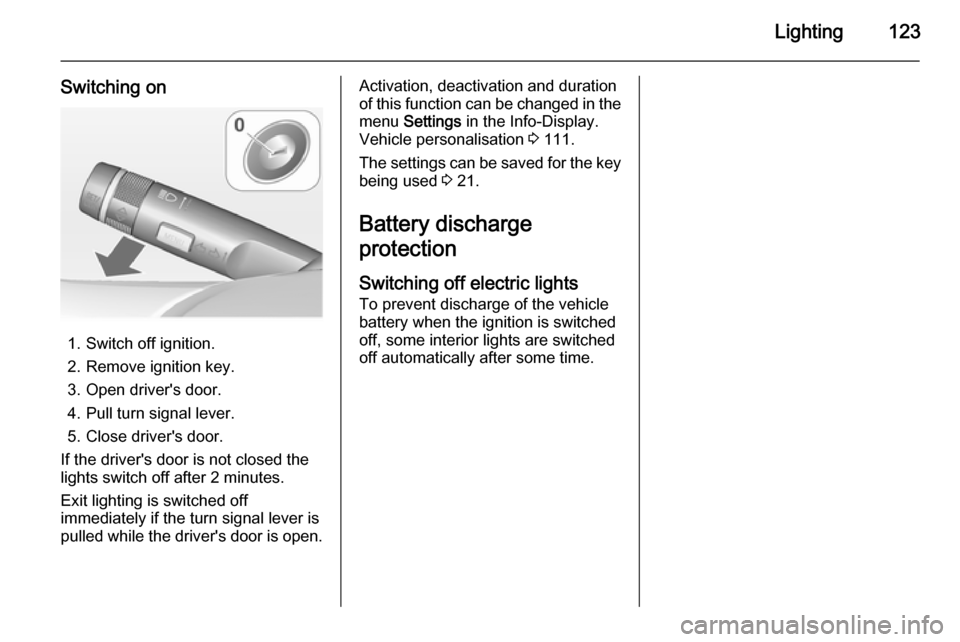
Switching on
1. Switch off ignition.
2. Remove ignition key.
3. Open driver's door.
4. Pull turn signal lever.
5. Close driver's door.
If the driver's door is not closed the
lights switch off after 2 minutes.
Exit lighting is switched off
immediately if the turn signal lever is pulled while the driver's door is open.
Activation, deactivation and duration
of this function can be changed in the menu Settings in the Info-Display.
Vehicle personalisation 3 111.
The settings can be saved for the key being used 3 21.
Battery discharge
protection
Switching off electric lights
To prevent discharge of the vehicle
battery when the ignition is switched
off, some interior lights are switched
off automatically after some time.
Page 182 of 245
180Vehicle care
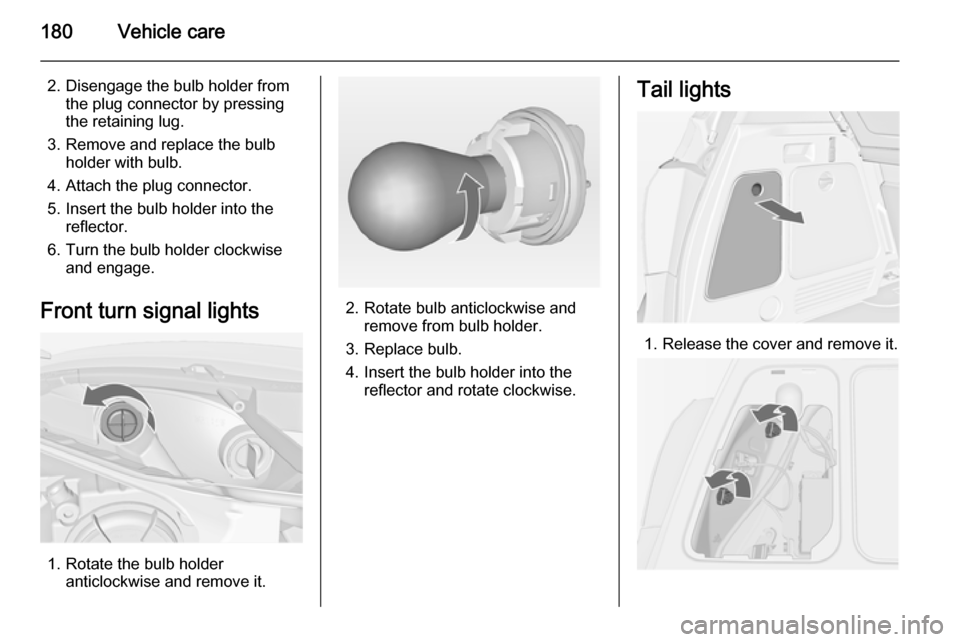
2. Disengage the bulb holder fromthe plug connector by pressing
the retaining lug.
3. Remove and replace the bulb holder with bulb.
4. Attach the plug connector.
5. Insert the bulb holder into the reflector.
6. Turn the bulb holder clockwise and engage.
Front turn signal lights
1. Rotate the bulb holder anticlockwise and remove it.
2. Rotate bulb anticlockwise andremove from bulb holder.
3. Replace bulb.
4. Insert the bulb holder into the reflector and rotate clockwise.
Tail lights
1. Release the cover and remove it.
Page 183 of 245
Vehicle care181
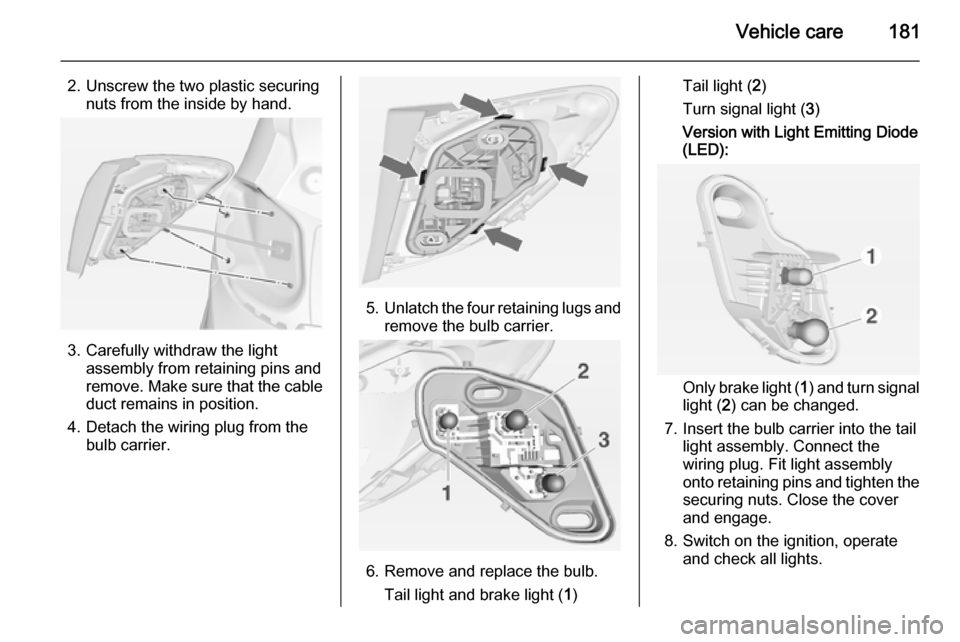
2. Unscrew the two plastic securingnuts from the inside by hand.
3. Carefully withdraw the light assembly from retaining pins and
remove. Make sure that the cable duct remains in position.
4. Detach the wiring plug from the bulb carrier.
5.Unlatch the four retaining lugs and
remove the bulb carrier.
6. Remove and replace the bulb.
Tail light and brake light ( 1)
Tail light ( 2)
Turn signal light ( 3)
Version with Light Emitting Diode (LED):
Only brake light ( 1) and turn signal
light ( 2) can be changed.
7. Insert the bulb carrier into the tail light assembly. Connect the
wiring plug. Fit light assembly
onto retaining pins and tighten the securing nuts. Close the cover
and engage.
8. Switch on the ignition, operate and check all lights.
Page 185 of 245
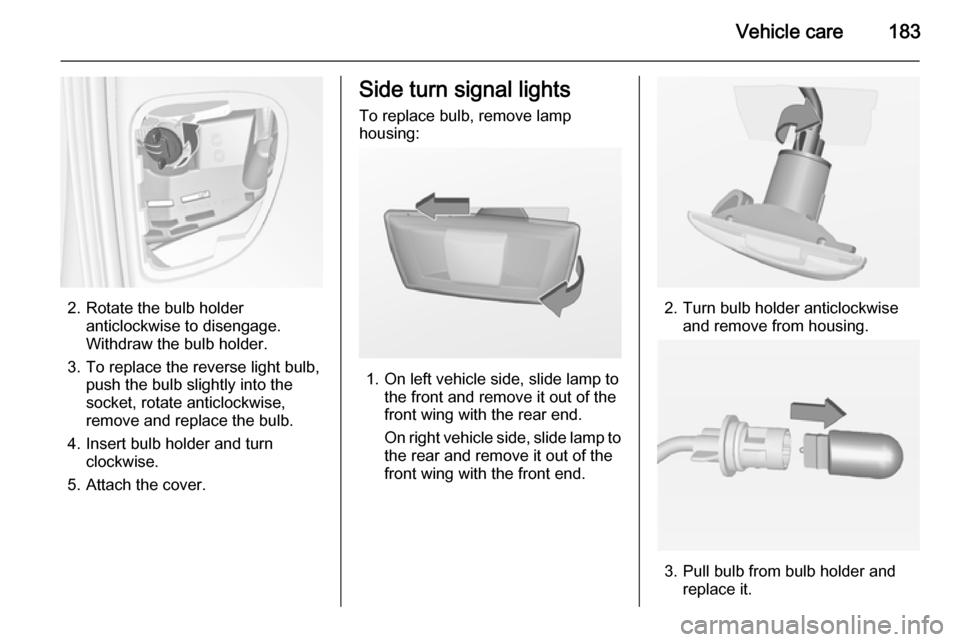
Vehicle care183
2. Rotate the bulb holderanticlockwise to disengage.
Withdraw the bulb holder.
3. To replace the reverse light bulb, push the bulb slightly into the
socket, rotate anticlockwise,
remove and replace the bulb.
4. Insert bulb holder and turn clockwise.
5. Attach the cover.
Side turn signal lights
To replace bulb, remove lamp
housing:
1. On left vehicle side, slide lamp to the front and remove it out of the
front wing with the rear end.
On right vehicle side, slide lamp to
the rear and remove it out of the front wing with the front end.
2. Turn bulb holder anticlockwise and remove from housing.
3. Pull bulb from bulb holder and replace it.
Page 195 of 245

Vehicle care193
Tyre pressures differ depending on
various options. For the correct tyre
pressure value, follow the procedure
below:
1. Identify the engine identifier code.
Engine data 3 224.
2. Identify the respective tyre.
The tyre pressure tables show all
possible tyre combinations 3 232.
For the tyres approved for your
vehicle, refer to the EEC Certificate of Conformity provided with your vehicle
or other national registration
documents.
The driver is responsible for correct
adjustment of tyre pressure.9 Warning
If the pressure is too low, this can
result in considerable tyre warm-
up and internal damage, leading to tread separation and even to tyre
blow-out at high speeds.
If the tyre pressure must be reduced
or increased on a vehicle with tyre
pressure monitoring system, switch
off ignition.
Tyre pressure monitoring system The tyre pressure monitoring system
(TPMS) checks the pressure of all
four wheels once a minute when
vehicle speed exceeds a certain limit.Caution
Tyre pressure monitoring system
warns only about low tyre pressure
condition and does not replace
regular tyre maintenance by the
driver.
All wheels must be equipped with pressure sensors and the tyres must
have the prescribed pressure.
Notice
In countries where the tyre pressure
monitoring system is legally
required, the use of wheels without
pressure sensors will invalidate the
vehicle type approval.
The current tyre pressures can be
shown in the Vehicle Information
Menu in the Driver Information Centre
(DIC).
The menu can be selected by the
buttons on the turn signal lever.
Press the MENU button to select the
Vehicle Information Menu X .