warning light VAUXHALL MERIVA 2015 User Guide
[x] Cancel search | Manufacturer: VAUXHALL, Model Year: 2015, Model line: MERIVA, Model: VAUXHALL MERIVA 2015Pages: 245, PDF Size: 7.76 MB
Page 96 of 245

94Instruments and controls9Warning
Have the cause of the fault
remedied immediately by a
workshop.
Belt pretensioners, airbag system
3 44, 3 48.
Airbag deactivation
V illuminates yellow.
Illuminates for approx. 60 seconds
after the ignition is switched on. The
front passenger airbag is activated.
* illuminates yellow.
The front passenger airbag is
deactivated 3 53.
9 Danger
Risk of fatal injury for a child using
a child restraint system together
with activated front passenger
airbag.
Risk of fatal injury for an adult
person with deactivated front
passenger airbag.
Charging system
p illuminates red.
Illuminates when the ignition is
switched on and extinguishes shortly
after the engine starts.
Illuminates when the engine is
running
Stop, switch off engine. Vehicle
battery is not charging. Engine
cooling may be interrupted. The
brake servo unit may cease to be
effective. Seek the assistance of a
workshop.
Malfunction indicator light
Z illuminates or flashes yellow.
Illuminates when the ignition is
switched on and extinguishes shortly
after the engine starts.
Illuminates when the engine is
running
Fault in the emission control system. The permitted emission limits may be
exceeded. Seek the assistance of a
workshop immediately.
Flashes when the engine isrunning
Fault that could lead to catalytic
converter damage. Ease up on the
accelerator until the flashing stops.
Seek the assistance of a workshop
immediately.
Service vehicle soon g illuminates yellow.
Additionally a warning message or a
warning code is displayed.
The vehicle needs a service.
Seek the assistance of a workshop.
Vehicle messages 3 104.
Page 100 of 245

98Instruments and controlsImmobiliser
d flashes yellow.
Fault in the immobiliser system. The
engine cannot be started.
Reduced engine power
# illuminates yellow.
The engine power is limited. Consult
a workshop.
Exterior light 8 illuminates green.
The exterior lights are on 3 115.
High beam
C illuminates blue.
Illuminated when high beam is on and during headlight flash 3 116.
Adaptive forward lighting
f illuminates or flashes yellow.
Illuminates
Fault in system.Seek the assistance of a workshop.
Flashes System switched to symmetrical low
beam.
Control indicator f flashes for approx.
4 seconds after the ignition is
switched on as a reminder that the
system has been activated 3 117.
Automatic light control 3 116.
Fog light
> illuminates green.
The front fog lights are on 3 119.
Rear fog light
r illuminates yellow.
The rear fog light is on 3 120.
Cruise control
m illuminates white or green.
Illuminates white
The system is on.Illuminates green
A certain speed is stored.
Cruise control 3 149.
Door open
h illuminates red.
A door or the tailgate is open.
Automatic locking ^ illuminates amber.
Fault in the automatic locking system. The rear doors are possibly not
secured against opening.9 Warning
Stop your journey immediately!
Follow the instructions as
described in paragraph "Fault in
the automatic locking system"
before continuing your journey
3 24.
Consult a workshop.
Page 109 of 245

Instruments and controls107
Vehicle messages on the
Colour-Info-Display Some important messages appear
additionally in the
Colour-Info-Display. Press the
multifunction knob to confirm a
message. Some messages only pop- up for a few seconds.
Warning chimes Only one warning chime will sound at
a time.
The warning chime regarding
unfastened seat belts has priority
over any other warning chime.
When starting the engine or
whilst driving ■ If seat belt is not fastened.
■ If a door or the tailgate is not fully closed when starting-off.
■ If a certain speed is exceeded with parking brake applied.
■ If a programmed speed is exceeded.■ If a warning message or a warningcode appears in the Driver
Information Centre.
■ If the parking assist detects an object.
■ If reverse gear is engaged and the rear end carrier is extended.
■ If a fault in the automatic locking system is detected.
■ If the diesel particle filter has reached the maximum filling level.
When the vehicle is parked and/ or the driver's door is opened ■ When the key is in the ignition switch.
■ With exterior lights on.
During an Autostop ■ If the driver's door is opened.
Battery voltage
When the vehicle battery voltage is
running low, a warning message or
warning code 174 will appear in the
Driver Information Centre.1. Switch off immediately any electrical consumers which are
not required for a safe ride, e.g.
seat heating, heated rear window
or other main consumers.
2. Charge the vehicle battery by driving continuously for a while or
by using a charging device.
The warning message or warning
code will disappear after the engine
has been started twice consecutively
without a voltage drop.
If the vehicle battery cannot be
recharged, have the cause of the fault
remedied by a workshop.
Page 114 of 245
112Instruments and controls
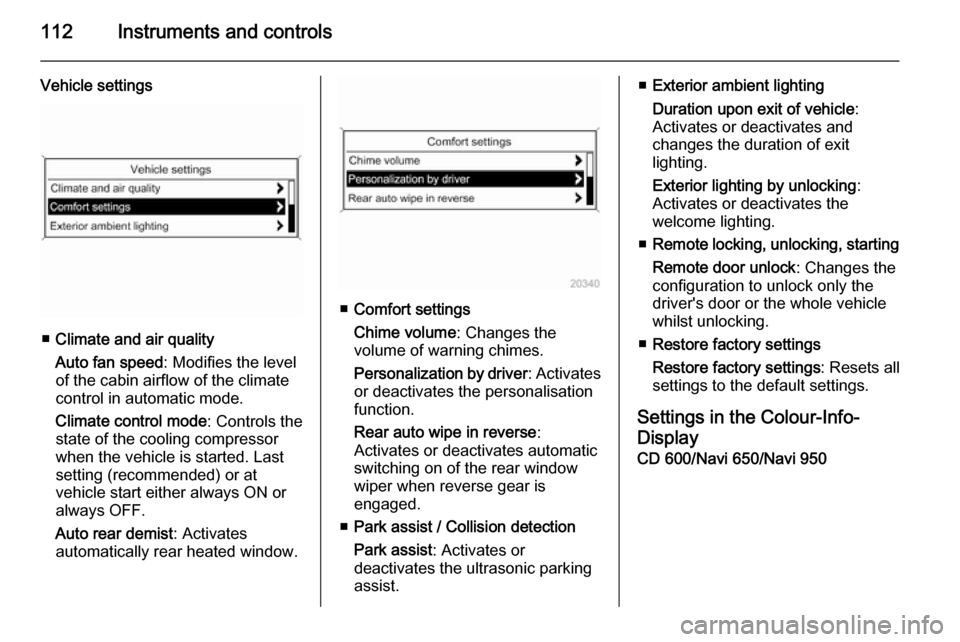
Vehicle settings
■Climate and air quality
Auto fan speed : Modifies the level
of the cabin airflow of the climate
control in automatic mode.
Climate control mode : Controls the
state of the cooling compressor
when the vehicle is started. Last
setting (recommended) or at
vehicle start either always ON or
always OFF.
Auto rear demist : Activates
automatically rear heated window.
■ Comfort settings
Chime volume : Changes the
volume of warning chimes.
Personalization by driver : Activates
or deactivates the personalisation
function.
Rear auto wipe in reverse :
Activates or deactivates automatic
switching on of the rear window
wiper when reverse gear is
engaged.
■ Park assist / Collision detection
Park assist : Activates or
deactivates the ultrasonic parking
assist.
■ Exterior ambient lighting
Duration upon exit of vehicle :
Activates or deactivates and
changes the duration of exit
lighting.
Exterior lighting by unlocking :
Activates or deactivates the
welcome lighting.
■ Remote locking, unlocking, starting
Remote door unlock : Changes the
configuration to unlock only the
driver's door or the whole vehicle
whilst unlocking.
■ Restore factory settings
Restore factory settings : Resets all
settings to the default settings.
Settings in the Colour-Info-
Display CD 600/Navi 650/Navi 950
Page 116 of 245

114Instruments and controls
■Display Off :
See Infotainment system manual
for further information.
■ Map Settings :
See Infotainment system manual
for further information.
Vehicle Settings ■ Climate and Air Quality
Auto Fan Speed : Modifies the fan
regulation. Changed setting will be active after switching the ignition off
and on again.
Air Conditioning Mode : Activates or
deactivates cooling when switching on the ignition or uses the last
chosen setting.
Auto Demist : Activates or
deactivates auto demist.
Auto Rear Demist : Activates
automatically the rear heated
window.
■ Comfort and Convenience
Chime Volume : Changes the
volume of warning chimes.Personalisation by Driver :
Activates or deactivates the
personalisation function.
Auto Reverse Gear Wiper :
Activates or deactivates
automatically switching on of the
rear window wiper when reverse gear is engaged.
■ Collision Detection Systems
Park Assist : Activates or
deactivates the ultrasonic sensors.
■ Lighting
Vehicle Locator Lights : Activates or
deactivates the entry lighting.
Exit Lighting : Activates or
deactivates and changes the
duration of exit lighting.
■ Remote Lock/Unlock/Start
Remote Door Unlock : Changes the
configuration to unlock only the
driver's door or the whole vehicle
whilst unlocking.
■ Return to Factory Settings? :
Resets all settings to the default
settings.
Page 121 of 245
Lighting119Hazard warning flashers
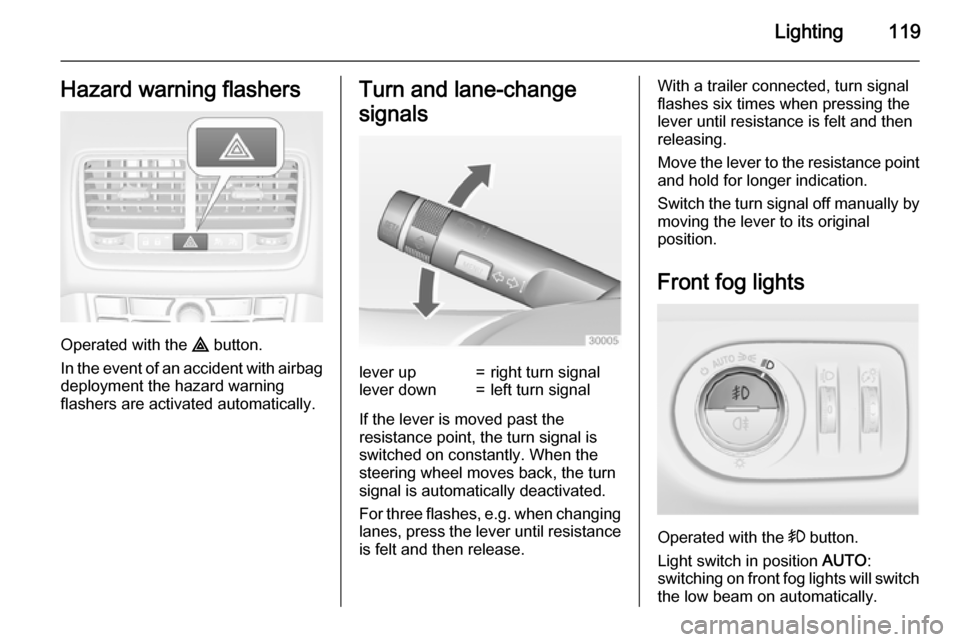
Operated with the ¨ button.
In the event of an accident with airbag
deployment the hazard warning
flashers are activated automatically.
Turn and lane-change
signalslever up=right turn signallever down=left turn signal
If the lever is moved past the
resistance point, the turn signal is
switched on constantly. When the
steering wheel moves back, the turn
signal is automatically deactivated.
For three flashes, e.g. when changing lanes, press the lever until resistance
is felt and then release.
With a trailer connected, turn signal
flashes six times when pressing the
lever until resistance is felt and then
releasing.
Move the lever to the resistance point
and hold for longer indication.
Switch the turn signal off manually by moving the lever to its original
position.
Front fog lights
Operated with the > button.
Light switch in position AUTO:
switching on front fog lights will switch the low beam on automatically.
Page 127 of 245
Climate control125
Notice
If the settings for demisting and
defrosting are selected, an Autostop
will be inhibited.
If the settings for demisting and
defrosting are selected while the
engine is in an Autostop, the engine will restart automatically.
Stop-start system 3 137.
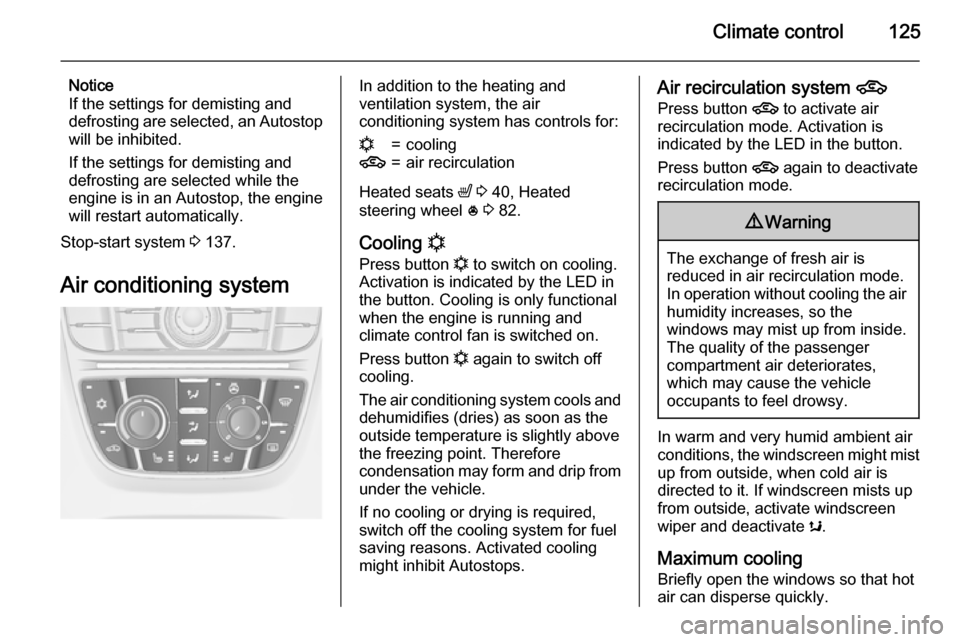
Air conditioning systemIn addition to the heating and
ventilation system, the air
conditioning system has controls for:n=cooling4=air recirculation
Heated seats ß 3 40, Heated
steering wheel * 3 82.
Cooling n
Press button n to switch on cooling.
Activation is indicated by the LED in
the button. Cooling is only functional
when the engine is running and
climate control fan is switched on.
Press button n again to switch off
cooling.
The air conditioning system cools and
dehumidifies (dries) as soon as the
outside temperature is slightly above
the freezing point. Therefore
condensation may form and drip from
under the vehicle.
If no cooling or drying is required,
switch off the cooling system for fuel
saving reasons. Activated cooling
might inhibit Autostops.
Air recirculation system 4
Press button 4 to activate air
recirculation mode. Activation is
indicated by the LED in the button.
Press button 4 again to deactivate
recirculation mode.9 Warning
The exchange of fresh air is
reduced in air recirculation mode.
In operation without cooling the air humidity increases, so the
windows may mist up from inside.
The quality of the passenger
compartment air deteriorates,
which may cause the vehicle
occupants to feel drowsy.
In warm and very humid ambient air conditions, the windscreen might mist up from outside, when cold air is
directed to it. If windscreen mists up
from outside, activate windscreen
wiper and deactivate s.
Maximum cooling
Briefly open the windows so that hot
air can disperse quickly.
Page 159 of 245

Driving and operating157
Fill the tank completely at regular
intervals to prevent corrosion in the
tank.
Faults and remedies
If gas mode is not possible, check the following:
■ Is there enough liquid gas present?
■ Is there enough petrol present for starting?
Due to extreme temperatures in
combination with the gas
composition, it may take slightly
longer before the system switches
from petrol to liquid gas mode.
In extreme situations, the system may
also switch back to petrol mode if the
minimum requirements are not
fulfilled.
Seek the assistance of a workshop in the event of all other faults.Caution
Repairs and adjustments may onlybe made by trained specialists in
order to maintain the safety and
warranty on the LPG system.
Liquid gas is given a particular odour
(odorised) so that any leaks can be
detected easily.
9 Warning
If you smell gas in the vehicle or in
the immediate vicinity, switch to petrol mode immediately. No
smoking. No naked flames or
ignition sources.
If possible, close the manual shut-off
valve on the multivalve. The
multivalve is located on the liquid gas
tank in the load compartment,
underneath the rear floor cover.
Turn the thumb wheel clockwise.
If no further gas odour is perceptible
when the manual shut-off valve is
closed, the vehicle can be used in
petrol mode. If the gas odour persists, do not start the engine. Have the
cause of the fault remedied by a
workshop.
When using underground car parks,
follow the instructions of the operator
and local laws.
Notice
In the event of an accident, switch off
the ignition and lights. Close the
manual shut-off valve on multivalve.
Page 164 of 245
162Driving and operatingTrailer hitch
General information
Only use towing equipment that has
been approved for your vehicle.
Entrust retrofitting of towing
equipment to a workshop. It may be
necessary to make changes that
affect the cooling system, heat
shields or other equipment.
Fitting of towing equipment could
cover the opening of the towing eye.
If this is the case use the coupling ball
bar for towing. Always keep the
coupling ball bar in the vehicle.
Driving characteristics and
towing tips
Before attaching a trailer, lubricate
the coupling ball. However, do not do
so if a stabiliser, which acts on the coupling ball, is being used to reduce snaking movements.
For trailers with low driving stability
and caravan trailers with a permitted
gross vehicle weight of more than1100 kg the use of a stabiliser is
strongly recommended when driving
above 50 mph.
If the trailer starts snaking, drive more slowly, do not attempt to correct the
steering and brake sharply if
necessary.
When driving downhill, drive in the
same gear as if driving uphill and
drive at a similar speed.
Adjust tyre pressure to the value
specified for full load 3 232.
Trailer towing Trailer loads9 Warning
Vehicles with engine A13DTE:
Use of towing equipment is
permissible for attaching
compatible bicycle carriers only.
Do not use towing equipment for
trailer towing.
The permissible trailer loads are
vehicle and engine-dependent
maximum values which must not be
exceeded. The actual trailer load is
the difference between the actual
gross weight of the trailer and the
actual coupling socket load with the
trailer coupled.
The permissible trailer loads are
specified in the vehicle documents. In general, they are valid for gradients
up to max. 12 %.
The permitted trailer load applies up to the specified incline and up to an
altitude of 1000 metres above sea
level. Since engine power decreases
as altitude increases due to the air becoming thinner, therefore reducing
climbing ability, the permissible gross
train weight also decreases by 10 %
for every 1000 metres of additional
altitude. The gross train weight does
not have to be reduced when driving
on roads with slight inclines (less than
8 %, e.g. motorways).
Page 197 of 245
Vehicle care195
Each time the tyres are replaced tyre
pressure monitoring system sensors
must be dismounted and serviced.
For the screwed sensor: replace
valve core and sealing ring. For
clipped sensor: replace complete
valve stem.
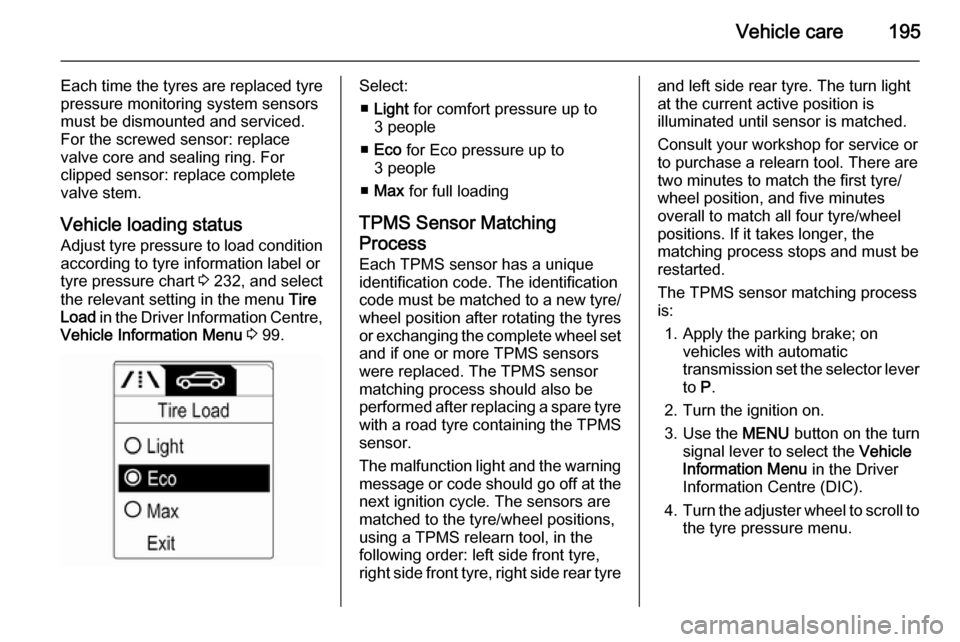
Vehicle loading status Adjust tyre pressure to load condition according to tyre information label or
tyre pressure chart 3 232, and select
the relevant setting in the menu Tire
Load in the Driver Information Centre,
Vehicle Information Menu 3 99.Select:
■ Light for comfort pressure up to
3 people
■ Eco for Eco pressure up to
3 people
■ Max for full loading
TPMS Sensor Matching
Process
Each TPMS sensor has a unique
identification code. The identification
code must be matched to a new tyre/
wheel position after rotating the tyres
or exchanging the complete wheel set and if one or more TPMS sensors
were replaced. The TPMS sensor matching process should also be
performed after replacing a spare tyre
with a road tyre containing the TPMS
sensor.
The malfunction light and the warning
message or code should go off at the
next ignition cycle. The sensors are
matched to the tyre/wheel positions,
using a TPMS relearn tool, in the
following order: left side front tyre,
right side front tyre, right side rear tyreand left side rear tyre. The turn light
at the current active position is
illuminated until sensor is matched.
Consult your workshop for service or
to purchase a relearn tool. There are
two minutes to match the first tyre/
wheel position, and five minutes
overall to match all four tyre/wheel
positions. If it takes longer, the
matching process stops and must be
restarted.
The TPMS sensor matching process is:
1. Apply the parking brake; on vehicles with automatic
transmission set the selector lever
to P.
2. Turn the ignition on.
3. Use the MENU button on the turn
signal lever to select the Vehicle
Information Menu in the Driver
Information Centre (DIC).
4. Turn the adjuster wheel to scroll to
the tyre pressure menu.