buttons VAUXHALL MOKKA 2014 Infotainment system
[x] Cancel search | Manufacturer: VAUXHALL, Model Year: 2014, Model line: MOKKA, Model: VAUXHALL MOKKA 2014Pages: 221, PDF Size: 4.66 MB
Page 35 of 221

External devices35
Browse through the structure until
you find the desired track.
Select the track to start playback.
Individual playlists
The system allows new playlists to be
created via the Gracenote function.
Similar tracks are put together on a
list automatically generated by the
system.
Select the track around which you
wish to create a new playlist.
Select the Play More Like This...
menu item in the respective audio
menu. A new playlist is created and stored in the Play Lists menu.
To delete a playlist generated by the
system, select the Delete Automatic
Playlist menu item. A list of all
generated playlists is displayed.
Select the playlist you wish to delete.
The playlist is deleted.
Displaying pictures Viewing picturesConnect a USB device 3 32.Press the ; button and then select
the Pictures icon to open the Picture
Viewer USB menu.
A list of all pictures and picture folders
found on the USB device is displayed.
Browse through the pictures and
folders until you find the desired
picture and select it. The picture is
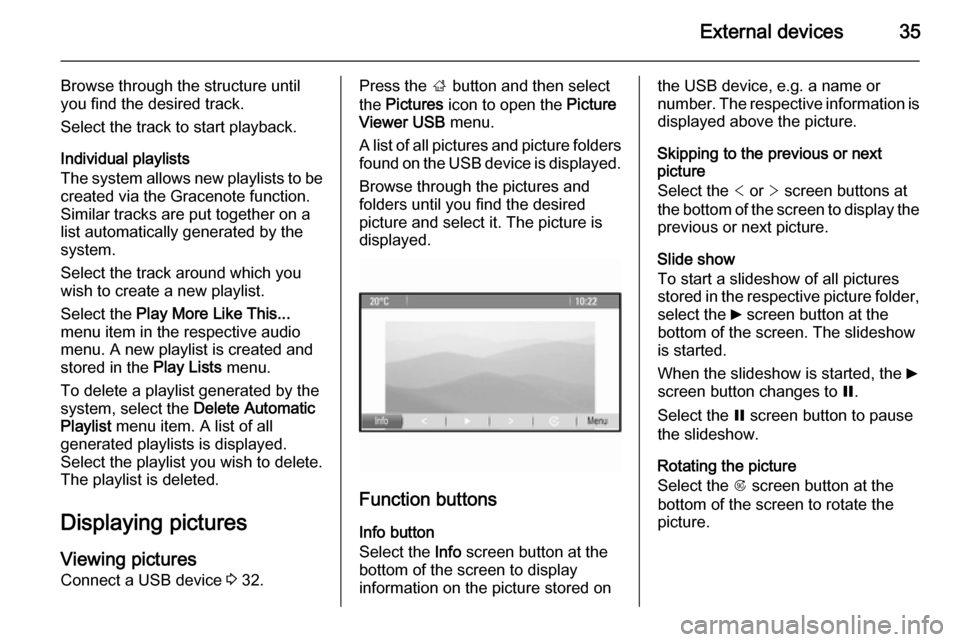
displayed.
Function buttons
Info button
Select the Info screen button at the
bottom of the screen to display
information on the picture stored on
the USB device, e.g. a name or
number. The respective information is
displayed above the picture.
Skipping to the previous or next
picture
Select the < or > screen buttons at
the bottom of the screen to display the previous or next picture.
Slide show
To start a slideshow of all pictures
stored in the respective picture folder,
select the 6 screen button at the
bottom of the screen. The slideshow
is started.
When the slideshow is started, the 6
screen button changes to Q.
Select the Q screen button to pause
the slideshow.
Rotating the picture
Select the R screen button at the
bottom of the screen to rotate the
picture.
Page 41 of 221

Navigation41
Map modes
Press the multifunction knob to
display the Navigation Menu . Select
the Map Modes menu item to display
the respective submenu.
The following options are available: ■ Full Map ("Normal" view described
above): Full screen map view, all
function and indication screen
buttons displayed.
■ Full Glory : Full screen map view,
most functions and indication
screen buttons hidden.
■ Split with Turn List : Divided screen
with map on the left and turn list on the right side.
■ Split with Turn Arrow : Divided
screen with map on the left side and
turn arrow for the next turning
manoeuvre on the right side.
■ Split with Media : Divided screen
with map on the left side and audio
source currently active on the right
side.
Select the desired option.Map display
Press the multifunction knob to
display the Navigation Menu . Select
the Map Settings menu item and then
Map Display to display the respective
submenu.
Depending on the external lighting
conditions, activate the Day or Night
menu item.
For an automatic adaption by the
system, activate Automatic.
Displaying POIs
Press the multifunction knob to
display the Navigation Menu .
Select the Show POIs menu item to
display the respective submenu.
If you wish all POIs available in the
system to be displayed on the map, activate Show all POIs .
If you do not wish POIs to be
displayed on the map, activate Hide
all POIs .
To only display specific POIs, activate
the User Defined menu item and then
activate the POI categories you wish
to be displayed.Changing screen information
The route information displayed on
the screen during active route
guidance may be customised.
Press the multifunction knob to
display the Navigation Menu . Scroll
through the list and select the Switch
Route Time/Destination menu item.Time information
If you wish to change the time
information displayed, select Switch
Arrival/Travel Time to display the
respective submenu.
Activate the information setting you
wish to be displayed.Destination information
If you are in a waypoint trip, you may
want to display the route information
for a waypoint instead of those for the final destination.
To change the setting, select Switch
Waypoint/Destination . A list of all
destinations in the waypoint trip
currently active is displayed.
Activate the information setting you
wish to be displayed.
Page 58 of 221

58Speech recognition
In such a case you need to select
another language for the display if you want to control the Infotainment
system via voice input. Changing
the display language, see
"Language" in chapter "System
settings" 3 21.
Address input for destinations in
foreign countries
In case you want to enter the address
of a destination located in a foreign
country via voice input, you need to
change the language of the
Infotainment display to the language
of the foreign country.
E.g. if the display is currently set to
English and you want to enter the
name of a city located in France, you
need to change the display language
to French.
Exceptions: If you want to enter
addresses in Belgium, you may
optionally change the display
language to French or Dutch. For
addresses in Switzerland you may
optionally change the display
language to French, German, or
Italian.For changing the display language,
see "Language" in chapter "System
settings" 3 21.
Input order for destination addresses The order in which the parts of an
address need to be entered using the speech recognition system is
dependent on the country where the
destination is located.
■ Austria, Germany:
■ Belgium, France, Great Britain:
■ Italy, Netherlands, Portugal, Russia, Spain, Switzerland:
Usage
Activating speech recognition Notice
Speech recognition is not available
during an active phone call.
Press the w button on the right side of
the steering wheel.The audio system mutes, the w
symbol on the display is highlighted, and a voice output message prompts
you to say a command.
As soon as the speech recognition is
ready for voice input, a beep is heard.
You can now say a voice command to
directly initiate a system function
(e.g. playing a radio station), or to
start a dialogue sequence with
several dialogue steps (e.g. entering
a destination address), see
"Operation via speech commands"
further below.
After a dialogue sequence is finished,
the speech recognition is deactivated
automatically. To initiate another dialogue sequence, you must activate
the speech recognition again.
Adjusting the volume of voice
prompts
Press the w or ─ buttons on the right
side of the steering wheel.
Page 79 of 221

Introduction79
1 RADIO BAND button
Activate radio or change
waveband .............................. 87
2 CD/AUX button
Start CD/MP3/WMA
replay or change audio
source ................................... 99
3 s button
Radio: search backwards .....87
CD/MP3/WMA: skip track
backwards ............................. 97
4 DEST / NAV button
Navigation destination
entry .................................... 106
5 m VOL knob
Press: switch on/off
Infotainment system ..............81
Turn: adjust volume ..............81
6 u button
Radio: search forwards .........87
CD/MP3/WMA: skip track
forwards ................................ 977 TONE button
Tone settings ........................ 84
8 Radio station buttons 1...6
Long press: save station .......88
Short press: select station ....88
9 FAV 1-2-3 button
Lists of favourites (preset
radio stations) ....................... 88
10 AS 1-2 button
Automatic memory levels
(preset radio stations) ...........88
11 TP button
Activate or deactivate
radio traffic service ................92
12 d button
CD ejection ........................... 97
13 CONFIG button
System settings ..................... 86
14 INFO button
Radio: information on the
currently played station .........87CD/MP3/WMA:
information on the
currently inserted CD ............97
Digital picture frame:
shows currently selected
picture/photo ....................... 102
Navigation: information,
e.g., on the current location 105
15 Multifunction knob
Turn: mark menu options
or set numeric values ...........82
Press (the outer ring):
select/activate the marked
option; confirm set value;
switch function on/off ............82
16 Eight-way switch
Navigation: move display
window in map view ............106
17 CD slot .................................. 97
18 BACK button
Menu: one level back ............82
Input: delete last character
or entire entry ........................ 82
Page 81 of 221

Introduction81UsageControl elements
The Infotainment system is operated
via function buttons, multifunctional
knobs and menus that are shown on
the display.
Inputs are made optionally via: ■ the central control unit in the instrument panel 3 78
■ controls on the steering wheel 3 78
■ the speech recognition system (if available) 3 143
Switching the Infotainment
system on or off
Press the X VOL knob briefly. After
switching on, the last selected
Infotainment source is active.
Automatic switch-off
If the Infotainment system has been
switched on using the X VOL knob
when the ignition was switched off, it
will switch off again automatically
after 30 minutes.Setting the volume
Turn the X VOL knob. The current
setting is shown on the display.
When the Infotainment system is
switched on, the last selected volume is set, provided that volume is lower
than the maximum start-up volume.
The following can be set separately: ■ the maximum start-up volume 3 86
■ the volume of the traffic announcements 3 86
■ the volume of the navigation messages 3 106
Speed compensated volume When speed compensated volume is
activated 3 86 the volume is
adapted automatically to compensate
for the road and wind noise as you
drive.
Mute
Press the O button (if Phone portal
available: press for a few seconds) to
mute the audio sources.To cancel mute again: turn the X
VOL knob or press the O button
again (if Phone portal available: press for a few seconds).
Volume limitation at high
temperatures
At very high temperatures inside the vehicle the Infotainment system limits
the maximum adjustable volume. If
necessary the volume is decreased
automatically.
Modes of operation Radio
Press the RADIO button to open the
radio main menu or to change
between the different wavebands.
Press the multifunction knob to open
a submenu with options for station
selection.
Detailed description of the radio
functions 3 87.
Page 87 of 221

Radio87RadioUsage.......................................... 87
Station search .............................. 87
Autostore lists .............................. 88
Favourite lists ............................... 88
Waveband menus ........................89
Radio data system (RDS) ............92
Digital audio broadcasting ...........94Usage
Control buttons
The most important buttons for
control of the radio are as follows:
■ RADIO : Activate radio
■ s u : Station search
■ AS 1-2 : Autostore lists
■ FAV 1-2-3 : Favourite lists
■ 1...6 : Preset buttons
■ TP : Radio traffic service 3 92
Activating the radio Press the RADIO button to open the
radio main menu.
The station last played will be
received.
Selecting the waveband
Press the RADIO button once or
several times to select the desired
waveband.
The station last played in that
waveband will be received.Station search
Automatic station search
Briefly press the button s or u
to play the previous/next station in the station memory.
Manual station search
Press and hold s or u button.
Release button when the required frequency has almost been reached
on the frequency display.
A search is made for the next station that can be received and it is played
automatically.
Manual station tuning
FM waveband
Press the multifunction knob to open
the FM menu and select Manual
tuning FM .
Turn the multifunction knob and set
the optimal reception frequency on
the pop-up frequency display.
Page 88 of 221

88Radio
AM waveband
Turn the multifunction knob and set
the optimal reception frequency on
the pop-up frequency display.
DAB waveband
Press the multifunction knob to open
the DAB menu and select DAB
manual tuning .
Turn the multifunction knob and set
the required reception frequency on
the pop-up frequency display.
Autostore lists
The stations that can be received best
in a waveband can be searched for
and stored automatically via the
autostore function.
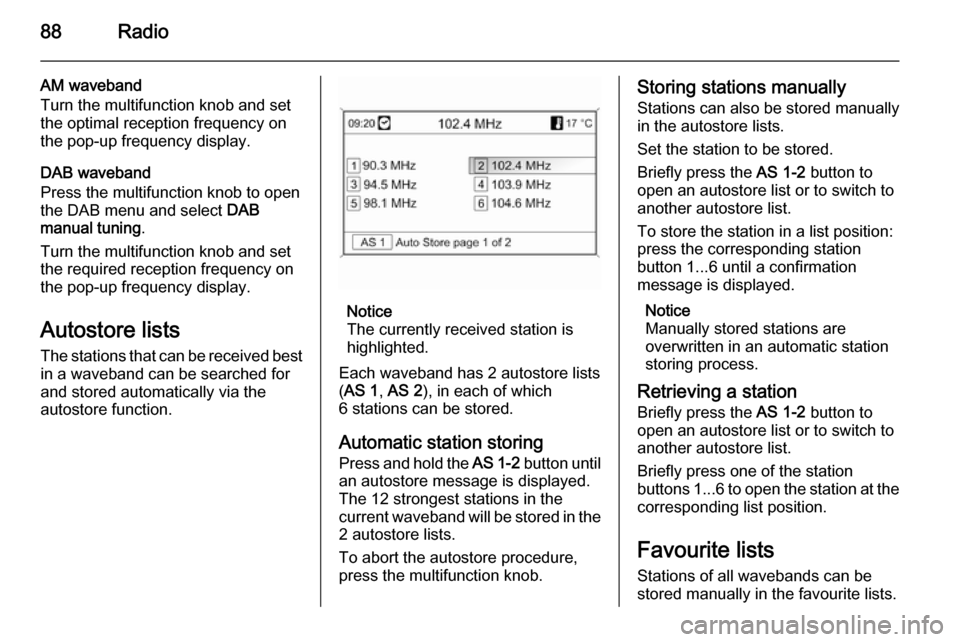
Notice
The currently received station is highlighted.
Each waveband has 2 autostore lists
( AS 1 , AS 2 ), in each of which
6 stations can be stored.
Automatic station storing
Press and hold the AS 1-2 button until
an autostore message is displayed.
The 12 strongest stations in the
current waveband will be stored in the 2 autostore lists.
To abort the autostore procedure,
press the multifunction knob.
Storing stations manually
Stations can also be stored manually
in the autostore lists.
Set the station to be stored.
Briefly press the AS 1-2 button to
open an autostore list or to switch to
another autostore list.
To store the station in a list position:
press the corresponding station
button 1...6 until a confirmation
message is displayed.
Notice
Manually stored stations are
overwritten in an automatic station storing process.
Retrieving a station
Briefly press the AS 1-2 button to
open an autostore list or to switch to
another autostore list.
Briefly press one of the station
buttons 1...6 to open the station at the
corresponding list position.
Favourite lists
Stations of all wavebands can be
stored manually in the favourite lists.
Page 89 of 221

Radio89
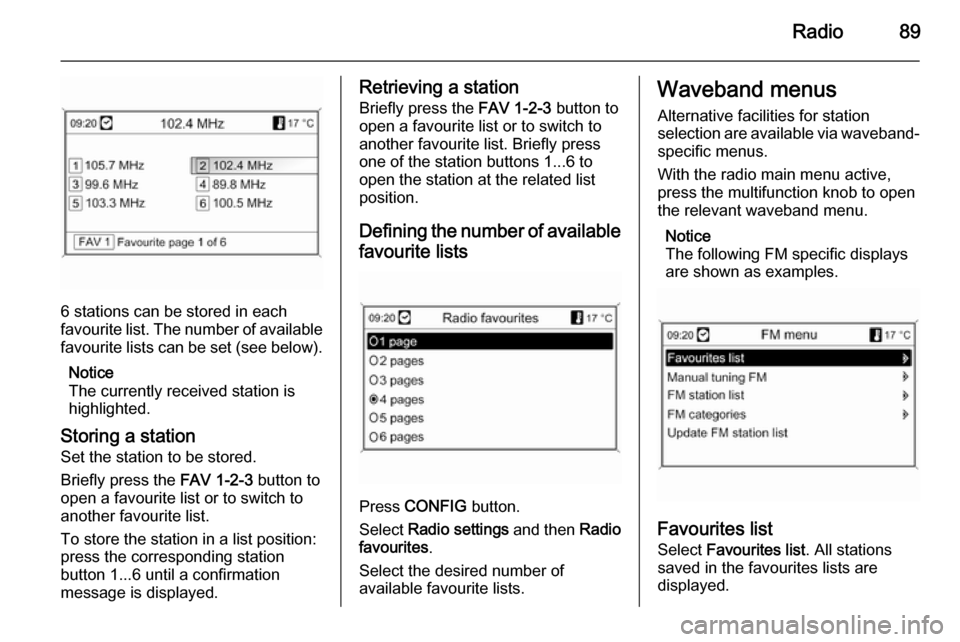
6 stations can be stored in each
favourite list. The number of available favourite lists can be set (see below).
Notice
The currently received station is
highlighted.
Storing a station Set the station to be stored.
Briefly press the FAV 1-2-3 button to
open a favourite list or to switch to
another favourite list.
To store the station in a list position:
press the corresponding station
button 1...6 until a confirmation
message is displayed.
Retrieving a station
Briefly press the FAV 1-2-3 button to
open a favourite list or to switch to
another favourite list. Briefly press
one of the station buttons 1...6 to
open the station at the related list
position.
Defining the number of available favourite lists
Press CONFIG button.
Select Radio settings and then Radio
favourites .
Select the desired number of
available favourite lists.
Waveband menus
Alternative facilities for station
selection are available via waveband-
specific menus.
With the radio main menu active,
press the multifunction knob to open
the relevant waveband menu.
Notice
The following FM specific displays
are shown as examples.
Favourites list
Select Favourites list . All stations
saved in the favourites lists are
displayed.
Page 152 of 221

152Phone
Enter the displayed SAP passcode in
the mobile phone (without spaces).
The mobile phone PIN code is shown
on the Infotainment display.
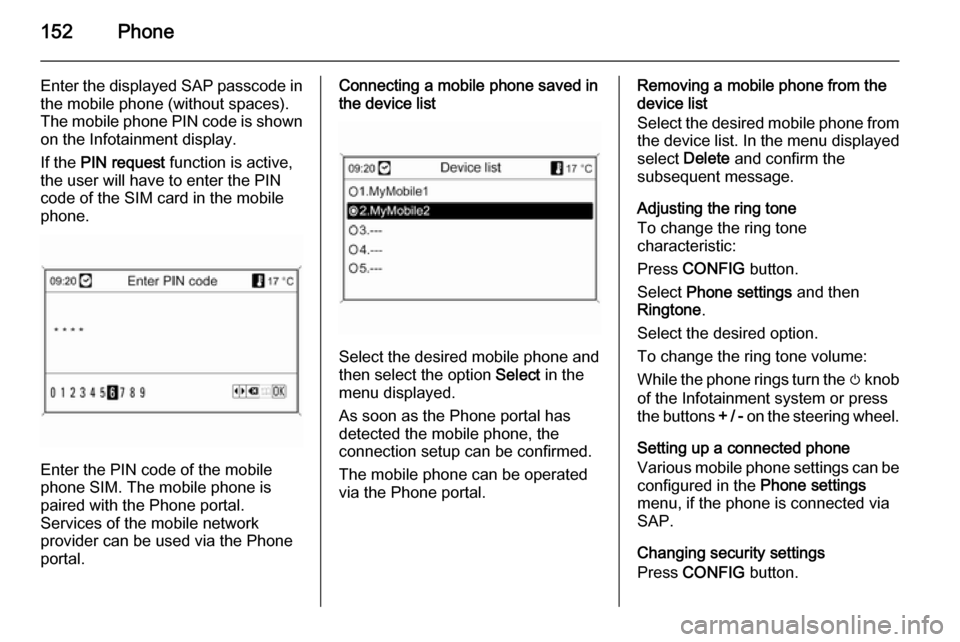
If the PIN request function is active,
the user will have to enter the PIN code of the SIM card in the mobile
phone.
Enter the PIN code of the mobile
phone SIM. The mobile phone is
paired with the Phone portal.
Services of the mobile network
provider can be used via the Phone
portal.
Connecting a mobile phone saved in
the device list
Select the desired mobile phone and
then select the option Select in the
menu displayed.
As soon as the Phone portal has
detected the mobile phone, the
connection setup can be confirmed.
The mobile phone can be operated
via the Phone portal.
Removing a mobile phone from the
device list
Select the desired mobile phone from
the device list. In the menu displayed select Delete and confirm the
subsequent message.
Adjusting the ring tone
To change the ring tone
characteristic:
Press CONFIG button.
Select Phone settings and then
Ringtone .
Select the desired option.
To change the ring tone volume:
While the phone rings turn the m knob
of the Infotainment system or press
the buttons + / - on the steering wheel.
Setting up a connected phone
Various mobile phone settings can be
configured in the Phone settings
menu, if the phone is connected via
SAP.
Changing security settings
Press CONFIG button.
Page 154 of 221

154Phonea sufficiently strong signal. Undercertain circumstances emergency
calls cannot be made on all mobile
phone networks; it is possible that
they cannot be made when certain network services and/or telephonefunctions are active. You can
enquire about this with the local
network operators.
The emergency call number can
differ depending on the region and
country. Please enquire
beforehand about the correct
emergency call number for the
relevant region.
Making an emergency call
Dial the emergency call number (e.g.
112 ).
The telephone connection to the
emergency call centre is set up.
Answer when the service personnel
questions you about the emergency.
9 Warning
Do not end the call until you are
requested to do so by the
emergency call centre.
Operation
Introduction As soon as a connection via
Bluetooth has been set up between
your mobile phone and the
Infotainment system, you can also
operate many functions of your
mobile phone via the Infotainment
system.
Via the Infotainment system, you can,
e.g., set up a connection to the
telephone numbers stored in your
mobile phone or change the
telephone numbers.
Notice
In the handsfree mode mobile phone
operation continues to be possible,
e. g. taking a call or adjusting the
volume.
After setup of a connection between
the mobile phone and the
Infotainment system the mobile
phone data is transmitted to the
Infotainment system. This can take
some time depending on the phone
model. During this period operation of
the mobile phone is possible via the
Infotainment system only to a limited
extent.
Not every telephone supports all
functions of the Phone portal.
Therefore deviations from the range
of functions described with these
specific telephones are possible.
Setting the volume for hands-
free facility
Turn the m VOL knob of the
Infotainment system or press the
buttons + / - on the steering wheel.