ignition VAUXHALL MOKKA 2014 Workshop Manual
[x] Cancel search | Manufacturer: VAUXHALL, Model Year: 2014, Model line: MOKKA, Model: VAUXHALL MOKKA 2014Pages: 217, PDF Size: 5.9 MB
Page 148 of 217

146Driving and operating
Once setting page is displayed, selectOff to deactivate pop-up function.
Reactivated by selecting On. When
switching on the ignition, pop-up function is deactivated.
Pop-up indication is displayed for approx. 8 seconds in the Driver
Information Centre.
Fault The traffic sign assistant system may
not operate correctly when:
■ the area of the windscreen, where the front camera is located, is notclean
■ traffic signs are completely or partially covered or difficult to
discern
■ there are adverse environmental conditions, e.g. heavy rain, snow,direct sunlight or shadows. In this
case No Traffic Sign Detection due
to Weather is indicated on the
display■ traffic signs are incorrectly mounted
or damaged
■ traffic signs do not comply with the Vienna Convention on traffic signs
(Wiener Übereinkommen über
Straßenverkehrszeichen)Caution
The system is intended to help the driver within a defined speed
range to recognise certain traffic
signs. Do not ignore traffic signs
which are not displayed by the
system.
The system does not recognise
any other than the conventional
traffic signs that might give or end
a speed limit.
Do not let this special feature
tempt you into taking risks when
driving.
Always adapt speed to the road
conditions.
The driver assistance systems do not relieve the driver from full
responsibility for vehicle
operation.
Lane departure warning
The lane departure warning system
observes the lane markings between
which the vehicle is driving via a front camera. The system detects lane
changes and warns the driver in the
event of an unintended lane change
via visual and acoustic signals.
Criteria for the detection of an
unintended lane change are:
■ no operation of turn signals
■ no brake pedal operation
■ no active accelerator operation or speeding-up
■ no active steering
If the driver is active, no warning will
be issued.
Page 151 of 217
Driving and operating1499Danger
Before refuelling, switch off engine
and any external heaters with
combustion chambers. Switch off
any mobile phones.
Follow the operating and safety
instructions of the filling station
when refuelling.
9 Danger
Fuel is flammable and explosive.
No smoking. No naked flames or
sparks.
If you can smell fuel in your
vehicle, have the cause of this
remedied immediately by a
workshop.
Caution
In case of misfuelling, do not
switch on ignition.
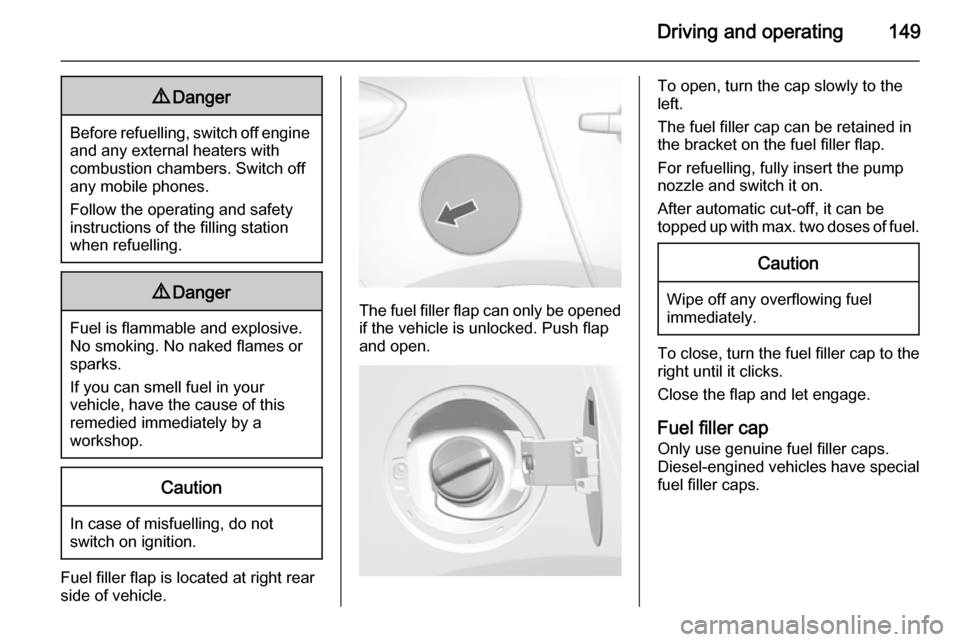
Fuel filler flap is located at right rear
side of vehicle.
The fuel filler flap can only be opened
if the vehicle is unlocked. Push flap
and open.
To open, turn the cap slowly to the
left.
The fuel filler cap can be retained in
the bracket on the fuel filler flap.
For refuelling, fully insert the pump
nozzle and switch it on.
After automatic cut-off, it can be
topped up with max. two doses of fuel.Caution
Wipe off any overflowing fuel
immediately.
To close, turn the fuel filler cap to the right until it clicks.
Close the flap and let engage.
Fuel filler cap
Only use genuine fuel filler caps. Diesel-engined vehicles have special
fuel filler caps.
Page 155 of 217
Vehicle care153
■ Open the bonnet, close all doorsand lock the vehicle.
■ Disconnect the clamp from the negative terminal of the vehicle
battery. Beware that all systems are
not functional, e.g. anti-theft alarm
system.
Putting back into operation
When the vehicle is to be put back into
operation:
■ Connect the clamp to the negative terminal of the vehicle battery.
Activate the electronics of the
power windows.
■ Check tyre pressure.
■ Fill up the washer fluid reservoir.
■ Check the engine oil level.
■ Check the coolant level.
■ Fit the number plate if necessary.End-of-life vehicle
recovery
Information on end-of-life vehicle
recovery centres and the recycling of
end-of-life vehicles is available on our website, where legally required. Only
entrust this work to an authorised
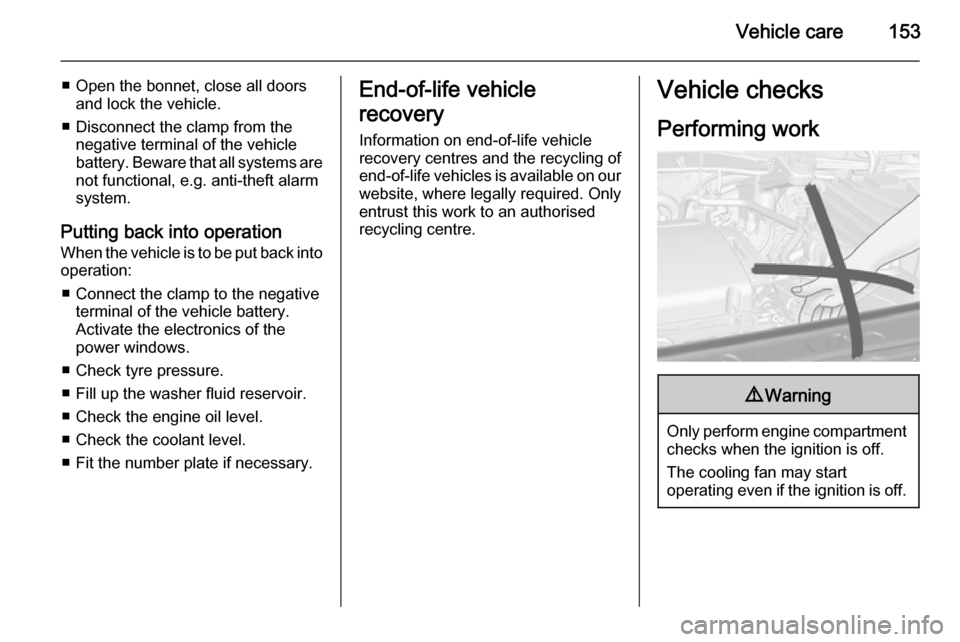
recycling centre.Vehicle checks
Performing work9 Warning
Only perform engine compartment
checks when the ignition is off.
The cooling fan may start
operating even if the ignition is off.
Page 156 of 217
154Vehicle care9Danger
The ignition system and Xenon
headlights use extremely high
voltage. Do not touch.
Bonnet
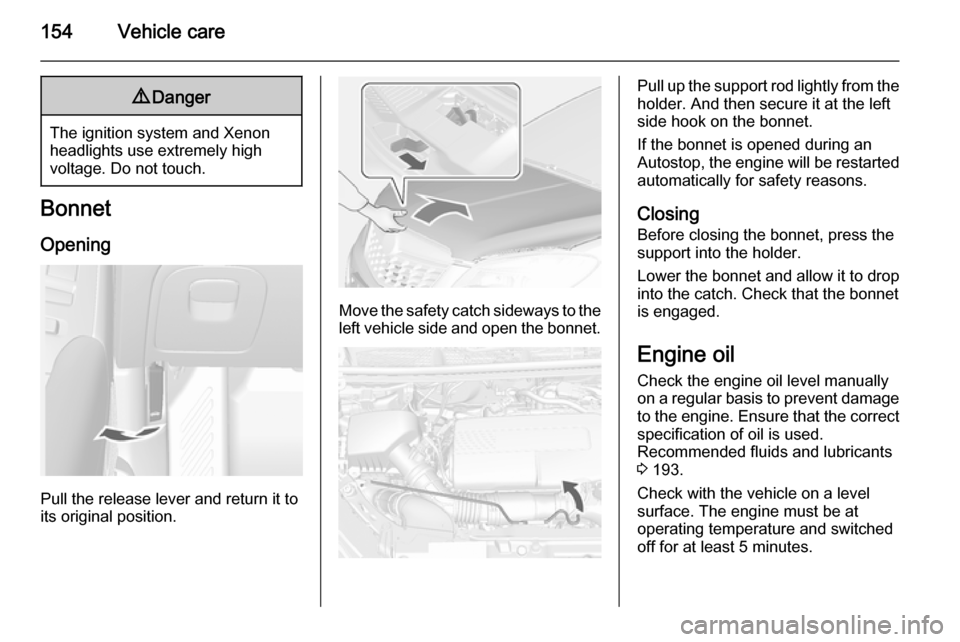
Opening
Pull the release lever and return it to
its original position.
Move the safety catch sideways to the left vehicle side and open the bonnet.
Pull up the support rod lightly from the
holder. And then secure it at the left
side hook on the bonnet.
If the bonnet is opened during an
Autostop, the engine will be restarted automatically for safety reasons.
Closing Before closing the bonnet, press the
support into the holder.
Lower the bonnet and allow it to drop into the catch. Check that the bonnet
is engaged.
Engine oil Check the engine oil level manually
on a regular basis to prevent damage
to the engine. Ensure that the correct specification of oil is used.
Recommended fluids and lubricants
3 193.
Check with the vehicle on a level
surface. The engine must be at
operating temperature and switched
off for at least 5 minutes.
Page 160 of 217
158Vehicle care
Laying up the vehicle for more than
4 weeks can lead to battery
discharge. Disconnect the clamp from the negative terminal of the vehicle
battery.
Ensure the ignition is switched off
before connecting or disconnecting
the vehicle battery.
The anti-theft alarm siren must be
deactivated as follows: Switch the
ignition on then off, disconnect the
vehicle's battery within 15 seconds.
Vehicle battery discharge protection
3 113.
Replacing the vehicle battery Notice
Any deviation from the instructions
given in this section may lead to
temporary deactivation of the stop-
start system.
When the vehicle battery is being replaced, please ensure that there
are no open ventilation holes in the
vicinity of the positive terminal. If a
ventilation hole is open in this area, itmust be closed off with a dummy cap, and the ventilation in the vicinity of the
negative terminal must be opened.
Only use vehicle batteries that allow
the fuse box to be mounted above the vehicle battery.
In vehicles with stop-start system, be
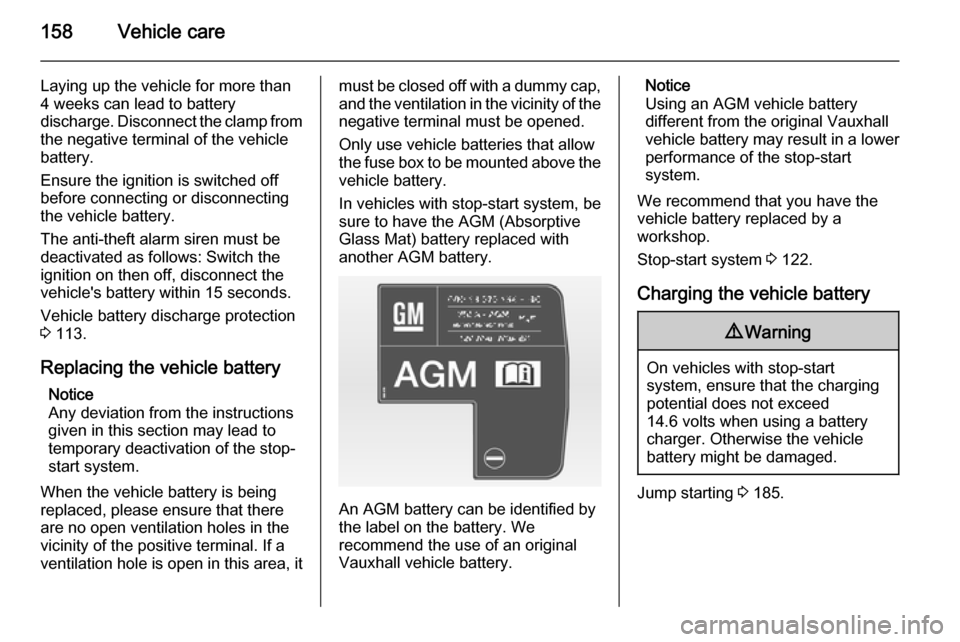
sure to have the AGM (Absorptive
Glass Mat) battery replaced with
another AGM battery.
An AGM battery can be identified by
the label on the battery. We
recommend the use of an original
Vauxhall vehicle battery.
Notice
Using an AGM vehicle battery
different from the original Vauxhall
vehicle battery may result in a lower performance of the stop-start
system.
We recommend that you have the
vehicle battery replaced by a
workshop.
Stop-start system 3 122.
Charging the vehicle battery9 Warning
On vehicles with stop-start
system, ensure that the charging potential does not exceed
14.6 volts when using a battery
charger. Otherwise the vehicle
battery might be damaged.
Jump starting 3 185.
Page 161 of 217
Vehicle care159
Warning label
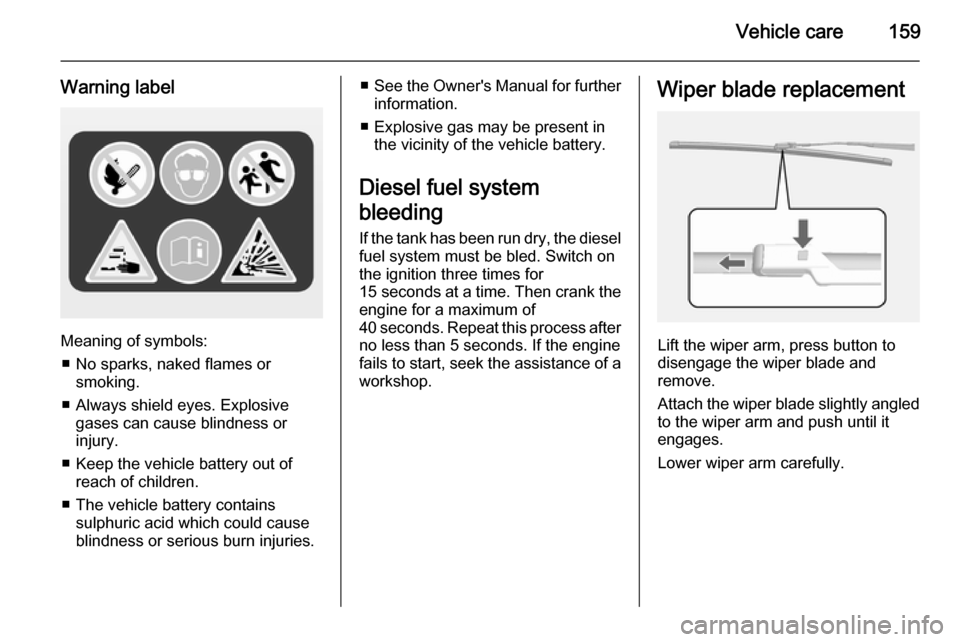
Meaning of symbols:■ No sparks, naked flames or smoking.
■ Always shield eyes. Explosive gases can cause blindness or
injury.
■ Keep the vehicle battery out of reach of children.
■ The vehicle battery contains sulphuric acid which could cause
blindness or serious burn injuries.
■ See the Owner's Manual for further
information.
■ Explosive gas may be present in the vicinity of the vehicle battery.
Diesel fuel system
bleeding
If the tank has been run dry, the diesel
fuel system must be bled. Switch on
the ignition three times for
15 seconds at a time. Then crank the
engine for a maximum of
40 seconds. Repeat this process after
no less than 5 seconds. If the engine fails to start, seek the assistance of a
workshop.Wiper blade replacement
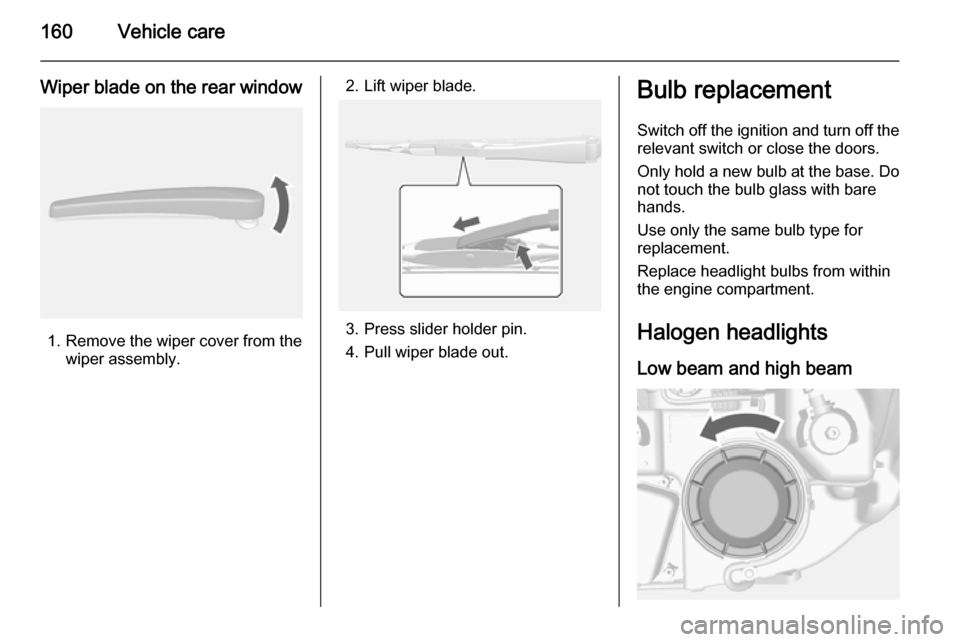
Lift the wiper arm, press button to
disengage the wiper blade and
remove.
Attach the wiper blade slightly angled
to the wiper arm and push until it
engages.
Lower wiper arm carefully.
Page 162 of 217
160Vehicle care
Wiper blade on the rear window
1. Remove the wiper cover from thewiper assembly.
2. Lift wiper blade.
3. Press slider holder pin.
4. Pull wiper blade out.
Bulb replacement
Switch off the ignition and turn off the
relevant switch or close the doors.
Only hold a new bulb at the base. Do not touch the bulb glass with bare
hands.
Use only the same bulb type for
replacement.
Replace headlight bulbs from within
the engine compartment.
Halogen headlights
Low beam and high beam
Page 166 of 217
164Vehicle care
2. Remove the cover.
Right-hand side
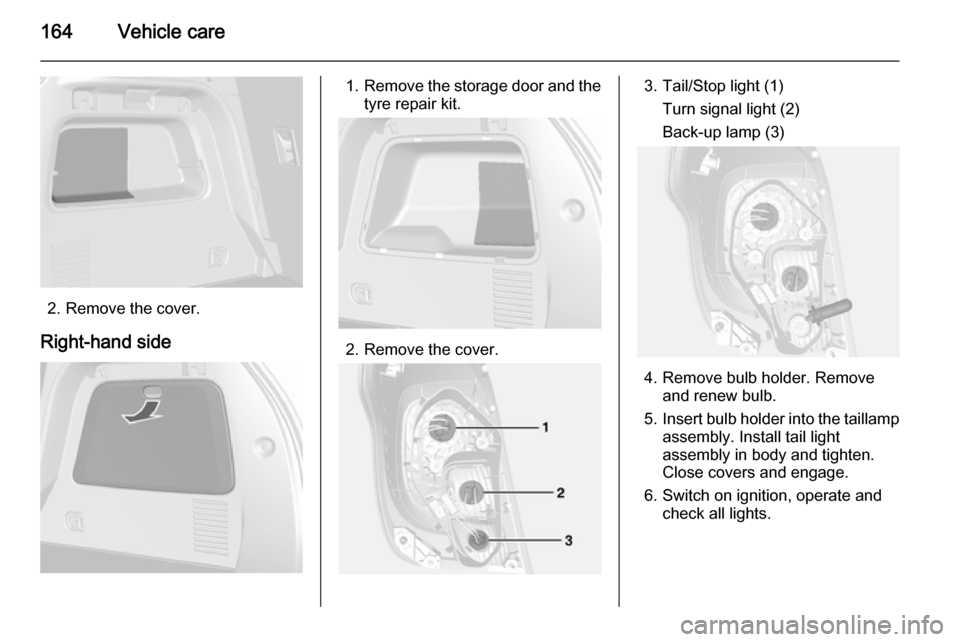
1. Remove the storage door and the
tyre repair kit.
2. Remove the cover.
3. Tail/Stop light (1)
Turn signal light (2)Back-up lamp (3)
4. Remove bulb holder. Remove and renew bulb.
5. Insert bulb holder into the taillamp
assembly. Install tail light
assembly in body and tighten.
Close covers and engage.
6. Switch on ignition, operate and check all lights.
Page 168 of 217
166Vehicle careInterior lightsCourtesy lights 1. To remove it, prise the opposite side of the light switch using a flat-blade screwdriver.
2. Remove the bulb.
3. Replace the bulb.
4. Reinstall the light assembly.
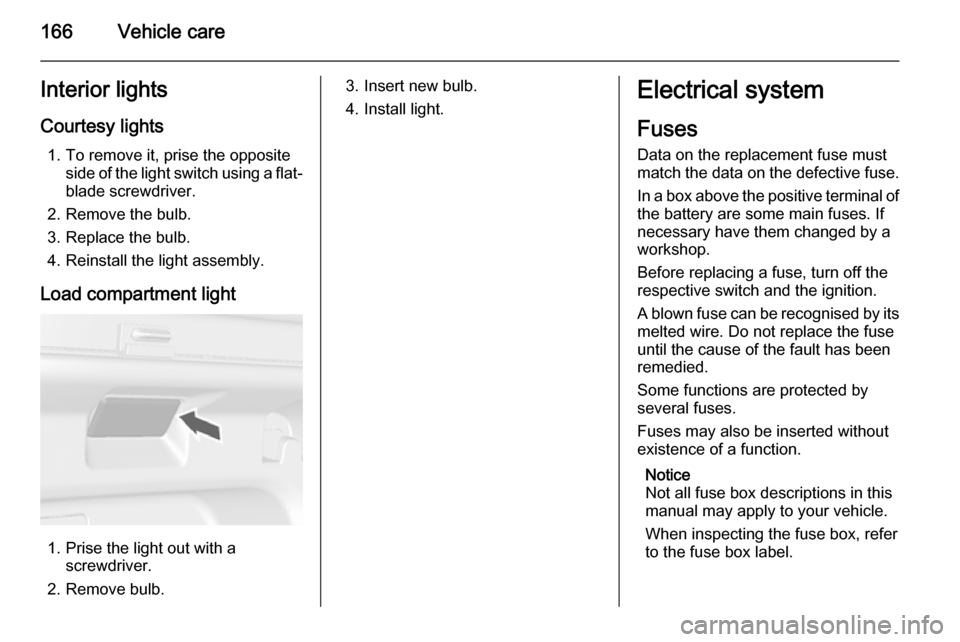
Load compartment light
1. Prise the light out with a screwdriver.
2. Remove bulb.
3. Insert new bulb.
4. Install light.Electrical system
Fuses
Data on the replacement fuse must
match the data on the defective fuse.
In a box above the positive terminal of the battery are some main fuses. If
necessary have them changed by a
workshop.
Before replacing a fuse, turn off the
respective switch and the ignition.
A blown fuse can be recognised by its
melted wire. Do not replace the fuse
until the cause of the fault has been
remedied.
Some functions are protected by
several fuses.
Fuses may also be inserted without
existence of a function.
Notice
Not all fuse box descriptions in this
manual may apply to your vehicle.
When inspecting the fuse box, refer
to the fuse box label.
Page 170 of 217
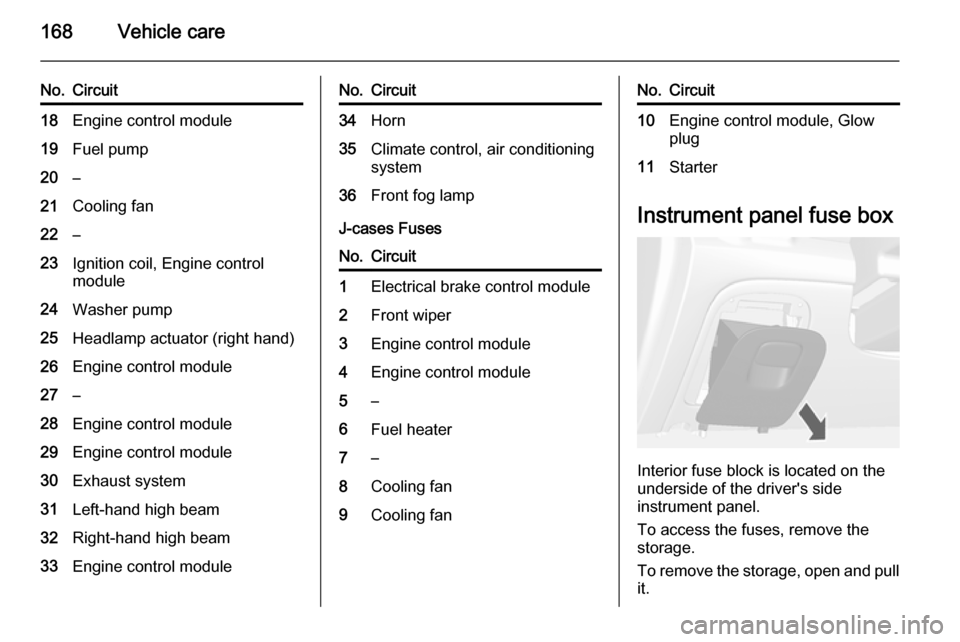
168Vehicle care
No.Circuit18Engine control module19Fuel pump20–21Cooling fan22–23Ignition coil, Engine control
module24Washer pump25Headlamp actuator (right hand)26Engine control module27–28Engine control module29Engine control module30Exhaust system31Left-hand high beam32Right-hand high beam33Engine control moduleNo.Circuit34Horn35Climate control, air conditioning
system36Front fog lamp
J-cases Fuses
No.Circuit1Electrical brake control module2Front wiper3Engine control module4Engine control module5–6Fuel heater7–8Cooling fan9Cooling fanNo.Circuit10Engine control module, Glow
plug11Starter
Instrument panel fuse box
Interior fuse block is located on the
underside of the driver's side
instrument panel.
To access the fuses, remove the
storage.
To remove the storage, open and pull it.