start stop button VAUXHALL MOKKA 2015 Owner's Manual
[x] Cancel search | Manufacturer: VAUXHALL, Model Year: 2015, Model line: MOKKA, Model: VAUXHALL MOKKA 2015Pages: 223, PDF Size: 6.2 MB
Page 13 of 223

In brief11
1Side air vents ...................... 118
2 Light switch ......................... 104
3 Turn and lane-change
signals ................................. 109
Headlight flash ....................105
Low beam and high beam ..105
4 Cruise control ...................... 136
Speed limiter ....................... 137
Forward collision alert .........138
5 Instruments ........................... 79
6 Horn ..................................... 73
Driver airbag ........................ 44
7 Steering wheel controls .......72
8 Windscreen wiper,
windscreen washer system ...73
Rear wiper, rear washer system ................................... 75
9 Centre air vents adjustment 118
10 Centre air vents ................... 118
11 Electronic Stability Control . 134
12 Hazard warning flashers ....10913 Control indicator for airbag
deactivation .......................... 84
14 Instrument panel storage
button .................................... 54
15 Passenger airbag
deactivation ........................... 46
16 Glovebox .............................. 55
17 Infotainment system
18 Eco button for stop-start
system ................................. 122
Fuel selector ......................... 80
19 AUX input, USB input, SD
card slot
20 Selector lever, manual
transmission ....................... 130
Automatic transmission ......127
21 Parking brake ......................132
22 Power outlet .......................... 78
23 Parking assist ..................... 140
Descent control system ......... 86
24 Climate control system ........ 113
25 Accelerator pedal ................12126Ignition switch with
steering wheel lock ............121
27 Brake pedal ......................... 131
28 Clutch pedal ........................ 120
29 Steering wheel adjustment ..72
30 Instrument panel storage ......54
31 Bonnet release lever ..........158
Page 19 of 223
In brief17
Starting the engine
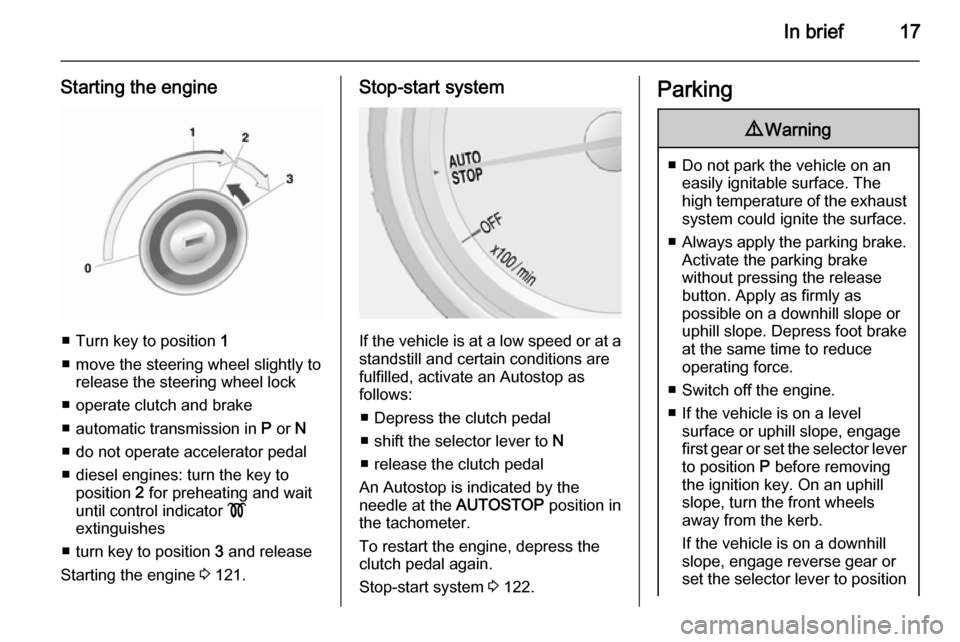
■ Turn key to position 1
■ move the steering wheel slightly to release the steering wheel lock
■ operate clutch and brake
■ automatic transmission in P or N
■ do not operate accelerator pedal
■ diesel engines: turn the key to position 2 for preheating and wait
until control indicator !
extinguishes
■ turn key to position 3 and release
Starting the engine 3 121.
Stop-start system
If the vehicle is at a low speed or at a
standstill and certain conditions are
fulfilled, activate an Autostop as
follows:
■ Depress the clutch pedal
■ shift the selector lever to N
■ release the clutch pedal
An Autostop is indicated by the
needle at the AUTOSTOP position in
the tachometer.
To restart the engine, depress the
clutch pedal again.
Stop-start system 3 122.
Parking9 Warning
■ Do not park the vehicle on an
easily ignitable surface. The
high temperature of the exhaust system could ignite the surface.
■ Always apply the parking brake.
Activate the parking brake
without pressing the release
button. Apply as firmly as
possible on a downhill slope or
uphill slope. Depress foot brake
at the same time to reduce
operating force.
■ Switch off the engine.
■ If the vehicle is on a level surface or uphill slope, engage
first gear or set the selector lever
to position P before removing
the ignition key. On an uphill
slope, turn the front wheels
away from the kerb.
If the vehicle is on a downhill
slope, engage reverse gear or
set the selector lever to position
Page 39 of 223
Seats, restraints37
Lumbar support
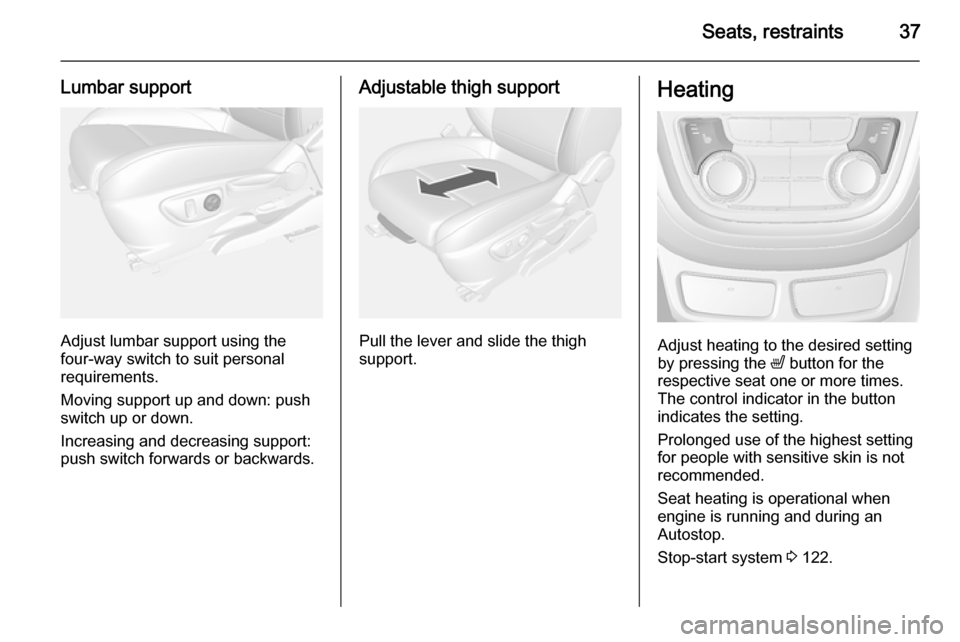
Adjust lumbar support using the
four-way switch to suit personal
requirements.
Moving support up and down: push
switch up or down.
Increasing and decreasing support:
push switch forwards or backwards.
Adjustable thigh support
Pull the lever and slide the thigh
support.
Heating
Adjust heating to the desired setting
by pressing the ß button for the
respective seat one or more times.
The control indicator in the button
indicates the setting.
Prolonged use of the highest setting
for people with sensitive skin is not
recommended.
Seat heating is operational when engine is running and during an
Autostop.
Stop-start system 3 122.
Page 117 of 223
Climate control115
Notice
If the V button is pressed while the
engine is running, an Autostop will
be inhibited until the V button is
pressed again.
If the l button with activated fan is
pressed while the engine is running,
an Autostop will be inhibited until the
l button is pressed again or until
the fan is deactivated.
If the V button is pressed while the
engine is in an Autostop, the engine will restart automatically.
If the l button is pressed with
activated fan while the engine is in an Autostop, the engine will restart
automatically.Electronic climate control
system
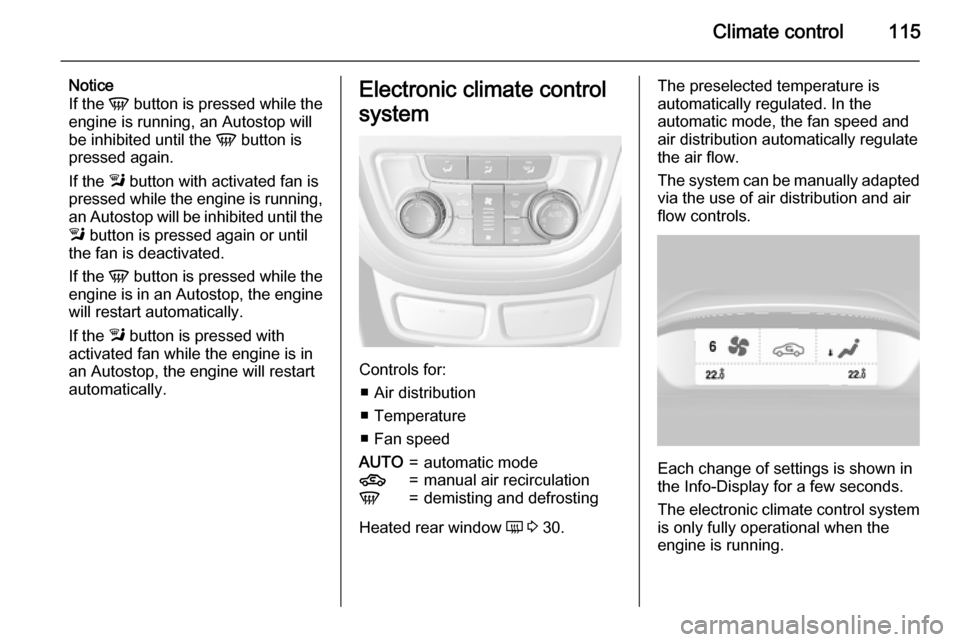
Controls for: ■ Air distribution
■ Temperature
■ Fan speed
AUTO=automatic mode4=manual air recirculationV=demisting and defrosting
Heated rear window Ü 3 30.
The preselected temperature is
automatically regulated. In the
automatic mode, the fan speed and
air distribution automatically regulate
the air flow.
The system can be manually adapted via the use of air distribution and air
flow controls.
Each change of settings is shown in
the Info-Display for a few seconds.
The electronic climate control system
is only fully operational when the
engine is running.
Page 118 of 223

116Climate control
Automatic mode AUTO
Basic setting for maximum comfort:■ Press AUTO button, the air
distribution and fan speed are
regulated automatically.
■ Open all air vents.
■ Press n to switch on cooling.
■ Set the desired temperature.
Temperature preselection Temperatures can be set to the
desired value.
If the minimum temperature is set, the
climate control system runs at
maximum cooling.
If the maximum temperature is set, the climate control system runs at maximum heating.
Notice
If the temperature will be reduced for
climate comfort reasons, an
Autostop can be inhibited or the
engine will restart automatically,
when cooling is switched on.
Stop-start system 3 122.
The temperature can be adjusted separately for driver and front
passenger side.
Demisting and defrosting the
windows V
■ Press button V.
■ Temperature and air distribution are set automatically and the fan
runs at high speed.
■ Switch on heated rear window Ü.
■ To return to previous mode: press button V, to return to automatic
mode: press button AUTO.Notice
If the V button is pressed while the
engine is running, an Autostop will
be inhibited until the V button is
pressed again.
If the l button with activated fan is
pressed while the engine is running,
an Autostop will be inhibited until the
l button is pressed again or until
the fan is deactivated.
If the V button is pressed while the
engine is in an Autostop, the engine will restart automatically.
If the l button is pressed with
activated fan while the engine is in an Autostop, the engine will restart
automatically.
Manual settings Climate control system settings can
be changed by activating the buttons
and rotary knobs as follows.
Changing a setting will deactivate the
automatic mode.
Page 125 of 223
Driving and operating123
Deactivation
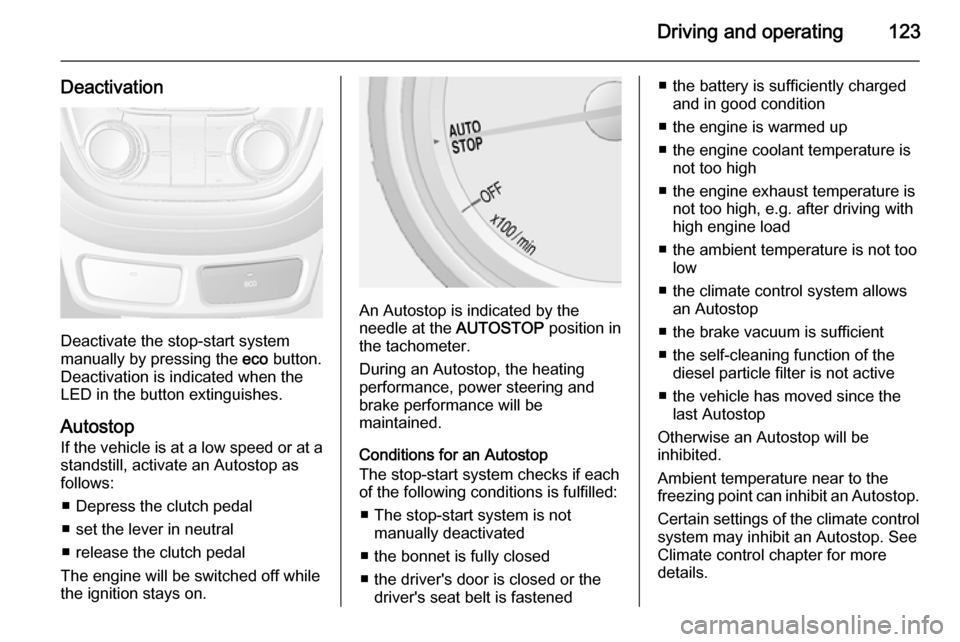
Deactivate the stop-start system
manually by pressing the eco button.
Deactivation is indicated when the
LED in the button extinguishes.
Autostop
If the vehicle is at a low speed or at a standstill, activate an Autostop as
follows:
■ Depress the clutch pedal
■ set the lever in neutral
■ release the clutch pedal
The engine will be switched off while
the ignition stays on.
An Autostop is indicated by the
needle at the AUTOSTOP position in
the tachometer.
During an Autostop, the heating
performance, power steering and
brake performance will be
maintained.
Conditions for an Autostop
The stop-start system checks if each
of the following conditions is fulfilled:
■ The stop-start system is not manually deactivated
■ the bonnet is fully closed
■ the driver's door is closed or the driver's seat belt is fastened
■ the battery is sufficiently chargedand in good condition
■ the engine is warmed up
■ the engine coolant temperature is not too high
■ the engine exhaust temperature is not too high, e.g. after driving with
high engine load
■ the ambient temperature is not too low
■ the climate control system allows an Autostop
■ the brake vacuum is sufficient
■ the self-cleaning function of the diesel particle filter is not active
■ the vehicle has moved since the last Autostop
Otherwise an Autostop will be
inhibited.
Ambient temperature near to the
freezing point can inhibit an Autostop.
Certain settings of the climate control
system may inhibit an Autostop. See
Climate control chapter for more
details.
Page 126 of 223

124Driving and operating
Immediately after motorway driving
an Autostop may be inhibited.
New vehicle running-in 3 121.
Battery discharge protection
To ensure reliable engine restarts, several battery discharge protection
features are implemented as part of
the stop-start system.
Power saving measures
During an Autostop, several electrical
features such as auxiliary electric
heater or rear window heating are
disabled or switched into a power
saving mode. The fan speed of the
climate control system is reduced to
save power.
Restart of the engine by the
driver Depress the clutch pedal to restart the
engine.
The engine start is indicated by the
needle at the idle speed position in
the tachometer.If the selector lever is shifted out of
neutral before depressing the clutch
first, control indicator - illuminates
or is shown as a message in the Driver Information Centre.
Control indicator - 3 85.
Restart of the engine by the
stop-start system
The selector lever has to be in neutral to enable an automatic restart.
If one of the following conditions occurs during an Autostop, the
engine will be restarted automatically
by the stop-start system:
■ The stop-start system is manually deactivated
■ the bonnet is opened
■ the driver's seat belt is unfastened and the driver's door is opened
■ the engine temperature is too low
■ the battery is discharged
■ the brake vacuum is not sufficient
■ the vehicle starts to move■ the climate control system requests
an engine start
■ the air conditioning is manually switched on
If the bonnet is not fully closed, a
warning message is displayed in the
Driver Information Centre.
If an electrical accessory, e.g. a
portable CD player, is connected to
the power outlet, a brief power drop during engine restart might be
noticeable.
Parking9 Warning
■ Do not park the vehicle on an
easily ignitable surface. The
high temperature of the exhaust system could ignite the surface.
■ Always apply the parking brake.
Activate the parking brake
without pressing the release
button. Apply as firmly as
possible on a downhill slope or
Page 182 of 223

180Vehicle care
Consult your workshop for service or
to purchase a relearn tool. There are
two minutes to match the first tyre/
wheel position, and five minutes
overall to match all four tyre/wheel
positions. If it takes longer, the
matching process stops and must be
restarted.
The TPMS sensor matching process
is:
1. Apply the parking brake; on vehicles with automatic
transmission set the selector lever
to P.
2. Turn the ignition on.
3. Use the MENU button on the turn
signal lever to select the Vehicle
Information Menu in the Driver
Information Centre (DIC).
4. Turn the adjuster wheel to scroll to
the tyre pressure menu.
5. Press the SET/CLR button to
begin the sensor matching process. A message requesting
acceptance of the process should display.6. Press the SET/CLR button again
to confirm the selection. The horn
sounds twice to signal the
receiver is in relearn mode.
7. Start with the left side front tyre.
8. Place the relearn tool against the tyre sidewall, near the valve stem.Then press the button to activate
the TPMS sensor. A horn chirp
confirms that the sensor
identification code has been
matched to this tyre and wheel
position.
9. Proceed to the right side front tyre,
and repeat the procedure in Step 8.
10. Proceed to the right side rear tyre,
and repeat the procedure in
Step 8.
11. Proceed to the left side rear tyre, and repeat the procedure inStep 8. The horn sounds twice to
indicate the sensor identification
code has been matched to the
driver side rear tyre, and the
TPMS sensor matching process
is no longer active.12. Turn off the ignition.
13. Set all four tyres to the recommended air pressure level
as indicated on the tyre pressure
label.
14. Ensure the tyre loading status is set according selected pressure
3 90.
Temperature dependency Tyre pressure depends on the
temperature of the tyre. During
driving, tyre temperature and
pressure increase.
The tyre pressure value displayed in
the Driver Information Centre shows
the actual tyre pressure. Therefore it
is important to check tyre pressure
with cold tyres.
Tread depth Check tread depth at regular
intervals.
Tyres should be replaced for safety
reasons at a tread depth of 2-3 mm
(4 mm for winter tyres).
Page 186 of 223
184Vehicle care
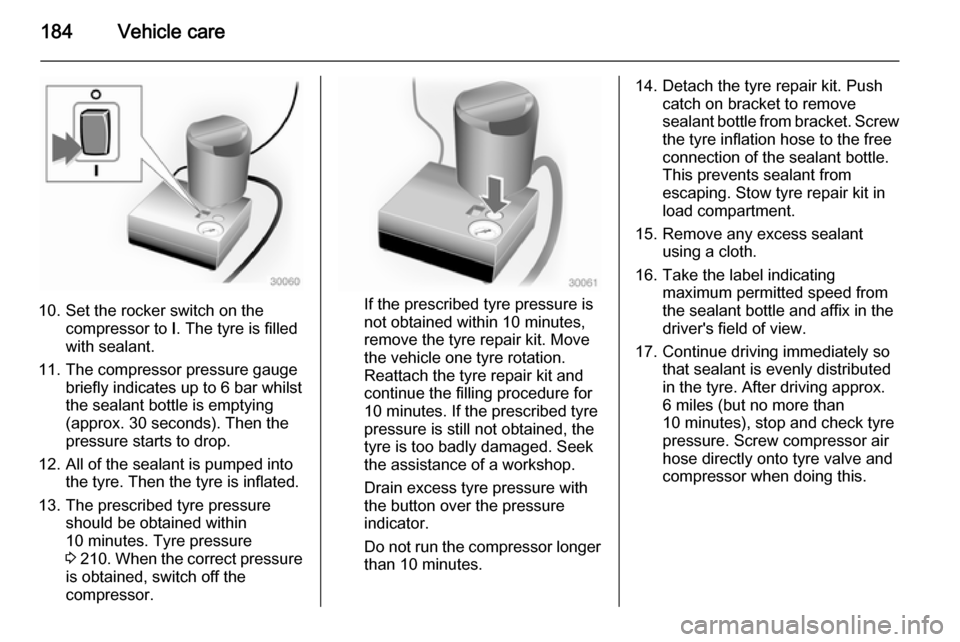
10. Set the rocker switch on thecompressor to I. The tyre is filled
with sealant.
11. The compressor pressure gauge briefly indicates up to 6 bar whilstthe sealant bottle is emptying
(approx. 30 seconds). Then the
pressure starts to drop.
12. All of the sealant is pumped into the tyre. Then the tyre is inflated.
13. The prescribed tyre pressure should be obtained within
10 minutes. Tyre pressure
3 210 . When the correct pressure
is obtained, switch off the
compressor.If the prescribed tyre pressure is
not obtained within 10 minutes,
remove the tyre repair kit. Move
the vehicle one tyre rotation.
Reattach the tyre repair kit and
continue the filling procedure for 10 minutes. If the prescribed tyre
pressure is still not obtained, the
tyre is too badly damaged. Seek
the assistance of a workshop.
Drain excess tyre pressure with
the button over the pressure indicator.
Do not run the compressor longer than 10 minutes.
14. Detach the tyre repair kit. Push catch on bracket to remove
sealant bottle from bracket. Screw
the tyre inflation hose to the free
connection of the sealant bottle.
This prevents sealant from
escaping. Stow tyre repair kit in
load compartment.
15. Remove any excess sealant using a cloth.
16. Take the label indicating maximum permitted speed from
the sealant bottle and affix in the
driver's field of view.
17. Continue driving immediately so that sealant is evenly distributedin the tyre. After driving approx.
6 miles (but no more than 10 minutes), stop and check tyre
pressure. Screw compressor air
hose directly onto tyre valve and
compressor when doing this.