change time VAUXHALL MOKKA 2016 Owner's Manual
[x] Cancel search | Manufacturer: VAUXHALL, Model Year: 2016, Model line: MOKKA, Model: VAUXHALL MOKKA 2016Pages: 231, PDF Size: 6.55 MB
Page 22 of 231
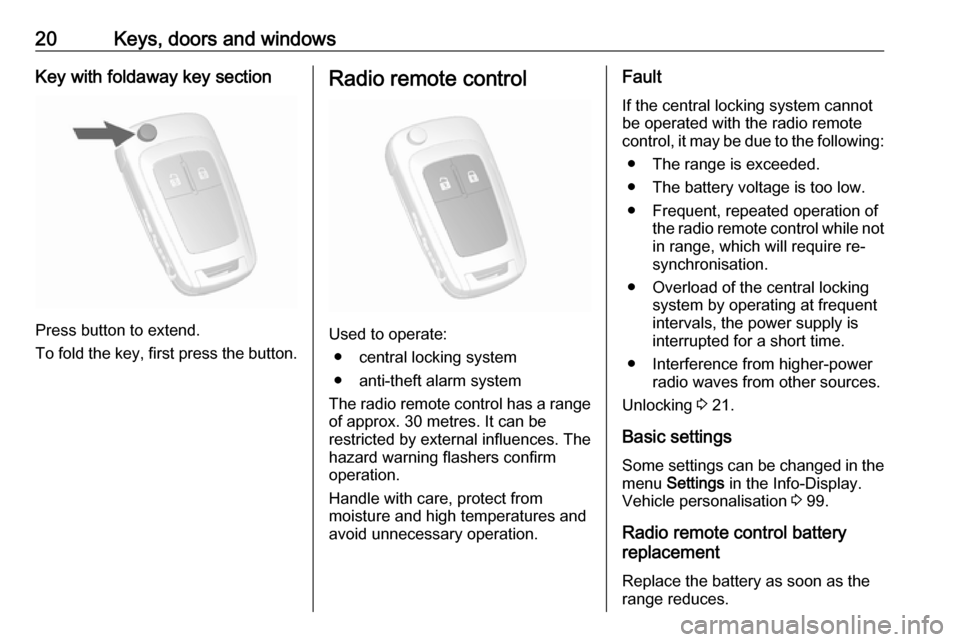
20Keys, doors and windowsKey with foldaway key section
Press button to extend.
To fold the key, first press the button.
Radio remote control
Used to operate: β central locking system
β anti-theft alarm system
The radio remote control has a range of approx. 30 metres. It can be
restricted by external influences. The
hazard warning flashers confirm
operation.
Handle with care, protect from
moisture and high temperatures and
avoid unnecessary operation.
Fault
If the central locking system cannot be operated with the radio remote
control, it may be due to the following:
β The range is exceeded.
β The battery voltage is too low.
β Frequent, repeated operation of the radio remote control while not
in range, which will require re-
synchronisation.
β Overload of the central locking system by operating at frequent
intervals, the power supply is
interrupted for a short time.
β Interference from higher-power radio waves from other sources.
Unlocking 3 21.
Basic settings Some settings can be changed in the
menu Settings in the Info-Display.
Vehicle personalisation 3 99.
Radio remote control battery
replacement
Replace the battery as soon as the
range reduces.
Page 76 of 231

74Instruments and controlsRear window wiper/washer
Press the rocker switch to activate the
rear window wiper:
upper switch:continuous
operationlower switch:intermittent
operationmiddle position:off
Push lever. Washer fluid is sprayed
onto the rear window and the wiper
wipes a few times.
Do not use if the rear window is
frozen.
Switch off in car washes.
The rear window wiper comes on
automatically when the windscreen
wiper is switched on and reverse gear
is engaged.
Activation or deactivation of this
function can be changed in the menu
Settings in the Info-Display.
Washer fluid 3 168
Vehicle personalisation 3 99.
Outside temperature
A drop in temperature is indicated
immediately and a rise in temperature
after a time delay.
If outside temperature drops to
0.5 Β°C, a warning message is
displayed in the Driver Information
Centre with Uplevel-Display or
Uplevel-Combi-Display.
9 Warning
The road surface may already be
icy even though the display
indicates a few degrees above 0
Β°C.
Page 77 of 231
Instruments and controls75ClockDate and time are shown in the
Info-Display.
Set date and time
CD 400
Press CONFIG . The menu Settings is
displayed.
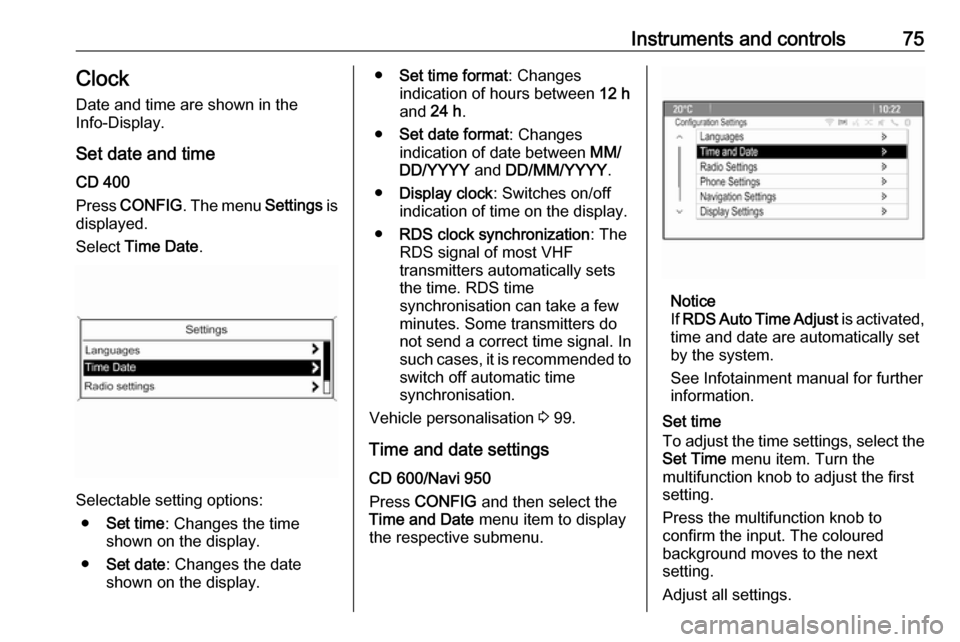
Select Time Date .
Selectable setting options:
β Set time : Changes the time
shown on the display.
β Set date : Changes the date
shown on the display.
β Set time format : Changes
indication of hours between 12 h
and 24 h.
β Set date format : Changes
indication of date between MM/
DD/YYYY and DD/MM/YYYY .
β Display clock : Switches on/off
indication of time on the display.
β RDS clock synchronization : The
RDS signal of most VHF
transmitters automatically sets
the time. RDS time
synchronisation can take a few
minutes. Some transmitters do not send a correct time signal. In
such cases, it is recommended to
switch off automatic time
synchronisation.
Vehicle personalisation 3 99.
Time and date settings
CD 600/Navi 950
Press CONFIG and then select the
Time and Date menu item to display
the respective submenu.
Notice
If RDS Auto Time Adjust is activated,
time and date are automatically set
by the system.
See Infotainment manual for further
information.
Set time
To adjust the time settings, select the
Set Time menu item. Turn the
multifunction knob to adjust the first
setting.
Press the multifunction knob to
confirm the input. The coloured
background moves to the next
setting.
Adjust all settings.
Page 81 of 231
Instruments and controls79LED off:petrol operationLED
flashes:checking conditions for
fuel transition to liquid
gas operation.
Illuminates if conditions
are fulfilled.LED illuβ
minates:liquid gas operationLED
flashes
five
times
and
extinβ
guishes:liquid gas tank is empty
or failure in liquid gas
system. A message is
displayed in the Driver
Information Centre.
As soon as the liquid gas tank is
empty, petrol operation is
automatically engaged until the
ignition is switched off.
Fuel for liquid gas operation 3 153.
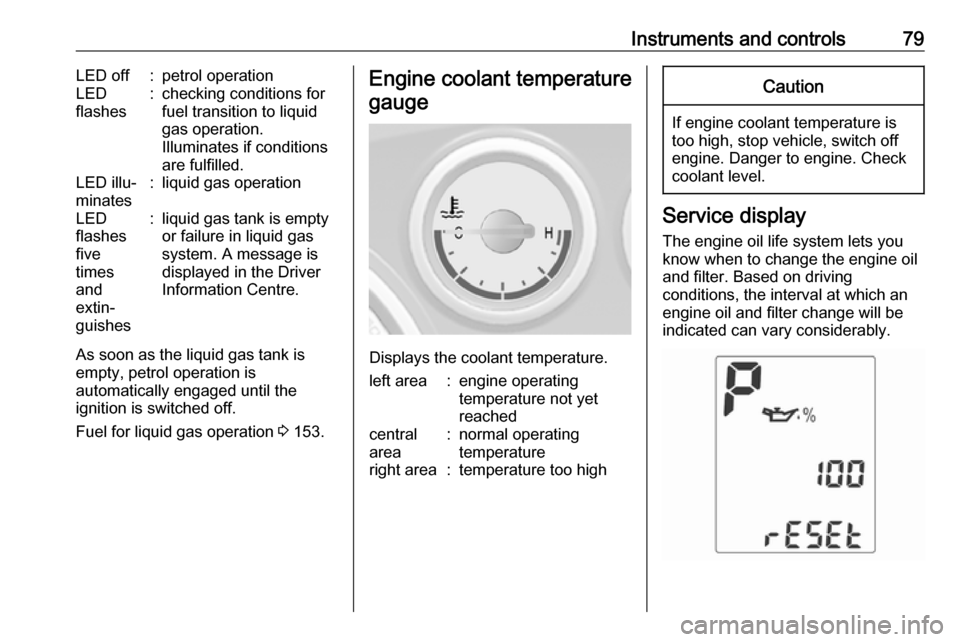
Engine coolant temperature
gauge
Displays the coolant temperature.
left area:engine operating
temperature not yet
reachedcentral
area:normal operating
temperatureright area:temperature too highCaution
If engine coolant temperature is
too high, stop vehicle, switch off
engine. Danger to engine. Check
coolant level.
Service display
The engine oil life system lets you
know when to change the engine oil
and filter. Based on driving
conditions, the interval at which an
engine oil and filter change will be
indicated can vary considerably.
Page 82 of 231
80Instruments and controlsIn the Uplevel-Display and Uplevel-
Combi-Display, the remaining oil life
duration is displayed in the Vehicle
Information Menu .
In the Midlevel-Display, the remaining
engine oil life duration is displayed by
control indicator I, therefore the
ignition must be switched on, with the engine off.
The menu and function can be
selected via the buttons on the turn signal lever.
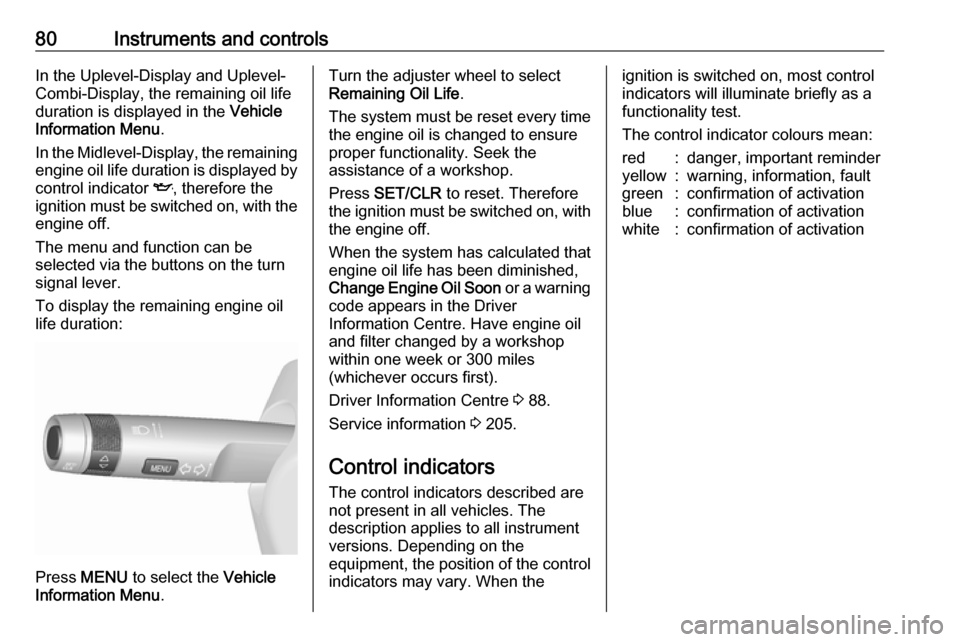
To display the remaining engine oil
life duration:
Press MENU to select the Vehicle
Information Menu .
Turn the adjuster wheel to select
Remaining Oil Life .
The system must be reset every time
the engine oil is changed to ensure
proper functionality. Seek the
assistance of a workshop.
Press SET/CLR to reset. Therefore
the ignition must be switched on, with the engine off.
When the system has calculated that
engine oil life has been diminished,
Change Engine Oil Soon or a warning
code appears in the Driver
Information Centre. Have engine oil
and filter changed by a workshop
within one week or 300 miles
(whichever occurs first).
Driver Information Centre 3 88.
Service information 3 205.
Control indicators The control indicators described are
not present in all vehicles. The
description applies to all instrument
versions. Depending on the
equipment, the position of the control
indicators may vary. When theignition is switched on, most control
indicators will illuminate briefly as a functionality test.
The control indicator colours mean:red:danger, important reminderyellow:warning, information, faultgreen:confirmation of activationblue:confirmation of activationwhite:confirmation of activation
Page 101 of 231
Instruments and controls99Average speedDisplay of average speed. The
measurement can be reset at any
time.
To reset, press SET/CLR for a few
seconds.
Digital speed Digital display of the instantaneous
speed.
Route guidance Additional to the navigation
information in the Colour-Info-
Display, route guidance is displayed
in the Driver Information Centre.Vehicle personalisation
The vehicle's behaviour can be
personalised by changing the settings
in the Info-Display.
Depending on vehicle equipment
some of the functions described
below may not be available.
Some functions are only displayed or
active when the engine is running.
Settings in the
Graphic-Info-Display
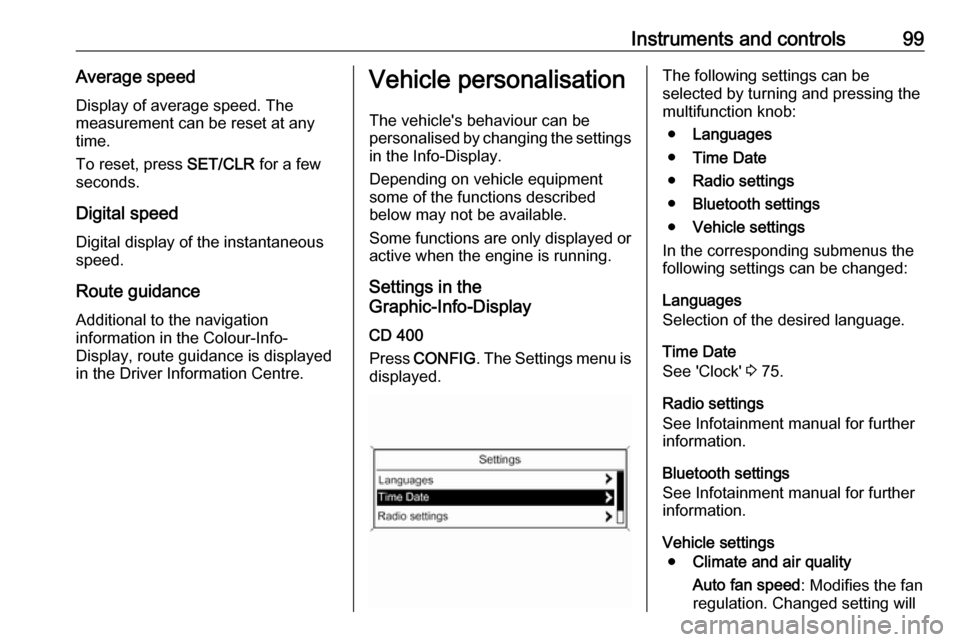
CD 400
Press CONFIG . The Settings menu is
displayed.The following settings can be
selected by turning and pressing the
multifunction knob:
β Languages
β Time Date
β Radio settings
β Bluetooth settings
β Vehicle settings
In the corresponding submenus the
following settings can be changed:
Languages
Selection of the desired language.
Time Date
See 'Clock' 3 75.
Radio settings
See Infotainment manual for further information.
Bluetooth settings
See Infotainment manual for further information.
Vehicle settings β Climate and air quality
Auto fan speed : Modifies the fan
regulation. Changed setting will
Page 103 of 231
Instruments and controls101
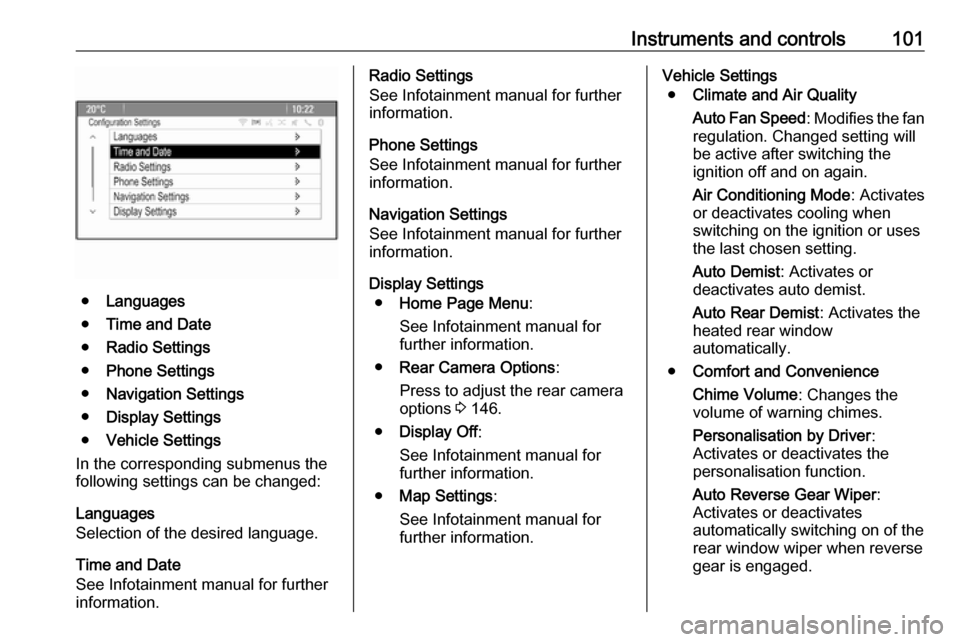
βLanguages
β Time and Date
β Radio Settings
β Phone Settings
β Navigation Settings
β Display Settings
β Vehicle Settings
In the corresponding submenus the
following settings can be changed:
Languages
Selection of the desired language.
Time and Date
See Infotainment manual for further
information.
Radio Settings
See Infotainment manual for further
information.
Phone Settings
See Infotainment manual for further information.
Navigation Settings
See Infotainment manual for further
information.
Display Settings β Home Page Menu :
See Infotainment manual for
further information.
β Rear Camera Options :
Press to adjust the rear camera
options 3 146.
β Display Off :
See Infotainment manual for
further information.
β Map Settings :
See Infotainment manual for
further information.Vehicle Settings
β Climate and Air Quality
Auto Fan Speed : Modifies the fan
regulation. Changed setting will
be active after switching the
ignition off and on again.
Air Conditioning Mode : Activates
or deactivates cooling when
switching on the ignition or uses
the last chosen setting.
Auto Demist : Activates or
deactivates auto demist.
Auto Rear Demist : Activates the
heated rear window
automatically.
β Comfort and Convenience
Chime Volume : Changes the
volume of warning chimes.
Personalisation by Driver :
Activates or deactivates the
personalisation function.
Auto Reverse Gear Wiper :
Activates or deactivates
automatically switching on of the
rear window wiper when reverse gear is engaged.
Page 107 of 231

Instruments and controls105On-demand diagnostics
At any time e.g. if the vehicle displays
a service message, press Z to
contact an OnStar advisor and ask to complete a real-time diagnostic check
to directly determine the issue.
Depending on the results, the advisor
will provide further support.
Monthly vehicle diagnostics
The vehicle automatically transmits
diagnostic data to OnStar which
sends a monthly email report to you
and your preferred workshop.
Notice
The workshop notification function
can be disabled in your account.
The report contains the status of key
operating systems of the vehicle like
engine, transmission, airbags,
antilock brakes, and other major
systems. It also provides information
on possible maintenance items and
tyre pressure (only with tyre pressure
monitoring system).
To look at the information in greater
detail, select the link within the email
and log into your account.Destination download
A desired destination can be directly
downloaded to the navigation system.
Press Z to call an OnStar advisor and
describe the destination or point of
interest.
The OnStar advisor can look up any
address or point of interest and
directly download the destination to
the built-in navigation system.
OnStar settings
OnStar PIN
To have full access to all OnStar
services, a four-digit PIN is required. The PIN has to be personalised when first talking to an OnStar advisor.
To change the PIN, press Z to call an
OnStar advisor.
Account data
An OnStar subscriber has an
account, where all the data is stored. To request a change of the account
information, press Z and talk to an
OnStar advisor or logon to your
account.If the OnStar service is used on
another vehicle, press Z and request
that the account be transferred to the
new vehicle.
Notice
In any case, if the vehicle is disposed
of, sold or otherwise transferred,
immediately inform OnStar about the changes and terminate the
OnStar service on this vehicle.
Vehicle location
The vehicle location is transmitted to
OnStar when service is requested or triggered. A message on the Info-
Display informs about this
transmission.
To activate or deactivate the
transmission of the vehicle location,
press and hold j until an audio
message is heard.
The deactivation is indicated by the
status light flashing red and green for a short period of time and each time
the vehicle is started.
Notice
If the transmission of the vehicle
location is deactivated, some
services are no longer available.
Page 109 of 231

Lighting107LightingExterior lighting.......................... 107
Light switch .............................. 107
Automatic light control .............108
High beam ............................... 108
Headlight flash ......................... 109
Headlight range adjustment ....109
Headlights when driving abroad .................................... 109
Daytime running lights .............110
Adaptive forward lighting .........110
Hazard warning flashers ..........112
Turn and lane-change signals . 113
Front fog lights ......................... 113
Rear fog light ........................... 113
Reversing lights .......................113
Misted light covers ...................114
Interior lighting ........................... 114
Instrument panel illumination control ..................................... 114
Interior lights ............................ 114
Reading lights .......................... 115
Glove box lighting ....................115
Sunvisor lights ......................... 115
Lighting features ........................115
Entry lighting ............................ 115Exit lighting.............................. 116
Battery discharge protection ....116Exterior lighting
Light switch
Turn light switch:
7:lights off8:sidelights9:low beam
Control indicator 8 3 87.
Page 115 of 231
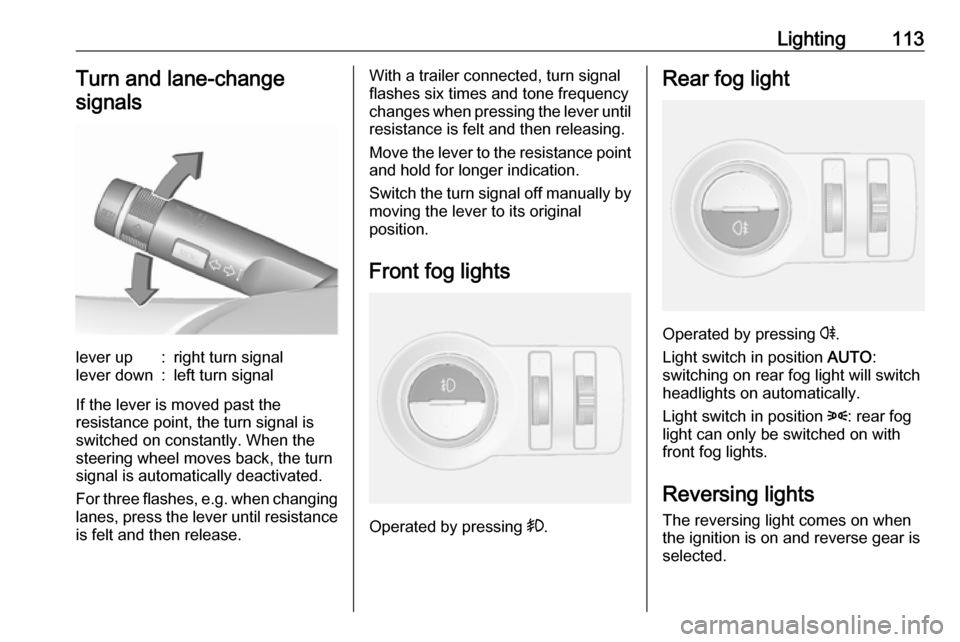
Lighting113Turn and lane-changesignalslever up:right turn signallever down:left turn signal
If the lever is moved past the
resistance point, the turn signal is
switched on constantly. When the
steering wheel moves back, the turn
signal is automatically deactivated.
For three flashes, e.g. when changing
lanes, press the lever until resistance
is felt and then release.
With a trailer connected, turn signal
flashes six times and tone frequency
changes when pressing the lever until resistance is felt and then releasing.
Move the lever to the resistance point
and hold for longer indication.
Switch the turn signal off manually by
moving the lever to its original
position.
Front fog lights
Operated by pressing >.
Rear fog light
Operated by pressing r.
Light switch in position AUTO:
switching on rear fog light will switch
headlights on automatically.
Light switch in position 8: rear fog
light can only be switched on with
front fog lights.
Reversing lights
The reversing light comes on when
the ignition is on and reverse gear is
selected.