check engine light VAUXHALL MOKKA 2016 Owner's Manual
[x] Cancel search | Manufacturer: VAUXHALL, Model Year: 2016, Model line: MOKKA, Model: VAUXHALL MOKKA 2016Pages: 231, PDF Size: 6.55 MB
Page 18 of 231
16In briefTransmission
Manual transmission
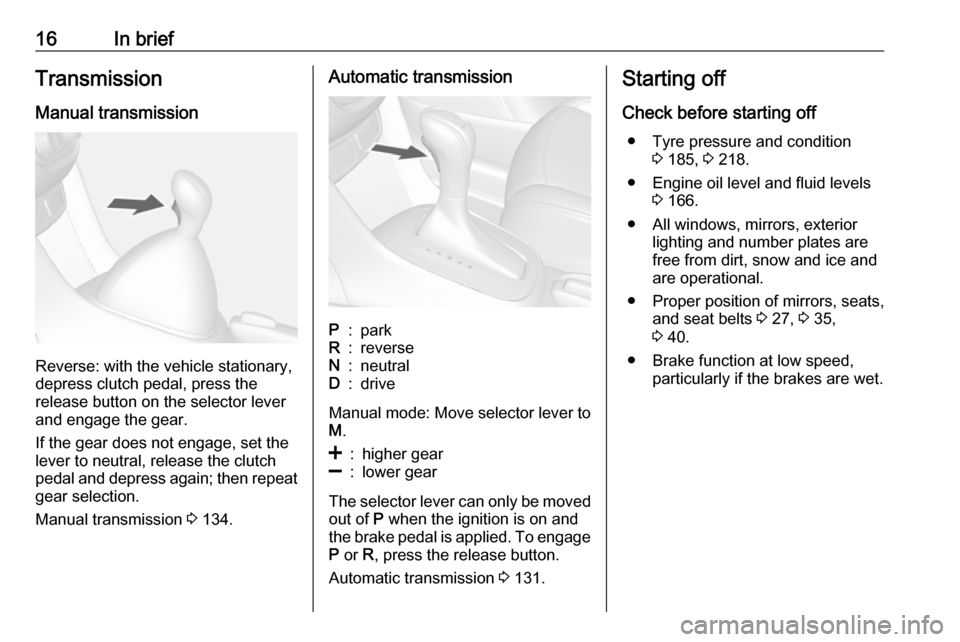
Reverse: with the vehicle stationary,
depress clutch pedal, press the
release button on the selector lever
and engage the gear.
If the gear does not engage, set the
lever to neutral, release the clutch
pedal and depress again; then repeat
gear selection.
Manual transmission 3 134.
Automatic transmissionP:parkR:reverseN:neutralD:drive
Manual mode: Move selector lever to
M .
<:higher gear]:lower gear
The selector lever can only be moved
out of P when the ignition is on and
the brake pedal is applied. To engage P or R, press the release button.
Automatic transmission 3 131.
Starting off
Check before starting off ● Tyre pressure and condition 3 185, 3 218.
● Engine oil level and fluid levels 3 166.
● All windows, mirrors, exterior lighting and number plates are
free from dirt, snow and ice and
are operational.
● Proper position of mirrors, seats, and seat belts 3 27, 3 35,
3 40.
● Brake function at low speed, particularly if the brakes are wet.
Page 89 of 231
Instruments and controls87Illuminates when the engine is
runningCaution
Engine lubrication may be
interrupted. This may result in
damage to the engine and/or
locking of the drive wheels.
1. Depress clutch.
2. Select neutral gear, set selector lever to N.
3. Move out of the flow of traffic as quickly as possible without
impeding other vehicles.
4. Switch off ignition.
9 Warning
When the engine is off,
considerably more force is needed
to brake and steer. During an
Autostop the brake servo unit will still be operational.
Do not remove key until vehicle is
stationary, otherwise the steeringwheel lock could engage
unexpectedly.
Check oil level before seeking the
assistance of a workshop 3 166.
Low fuel
i illuminates or flashes yellow.
Illuminates
Level in fuel tank is too low.
Flashes
Fuel used up. Refuel immediately.
Never run the tank dry.
Refuelling 3 154.
Catalytic converter 3 131.
Bleeding the diesel fuel system
3 171.
Immobiliser d flashes yellow.
Fault in the immobiliser system. The
engine cannot be started.
Have the cause of the fault remedied
by a repairer.
Exterior light
8 illuminates green.
The exterior lights are on 3 107.
High beam
C illuminates blue.
Illuminates when high beam is on or
during headlight flash 3 108 , or when
high beam is on with high beam
assist, adaptive forward lighting
3 110.
Adaptive forward lighting f illuminates or flashes yellow.
Illuminates
The adaptive forward lighting system
needs a service.
Seek the assistance of a workshop. Adaptive forward lighting 3 110.
Page 92 of 231
90Instruments and controls
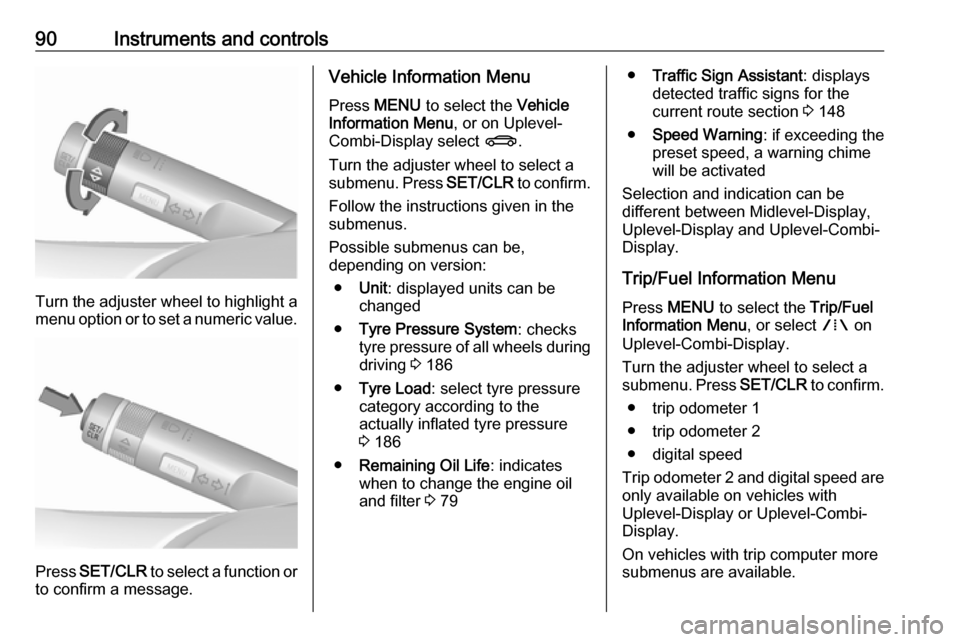
Turn the adjuster wheel to highlight a
menu option or to set a numeric value.
Press SET/CLR to select a function or
to confirm a message.
Vehicle Information Menu
Press MENU to select the Vehicle
Information Menu , or on Uplevel-
Combi-Display select X.
Turn the adjuster wheel to select a
submenu. Press SET/CLR to confirm.
Follow the instructions given in the
submenus.
Possible submenus can be,
depending on version:
● Unit : displayed units can be
changed
● Tyre Pressure System : checks
tyre pressure of all wheels during
driving 3 186
● Tyre Load : select tyre pressure
category according to the
actually inflated tyre pressure
3 186
● Remaining Oil Life : indicates
when to change the engine oil
and filter 3 79● Traffic Sign Assistant : displays
detected traffic signs for the
current route section 3 148
● Speed Warning : if exceeding the
preset speed, a warning chime
will be activated
Selection and indication can be
different between Midlevel-Display,
Uplevel-Display and Uplevel-Combi-
Display.
Trip/Fuel Information Menu
Press MENU to select the Trip/Fuel
Information Menu , or select W on
Uplevel-Combi-Display.
Turn the adjuster wheel to select a
submenu. Press SET/CLR to confirm.
● trip odometer 1
● trip odometer 2
● digital speed
Trip odometer 2 and digital speed are
only available on vehicles with
Uplevel-Display or Uplevel-Combi-
Display.
On vehicles with trip computer more
submenus are available.
Page 106 of 231

104Instruments and controlsNotice
The Wi-Fi hotspot functionality is not available for all markets.
Up to seven devices may be
connected.
To connect a mobile device with the
OnStar Wi-Fi hotspot:
1. Press j and then select Wi-Fi
settings on the Info-Display. The settings displayed include the Wi- Fi hotspot name (SSID),
password and connection type.
2. Start a Wi-Fi network search on your mobile device.
3. Select your vehicle hotspot (SSID) when listed.
4. When prompted, enter the password on your mobile device.
Notice
To change the SSID or password,
select Z and talk to an OnStar
advisor or logon to your account.
To switch off the Wi-Fi hotspot
functionality, press Z to call an
OnStar advisor.Smartphone app
With the My Vauxhall smartphone
app, some vehicle functions can be
operated via a smartphone.
The following functions are available: ● Lock or unlock doors.
● Honk horn or flash lights.
● Check fuel level, engine oil life and tyre pressure (only with tyre
pressure monitoring system).
● Send navigation destination to the vehicle, if equipped with a
built-in navigation system.
● Locate vehicle on a map.
● Manage Wi-Fi settings.
To operate these functions, download the app from the respective app store.
Remote service
If desired, use any phone to call an
OnStar advisor, who can remotely
operate specific vehicle functions.
Find the respective OnStar phone
number on our country-specific
website.The following functions are available:
● Lock or unlock doors.
● Provide information on the vehicle location.
● Honk horn or flash lights.
Stolen vehicle assistance
If a vehicle is stolen, the OnStar
stolen vehicle assistance service can
provide support in locating and
recovering the vehicle.Theft alert
When the anti-theft alarm system is triggered, a notification is sent to
OnStar. You are then informed about
this event by text message or email.
If required, report the theft to the
authorities and request OnStar stolen vehicle assistance. Use any phone to
call an OnStar advisor. Find the
respective OnStar phone number on
our country-specific website.Remote ignition block
By sending remote signals, OnStar can block the ignition cycle
preventing the vehicle from restarting once it has been turned off.
Page 107 of 231

Instruments and controls105On-demand diagnostics
At any time e.g. if the vehicle displays
a service message, press Z to
contact an OnStar advisor and ask to complete a real-time diagnostic check
to directly determine the issue.
Depending on the results, the advisor
will provide further support.
Monthly vehicle diagnostics
The vehicle automatically transmits
diagnostic data to OnStar which
sends a monthly email report to you
and your preferred workshop.
Notice
The workshop notification function
can be disabled in your account.
The report contains the status of key
operating systems of the vehicle like
engine, transmission, airbags,
antilock brakes, and other major
systems. It also provides information
on possible maintenance items and
tyre pressure (only with tyre pressure
monitoring system).
To look at the information in greater
detail, select the link within the email
and log into your account.Destination download
A desired destination can be directly
downloaded to the navigation system.
Press Z to call an OnStar advisor and
describe the destination or point of
interest.
The OnStar advisor can look up any
address or point of interest and
directly download the destination to
the built-in navigation system.
OnStar settings
OnStar PIN
To have full access to all OnStar
services, a four-digit PIN is required. The PIN has to be personalised when first talking to an OnStar advisor.
To change the PIN, press Z to call an
OnStar advisor.
Account data
An OnStar subscriber has an
account, where all the data is stored. To request a change of the account
information, press Z and talk to an
OnStar advisor or logon to your
account.If the OnStar service is used on
another vehicle, press Z and request
that the account be transferred to the
new vehicle.
Notice
In any case, if the vehicle is disposed
of, sold or otherwise transferred,
immediately inform OnStar about the changes and terminate the
OnStar service on this vehicle.
Vehicle location
The vehicle location is transmitted to
OnStar when service is requested or triggered. A message on the Info-
Display informs about this
transmission.
To activate or deactivate the
transmission of the vehicle location,
press and hold j until an audio
message is heard.
The deactivation is indicated by the
status light flashing red and green for a short period of time and each time
the vehicle is started.
Notice
If the transmission of the vehicle
location is deactivated, some
services are no longer available.
Page 129 of 231

Driving and operating127Automatic Starter ControlThis function controls the engine
starting procedure. The driver does
not need to hold the key in position 3.
Once applied, the system will go on starting automatically until the engine is running. Because of the checkingprocedure, the engine starts running
after a short delay.
Possible reasons for a non-starting
engine:
● clutch pedal not operated (manual transmission)
● brake pedal not operated or selector lever not in P or N
(automatic transmission)
● timeout occurred
Turbo engine warm-up Upon start-up, engine available
torque may be limited for a short time,
especially when the engine
temperature is cold. The limitation is
to allow the lubrication system to fully protect the engine.Overrun cut-off
The fuel supply is automatically cut off during overrun, i.e. when the vehicle
is driven with a gear engaged but
accelerator is released.
Stop-start system The stop-start system helps to save
fuel and to reduce the exhaust
emissions. When conditions allow, it
switches off the engine as soon as the
vehicle is at a low speed or at a
standstill, e.g. at a traffic light or in a
traffic jam. It starts the engine
automatically as soon as the clutch is
depressed. A battery sensor ensures
that an Autostop is only performed if
the battery is sufficiently charged for
a restart.
Activation
The stop-start system is available as
soon as the engine is started, the
vehicle starts-off and the conditions
as stated below in this section are
fulfilled.Deactivation
Deactivate the stop-start system
manually by pressing Ï.
Deactivation is indicated when the
LED in the button extinguishes.
Autostop If the vehicle is at a low speed or at a
standstill, activate an Autostop as
follows:
● Depress the clutch pedal.
● Set the lever in neutral.
● Release the clutch pedal.
The engine will be switched off while
the ignition stays on.
Page 156 of 231
154Driving and operatingFill the tank completely at regular
intervals to prevent corrosion in the
tank.
Faults and remedies
If gas mode is not possible, check the following:
● Is there enough liquid gas present?
● Is there enough petrol present for
starting?
Due to extreme temperatures in
combination with the gas
composition, it may take slightly
longer before the system switches
from petrol to gas mode.
In extreme situations, the system may
also switch back to petrol mode if the
minimum requirements are not
fulfilled. If conditions allow, it might be possible to manually switch back to
liquid gas operation.
Seek the assistance of a workshop in
the event of all other faults.Caution
Repairs and adjustments may only be made by trained specialists in
order to maintain the safety and
warranty on the LPG system.
Liquid gas is given a particular odour
(odorised) so that any leaks can be
detected easily.
9 Warning
If you smell gas in the vehicle or in
the immediate vicinity, switch to petrol mode immediately. No
smoking. No naked flames or
ignition sources.
If the gas odour persists, do not start
the engine. Have the cause of the
fault remedied by a workshop.
When using underground car parks,
follow the instructions of the operator
and local laws.
Notice
In the event of an accident, switch off
the ignition and lights.
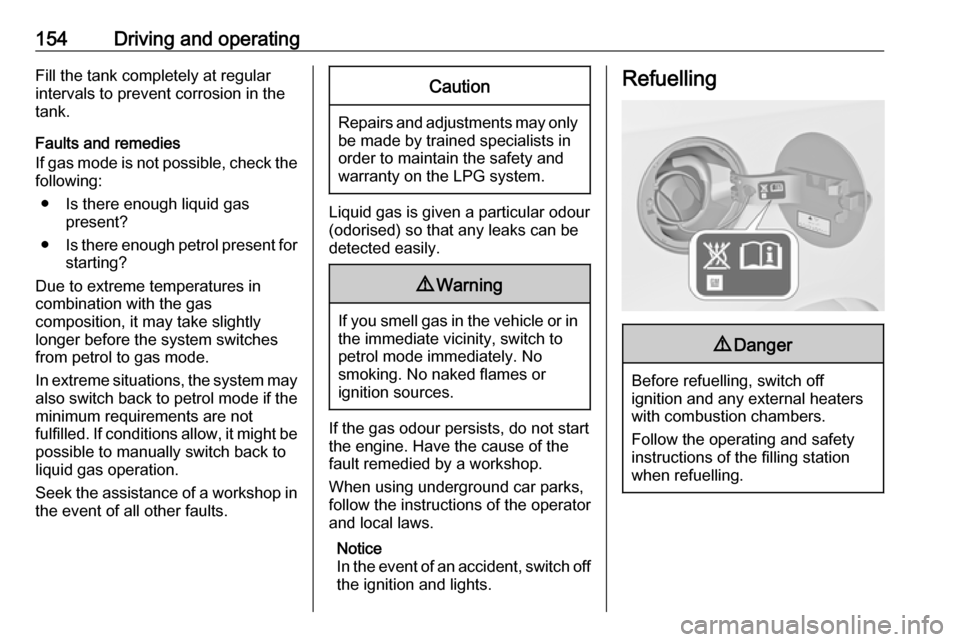
Refuelling9 Danger
Before refuelling, switch off
ignition and any external heaters
with combustion chambers.
Follow the operating and safety
instructions of the filling station
when refuelling.
Page 165 of 231

Vehicle care163Vehicle careGeneral Information...................164
Accessories and vehicle modifications .......................... 164
Vehicle storage ........................164
End-of-life vehicle recovery .....164
Vehicle checks ........................... 165
Performing work ......................165
Bonnet ..................................... 165
Engine oil ................................. 166
Engine coolant ......................... 167
Power steering fluid .................168
Washer fluid ............................ 168
Brakes ..................................... 169
Brake fluid ............................... 169
Vehicle battery ......................... 169
Diesel fuel system bleeding .....171
Wiper blade replacement ........171
Bulb replacement .......................172
Halogen headlights ..................172
Xenon headlights .....................174
Fog lights ................................. 175
Front turn signal lights .............175
Tail lights ................................. 176
Side turn signal lights ..............177Centre high-mounted brake
light ......................................... 177
Number plate light ...................178
Interior lights ............................ 178
Electrical system ........................179
Fuses ....................................... 179
Engine compartment fuse box . 179
Instrument panel fuse box .......181
Load compartment fuse box ....182
Vehicle tools .............................. 184
Tools ........................................ 184
Wheels and tyres .......................184
Winter tyres ............................. 184
Tyre designations ....................185
Tyre pressure .......................... 185
Tyre pressure monitoring system .................................... 186
Tread depth ............................. 189
Changing tyre and wheel size . 190 Wheel covers ........................... 190
Tyre chains .............................. 190
Tyre repair kit .......................... 191
Wheel changing .......................194
Spare wheel ............................ 196
Jump starting ............................. 198
Towing ....................................... 200
Towing the vehicle ...................200
Towing another vehicle ...........201Appearance care .......................202
Exterior care ............................ 202
Interior care ............................. 204
Page 167 of 231
Vehicle care165website, where legally required. Only
entrust this work to an authorised
recycling centre.
Gas vehicles must be recycled by a service centre authorised for gas
vehicles.Vehicle checks
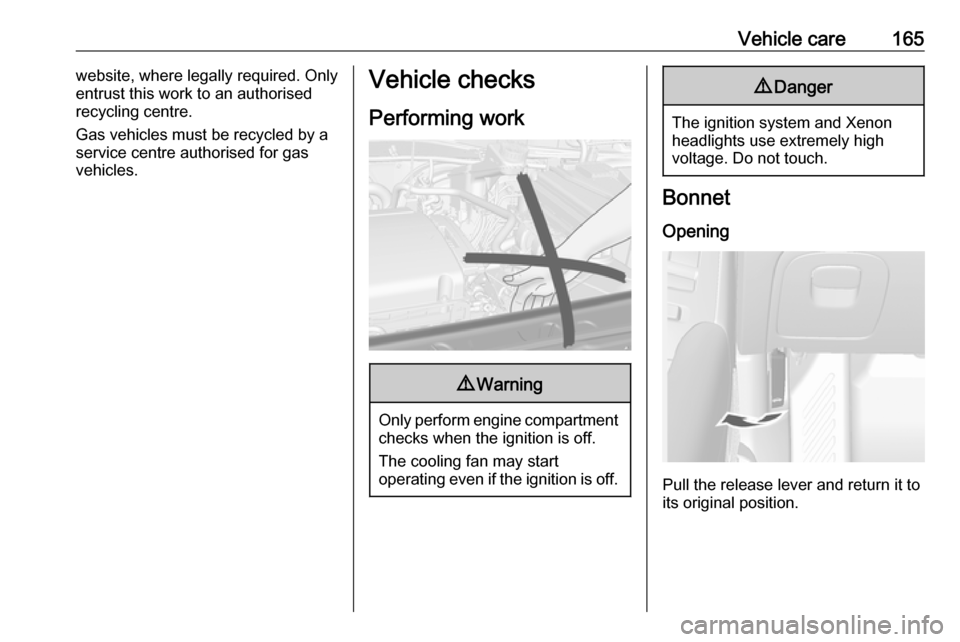
Performing work9 Warning
Only perform engine compartment
checks when the ignition is off.
The cooling fan may start
operating even if the ignition is off.
9 Danger
The ignition system and Xenon
headlights use extremely high
voltage. Do not touch.
Bonnet
Opening
Pull the release lever and return it to
its original position.
Page 168 of 231
166Vehicle care
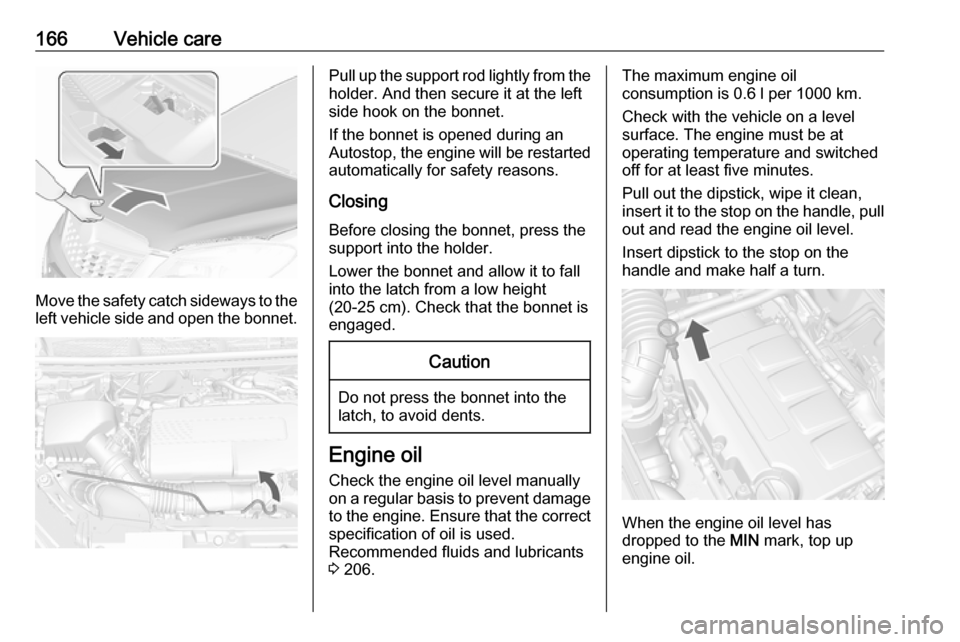
Move the safety catch sideways to theleft vehicle side and open the bonnet.
Pull up the support rod lightly from the
holder. And then secure it at the left
side hook on the bonnet.
If the bonnet is opened during an
Autostop, the engine will be restarted automatically for safety reasons.
Closing
Before closing the bonnet, press the
support into the holder.
Lower the bonnet and allow it to fall
into the latch from a low height
(20-25 cm). Check that the bonnet is
engaged.Caution
Do not press the bonnet into the
latch, to avoid dents.
Engine oil
Check the engine oil level manually
on a regular basis to prevent damage
to the engine. Ensure that the correct specification of oil is used.
Recommended fluids and lubricants
3 206.
The maximum engine oil
consumption is 0.6 l per 1000 km.
Check with the vehicle on a level
surface. The engine must be at
operating temperature and switched
off for at least five minutes.
Pull out the dipstick, wipe it clean, insert it to the stop on the handle, pull
out and read the engine oil level.
Insert dipstick to the stop on the
handle and make half a turn.
When the engine oil level has
dropped to the MIN mark, top up
engine oil.