phone VAUXHALL MOKKA X 2017 Infotainment system
[x] Cancel search | Manufacturer: VAUXHALL, Model Year: 2017, Model line: MOKKA X, Model: VAUXHALL MOKKA X 2017Pages: 155, PDF Size: 2.85 MB
Page 20 of 155
20Basic operationSelect H at the bottom of the screen
to reveal the interaction selector bar
and then select DONE to return to the
settings menu.
Deleting favourites
Scroll to the respective favourites
page.
Select the favourite you wish to
delete.
Select DELETE . The favourite and all
associated data are deleted.
Select DONE to return to the settings
menu.
Moving favourites
Scroll to the respective favourites page.
Drag the favourite you wish to move to its new position.
To store a favourite in a location
beyond the favourites page currently
visible, drag it to the p or q symbols
on top of the favourites page. The list
starts scrolling. To stop scrolling,
navigate back to the favourites page
area.Select DONE to confirm the action
and return to the settings menu.
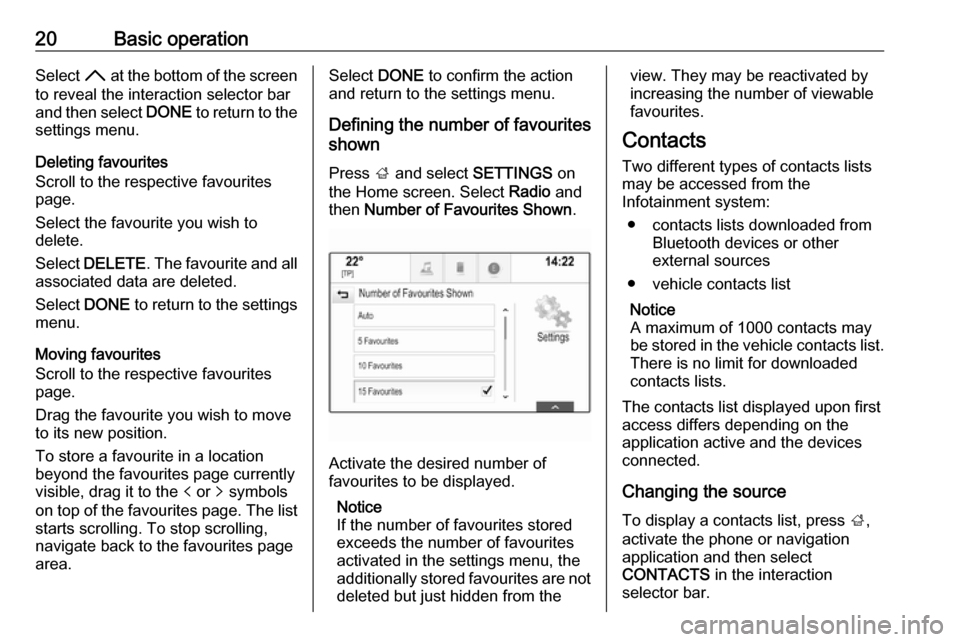
Defining the number of favourites
shown
Press ; and select SETTINGS on
the Home screen. Select Radio and
then Number of Favourites Shown .
Activate the desired number of
favourites to be displayed.
Notice
If the number of favourites stored
exceeds the number of favourites
activated in the settings menu, the
additionally stored favourites are not
deleted but just hidden from the
view. They may be reactivated by
increasing the number of viewable favourites.
Contacts Two different types of contacts lists
may be accessed from the
Infotainment system:
● contacts lists downloaded from Bluetooth devices or other
external sources
● vehicle contacts list
Notice
A maximum of 1000 contacts may
be stored in the vehicle contacts list.
There is no limit for downloaded
contacts lists.
The contacts list displayed upon first
access differs depending on the
application active and the devices
connected.
Changing the source To display a contacts list, press ;,
activate the phone or navigation
application and then select
CONTACTS in the interaction
selector bar.
Page 21 of 155
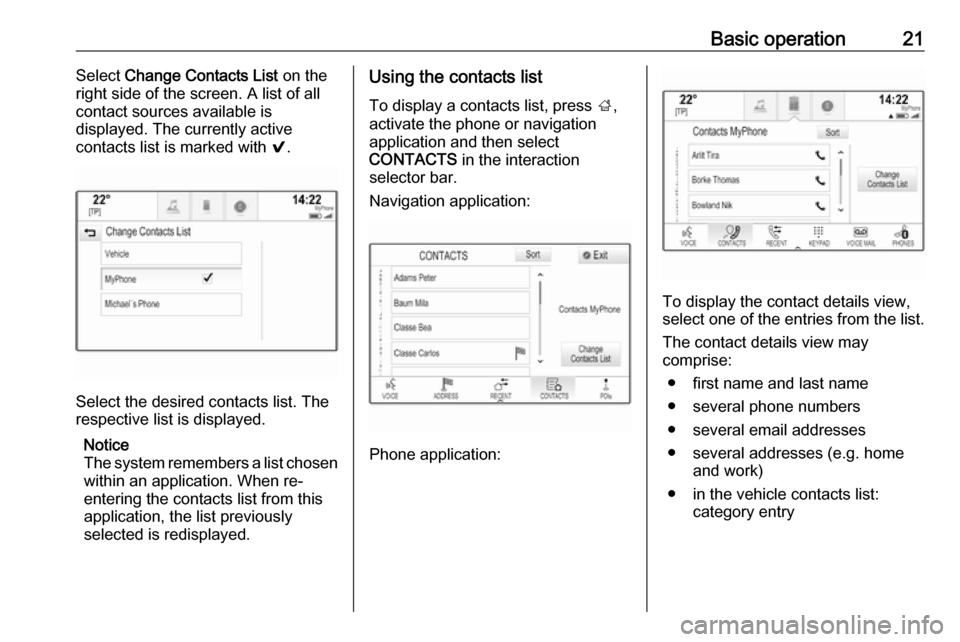
Basic operation21Select Change Contacts List on the
right side of the screen. A list of all contact sources available is
displayed. The currently active
contacts list is marked with 9.
Select the desired contacts list. The
respective list is displayed.
Notice
The system remembers a list chosen within an application. When re-
entering the contacts list from this
application, the list previously
selected is redisplayed.
Using the contacts list
To display a contacts list, press ;,
activate the phone or navigation
application and then select
CONTACTS in the interaction
selector bar.
Navigation application:
Phone application:
To display the contact details view,
select one of the entries from the list.
The contact details view may
comprise:
● first name and last name● several phone numbers
● several email addresses
● several addresses (e.g. home and work)
● in the vehicle contacts list: category entry
Page 22 of 155
22Basic operation● in the vehicle contacts list: notesfield
● for POI entries: information on business hours, menu (e.g.
restaurant), prices etc.
Notice
The data is ordered depending on
the application active, e.g. in the
phone application, the phone
numbers are displayed first.
Select the desired entry.
Adding new contacts
To add information from the
application menus to the vehicle
contacts list, open the respective
application.
Navigation application: Select or
enter a destination 3 47. The
destination details view is displayed.
Select Save. A menu is displayed.
Phone application: Select RECENT.
Select w beside the phone number
you wish to add to the contacts list. A menu is displayed.
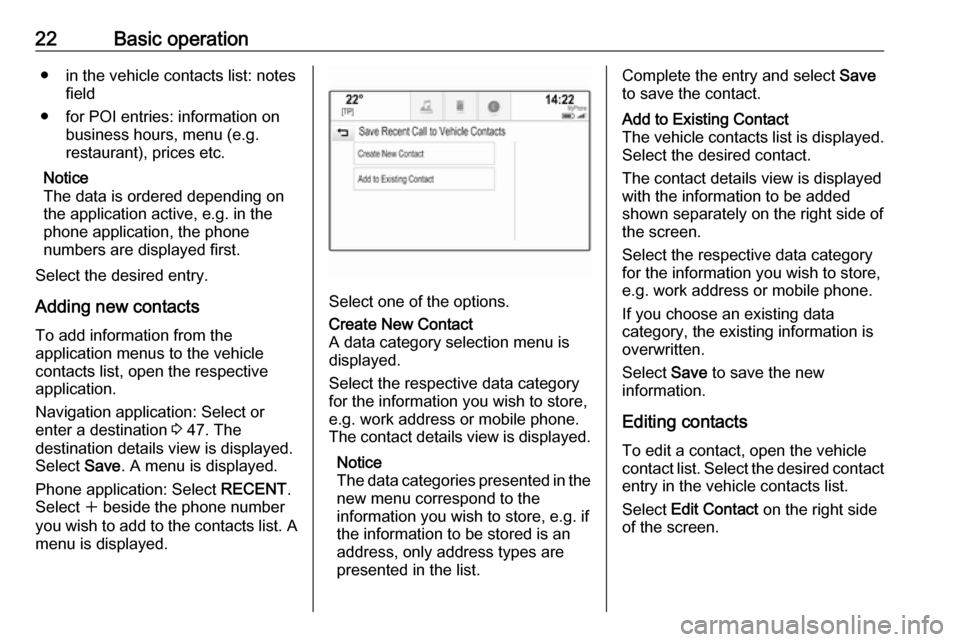
Select one of the options.
Create New Contact
A data category selection menu is displayed.
Select the respective data category
for the information you wish to store,
e.g. work address or mobile phone.
The contact details view is displayed.
Notice
The data categories presented in the new menu correspond to the
information you wish to store, e.g. if
the information to be stored is an
address, only address types are
presented in the list.Complete the entry and select Save
to save the contact.Add to Existing Contact
The vehicle contacts list is displayed. Select the desired contact.
The contact details view is displayed with the information to be added
shown separately on the right side of
the screen.
Select the respective data category
for the information you wish to store,
e.g. work address or mobile phone.
If you choose an existing data
category, the existing information is
overwritten.
Select Save to save the new
information.
Editing contacts
To edit a contact, open the vehicle
contact list. Select the desired contact
entry in the vehicle contacts list.
Select Edit Contact on the right side
of the screen.
Page 23 of 155
Basic operation23
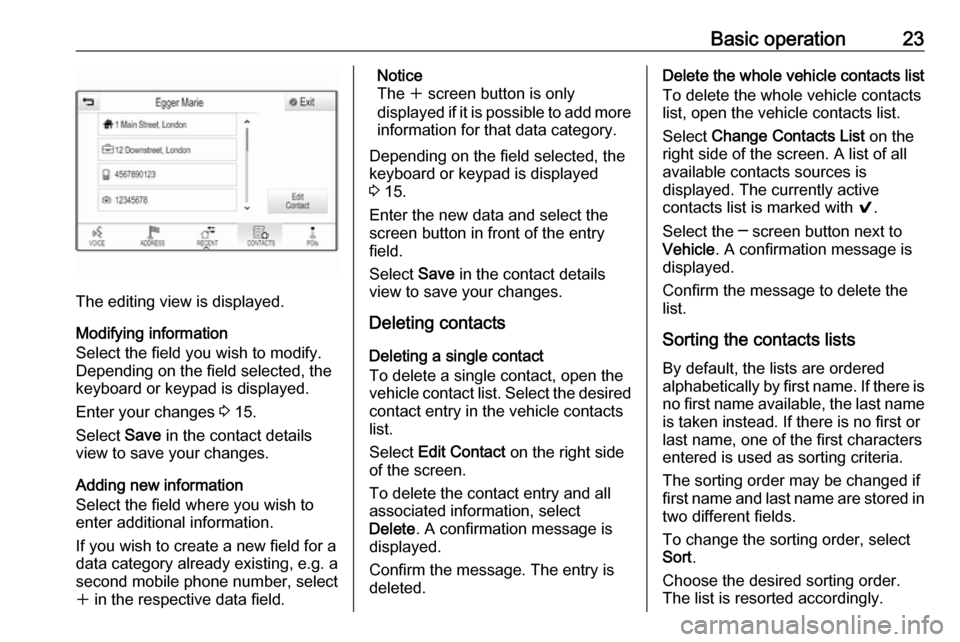
The editing view is displayed.
Modifying information
Select the field you wish to modify.
Depending on the field selected, the
keyboard or keypad is displayed.
Enter your changes 3 15.
Select Save in the contact details
view to save your changes.
Adding new information
Select the field where you wish to
enter additional information.
If you wish to create a new field for a
data category already existing, e.g. a
second mobile phone number, select
w in the respective data field.
Notice
The w screen button is only
displayed if it is possible to add more information for that data category.
Depending on the field selected, the
keyboard or keypad is displayed
3 15.
Enter the new data and select the
screen button in front of the entry
field.
Select Save in the contact details
view to save your changes.
Deleting contacts
Deleting a single contact
To delete a single contact, open the
vehicle contact list. Select the desired
contact entry in the vehicle contacts
list.
Select Edit Contact on the right side
of the screen.
To delete the contact entry and all
associated information, select
Delete . A confirmation message is
displayed.
Confirm the message. The entry is
deleted.Delete the whole vehicle contacts list
To delete the whole vehicle contacts
list, open the vehicle contacts list.
Select Change Contacts List on the
right side of the screen. A list of all
available contacts sources is
displayed. The currently active
contacts list is marked with 9.
Select the ─ screen button next to
Vehicle . A confirmation message is
displayed.
Confirm the message to delete the
list.
Sorting the contacts lists By default, the lists are ordered
alphabetically by first name. If there is
no first name available, the last name is taken instead. If there is no first or
last name, one of the first characters
entered is used as sorting criteria.
The sorting order may be changed if
first name and last name are stored in
two different fields.
To change the sorting order, select
Sort .
Choose the desired sorting order.
The list is resorted accordingly.
Page 27 of 155
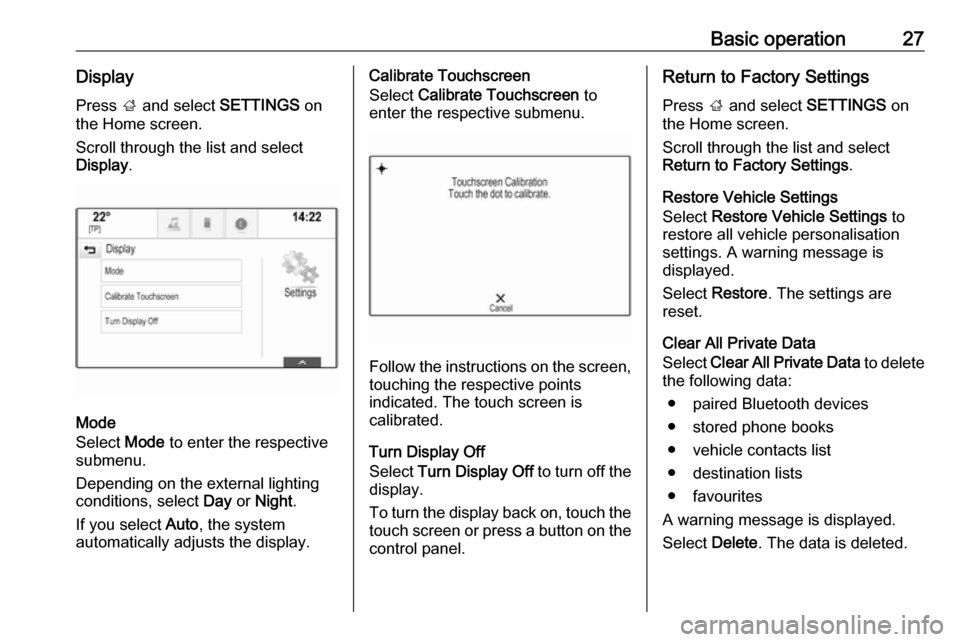
Basic operation27DisplayPress ; and select SETTINGS on
the Home screen.
Scroll through the list and select
Display .
Mode
Select Mode to enter the respective
submenu.
Depending on the external lighting
conditions, select Day or Night .
If you select Auto, the system
automatically adjusts the display.
Calibrate Touchscreen
Select Calibrate Touchscreen to
enter the respective submenu.
Follow the instructions on the screen,
touching the respective points
indicated. The touch screen is
calibrated.
Turn Display Off
Select Turn Display Off to turn off the
display.
To turn the display back on, touch the touch screen or press a button on the
control panel.
Return to Factory Settings
Press ; and select SETTINGS on
the Home screen.
Scroll through the list and select
Return to Factory Settings .
Restore Vehicle Settings
Select Restore Vehicle Settings to
restore all vehicle personalisation
settings. A warning message is
displayed.
Select Restore . The settings are
reset.
Clear All Private Data
Select Clear All Private Data to delete
the following data:
● paired Bluetooth devices● stored phone books
● vehicle contacts list
● destination lists
● favourites
A warning message is displayed.
Select Delete. The data is deleted.
Page 34 of 155
34External devicesExternal devicesGeneral information.....................34
Playing audio ............................... 35
Playing movies ............................. 36
Using smartphone applications ...37
Using apps ................................... 37General information
A USB socket for the connection of external devices is located in thecentre console.
Notice
The sockets must always be kept
clean and dry.
USB port
An MP3 player, USB device or
smartphone can be connected to the
USB port.
The Infotainment system can play
music files and movies contained in
these devices.
When connected to the USB port, the devices mentioned above can be
operated via the controls and menus
of the Infotainment system.
Notice
Not all auxiliary devices are
supported by the Infotainment
system. Check the compatibility list
on our website.
Connecting/disconnecting a device
Connect the USB device to the USB port.Notice
If a non-readable USB device is
connected, a corresponding error
message appears and the
Infotainment system automatically
switches to the previous function.
To disconnect the USB device, select
another function and then remove the USB storage device.Caution
Avoid disconnecting the device
during playback. This may
damage the device or the
Infotainment system.
Bluetooth
Devices which support the Bluetooth
music profiles A2DP and AVRCP can be connected wirelessly to the
Infotainment system.
The Infotainment system can play
music files contained in these
devices.
Connecting/disconnecting a device
For a detailed description on the
Bluetooth connection 3 65.
Page 37 of 155

External devices37Alternatively, move the slider on the
time bar.
Video menu
To display the video menu, select
MENU in the interaction selector bar.
Using smartphone applications
The phone projection applications
Apple CarPlay™ and Android™ Auto
display selected apps from your
smartphone on the Infotainment
screen and allow their operation
directly via the Infotainment controls.
Check with the device's manufacturer
if this function is compatible with your smartphone and if this application is
available in the country you are in.
Preparing the smartphone
Android phone: Download the
Android Auto app to your smartphone from the Google Play™ Store.
iPhone ®
: Make sure Siri ®
is activated
on your smartphone.Activating phone projection in the
settings menu
Press ; and then select SETTINGS
on the Home screen.
Scroll through the list and select
Apple CarPlay or Android Auto to
display a submenu.
Make sure the respective application
is activated.
To display a list of all devices
registered for this function, select
Manage Devices .
Connecting the mobile phone Connect the smartphone to the USBport 3 34.
Starting phone projection To start the phone projection function,
press ; and then select
PROJECTION .
Notice
If the application is recognised by
the Infotainment system, the
application icon may change to
Apple CarPlay or Android Auto .To start the function, you can
alternatively press and hold ; for a
few seconds.
The phone projection screen
displayed depends on your
smartphone and software version.
Returning to the Infotainment
screen
Press ;.
Using apps Via the SHOP application, external
apps can be downloaded to the
Infotainment system.
User registration
When first starting the SHOP, a user
registration is required.
Press ; and then select SHOP.
Follow the instructions on the screen: 1. Start the registration process.
2. Enter your first and last name.
3. Choose your country.
4. Accept the terms of use and privacy notice.
Page 38 of 155
38External devicesNotice
To read the terms of use and/or the
privacy notice, display the text on the
screen or send it to your email
account.
When the registration process is
completed, the app shop main page
is displayed.
Notice
The apps in the app shop can only
be downloaded if the Infotainment
system is connected to the internet.
Internet connection
An internet connection is required
either via the in-vehicle OnStar Wi-Fi
hotspot or an external device, e.g.
smartphone.
Press ; and then select SETTINGS.
Select Wi-Fi to display the Wi-Fi
menu.
Make sure that Wi-Fi is activated.
Select Manage Wi-Fi Networks to
display a submenu for internet
connections. Select Add Other
Network to establish a new
connection. Follow the instructions on the screen.Downloading an app
Before the external apps can be used
on the Infotainment system, they
have to be downloaded.
Press ; and then select SHOP.
Choose the browse tab to gain
access to all apps available for
download. Select the desired app to
display its main page and then start
the download process.
Notice
Apps which have been downloaded
to the Infotainment system are also
accessible via the home screen.
Starting an app
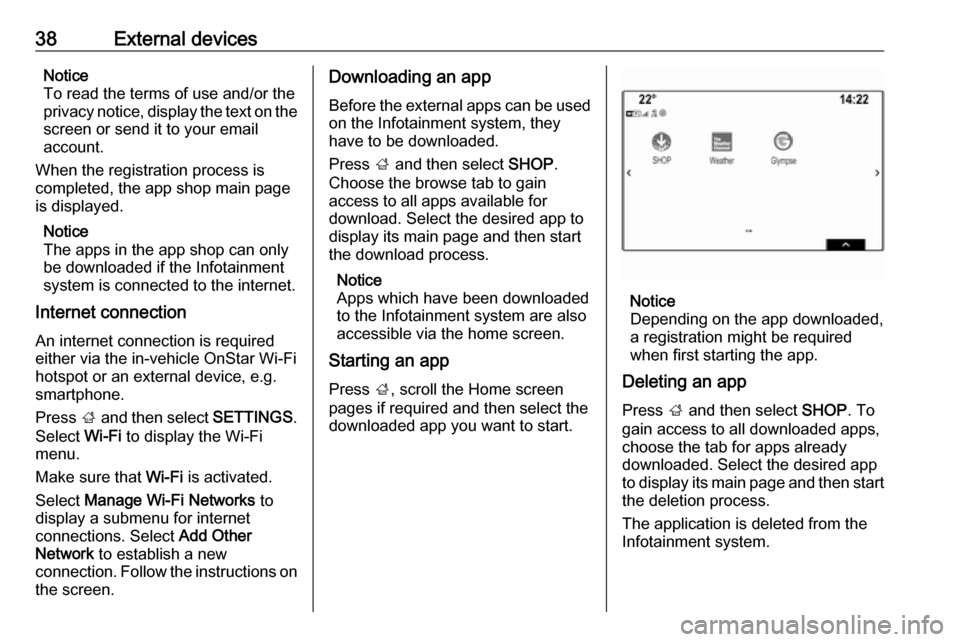
Press ;, scroll the Home screen
pages if required and then select the
downloaded app you want to start.
Notice
Depending on the app downloaded,
a registration might be required
when first starting the app.
Deleting an app
Press ; and then select SHOP. To
gain access to all downloaded apps,
choose the tab for apps already
downloaded. Select the desired app
to display its main page and then start
the deletion process.
The application is deleted from the
Infotainment system.
Page 46 of 155
46Navigationuser defined POIs can be
downloaded to the Infotainment
system.
For each POI, you need to define the GPS coordinates (longitude and
latitude values) of the respective
location and a descriptive name.
After downloading the POI data to the Infotainment system, you will find the
respective POIs as selectable
destinations in the My POIs menu,
see "POIs entry" in chapter
"Destination input" 3 47.
Creating a text file with POI data
Create a text file (e.g. by using a
simple text editor software) with an arbitrary name and the file
extension .poi, e.g. "TomsPOIs.poi".
Notice
Character encoding UTF-8
(Unicode) needs to be selected
when storing the text file. Otherwise
the POI data may not be imported
correctly to the system.
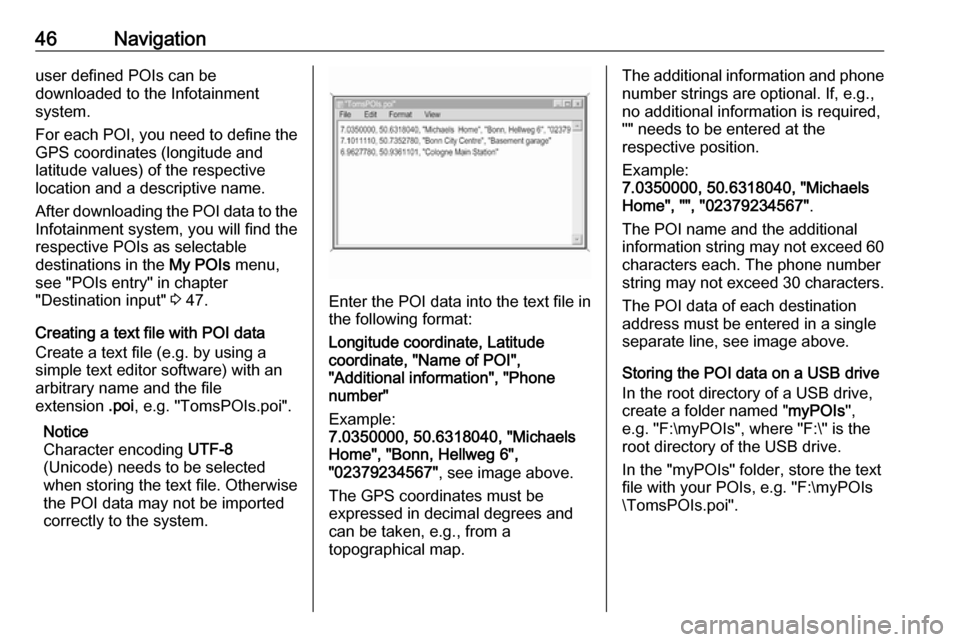
Enter the POI data into the text file in the following format:
Longitude coordinate, Latitude
coordinate, "Name of POI",
"Additional information", "Phone
number"
Example:
7.0350000, 50.6318040, "Michaels
Home", "Bonn, Hellweg 6",
"02379234567" , see image above.
The GPS coordinates must be
expressed in decimal degrees and
can be taken, e.g., from a
topographical map.
The additional information and phone
number strings are optional. If, e.g., no additional information is required,
"" needs to be entered at the
respective position.
Example:
7.0350000, 50.6318040, "Michaels
Home", "", "02379234567" .
The POI name and the additional
information string may not exceed 60 characters each. The phone number
string may not exceed 30 characters.
The POI data of each destination
address must be entered in a single
separate line, see image above.
Storing the POI data on a USB drive
In the root directory of a USB drive,
create a folder named " myPOIs",
e.g. "F:\myPOIs", where "F:\" is the
root directory of the USB drive.
In the "myPOIs" folder, store the text
file with your POIs, e.g. "F:\myPOIs
\TomsPOIs.poi".
Page 53 of 155
Navigation53New destinationTo set a new destination, you may
cancel route guidance to the current
destination and then enter a new
destination. Or you may directly enter
a new destination.
While under active route guidance,
select DESTINATION in the
interaction selector bar of the map
view.
Alternatively, touch the arrow symbol
indicating your next turning
manoeuvre on the right side of the
screen to display the route guidance
menu. Select DESTINATION in the
interaction selector bar of the route
guidance menu.
Enter or select a new address.
Select Go. You are prompted with a
message.
Select Set New Destination . The
route is recalculated and the new
destination is set.
Calling a destination
After entering a destination and
before starting route guidance, the
destination details view is displayed.To initiate a phone call to the selected location, select Call.
Notice
The Call screen button is only
available if a phone number is stored
for the respective location.
Storing destinations
Contacts entry
After entering a destination and
before starting route guidance, the
destination details view is displayed.
To save the respective destination in
the contacts list, select Save. For a
detailed description on how to save
an address in the contacts list 3 20.
Notice
The Save screen button is only
available if the address has not yet been stored in the system.
Favourite
Favourites may be stored from almost
all screen views.
For a detailed description on how to store destination favourites 3 16.Guidance
Route guidance is provided by the
navigation system through visual
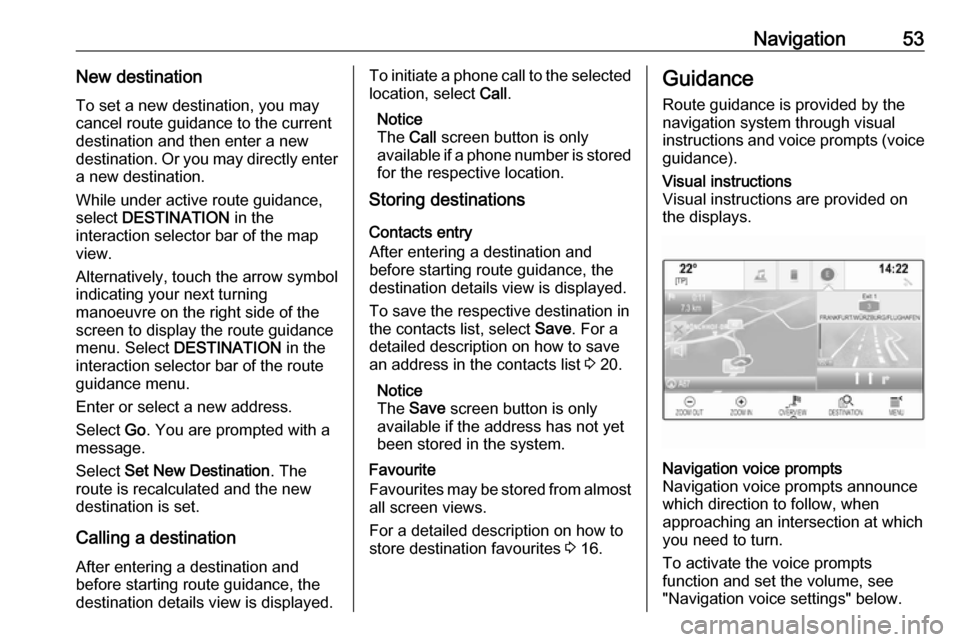
instructions and voice prompts (voice guidance).Visual instructions
Visual instructions are provided on
the displays.Navigation voice prompts
Navigation voice prompts announce
which direction to follow, when
approaching an intersection at which
you need to turn.
To activate the voice prompts
function and set the volume, see
"Navigation voice settings" below.