ESP VAUXHALL MOKKA X 2017 Infotainment system
[x] Cancel search | Manufacturer: VAUXHALL, Model Year: 2017, Model line: MOKKA X, Model: VAUXHALL MOKKA X 2017Pages: 155, PDF Size: 2.85 MB
Page 103 of 155

Radio103Scroll through the list and select DAB
Announcements to display a list of the
categories available.
Activate all or just the desired
announcement categories. Different
announcement categories can be
selected at the same time.
DAB-DAB Linking If this function is activated, the device
switches over to the same service
(programme) on another DAB
ensemble (if available) when the DAB
signal is too weak to be picked up bythe receiver.
Select Menu in the bottom line of the
DAB radio main menu to open the corresponding waveband-specific
submenu.
Scroll through the list and activate or
deactivate DAB-DAB Linking .
DAB-FM Linking If this function is activated, the device
switches over to a corresponding FM
station of the active DAB service (if
available) when the DAB signal is too
weak to be picked up by the receiver.Scroll through the list and activate or
deactivate DAB-FM Linking .
L Band With this function, you may define
which DAB wavebands are to be
received by the Infotainment system.
L Band (earth and satellite radio) is
another radio band that can be
received additionally.
Select Menu in the bottom line of the
DAB radio main menu to open the
corresponding waveband-specific
submenu.
Scroll through the list and activate or
deactivate L Band.
Intellitext The Intellitext function allows the
reception of additional information
such as financial information, sports,
news etc.
Notice
The content available depends on
the station and region.Select Menu in the bottom line of the
DAB radio main menu to open the
corresponding waveband-specific
submenu.
Scroll through the list and select
Intellitext .
Select one of the categories and choose a specific item to display
detailed information.
EPG The Electronic Programme Guide
provides information on the current and upcoming programme of therespective DAB station.
Select Menu in the bottom line of the
DAB radio main menu and then select Station List .
To display the programme of the
desired station, touch the icon next to
the station.
Page 104 of 155

104External devicesExternal devicesGeneral information...................104
Playing audio ............................. 106
Displaying pictures ..................... 107
Playing movies ........................... 108
Using smartphone applications . 109General information
A USB socket for the connection of external devices is located in thecentre console.
Notice
The sockets must always be kept
clean and dry.
USB port
An MP3 player, USB drive, SD card
(via USB connector/adapter) or
smartphone can be connected to the
USB port.
Up to two USB devices can be
connected to the Infotainment system at a time.
Notice
For the connection of two USB
devices, an external USB hub is
required.
The Infotainment system can play audio files, show picture files or play
movie files contained in USB storage
devices.When connected to the USB port,
various functions of the devices
mentioned above can be operated via
the controls and menus of the
Infotainment system.
Notice
Not all auxiliary devices are
supported by the Infotainment
system. Check the compatibility list
on our website.
Connecting/disconnecting a device
Connect one of the devices
mentioned above to the USB port. If
required, use the appropriate
connection cable. The music function starts automatically.
Notice
If a non-readable USB device is
connected, a corresponding error
message appears and the
Infotainment system automatically
switches to the previous function.
To disconnect the USB device, select
another function and then remove the USB storage device.
Page 106 of 155
106External devicesThe maximum resolution is 1280 x
720 pixels. The frame rate must be
less than 30 fps.
The usable codec is H.264/MPEG-4
AVC.
The playable audio formats are MP3,
AC3, AAC and WMA.
The displayable subtitle format is
SMI.
Playing audio Activating the music function
If the device is not yet connected to
the Infotainment system, connect the
device 3 104.
Usually, the respective audio main
menu is displayed automatically.
If playback is not started
automatically, e.g. if USB Auto
Launch is deactivated 3 104 , take the
following steps:
Press ; and then select AUDIO to
open the audio main menu last selected.Select Source in the interaction
selector bar and then select the
desired audio source to open the respective audio main menu.
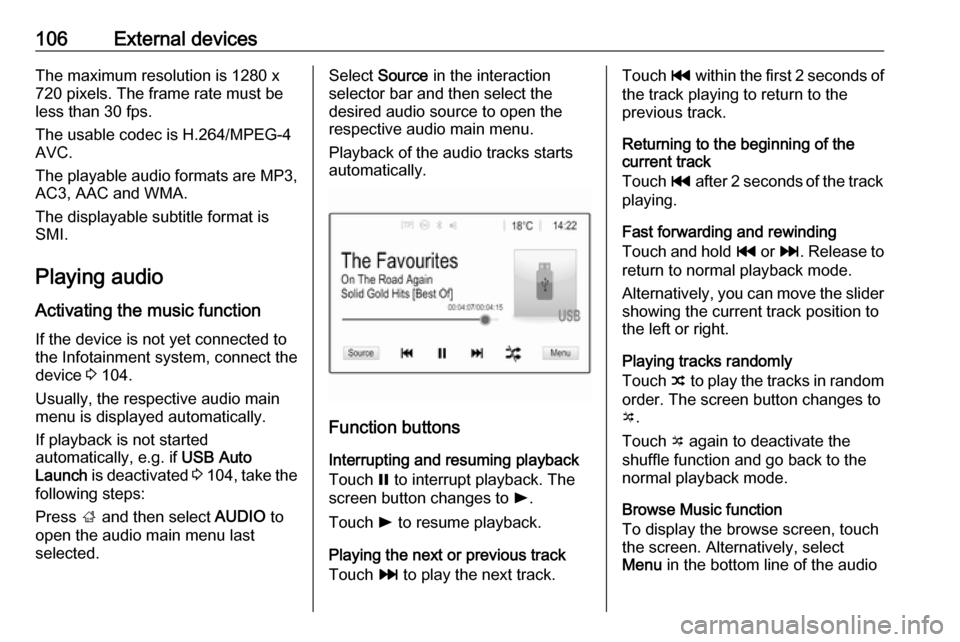
Playback of the audio tracks starts
automatically.
Function buttons
Interrupting and resuming playback
Touch = to interrupt playback. The
screen button changes to l.
Touch l to resume playback.
Playing the next or previous track
Touch v to play the next track.
Touch t within the first 2 seconds of
the track playing to return to the
previous track.
Returning to the beginning of the
current track
Touch t after 2 seconds of the track
playing.
Fast forwarding and rewinding
Touch and hold t or v. Release to
return to normal playback mode.
Alternatively, you can move the slider
showing the current track position to
the left or right.
Playing tracks randomly
Touch n to play the tracks in random
order. The screen button changes to
o .
Touch o again to deactivate the
shuffle function and go back to the normal playback mode.
Browse Music function
To display the browse screen, touch
the screen. Alternatively, select
Menu in the bottom line of the audio
Page 107 of 155
External devices107main screen to display the respective
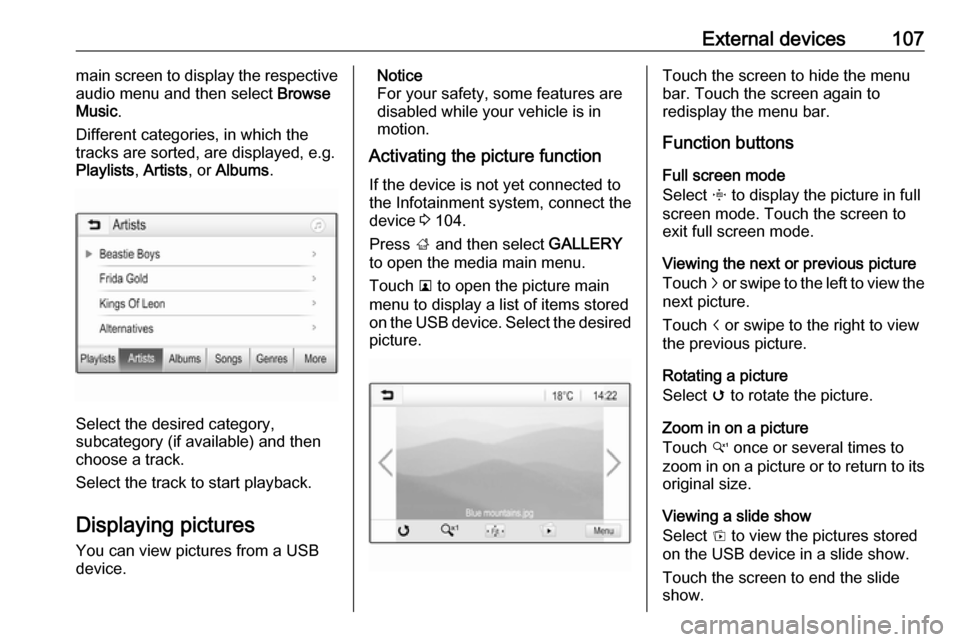
audio menu and then select Browse
Music .
Different categories, in which the tracks are sorted, are displayed, e.g.
Playlists , Artists , or Albums .
Select the desired category,
subcategory (if available) and then
choose a track.
Select the track to start playback.
Displaying pictures
You can view pictures from a USB
device.
Notice
For your safety, some features are
disabled while your vehicle is in
motion.
Activating the picture function
If the device is not yet connected to
the Infotainment system, connect the
device 3 104.
Press ; and then select GALLERY
to open the media main menu.
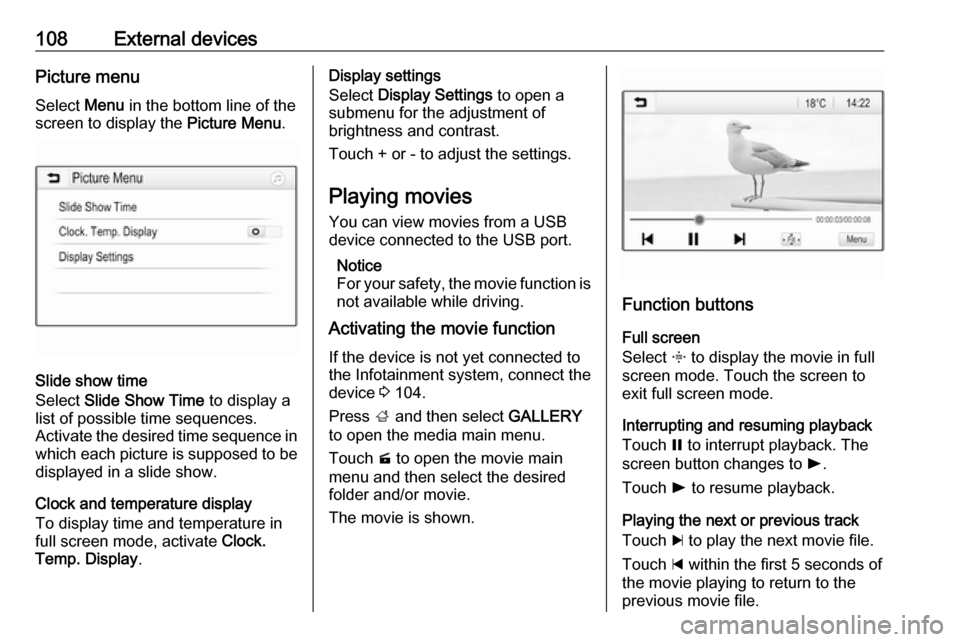
Touch l to open the picture main
menu to display a list of items stored
on the USB device. Select the desired
picture.Touch the screen to hide the menu
bar. Touch the screen again to
redisplay the menu bar.
Function buttons
Full screen mode
Select x to display the picture in full
screen mode. Touch the screen to
exit full screen mode.
Viewing the next or previous picture
Touch j or swipe to the left to view the
next picture.
Touch i or swipe to the right to view
the previous picture.
Rotating a picture
Select v to rotate the picture.
Zoom in on a picture
Touch w once or several times to
zoom in on a picture or to return to its
original size.
Viewing a slide show
Select t to view the pictures stored
on the USB device in a slide show.
Touch the screen to end the slide
show.
Page 108 of 155
108External devicesPicture menuSelect Menu in the bottom line of the
screen to display the Picture Menu.
Slide show time
Select Slide Show Time to display a
list of possible time sequences.
Activate the desired time sequence in which each picture is supposed to be
displayed in a slide show.
Clock and temperature display
To display time and temperature in
full screen mode, activate Clock.
Temp. Display .
Display settings
Select Display Settings to open a
submenu for the adjustment of
brightness and contrast.
Touch + or - to adjust the settings.
Playing movies
You can view movies from a USB device connected to the USB port.
Notice
For your safety, the movie function is
not available while driving.
Activating the movie function
If the device is not yet connected to
the Infotainment system, connect the
device 3 104.
Press ; and then select GALLERY
to open the media main menu.
Touch m to open the movie main
menu and then select the desired
folder and/or movie.
The movie is shown.
Function buttons
Full screen
Select x to display the movie in full
screen mode. Touch the screen to
exit full screen mode.
Interrupting and resuming playback
Touch = to interrupt playback. The
screen button changes to l.
Touch l to resume playback.
Playing the next or previous track
Touch c to play the next movie file.
Touch d within the first 5 seconds of
the movie playing to return to the
previous movie file.
Page 109 of 155
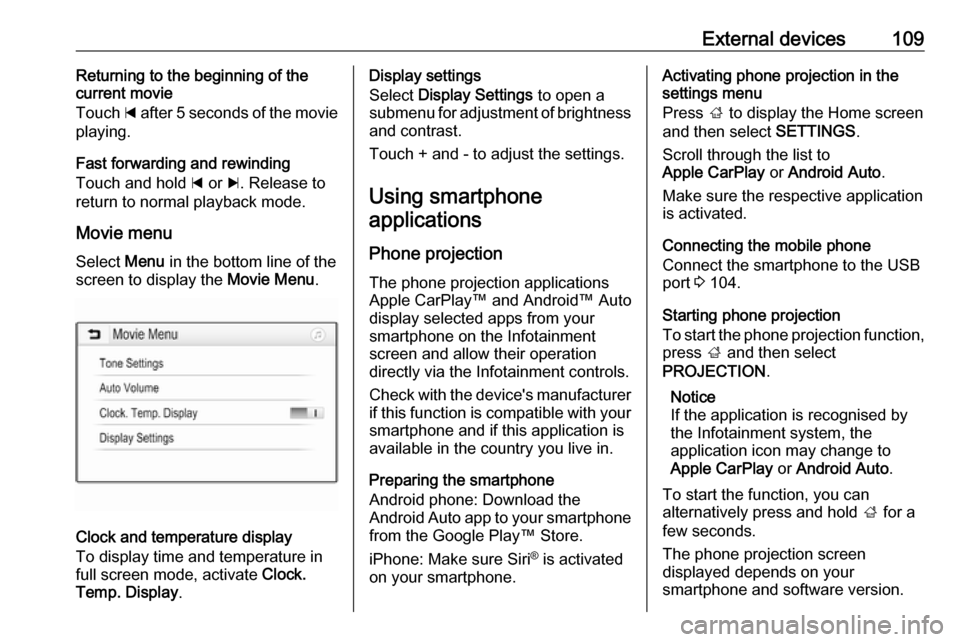
External devices109Returning to the beginning of the
current movie
Touch d after 5 seconds of the movie
playing.
Fast forwarding and rewinding
Touch and hold d or c. Release to
return to normal playback mode.
Movie menuSelect Menu in the bottom line of the
screen to display the Movie Menu.
Clock and temperature display
To display time and temperature in
full screen mode, activate Clock.
Temp. Display .
Display settings
Select Display Settings to open a
submenu for adjustment of brightness and contrast.
Touch + and - to adjust the settings.
Using smartphone applications
Phone projection
The phone projection applications
Apple CarPlay™ and Android™ Auto display selected apps from your
smartphone on the Infotainment
screen and allow their operation
directly via the Infotainment controls.
Check with the device's manufacturer if this function is compatible with your
smartphone and if this application is
available in the country you live in.
Preparing the smartphone
Android phone: Download the
Android Auto app to your smartphone
from the Google Play™ Store.
iPhone: Make sure Siri ®
is activated
on your smartphone.Activating phone projection in the
settings menu
Press ; to display the Home screen
and then select SETTINGS.
Scroll through the list to
Apple CarPlay or Android Auto .
Make sure the respective application is activated.
Connecting the mobile phone
Connect the smartphone to the USB
port 3 104.
Starting phone projection
To start the phone projection function,
press ; and then select
PROJECTION .
Notice
If the application is recognised by the Infotainment system, the
application icon may change to
Apple CarPlay or Android Auto .
To start the function, you can
alternatively press and hold ; for a
few seconds.
The phone projection screen
displayed depends on your
smartphone and software version.
Page 110 of 155

110External devicesReturning to the Infotainment screen
Press ;.
BringGo
BringGo is a navigation app providing location search, map display and
route guidance.
Downloading the app
Before BringGo can be operated
using the controls and menus of the
Infotainment system, the respective
application must be installed on the
smartphone.
Download the app from App Store ®
or
Google Play Store.
Activating phone projection in the
settings menu
Press ; to display the Home screen
and then select SETTINGS.
Scroll through the list to BringGo.
Make sure the application is
activated.
Connecting the mobile phone
Connect the smartphone to the USB port 3 104.Starting BringGo
To start the app, press ; and then
select the navigation icon.
The main menu of the application is
shown on the display of the
Infotainment system.
For further information on how to
operate the app, see the instructions
on the manufacturer's website.
Page 113 of 155
Phone113interference is caused by the
mobile phone or if dangerous
situations can occur.
Bluetooth
The Phone portal is certified by the
Bluetooth Special Interest Group
(SIG).
You can find further information about the specification on the internet at
http://www.bluetooth.com
Bluetooth connection Bluetooth is a radio standard for the
wireless connection of e.g. mobile
phones, smartphones or other
devices.
The pairing (PIN code exchange
between Bluetooth device and
Infotainment system) and connecting
of the Bluetooth devices to the
Infotainment system are carried out
via the Bluetooth menu.
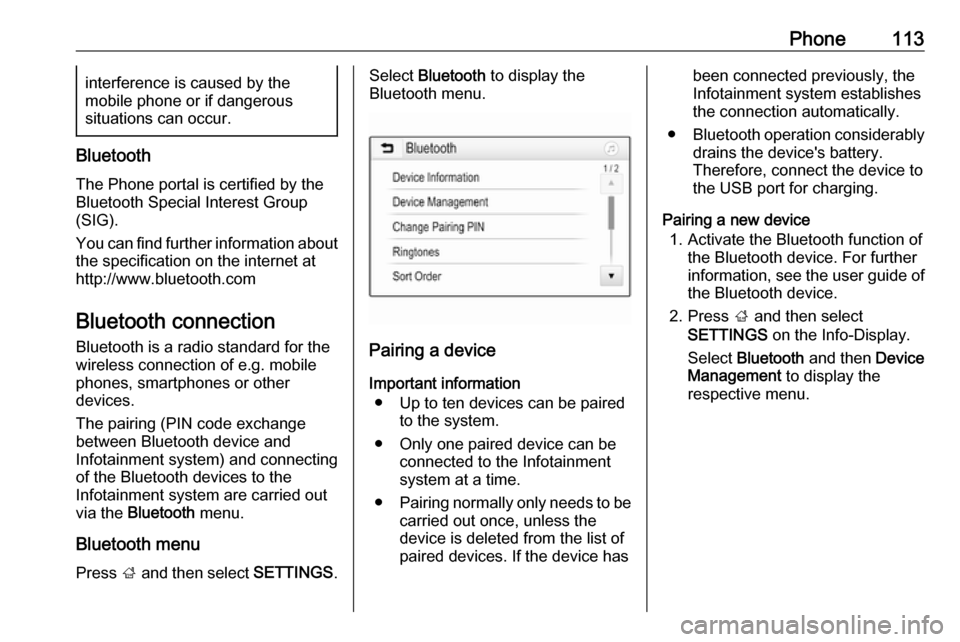
Bluetooth menu Press ; and then select SETTINGS.
Select Bluetooth to display the
Bluetooth menu.
Pairing a device
Important information ● Up to ten devices can be paired to the system.
● Only one paired device can be connected to the Infotainment
system at a time.
● Pairing normally only needs to be
carried out once, unless the
device is deleted from the list of
paired devices. If the device has
been connected previously, the
Infotainment system establishes
the connection automatically.
● Bluetooth operation considerably
drains the device's battery.
Therefore, connect the device to
the USB port for charging.
Pairing a new device 1. Activate the Bluetooth function of the Bluetooth device. For furtherinformation, see the user guide of
the Bluetooth device.
2. Press ; and then select
SETTINGS on the Info-Display.
Select Bluetooth and then Device
Management to display the
respective menu.
Page 114 of 155
114Phone
Notice
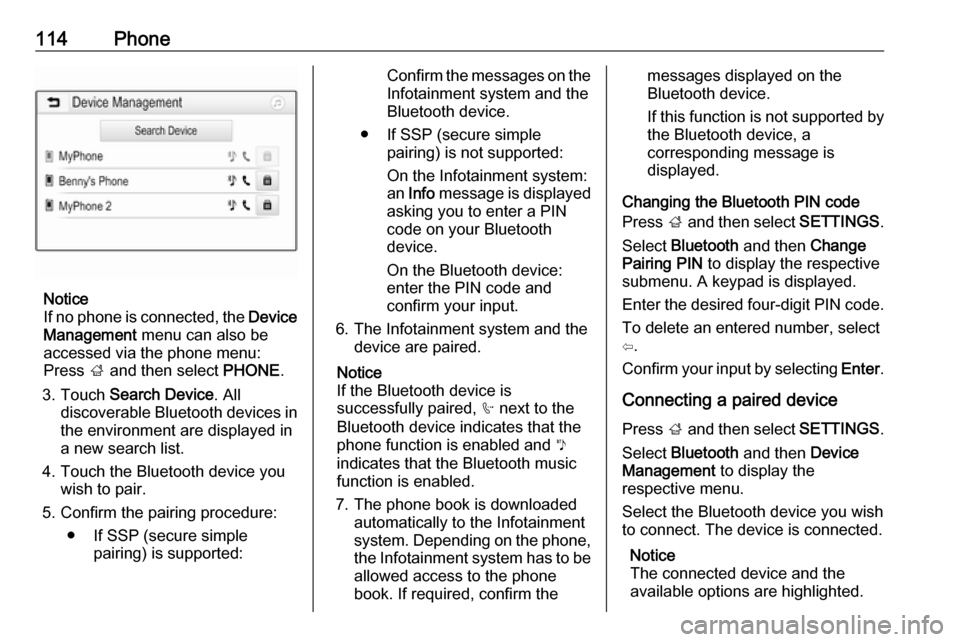
If no phone is connected, the Device
Management menu can also be
accessed via the phone menu:
Press ; and then select PHONE.
3. Touch Search Device . All
discoverable Bluetooth devices in
the environment are displayed in a new search list.
4. Touch the Bluetooth device you wish to pair.
5. Confirm the pairing procedure: ● If SSP (secure simple pairing) is supported:
Confirm the messages on the
Infotainment system and the
Bluetooth device.
● If SSP (secure simple pairing) is not supported:
On the Infotainment system: an Info message is displayed
asking you to enter a PIN
code on your Bluetooth
device.
On the Bluetooth device: enter the PIN code and
confirm your input.
6. The Infotainment system and the device are paired.
Notice
If the Bluetooth device is
successfully paired, h next to the
Bluetooth device indicates that the
phone function is enabled and y
indicates that the Bluetooth music
function is enabled.
7. The phone book is downloaded automatically to the Infotainment
system. Depending on the phone, the Infotainment system has to be
allowed access to the phone
book. If required, confirm themessages displayed on the
Bluetooth device.
If this function is not supported by
the Bluetooth device, a
corresponding message is
displayed.
Changing the Bluetooth PIN code
Press ; and then select SETTINGS.
Select Bluetooth and then Change
Pairing PIN to display the respective
submenu. A keypad is displayed.
Enter the desired four-digit PIN code. To delete an entered number, select
⇦.
Confirm your input by selecting Enter.
Connecting a paired device Press ; and then select SETTINGS.
Select Bluetooth and then Device
Management to display the
respective menu.
Select the Bluetooth device you wish to connect. The device is connected.
Notice
The connected device and the
available options are highlighted.
Page 115 of 155
Phone115Disconnecting a devicePress ; and then select SETTINGS.
Select Bluetooth and then Device
Management to display the
respective menu.
Select the Bluetooth device currently
connected. You are prompted with a message.
Select Yes to disconnect the device.
Deleting a device Press ; and then select SETTINGS.
Select Bluetooth and then Device
Management to display the
respective menu.
Select DEL next to the Bluetooth
device. You are prompted with a
message.
Select Yes to delete the device.
Device info Press ; and then select SETTINGS.
Select Bluetooth and then Device
Information to display the respective
menu.The information displayed includes
Device Name , Address , and PIN
Code .
Emergency call9 Warning
Connection setup cannot be
guaranteed in all situations.For this reason you should not rely
exclusively on a mobile phone
when a vitally important
communication (e.g. a medical
emergency) is concerned.
In some networks it may be
necessary for a valid SIM card to
be properly inserted in the mobile
phone.
9 Warning
Bear in mind that you can make
and receive calls with the mobile
phone, if it is in a service area with
a sufficiently strong signal. Under
certain circumstances emergency
calls cannot be made on all mobile
phone networks; it is possible that
they cannot be made when certain network services and/or telephone
functions are active. You can
enquire about this with the local
network operators.
The emergency call number can
differ depending on the region and country. Please enquire
beforehand about the correct
emergency call number for the
relevant region.
Making an emergency call
Dial the emergency call number (e.g.
112 ).
The telephone connection to the
emergency call centre is set up.
Answer when the service personnel
questions you about the emergency.
9 Warning
Do not end the call until you are
requested to do so by the
emergency call centre.