USE PORT VAUXHALL MOKKA X 2017 Owner's Manual
[x] Cancel search | Manufacturer: VAUXHALL, Model Year: 2017, Model line: MOKKA X, Model: VAUXHALL MOKKA X 2017Pages: 245, PDF Size: 6.77 MB
Page 5 of 245

Introduction3Vehicle specific dataPlease enter your vehicle's data on
the previous page to keep it easily
accessible. This information is
available in the sections "Service and
maintenance" and "Technical data"
as well as on the identification plate.
Introduction
Your vehicle is a designed
combination of advanced technology, safety, environmental friendliness
and economy.
This Owner's Manual provides you
with all the necessary information to
enable you to drive your vehicle
safely and efficiently.
Make sure your passengers are
aware of the possible risk of accident
and injury which may result from
improper use of the vehicle.
You must always comply with the
specific laws and regulations of the
country that you are in. These laws
may differ from the information in this Owner's Manual.
Disregarding the description given in
this manual may affect your warranty.When this Owner's Manual refers to a
workshop visit, we recommend your
Vauxhall Authorised Repairer. For
gas vehicles, we recommend a
Vauxhall Authorised Repairer
licensed to service gas vehicles.
All Vauxhall Authorised Repairers
provide first-class service at
reasonable prices. Experienced
mechanics trained by Vauxhall work according to specific Vauxhall
instructions.
The customer literature pack should
always be kept ready to hand in the
vehicle.
Using this manual ● This manual describes all options
and features available for this
model. Certain descriptions,
including those for display and
menu functions, may not apply to
your vehicle due to model
variant, country specifications,
special equipment or
accessories.
● The "In brief" section will give you
an initial overview.● The table of contents at the beginning of this manual and
within each section shows where the information is located.
● The index will enable you to search for specific information.
● This Owner's Manual depicts left-
hand drive vehicles. Operation is similar for right-hand drive
vehicles.
● The Owner's Manual uses the engine identifier code. The
corresponding sales designation
and engineering code can be
found in the section "Technical
data".
● Directional data, e.g. left or right, or front or back, always relate to
the direction of travel.
● Displays may not support your specific language.
● Display messages and interior labelling are written in bold
letters.
Page 13 of 245

In brief111Central locking system ..........23
2 Power windows .....................34
3 Exterior mirrors .....................31
4 Light switch ......................... 114
5 Cruise control ...................... 151
Speed limiter ....................... 153
Forward collision alert .........154
6 Side air vents ...................... 130
7 Turn and lane-change
signals ................................. 121
Headlight flash ....................116
Low beam and high beam ..115
Buttons for Driver
Information Centre ................96
8 Instruments ........................... 83
9 Steering wheel controls .......76
10 Windscreen wiper,
windscreen washer system ...77
Rear window wiper, rear
window washer system .........79
11 Centre air vents ................... 130
12 Anti-theft alarm system
status LED ........................... 2913Info-Display ........................ 100
14 Controls for Info-Display
operation ............................. 100
15 Glovebox .............................. 58
16 Descent control system ......... 93
Fuel selector ......................... 85
Stop-start system ................137
17 Climate control system ........ 125
18 Electronic Stability Control
(ESC) .................................. 149
19 Control indicator for airbag
deactivation .......................... 92
20 Front storage ......................... 59
Power outlet .......................... 82
USB port, AUX input
21 Selector lever, manual
transmission ....................... 145
Selector lever, automatic
transmission ....................... 142
22 Parking brake ......................147
23 Hazard warning flashers ....120
24 Parking assist ..................... 157
Lane departure warning ......16425Ignition switch with
steering wheel lock ............134
Power button ....................... 134
26 Horn ..................................... 77
Driver airbag ........................ 49
27 Steering wheel adjustment ..76
28 Bonnet release lever ..........178
29 Front storage ......................... 59
Fuse box ............................ 191
Page 30 of 245
28Keys, doors and windowsThe setting can be saved for the
electronic key being used 3 23.
Child locks9 Warning
Use the child locks whenever
children are occupying the rear
seats.
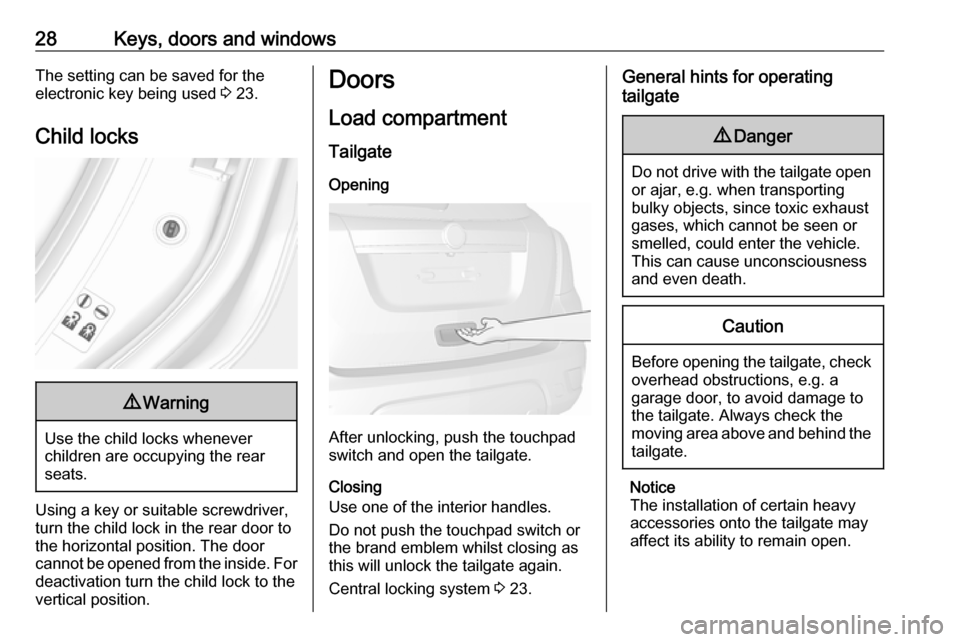
Using a key or suitable screwdriver,
turn the child lock in the rear door to
the horizontal position. The door
cannot be opened from the inside. For
deactivation turn the child lock to the
vertical position.
Doors
Load compartment Tailgate
Opening
After unlocking, push the touchpad
switch and open the tailgate.
Closing
Use one of the interior handles.
Do not push the touchpad switch or
the brand emblem whilst closing as
this will unlock the tailgate again.
Central locking system 3 23.
General hints for operating
tailgate9 Danger
Do not drive with the tailgate open
or ajar, e.g. when transporting
bulky objects, since toxic exhaust
gases, which cannot be seen or
smelled, could enter the vehicle.
This can cause unconsciousness
and even death.
Caution
Before opening the tailgate, check overhead obstructions, e.g. a
garage door, to avoid damage to
the tailgate. Always check the
moving area above and behind the
tailgate.
Notice
The installation of certain heavy
accessories onto the tailgate may
affect its ability to remain open.
Page 44 of 245
42Seats, restraintsLumbar support
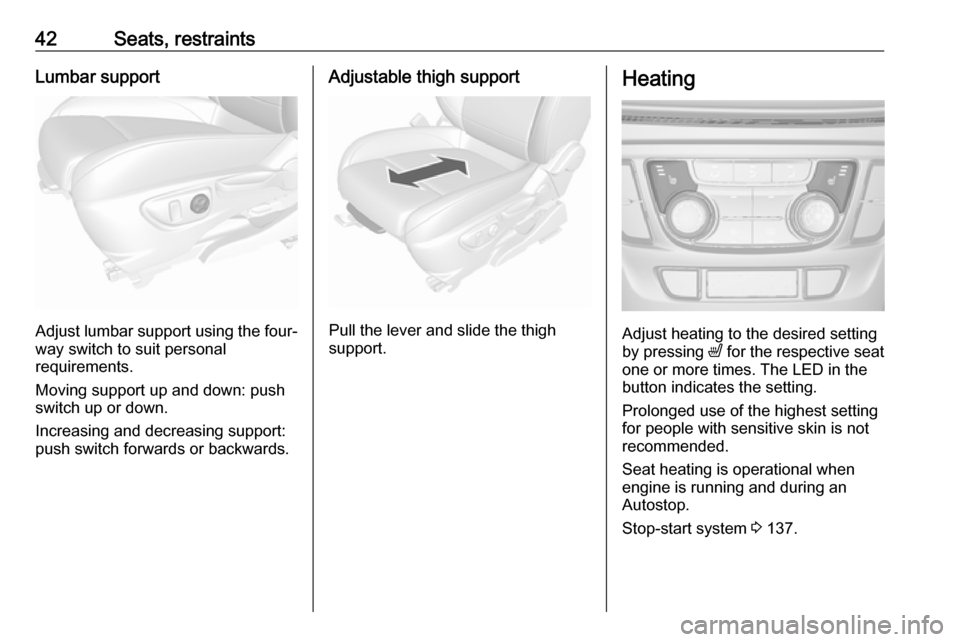
Adjust lumbar support using the four-way switch to suit personal
requirements.
Moving support up and down: push switch up or down.
Increasing and decreasing support:
push switch forwards or backwards.
Adjustable thigh support
Pull the lever and slide the thigh
support.
Heating
Adjust heating to the desired setting
by pressing ß for the respective seat
one or more times. The LED in the
button indicates the setting.
Prolonged use of the highest setting
for people with sensitive skin is not
recommended.
Seat heating is operational when
engine is running and during an
Autostop.
Stop-start system 3 137.
Page 63 of 245
Storage61rear carrier system. The maximum
load per bicycle on the adapter is
20 kg.
The wheelbase of a bicycle must not
exceed 1.15 metres. Otherwise the
secure fastening of a bicycle is not
possible.
If not in use, the rear carrier system
must be slid back into the vehicle
floor.
There must not be any objects on the
bicycles that could become loose
during transportation.Caution
If the rear carrier system is
extended and the vehicle is fully
loaded, the ground clearance will
be reduced.
Drive carefully whenever the road
has a steep inclination or when
driving over a ramp, bump, etc.
Caution
Consult your bicycle dealer before
attaching bicycles with carbon
frames. The bicycles may get
damaged.
Notice
The tail lights of the vehicle will be
deactivated if the tail lights of the rear carrier system are installed.
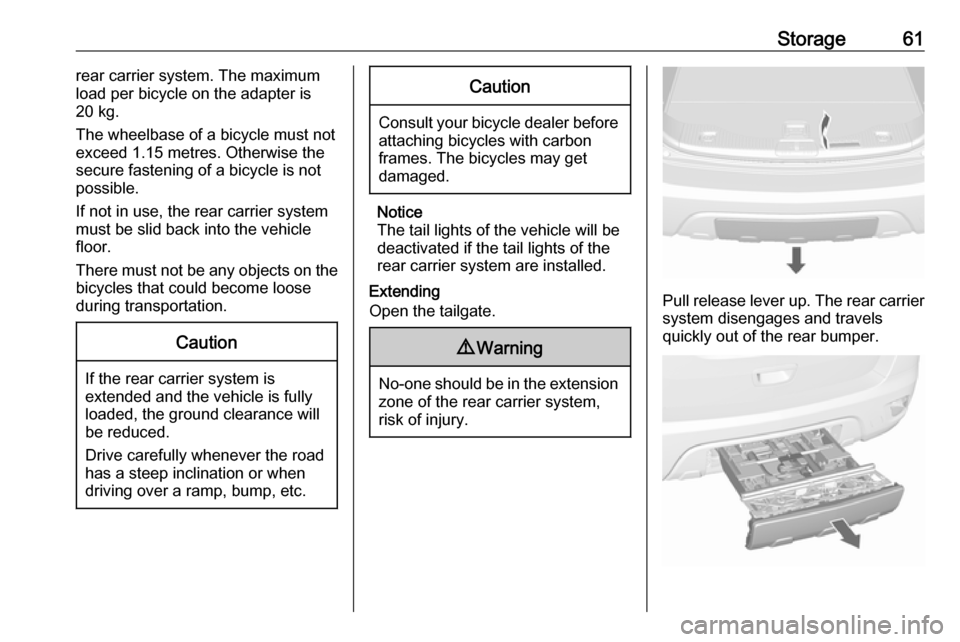
Extending
Open the tailgate.
9 Warning
No-one should be in the extension
zone of the rear carrier system,
risk of injury.
Pull release lever up. The rear carrier system disengages and travels
quickly out of the rear bumper.
Page 112 of 245

110Instruments and controlsTo connect a mobile device with the
Wi-Fi hotspot:
1. Press j and then select Wi-Fi
settings on the Info-Display. The settings displayed include the Wi-
Fi hotspot name (SSID),
password and connection type.
2. Start a Wi-Fi network search on your mobile device.
3. Select your vehicle hotspot (SSID) when listed.
4. When prompted, enter the password on your mobile device.
Notice
To change the SSID or password,
press Z and talk to an advisor or log
in to your account.
To switch off the Wi-Fi hotspot
functionality, press Z to call an
advisor.
Smartphone app
With the My Vauxhall smartphone
app, some vehicle functions can be
operated remotely.The following functions are available:
● Lock or unlock vehicle.
● Honk horn or flash lights.
● Check fuel level, engine oil life and tyre pressure (only with tyre
pressure monitoring system).
● Send navigation destination to the vehicle, if equipped with a
built-in navigation system.
● Locate vehicle on a map.
● Manage Wi-Fi settings.
To operate these functions, download the app from App Store ®
or
Google Play™ Store.
Remote control
If desired, use any phone to call an
advisor, who can remotely operate
specific vehicle functions. Find the
respective OnStar phone number on
our country-specific website.
The following functions are available: ● Lock or unlock vehicle.
● Provide information on the vehicle location.
● Honk horn or flash lights.Stolen vehicle assistance
If the vehicle is stolen, report the theft
to the authorities and request OnStar
stolen vehicle assistance. Use any
phone to call an advisor. Find the
respective OnStar phone number on
our country-specific website.
OnStar can provide support in
locating and recovering the vehicle.Theft alert
When the anti-theft alarm system is
triggered, a notification is sent to
OnStar. You are then informed about
this event by text message or email.Restart prevention
By sending remote signals, OnStar can prevent the vehicle from
restarting once it has been turned off.
On-demand diagnostics
At any time e.g. if the vehicle displays a vehicle message, press Z to
contact an advisor and ask to
complete a real-time diagnostic check
to directly determine the issue.
Depending on the results, the advisor
will provide further support.
Page 113 of 245

Instruments and controls111Diagnostic report
The vehicle automatically transmits
diagnostic data to OnStar which
sends a monthly email report to you
and your preferred workshop.
Notice
The workshop notification function
can be disabled in your account.
The report contains the status of key
operating systems of the vehicle like
engine, transmission, airbags, ABS,
and other major systems. It also
provides information on possible
maintenance items and tyre pressure
(only with tyre pressure monitoring
system).
To look at the information in greater
detail, select the link within the email and log in to your account.
Destination download
A desired destination can be directly
downloaded to the navigation system.
Press Z to call an advisor and
describe the destination or point of
interest.The advisor can look up any address
or point of interest and directly send
the destination to the built-in
navigation system.
OnStar settings
OnStar PIN
To have full access to all OnStar
services, a four-digit PIN is required.
The PIN has to be personalised when
first talking to an advisor.
To change the PIN, press Z to call an
advisor.
Account data
An OnStar subscriber has an account
where all the data is stored. To
request a change of the account
information, press Z and talk to an
advisor or log in to your account.
If the OnStar service is used on
another vehicle, press Z and request
that the account be transferred to the
new vehicle.Notice
In any case, if the vehicle is disposed of, sold or otherwise transferred,
immediately inform OnStar about
the changes and terminate the
OnStar service on this vehicle.
Vehicle location
The vehicle location is transmitted to OnStar when service is requested ortriggered. A message on the Info-
Display informs about this
transmission.
To activate or deactivate the
transmission of the vehicle location,
press and hold j until an audio
message is heard.
The deactivation is indicated by the
status light flashing red and green for
a short period of time and each time
the vehicle is started.
Notice
If the transmission of the vehicle
location is deactivated, some
services are no longer available.
Page 149 of 245

Driving and operating147Brakes
The brake system comprises two
independent brake circuits.
If a brake circuit fails, the vehicle can
still be braked using the other brake
circuit. However, braking effect is
achieved only when the brake pedal
is depressed firmly. Considerably
more force is needed for this. The
braking distance is extended. Seek the assistance of a workshop before
continuing the journey.
When the engine is not running, the
support of the brake servo unit
disappears once the brake pedal has
been depressed once or twice.
Braking effect is not reduced, but
braking requires significantly greater
force. It is especially important to bear this in mind when being towed.
Control indicator R 3 92.
Antilock brake system
Antilock brake system (ABS)
prevents the wheels from locking.ABS starts to regulate brake pressure as soon as a wheel shows a tendency to lock. The vehicle remains
steerable, even during hard braking.
ABS control is made apparent
through a pulse in the brake pedal
and the noise of the regulation
process.
For optimum braking, keep the brake
pedal fully depressed throughout the
braking process, despite the fact that
the pedal is pulsating. Do not reduce
the pressure on the pedal.
After starting-off the system performs
a self-test which may be audible.
Control indicator u 3 92.
Adaptive brake light
During full braking, all three brake
lights flash for the duration of ABS
control.Fault9 Warning
If there is a fault in the ABS, the
wheels may be liable to lock due
to braking that is heavier than
normal. The advantages of ABS are no longer available. During
hard braking, the vehicle can no longer be steered and may
swerve.
Have the cause of the fault remedied
by a workshop.
Parking brake
Page 153 of 245
Driving and operating151show DCS is in operation. DCS will
not activate at speeds above
30 mph, even if the button is pressed.
Deactivation Press u again. The green control
indicator u extinguishes. Depressing
the foot brake or accelerator will also
cause the system to be deactivated.
Fault If the green control indicator u does
not illuminate or flash after pressing
the button, there is a fault in the
system.
Seek the assistance of a workshop.
DSC control indicators u 3 93.Driver assistance
systems9 Warning
Driver assistance systems are
developed to support the driver
and not to replace the driver's
attention.
The driver accepts full
responsibility when driving the
vehicle.
When using driver assistance
systems, always take care
regarding the current traffic
situation.
Cruise control
The Cruise control can store and
maintain speeds of approx. 20 to
120 mph. Deviations from the stored
speeds may occur when driving uphill or downhill.
For safety reasons, the cruise control cannot be activated until the brake
pedal has been operated once.
Activating in first gear is not possible.
Do not use the cruise control if it is not advisable to maintain a constant
speed.
With automatic transmission, only
activate cruise control in automatic
mode.
Control indicator m 3 95.
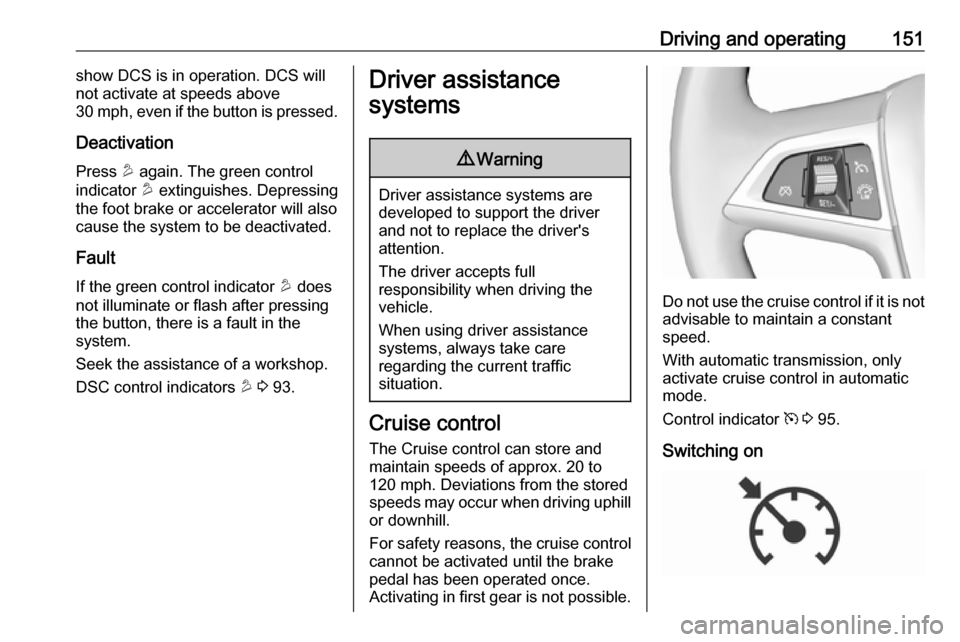
Switching on
Page 160 of 245
158Driving and operatingIf r is pressed once within an
ignition cycle, the front parking assist
is reactivated if the vehicle speed
goes below a certain value and if the
vehicle speed has not exceeded 16 mph beforehand.
Deactivation
Deactivate the system by pressing
r .
The LED in the button will go out and
Park Assist Off will be displayed in the
Driver Information Centre.
The system is deactivated
automatically at a certain speed.
Fault
In the event of a fault in the system, a
vehicle message is displayed in the Driver Information Centre.
Additionally, a vehicle message is
displayed in the Driver Information
Centre if a malfunction of the system
due to temporary conditions, e.g.
snow covered sensors is detected.
Vehicle messages 3 102.Important hints for using the
parking assist systems9 Warning
Under certain circumstances,
various reflective surfaces on
objects or clothing as well as
external noise sources may cause the system to fail to detect
obstacles.
Special attention has to be paid to
low obstacles which can damage
the lower part of the bumper. If
such obstacles leave the detection area of the sensors during
approach of the vehicle, a
continuous warning tone will
sound.
Caution
Performance of the system can be reduced when sensors are
covered, e.g. by ice or snow.
Performance of the parking assist
system can be reduced due to
heavy loading.
Special conditions apply if there
are taller vehicles in the vicinity
(e.g. off-road vehicles, mini vans,
vans). Object identification and correct distance indication in the
upper part of these vehicles
cannot be guaranteed.
Objects with a very small reflection
cross-section, e.g. objects of
narrow size or soft materials, may
not be detected by the system.
Parking assist systems do not
detect objects outside the
detection range.
Notice
The parking assist system
automatically detects factory-fitted
towing equipment. It is deactivated
when the connector is plugged in.
The sensor may detect a non-
existent object (echo disturbance)
caused by external acoustic or
mechanical disturbances.
Notice
The parking assist is deactivated
when the rear carrier system is
extended.