brake sensor VAUXHALL MOKKA X 2017 Owner's Manual
[x] Cancel search | Manufacturer: VAUXHALL, Model Year: 2017, Model line: MOKKA X, Model: VAUXHALL MOKKA X 2017Pages: 245, PDF Size: 6.77 MB
Page 96 of 245
94Instruments and controlsTyre pressure monitoringsystem
w illuminates or flashes yellow.
Illuminates
Tyre pressure loss. Stop immediately
and check tyre pressure.
Flashes
Fault in system or tyre without
pressure sensor mounted (e.g. spare
wheel). After 60-90 seconds the
control indicator illuminates
continuously. Consult a workshop.
Tyre pressure monitor system
3 196.
Engine oil pressure
I illuminates red.
Illuminates when the ignition is
switched on and extinguishes shortly
after the engine starts.Illuminates when the engine is
runningCaution
Engine lubrication may be
interrupted. This may result in
damage to the engine and/or
locking of the drive wheels.
1. Depress clutch.
2. Select neutral gear, set selector lever to N.
3. Move out of the flow of traffic as quickly as possible without
impeding other vehicles.
4. Switch off ignition.
9 Warning
When the engine is off,
considerably more force is needed
to brake and steer. During an
Autostop the brake servo unit will still be operational.
Do not remove key until vehicle is
stationary, otherwise the steeringwheel lock could engage
unexpectedly.
Check oil level before seeking the
assistance of a workshop 3 179.
Low fuel
Y illuminates or flashes yellow.
Illuminates
Level in fuel tank is too low.
Flashes
Fuel used up. Refuel immediately.
Never run the tank dry.
Refuelling 3 168.
Catalytic converter 3 141.
Bleeding the diesel fuel system
3 183.
Immobiliser d flashes yellow.
Fault in the immobiliser system. The
engine cannot be started.
Page 139 of 245

Driving and operating137Starting the vehicle at lowtemperatures
Starting the engine without additional
heaters is possible down to -25 °С for diesel engines and -30 °C for petrol
engines. Required is an engine oil
with the correct viscosity, the correct fuel, performed services and a
sufficiently charged vehicle battery.
With temperatures below -30 °C, the
automatic transmission requires a
warming phase of approx.
five minutes. The selector lever must
be in position P.
Automatic Starter Control This function controls the engine
starting procedure. The driver does
not need to hold the key in position 3
or to hold Engine Start/Stop pressed.
Once applied, the system will go on
starting automatically until the engine
is running. Because of the checking
procedure, the engine starts running
after a short delay.Possible reasons for a non-starting
engine:
● Clutch pedal not depressed (manual transmission).
● Brake pedal not depressed or selector lever not in P or N
(automatic transmission).
● Timeout occurred
Turbo engine warm-up
Upon start-up, engine available
torque may be limited for a short time,
especially when the engine
temperature is cold. The limitation is
to allow the lubrication system to fully protect the engine.
Overrun cut-off The fuel supply is automatically cut off
during overrun, i.e. when the vehicle
is driven with a gear engaged but
accelerator pedal is released.
Depending on driving conditions, the
overrun cut-off may be deactivated.Stop-start system
The stop-start system helps to save
fuel and to reduce the exhaust
emissions. When conditions allow, it
switches off the engine as soon as the
vehicle is at a low speed or at a
standstill, e.g. at a traffic light or in a
traffic jam. It starts the engine
automatically as soon as the clutch is
depressed. A battery sensor ensures
that an Autostop is only performed if the battery is sufficiently charged for
a restart.
Activation
The stop-start system is available as
soon as the engine is started, the
vehicle starts-off and the conditions
as stated below in this section are
fulfilled.
Page 158 of 245
156Driving and operating
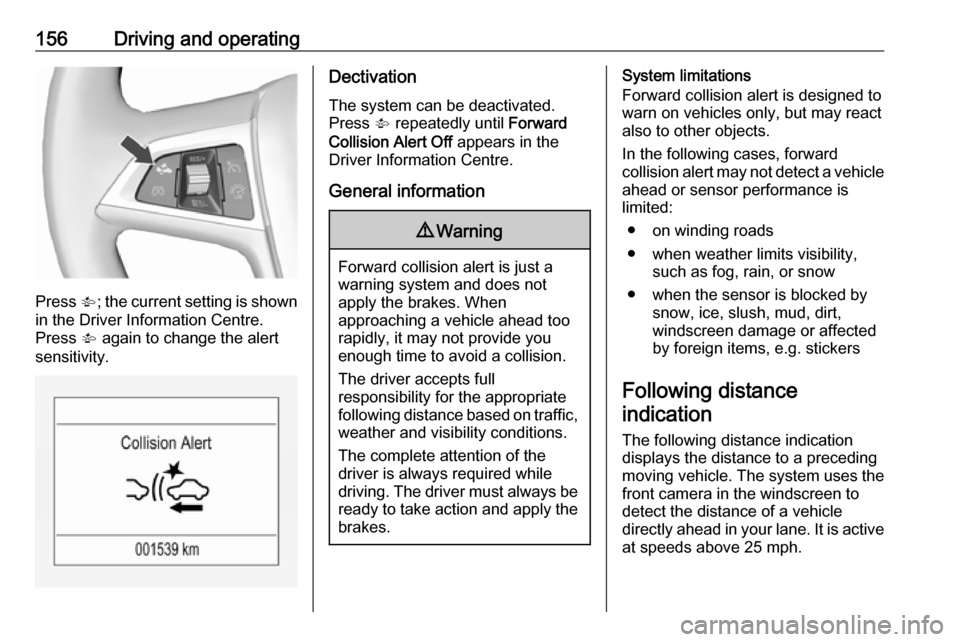
Press V; the current setting is shown
in the Driver Information Centre.
Press V again to change the alert
sensitivity.
Dectivation
The system can be deactivated.
Press V repeatedly until Forward
Collision Alert Off appears in the
Driver Information Centre.
General information9 Warning
Forward collision alert is just a
warning system and does not
apply the brakes. When
approaching a vehicle ahead too
rapidly, it may not provide you
enough time to avoid a collision.
The driver accepts full
responsibility for the appropriate
following distance based on traffic, weather and visibility conditions.
The complete attention of the
driver is always required while
driving. The driver must always be
ready to take action and apply the
brakes.
System limitations
Forward collision alert is designed to warn on vehicles only, but may reactalso to other objects.
In the following cases, forward
collision alert may not detect a vehicle ahead or sensor performance is
limited:
● on winding roads
● when weather limits visibility, such as fog, rain, or snow
● when the sensor is blocked by snow, ice, slush, mud, dirt,
windscreen damage or affected
by foreign items, e.g. stickers
Following distance indication
The following distance indication
displays the distance to a preceding
moving vehicle. The system uses the
front camera in the windscreen to
detect the distance of a vehicle
directly ahead in your lane. It is active
at speeds above 25 mph.
Page 192 of 245
190Vehicle care
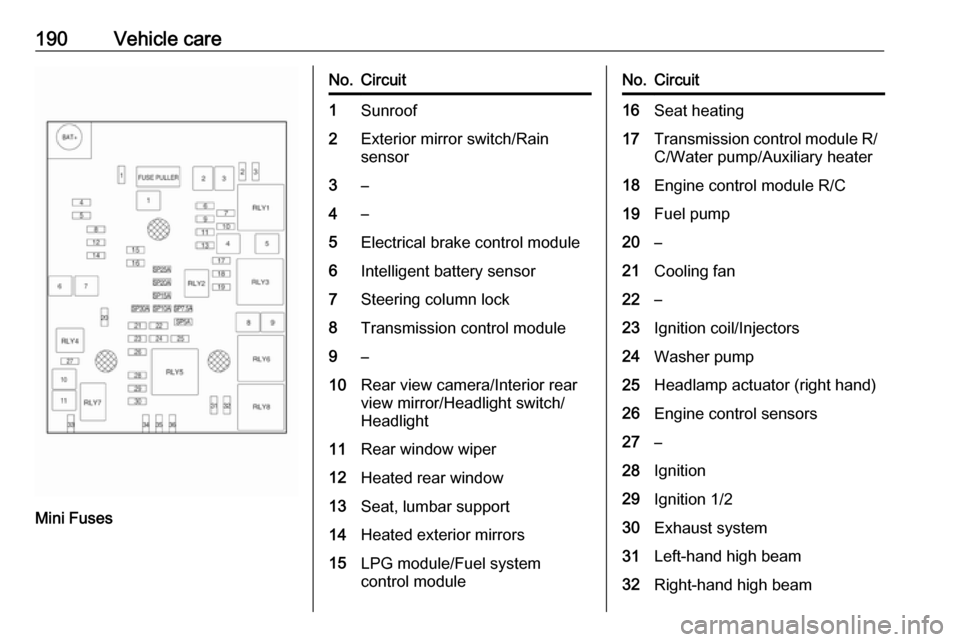
Mini Fuses
No.Circuit1Sunroof2Exterior mirror switch/Rain
sensor3–4–5Electrical brake control module6Intelligent battery sensor7Steering column lock8Transmission control module9–10Rear view camera/Interior rear
view mirror/Headlight switch/
Headlight11Rear window wiper12Heated rear window13Seat, lumbar support14Heated exterior mirrors15LPG module/Fuel system
control moduleNo.Circuit16Seat heating17Transmission control module R/ C/Water pump/Auxiliary heater18Engine control module R/C19Fuel pump20–21Cooling fan22–23Ignition coil/Injectors24Washer pump25Headlamp actuator (right hand)26Engine control sensors27–28Ignition29Ignition 1/230Exhaust system31Left-hand high beam32Right-hand high beam
Page 200 of 245
198Vehicle careAfter inflating, some driving may be
required to update the tyre pressure
values in the Driver Information
Centre. During this time w may
illuminate.
If w illuminates at lower temperatures
and extinguishes after driving, this
could be an indicator for approaching
a low tyre pressure condition. Check
tyre pressure.
Vehicle messages 3 102.
If the tyre pressure must be reduced
or increased, switch off ignition.
Only mount wheels with pressure
sensors, otherwise the tyre pressure
will not be displayed and w
illuminates continuously.
A spare wheel or temporary spare
wheel is not equipped with pressure
sensors. The tyre pressure
monitoring system is not operational
for these tyres. Control indicator w
illuminates. For the further three
tyres, the system remains
operational.The use of commercially-available
liquid tyre repair kits can impair the
function of the system. Factory-
approved repair kits can be used.
Operating electronic devices or being close to facilities using similar wave
frequencies could disrupt the tyre
pressure monitoring system.
Each time the tyres are replaced, tyre
pressure monitoring system sensors
must be dismounted and serviced. For the screwed sensor, replace
valve core and sealing ring. For the
clipped sensor, replace complete
valve stem.
Vehicle loading status
Adjust tyre pressure to load condition according to tyre information label or
tyre pressure chart 3 230, and select
the appropriate setting in the
menu Tyre Load in the Driver
Information Centre, Vehicle
Information Menu 3 96 . This setting is
the reference for the tyre pressure
warnings.The Tyre load menu only appears
when the vehicle is at a standstill and
the parking brake is applied. On
vehicles with automatic transmission
the selector lever must be in P.
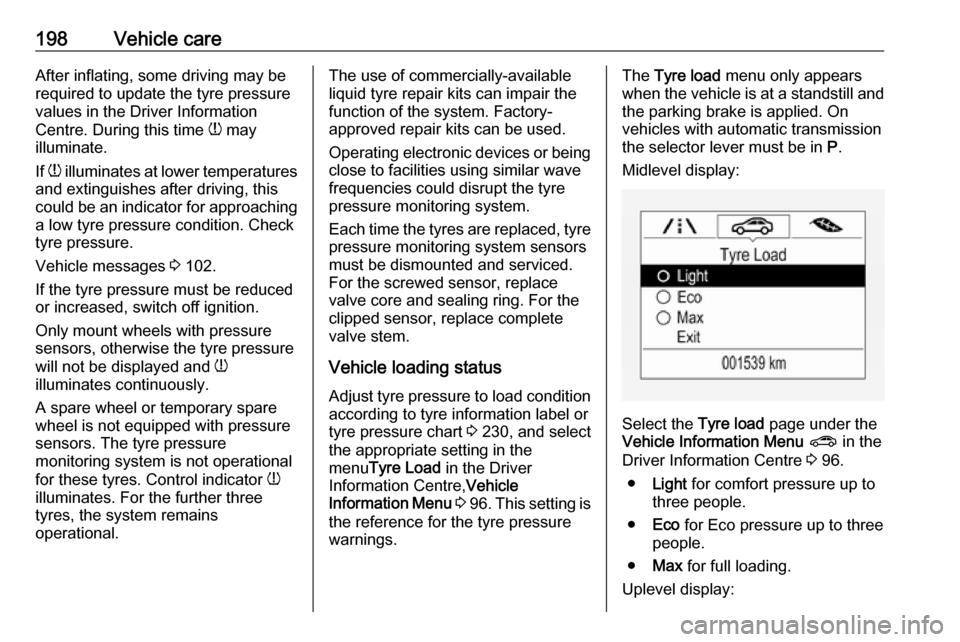
Midlevel display:
Select the Tyre load page under the
Vehicle Information Menu ? in the
Driver Information Centre 3 96.
● Light for comfort pressure up to
three people.
● Eco for Eco pressure up to three
people.
● Max for full loading.
Uplevel display:
Page 201 of 245
Vehicle care199
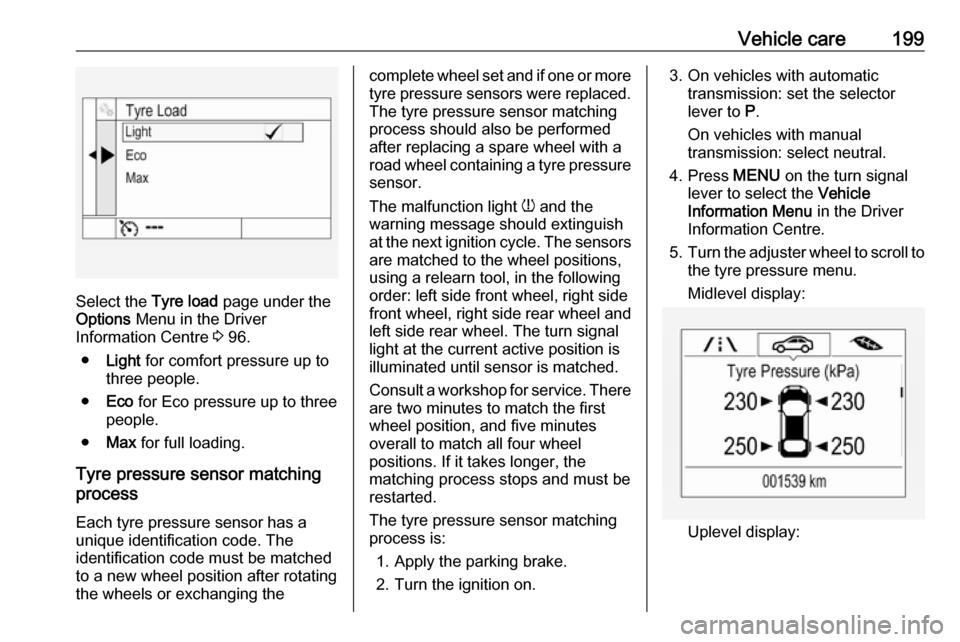
Select the Tyre load page under the
Options Menu in the Driver
Information Centre 3 96.
● Light for comfort pressure up to
three people.
● Eco for Eco pressure up to three
people.
● Max for full loading.
Tyre pressure sensor matching process
Each tyre pressure sensor has a
unique identification code. The
identification code must be matched
to a new wheel position after rotating
the wheels or exchanging the
complete wheel set and if one or more tyre pressure sensors were replaced.
The tyre pressure sensor matching
process should also be performed
after replacing a spare wheel with a
road wheel containing a tyre pressure sensor.
The malfunction light w and the
warning message should extinguish
at the next ignition cycle. The sensors
are matched to the wheel positions,
using a relearn tool, in the following
order: left side front wheel, right side
front wheel, right side rear wheel and
left side rear wheel. The turn signal
light at the current active position is
illuminated until sensor is matched.
Consult a workshop for service. There
are two minutes to match the first
wheel position, and five minutes
overall to match all four wheel
positions. If it takes longer, the
matching process stops and must be
restarted.
The tyre pressure sensor matching
process is:
1. Apply the parking brake.
2. Turn the ignition on.3. On vehicles with automatic transmission: set the selector
lever to P.
On vehicles with manual
transmission: select neutral.
4. Press MENU on the turn signal
lever to select the Vehicle
Information Menu in the Driver
Information Centre.
5. Turn the adjuster wheel to scroll to
the tyre pressure menu.
Midlevel display:
Uplevel display: