Turn VAUXHALL MOKKA X 2018 Owner's Manual
[x] Cancel search | Manufacturer: VAUXHALL, Model Year: 2018, Model line: MOKKA X, Model: VAUXHALL MOKKA X 2018Pages: 249, PDF Size: 6.83 MB
Page 13 of 249

In brief111Central locking system ..........23
2 Power windows .....................33
3 Exterior mirrors .....................31
4 Light switch ......................... 115
5 Cruise control ...................... 152
Speed limiter ....................... 154
Forward collision alert .........155
6 Side air vents ...................... 131
7 Turn and lane-change
signals ................................. 122
Headlight flash ....................117
Low beam and high beam ..116
Buttons for Driver
Information Centre ................97
8 Instruments ........................... 84
9 Steering wheel controls .......77
10 Windscreen wiper,
windscreen washer system ...78
Rear window wiper, rear
window washer system .........80
11 Centre air vents ................... 131
12 Anti-theft alarm system
status LED ........................... 2913Info-Display ........................ 101
14 Controls for Info-Display
operation ............................. 101
15 Glovebox .............................. 59
16 Descent control system ......... 94
Fuel selector ......................... 86
Stop-start system ................138
17 Climate control system ........ 126
18 Electronic Stability Control
(ESC) .................................. 150
19 Control indicator for airbag
deactivation .......................... 93
20 Front storage ......................... 60
Power outlet .......................... 83
USB port, AUX input
21 Selector lever, manual
transmission ....................... 146
Selector lever, automatic
transmission ....................... 143
22 Parking brake ......................148
23 Hazard warning flashers ....121
24 Parking assist ..................... 158
Lane departure warning ......16525Ignition switch with
steering wheel lock ............135
Power button ....................... 135
26 Horn ..................................... 78
Driver airbag ........................ 48
27 Steering wheel adjustment ..77
28 Bonnet release lever ..........179
29 Front storage ......................... 60
Fuse box ............................ 192
Page 14 of 249

12In briefExterior lighting
Turn light switch:
m:lights off8:sidelights9:low beam
Automatic light control
AUTO:automatic light control:
exterior lighting is switched
on and off automaticallym:activation or deactivation of
the automatic light control8:sidelights9:low beam
Fog lights
Press light switch:
>:front fog lightsø:rear fog light
Lighting 3 115.
Headlight flash, high beam and
low beamheadlight flash:pull leverhigh beam:push leverlow beam:push or pull lever
Automatic light control 3 116, High
beam 3 116, Headlight flash 3 117,
Adaptive forward lighting 3 119.
Page 15 of 249

In brief13Turn and lane-change signalslever up:right turn signallever down:left turn signal
Turn and lane-change signals
3 122.
Hazard warning flashers
Operated by pressing ¨.
Hazard warning flashers 3 121.
Horn
Press j.
Page 19 of 249

In brief17Starting the engine
● Ignition switch: turn key toposition 2.
Power button: press
Engine Start/Stop for a few
seconds until green LED
illuminates.
● Move the steering wheel slightly to release the steering wheel
lock.
● Manual transmission: operate clutch and brake pedal.
● Automatic transmission: operate brake pedal and move selector
lever to P or N.
● Do not operate accelerator pedal.
● Diesel engines: wait until control indicator ! for preheating
extinguishes.
● Ignition switch: turn key to position 3 and release.
Power button: press
Engine Start/Stop and release.
Starting the engine 3 137.Stop-start system
If the vehicle is at a low speed or at a
standstill and certain conditions are
fulfilled, activate an Autostop as
follows:
● Depress the clutch pedal.
● Shift the selector lever to N.
● Release the clutch pedal.
An Autostop is indicated by the
needle at the AUTOSTOP position in
the tachometer.
To restart the engine, depress the
clutch pedal again.
Stop-start system 3 138.
Page 20 of 249

18In briefParking9Warning
● Do not park the vehicle on an
easily ignitable surface. The
high temperature of the
exhaust system could ignite the
surface.
● Always apply the parking brake. Activate the parking
brake without pressing the
release button. Apply as firmly
as possible on a downhill slope
or uphill slope. Depress brake
pedal at the same time to
reduce operating force.
● Switch off the engine.
● If the vehicle is on a level surface or uphill slope, engage
first gear or set the selector
lever to position P before
removing the ignition key. On
an uphill slope, turn the front
wheels away from the kerb.
If the vehicle is on a downhill
slope, engage reverse gear or
set the selector lever to position P before removing the ignition
key. Turn the front wheels
towards the kerb.
● Close the windows and the sunroof.
● Remove the ignition key from the ignition switch. For vehicles
with automatic transmission,
the key can only be removed
when the selector lever is in
position P.
Turn the steering wheel until
the steering wheel lock is felt to engage.
● Lock the vehicle with e on the
radio remote control.
Activate the anti-theft alarm
system 3 29.
● The engine cooling fans may run
after the engine has been
switched off 3 179.
Caution
After running at high engine
speeds or with high engine loads,
operate the engine briefly at a low load or run in neutral for approx.30 seconds before switching off, in
order to protect the turbocharger.
Keys, locks 3 19, Laying the vehicle
up for a long period of time 3 178.
Page 22 of 249

20Keys, doors and windowsKey with foldaway key section
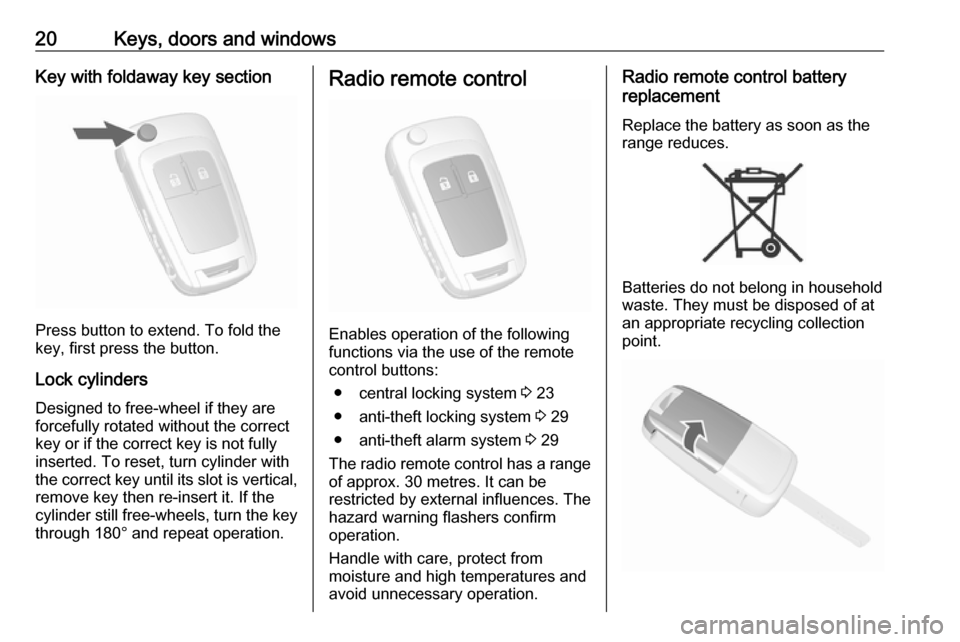
Press button to extend. To fold the
key, first press the button.
Lock cylinders
Designed to free-wheel if they are forcefully rotated without the correct
key or if the correct key is not fully
inserted. To reset, turn cylinder with
the correct key until its slot is vertical, remove key then re-insert it. If the
cylinder still free-wheels, turn the key
through 180° and repeat operation.
Radio remote control
Enables operation of the following
functions via the use of the remote control buttons:
● central locking system 3 23
● anti-theft locking system 3 29
● anti-theft alarm system 3 29
The radio remote control has a range of approx. 30 metres. It can be
restricted by external influences. The
hazard warning flashers confirm
operation.
Handle with care, protect from
moisture and high temperatures and
avoid unnecessary operation.
Radio remote control battery
replacement
Replace the battery as soon as the
range reduces.
Batteries do not belong in household
waste. They must be disposed of at
an appropriate recycling collection
point.
Page 24 of 249

22Keys, doors and windowsBatteries do not belong in household
waste. They must be disposed of at
an appropriate recycling collection
point.
To replace:
1. Press button at the back of the electronic key unit and extract thekey blade from the housing.
2. Insert the key blade approx. 6 mm
into the housing and turn the key
to open the housing. Further
insertion of the key blade can
damage the housing.
3. Remove and replace battery. Use
CR 2032 or equivalent battery.
Pay attention to the installation
position.
4. Close the housing and insert key blade.
Batteries do not belong in household
waste. They must be disposed of at
an appropriate recycling collection
point.
Electronic key synchronisation
The electronic key synchronises itself automatically during every starting
procedure.
Fault
If the central locking cannot be
operated or the engine cannot be
started, the cause may be one of the
following:
● Fault in electronic key.
● Electronic key is out of reception range.
● The battery voltage is too low.
● Overload of the central locking system by operating at frequent
intervals, the power supply is
interrupted for a short time.
● Interference from higher-power radio waves from other sources.
To rectify the cause of the fault,
change the position of the electronic
key.
Manual unlocking 3 23.
Page 28 of 249

26Keys, doors and windowsConfirmation
Operation of central locking system is confirmed by the hazard warning
flashers. A precondition is that the
setting is activated in the vehicle
personalisation 3 105.
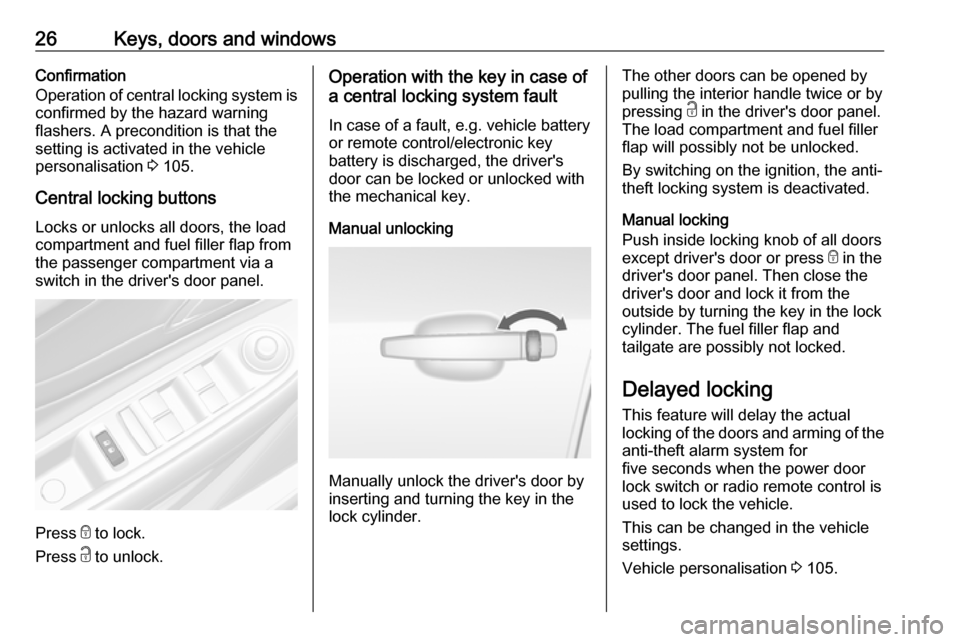
Central locking buttons Locks or unlocks all doors, the load
compartment and fuel filler flap from
the passenger compartment via a
switch in the driver's door panel.
Press e to lock.
Press c to unlock.
Operation with the key in case of
a central locking system fault
In case of a fault, e.g. vehicle battery
or remote control/electronic key
battery is discharged, the driver's
door can be locked or unlocked with
the mechanical key.
Manual unlocking
Manually unlock the driver's door by
inserting and turning the key in the
lock cylinder.
The other doors can be opened by
pulling the interior handle twice or by
pressing c in the driver's door panel.
The load compartment and fuel filler
flap will possibly not be unlocked.
By switching on the ignition, the anti-
theft locking system is deactivated.
Manual locking
Push inside locking knob of all doors
except driver's door or press e in the
driver's door panel. Then close the driver's door and lock it from the
outside by turning the key in the lock
cylinder. The fuel filler flap and
tailgate are possibly not locked.
Delayed locking
This feature will delay the actual
locking of the doors and arming of the
anti-theft alarm system for
five seconds when the power door
lock switch or radio remote control is
used to lock the vehicle.
This can be changed in the vehicle
settings.
Vehicle personalisation 3 105.
Page 30 of 249

28Keys, doors and windowsThe setting can be saved for the
electronic key being used 3 23.
Child locks9 Warning
Use the child locks whenever
children are occupying the rear
seats.
Using a key or suitable screwdriver,
turn the child lock in the rear door to
the horizontal position. The door
cannot be opened from the inside. For
deactivation turn the child lock to the
vertical position.
Doors
Load compartment Tailgate
Opening
After unlocking, push the touchpad
switch and open the tailgate.
Closing
Use one of the interior handles.
Do not push the touchpad switch or
the brand emblem whilst closing as
this will unlock the tailgate again.
Central locking system 3 23.
General hints for operating
tailgate9 Danger
Do not drive with the tailgate open
or ajar, e.g. when transporting
bulky objects, since toxic exhaust
gases, which cannot be seen or
smelled, could enter the vehicle.
This can cause unconsciousness
and even death.
Caution
Before opening the tailgate, check overhead obstructions, e.g. a
garage door, to avoid damage to
the tailgate. Always check the
moving area above and behind the
tailgate.
Notice
The installation of certain heavy
accessories onto the tailgate may
affect its ability to remain open.
Page 33 of 249

Keys, doors and windows31Notice
The immobiliser does not lock the
doors. You should always lock the
vehicle after leaving it and switch on
the anti-theft alarm system 3 23,
3 29.
Control indicator d 3 95.Exterior mirrors
Convex shape
The convex exterior mirror contains
an aspherical area and reduces blind spots. The shape of the mirror makes objects appear smaller, which will
affect the ability to estimate
distances.
Electric adjustment
Select the relevant exterior mirror by
turning the control to left (L) or right
(R) . Then swivel the control to adjust
the mirror.
In position 0 no mirror is selected.
Folding mirrors
Manual folding
For pedestrian safety, the exterior
mirrors will swing out of their normal
mounting position if they are struck
with sufficient force. Reposition the mirror by applying slight pressure tothe mirror housing.