ECO mode VAUXHALL MOKKA X 2019 User Guide
[x] Cancel search | Manufacturer: VAUXHALL, Model Year: 2019, Model line: MOKKA X, Model: VAUXHALL MOKKA X 2019Pages: 253, PDF Size: 7.09 MB
Page 122 of 253
120LightingAFL-LED lighting functions
AFL-LED lighting functions are active automatically with light switch in
position AUTO. AFL-LED includes
following functions:
● curve and cornering lights
● town light
● country light
● motorway light
● high beam assist
● reverse parking function
● eco mode
● dynamic automatic headlight levelling
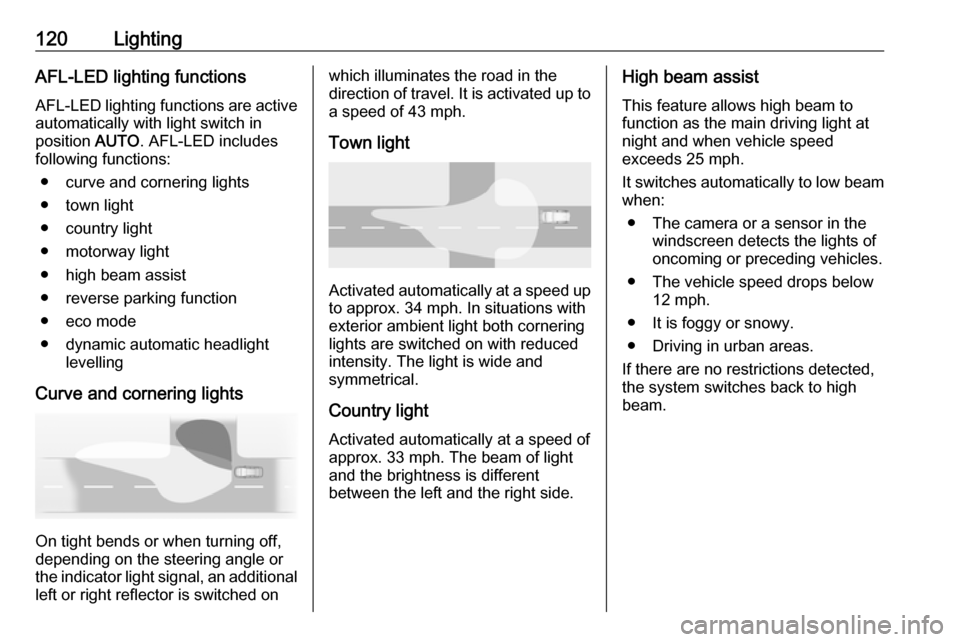
Curve and cornering lights
On tight bends or when turning off,
depending on the steering angle or
the indicator light signal, an additional left or right reflector is switched on
which illuminates the road in the
direction of travel. It is activated up to
a speed of 43 mph.
Town light
Activated automatically at a speed up to approx. 34 mph. In situations with
exterior ambient light both cornering
lights are switched on with reduced
intensity. The light is wide and
symmetrical.
Country light
Activated automatically at a speed of
approx. 33 mph. The beam of light
and the brightness is different
between the left and the right side.
High beam assist
This feature allows high beam to
function as the main driving light at
night and when vehicle speed
exceeds 25 mph.
It switches automatically to low beam
when:
● The camera or a sensor in the windscreen detects the lights of
oncoming or preceding vehicles.
● The vehicle speed drops below 12 mph.
● It is foggy or snowy.
● Driving in urban areas.
If there are no restrictions detected,
the system switches back to high
beam.
Page 123 of 253
Lighting121Activation
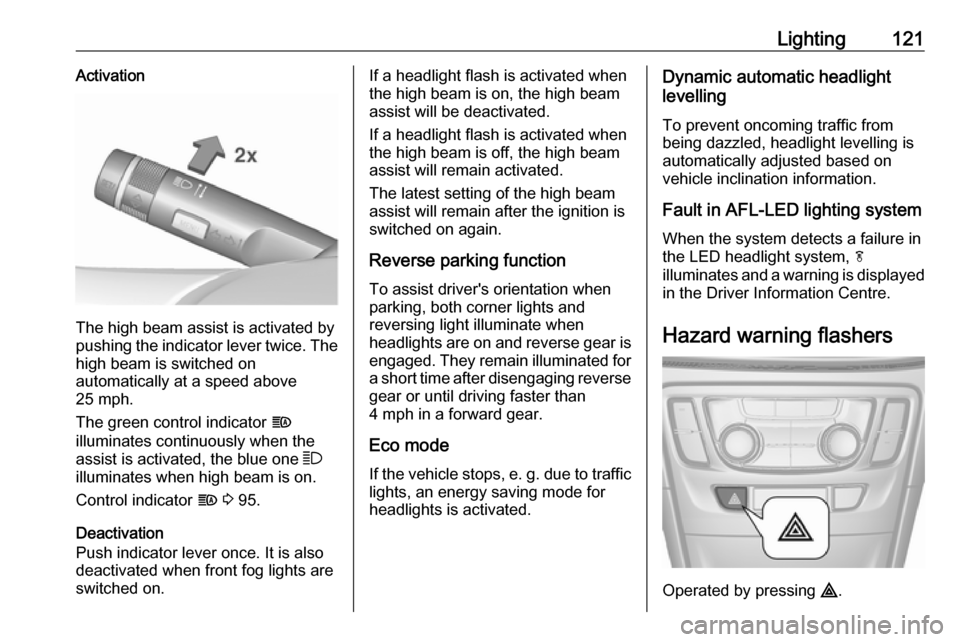
The high beam assist is activated by
pushing the indicator lever twice. The high beam is switched on
automatically at a speed above
25 mph.
The green control indicator f
illuminates continuously when the
assist is activated, the blue one 7
illuminates when high beam is on.
Control indicator f 3 95.
Deactivation
Push indicator lever once. It is also
deactivated when front fog lights are
switched on.
If a headlight flash is activated when
the high beam is on, the high beam
assist will be deactivated.
If a headlight flash is activated when
the high beam is off, the high beam
assist will remain activated.
The latest setting of the high beam
assist will remain after the ignition is
switched on again.
Reverse parking function
To assist driver's orientation when
parking, both corner lights and
reversing light illuminate when
headlights are on and reverse gear is engaged. They remain illuminated for
a short time after disengaging reverse gear or until driving faster than
4 mph in a forward gear.
Eco mode If the vehicle stops, e. g. due to traffic lights, an energy saving mode for
headlights is activated.Dynamic automatic headlight
levelling
To prevent oncoming traffic frombeing dazzled, headlight levelling is
automatically adjusted based on
vehicle inclination information.
Fault in AFL-LED lighting system
When the system detects a failure in
the LED headlight system, f
illuminates and a warning is displayed
in the Driver Information Centre.
Hazard warning flashers
Operated by pressing ¨.
Page 130 of 253
128Climate controlDemisting and defrosting the
windows V
● Press V: fan automatically
switches to higher speed, the air
distribution is directed towards
the windscreen.
● Set temperature control to warmest level.
● Switch on heated rear window Ü.
● Open side air vents as required and direct them towards the doorwindows.
Notice
If V is pressed while the engine is
running, an Autostop will be inhibited
until V is pressed again.
If l is pressed with the fan switched
on and the engine running, an
Autostop will be inhibited until l is
pressed again or until the fan is
switched off.
If V is pressed while the engine is
in an Autostop, the engine will restart automatically.If l is pressed with the fan switched
on while the engine is in an
Autostop, the engine will restart
automatically.
Stop-start system 3 138.
Electronic climate control
system
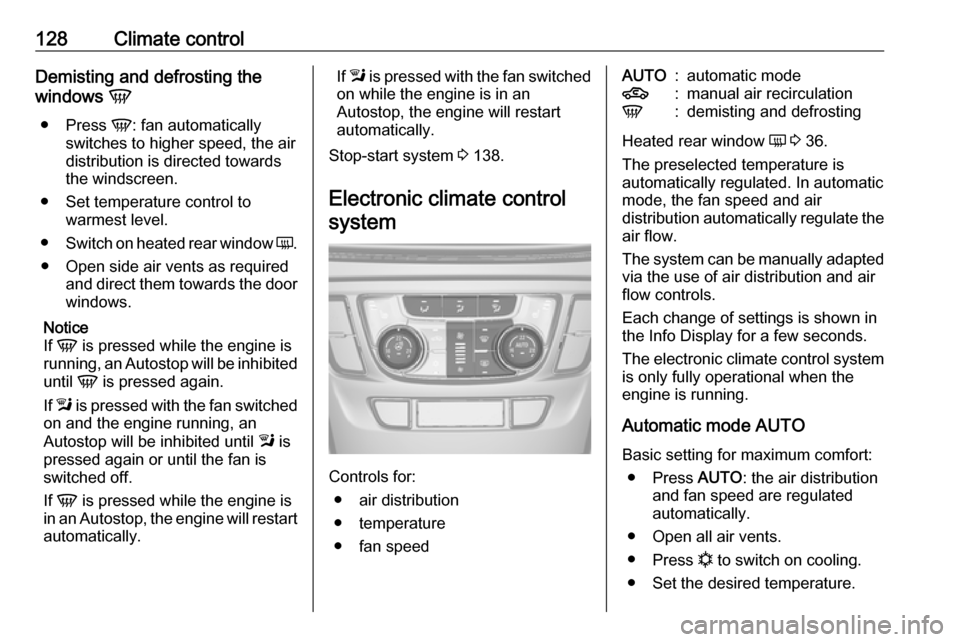
Controls for: ● air distribution
● temperature
● fan speed
AUTO:automatic mode4:manual air recirculationV:demisting and defrosting
Heated rear window Ü 3 36.
The preselected temperature is
automatically regulated. In automatic
mode, the fan speed and air
distribution automatically regulate the
air flow.
The system can be manually adapted via the use of air distribution and air
flow controls.
Each change of settings is shown in
the Info Display for a few seconds.
The electronic climate control system
is only fully operational when the
engine is running.
Automatic mode AUTO
Basic setting for maximum comfort: ● Press AUTO: the air distribution
and fan speed are regulated
automatically.
● Open all air vents.
● Press n to switch on cooling.
● Set the desired temperature.
Page 132 of 253
130Climate controlReturn to automatic air distribution:
Deactivate corresponding setting or
press AUTO .
Cooling n
Press n to switch on cooling. The
LED in the button illuminates to
indicate activation. Cooling is only
functional when the engine is running and climate control fan is switched on.
Press n again to switch off cooling.
The air conditioning system cools and
dehumidifies (dries) when outside
temperature is above a specific level. Therefore condensation may form
and drip from under the vehicle.
If no cooling or drying is required,
switch off the cooling system for fuel
saving reasons. Activated cooling
may inhibit an Autostop.
Stop-start system 3 138.
Eco appears in the display when
cooling is deactivated.
Air recirculation mode 4
Press 4 once to activate the
manual air recirculation mode.9 Warning
The exchange of fresh air is
reduced in air recirculation mode.
In operation without cooling the air humidity increases, so the
windows may mist up from inside.
The quality of the passenger
compartment air deteriorates,
which may cause the vehicle
occupants to feel drowsy.
Air conditioning with the engine
not running
When ignition is off, the residual heat
or cooling in the system can be used for climate control in passenger
compartment.
Auxiliary heater Air heater Quickheat is an electric auxiliary air
heater which automatically warms up
the passenger compartment more
quickly.
Air vents
Adjustable air vents At least one air vent must be open
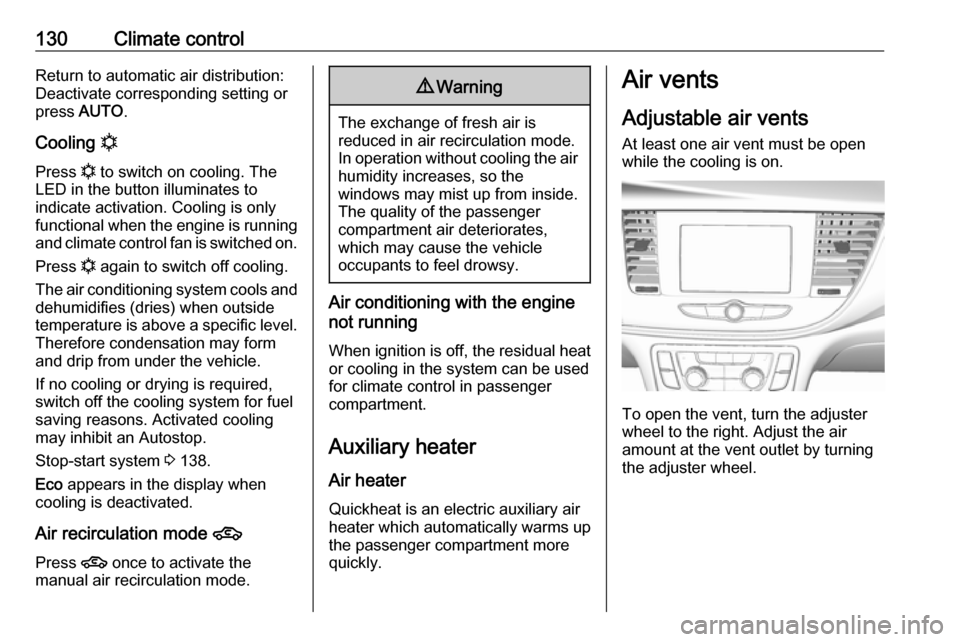
while the cooling is on.
To open the vent, turn the adjuster
wheel to the right. Adjust the air
amount at the vent outlet by turning
the adjuster wheel.
Page 137 of 253
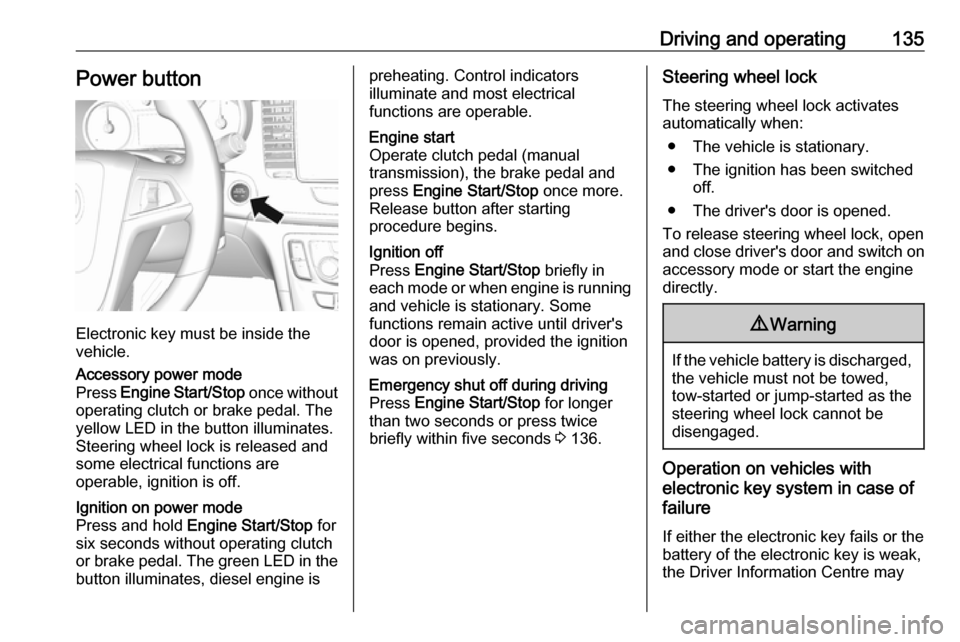
Driving and operating135Power button
Electronic key must be inside the
vehicle.
Accessory power mode
Press Engine Start/Stop once without
operating clutch or brake pedal. The yellow LED in the button illuminates.
Steering wheel lock is released and
some electrical functions are
operable, ignition is off.Ignition on power mode
Press and hold Engine Start/Stop for
six seconds without operating clutch
or brake pedal. The green LED in the button illuminates, diesel engine ispreheating. Control indicators
illuminate and most electrical
functions are operable.Engine start
Operate clutch pedal (manual
transmission), the brake pedal and
press Engine Start/Stop once more.
Release button after starting
procedure begins.Ignition off
Press Engine Start/Stop briefly in
each mode or when engine is running and vehicle is stationary. Some
functions remain active until driver's
door is opened, provided the ignition
was on previously.Emergency shut off during driving
Press Engine Start/Stop for longer
than two seconds or press twice
briefly within five seconds 3 136.Steering wheel lock
The steering wheel lock activates
automatically when:
● The vehicle is stationary.
● The ignition has been switched off.
● The driver's door is opened.
To release steering wheel lock, open
and close driver's door and switch on accessory mode or start the engine
directly.9 Warning
If the vehicle battery is discharged,
the vehicle must not be towed,
tow-started or jump-started as the
steering wheel lock cannot be
disengaged.
Operation on vehicles with
electronic key system in case of
failure
If either the electronic key fails or the
battery of the electronic key is weak,
the Driver Information Centre may
Page 138 of 253
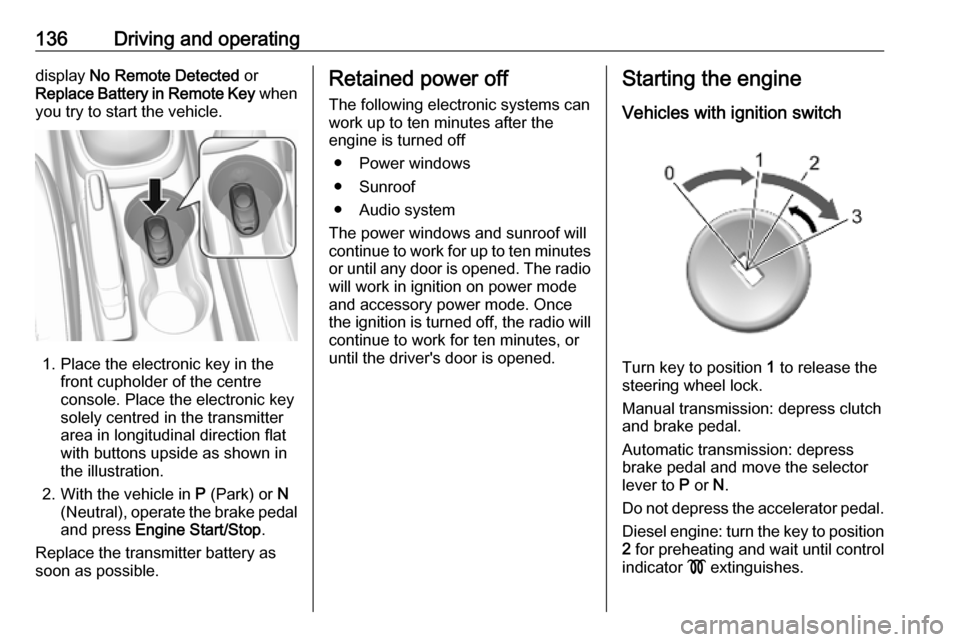
136Driving and operatingdisplay No Remote Detected or
Replace Battery in Remote Key when
you try to start the vehicle.
1. Place the electronic key in the front cupholder of the centreconsole. Place the electronic key
solely centred in the transmitter
area in longitudinal direction flat
with buttons upside as shown in
the illustration.
2. With the vehicle in P (Park) or N
(Neutral), operate the brake pedal
and press Engine Start/Stop .
Replace the transmitter battery as
soon as possible.
Retained power off
The following electronic systems can
work up to ten minutes after the
engine is turned off
● Power windows
● Sunroof
● Audio system
The power windows and sunroof will
continue to work for up to ten minutes or until any door is opened. The radio
will work in ignition on power mode
and accessory power mode. Once
the ignition is turned off, the radio will
continue to work for ten minutes, or
until the driver's door is opened.Starting the engine
Vehicles with ignition switch
Turn key to position 1 to release the
steering wheel lock.
Manual transmission: depress clutch and brake pedal.
Automatic transmission: depress
brake pedal and move the selector
lever to P or N.
Do not depress the accelerator pedal. Diesel engine: turn the key to position2 for preheating and wait until control
indicator ! extinguishes.
Page 147 of 253
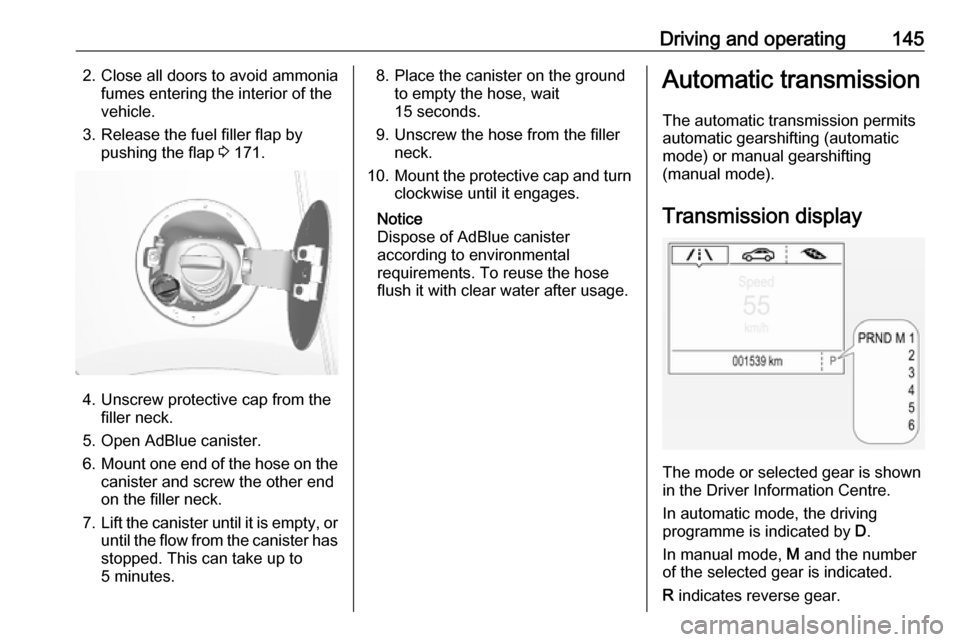
Driving and operating1452. Close all doors to avoid ammoniafumes entering the interior of the
vehicle.
3. Release the fuel filler flap by pushing the flap 3 171.
4. Unscrew protective cap from the
filler neck.
5. Open AdBlue canister.
6. Mount one end of the hose on the
canister and screw the other end
on the filler neck.
7. Lift the canister until it is empty, or
until the flow from the canister has stopped. This can take up to
5 minutes.
8. Place the canister on the ground to empty the hose, wait
15 seconds.
9. Unscrew the hose from the filler neck.
10. Mount the protective cap and turn
clockwise until it engages.
Notice
Dispose of AdBlue canister
according to environmental
requirements. To reuse the hose
flush it with clear water after usage.Automatic transmission
The automatic transmission permits
automatic gearshifting (automatic
mode) or manual gearshifting
(manual mode).
Transmission display
The mode or selected gear is shown
in the Driver Information Centre.
In automatic mode, the driving
programme is indicated by D.
In manual mode, M and the number
of the selected gear is indicated.
R indicates reverse gear.
Page 149 of 253
![VAUXHALL MOKKA X 2019 User Guide Driving and operating147Manual mode
Move selector lever to position M.
Press button on the selector lever:
<:shift to a higher gear]:shift to a lower gear
If a higher gear is selected when
vehicle spe VAUXHALL MOKKA X 2019 User Guide Driving and operating147Manual mode
Move selector lever to position M.
Press button on the selector lever:
<:shift to a higher gear]:shift to a lower gear
If a higher gear is selected when
vehicle spe](/img/38/19541/w960_19541-148.png)
Driving and operating147Manual mode
Move selector lever to position M.
Press button on the selector lever:
<:shift to a higher gear]:shift to a lower gear
If a higher gear is selected when
vehicle speed is too low, or a lower
gear when vehicle speed is too high,
the shift is not executed. This can
cause a message in the Driver
Information Centre.
In manual mode no automatic shifting to a higher gear takes place at high
engine revolutions.
Gear shift indication
The symbol R with a number beside
it is indicated when gearshifting is
recommended for fuel saving
reasons.
Shift indication appears only in
manual mode.
Electronic driving programmes
Special programmes automatically
adapt the shifting points when driving up inclines or down hills.
Automatic transmission
adaptation feature
This feature adapts transmission
operation during constant driving or
gear shifting. It increases durability
and keeps best shift quality over the
life cycle. You may perceive shifting
at initial mileage as uncomfortable,
but this is normal. Shift quality will be
improved gradually by constant
driving at each gear and gear shifting.Kickdown
Pressing down the accelerator pedal
beyond the kickdown detent will lead to maximum acceleration
independent of selected driving
mode. The transmission shifts to a lower gear depending on enginespeed.
Fault
In the event of a fault, a vehicle
message is displayed in the Driver
Information Centre. Vehicle
messages 3 103.
The transmission no longer shifts
automatically. Continued travel is possible with manual shifting.
Only the highest gear is available.
Depending on the fault, second gear
may also be available in manual
mode. Shift only when vehicle is at a
standstill.
Have the cause of the fault remedied
by a workshop.
Page 191 of 253

Vehicle care1895. Install the new bulb in theheadlight assembly by turning
clockwise.
6. Reconnect the wiring harness connector.
7. Install the protective cover.
For the driver side, reinstall the
windscreen washer bottle filler neck
by firmly pushing it straight into the
bottle. Ensure that the filler neck clip
engages into the underhood electrical
centre retainer.
Uplevel headlight assembly
The uplevel model vehicle has LED high beam and low beam headlights,
turn lights, a sidelight and daytime
running lights on the headlight
assembly.Front fog lights
The bulbs are accessible from the
underside of the vehicle
1. Turn the respective wheel inside to get better access and remove
three torx screws on outside of
wheel house.
Vehicle tools 3 197.
2. Pull and hold lining to get access to the bulb holder.
3.Pull the retaining rib outwards and
remove plug connector from the
bulb socket.
4. Turn the bulb holder anticlockwise
and remove it from the reflector.
5. Remove and replace the bulb socket with bulb and attach the
plug connector.
6. Insert the bulb socket into the reflector by turning clockwise and
engage.
7. Re-assemble the lining and fasten
the three torx screws.
Page 251 of 253

249Rear view camera ...................... 162
Rear window wiper and washer ..79
Recommended fluids and lubricants ........................ 221, 225
Refuelling ................................... 171
Registered trademarks ...............240
Retained power off .....................136
Reversing lights .........................122
Ride control systems ..................151
Roof .............................................. 36
Roof load ...................................... 73
Roof rack ..................................... 73
S Seat adjustment ....................... 6, 40
Seat belt ........................................ 8
Seat belt reminder .......................91
Seat belts ..................................... 43
Seat heating ................................. 42
Seat position ................................ 39
Selective catalytic reduction .......143
Selector lever ............................. 146
Service ....................................... 131
Service display ............................ 86
Service information ....................220
Side airbag system ......................50
Software acknowledgement .......239
Spare wheel ............................... 209
Speed limiter......................... 96, 156
Speedometer ............................... 83Starting and operating ................133
Starting off ................................... 16
Starting the engine ....................136
Steering ...................................... 133
Steering wheel adjustment ......9, 76
Steering wheel controls ...............76
Stop-start system........................ 138
Storage compartments .................58
Sunroof ........................................ 36
Sunvisor lights ........................... 124
Sun visors .................................... 36
Symbols ......................................... 4
T
Tachometer ................................. 84
Tail lights ................................... 190
Three-point seat belt .................... 44
Tools .......................................... 197
Tow bar....................................... 175
Towing ................................ 175, 214
Towing another vehicle .............216
Towing equipment .....................176
Towing the vehicle .....................214
Traction Control system ............. 151
Traction Control system off........... 94
Traffic sign assistant .............96, 164
Trailer towing ............................. 176
Transmission ............................... 16
Transmission display .................145
Tread depth ............................... 204Trip odometer .............................. 83
Turn lights ............................ 91, 122
Tyre chains ................................ 205
Tyre designations ......................198
Tyre pressure ............................ 199
Tyre pressure monitoring system ............................... 94, 200
Tyre pressures ........................... 234
Tyre repair kit ............................. 205
U Ultrasonic parking assist............. 160
Underseat storage .......................59
Upholstery .................................. 219
Uplevel display ............................. 96
Using this manual ..........................3
V Valet mode ................................. 101
Vehicle battery ........................... 185
Vehicle checks............................ 181
Vehicle data ................................ 225
Vehicle data recording and privacy ..................................... 241
Vehicle detected ahead ................96
Vehicle dimensions .................... 232
Vehicle Identification Number ....223
Vehicle jack ................................ 197
Vehicle messages .....................103
Vehicle personalisation .............105
Vehicle security ............................ 30