instrument panel VAUXHALL MOVANO_B 2015 User Guide
[x] Cancel search | Manufacturer: VAUXHALL, Model Year: 2015, Model line: MOVANO_B, Model: VAUXHALL MOVANO_B 2015Pages: 209, PDF Size: 4.92 MB
Page 96 of 209
94Lighting
Rear reading lightsBus
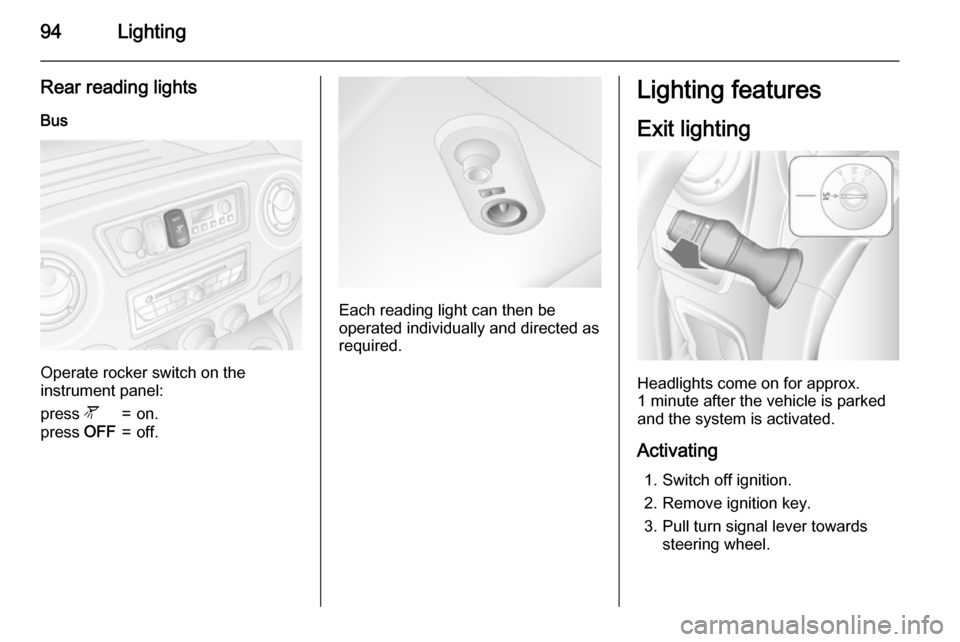
Operate rocker switch on the
instrument panel:
press l=on.press OFF=off.
Each reading light can then be
operated individually and directed as
required.
Lighting features
Exit lighting
Headlights come on for approx.
1 minute after the vehicle is parked
and the system is activated.
Activating 1. Switch off ignition.
2. Remove ignition key.
3. Pull turn signal lever towards steering wheel.
Page 100 of 209
98Climate control
Demisting and defrosting the
windows ■ Switch cooling n on.
■ Set temperature control to warmest
level.
■ Set fan speed to highest level.
■ Set air distribution control to V.
■ Switch on heated rear window Ü.
■ Open side air vents as required and
direct them towards door windows.
■ For simultaneous warming of the foot well, set air distribution control
to J.
Notice
If the V button is pressed while the
engine is running, an Autostop will
be inhibited until the V button is
pressed again.
If the V button is pressed while the
engine is in an Autostop, the engine will restart automatically.Electronic climate control
system
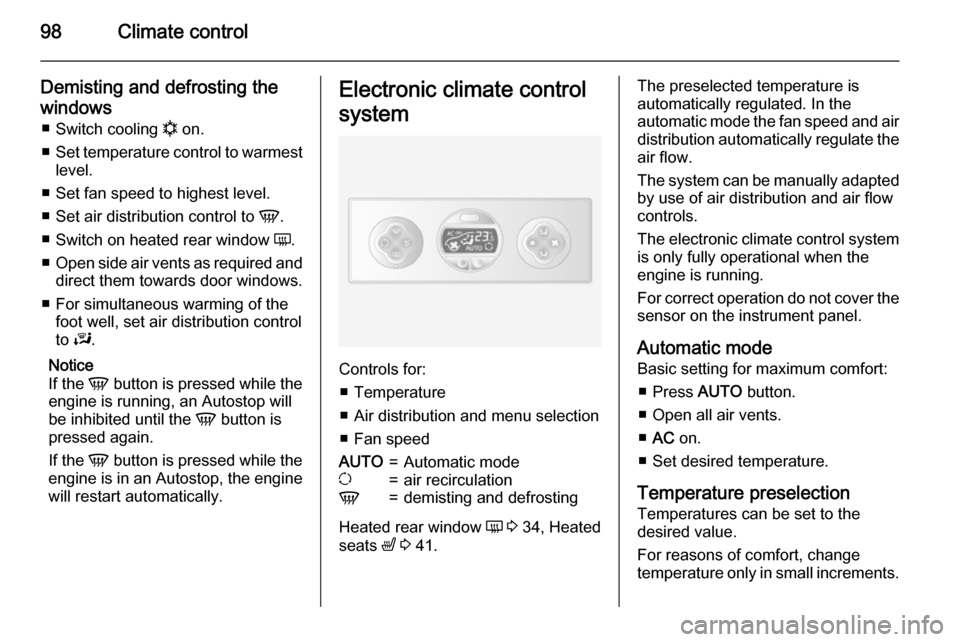
Controls for: ■ Temperature
■ Air distribution and menu selection
■ Fan speed
AUTO=Automatic modeu=air recirculationV=demisting and defrosting
Heated rear window Ü 3 34, Heated
seats ß 3 41.
The preselected temperature is
automatically regulated. In the
automatic mode the fan speed and air distribution automatically regulate the
air flow.
The system can be manually adapted by use of air distribution and air flowcontrols.
The electronic climate control system
is only fully operational when the
engine is running.
For correct operation do not cover the
sensor on the instrument panel.
Automatic mode Basic setting for maximum comfort:
■ Press AUTO button.
■ Open all air vents.
■ AC on.
■ Set desired temperature.
Temperature preselection
Temperatures can be set to the
desired value.
For reasons of comfort, change
temperature only in small increments.
Page 106 of 209

104Climate control
In addition to the remote control unit,
the heating can also be switched on
for 30 minutes, or off, using the button on the instrument panel.
Battery replacement
Replace the battery when the range
of the remote control is reduced or
when the battery charge symbol
flashes.
Open the cover using a coin and
replace the battery (CR 2430 or
equivalent), ensuring the new battery
is correctly installed with the positive
( < ) side facing the positive terminals.
Replace the cover securely.
Dispose of old batteries in
accordance with environmental
regulations.Batteries do not belong in household
waste. They must be disposed of at
an appropriate recycling collection
point.
Remote control fault displayscobA=Poor signal –
adjust positionconP=No signal –
move closerbALo=Battery low –
change batteryErr=System error –
consult workshopAdd, AddE=System in learning
mode
Teach remote control
If the vehicle battery is reconnected, the LED in the instrument panel
button illuminates and the system
configures the remote control menu
automatically. If the LED flashes,
press OK button on remote control,
select Add or AddE and confirm.
Additional remote control units may
also be configured. Press the button
until LED flashes, switch on the
remote control, select Add and
confirm.
AddE teaches the current remote
control unit exclusively and blocks all
previously configured units. Add
teaches up to 4 remote control units,
but only one unit can operate the
system at any one time.
Operation
Heating Y
Select Y in the menu bar and confirm.
The predetermined heating duration,
e.g. L 30, flashes in the display. The
factory setting is 30 minutes.
To temporarily adjust the heating
duration, adjust with the q or r
button and confirm. The value can be
set from 10 to 120 minutes. Due to the power consumption, note the heatingduration.
To switch off, select Y in the menu bar
again and confirm.
Page 131 of 209
Driving and operating129vans). Object identification in the
upper part of these vehicles
cannot be guaranteed.
Objects with a very small reflection
cross section, like objects of
narrow size or soft materials, may
not be detected by the system.
Parking assist will not detect
objects out of the detection range.
Deactivation
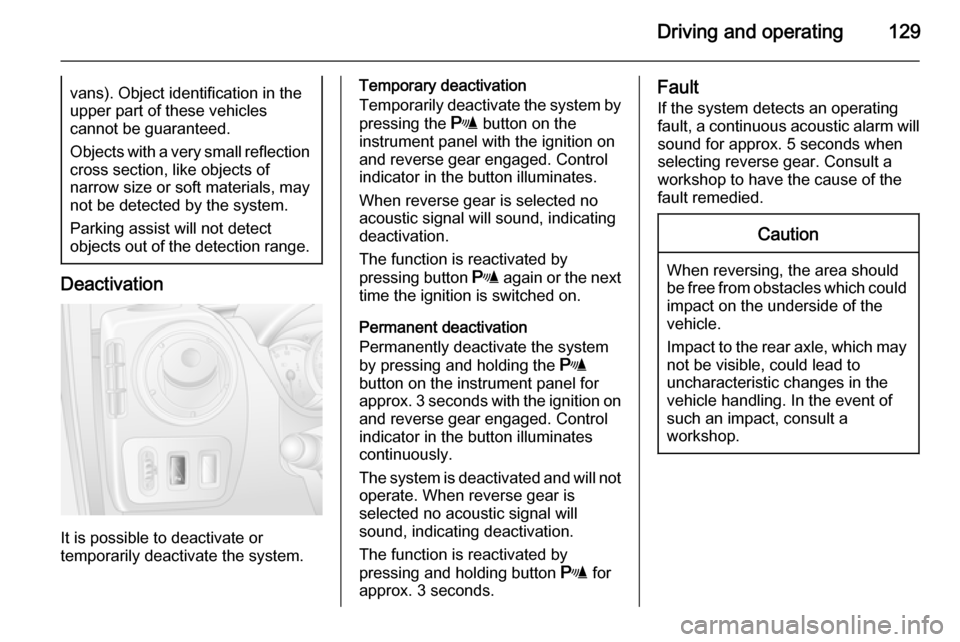
It is possible to deactivate or
temporarily deactivate the system.
Temporary deactivation
Temporarily deactivate the system by
pressing the r button on the
instrument panel with the ignition on
and reverse gear engaged. Control
indicator in the button illuminates.
When reverse gear is selected no
acoustic signal will sound, indicating
deactivation.
The function is reactivated by
pressing button r again or the next
time the ignition is switched on.
Permanent deactivation
Permanently deactivate the system
by pressing and holding the r
button on the instrument panel for
approx. 3 seconds with the ignition on and reverse gear engaged. Control
indicator in the button illuminates
continuously.
The system is deactivated and will not operate. When reverse gear is
selected no acoustic signal will
sound, indicating deactivation.
The function is reactivated by
pressing and holding button r for
approx. 3 seconds.Fault
If the system detects an operating fault, a continuous acoustic alarm will sound for approx. 5 seconds when
selecting reverse gear. Consult a
workshop to have the cause of the
fault remedied.Caution
When reversing, the area should
be free from obstacles which could impact on the underside of the
vehicle.
Impact to the rear axle, which may
not be visible, could lead to
uncharacteristic changes in the
vehicle handling. In the event of
such an impact, consult a
workshop.
Page 136 of 209
134Driving and operating
The pitch of the audible warning will
change if a turn signal light on the
trailer or the towing vehicle fails.
Trailer stability assist
If the system detects snaking
movements, engine power is reduced
and the vehicle/trailer combination is
selectively braked until the snaking ceases. While the system is working,keep steering wheel as still as
possible.
Trailer stability assist (TSA) is a
function of the Electronic stability
program (ESP) 3 124.Auxiliary features
Power take-off
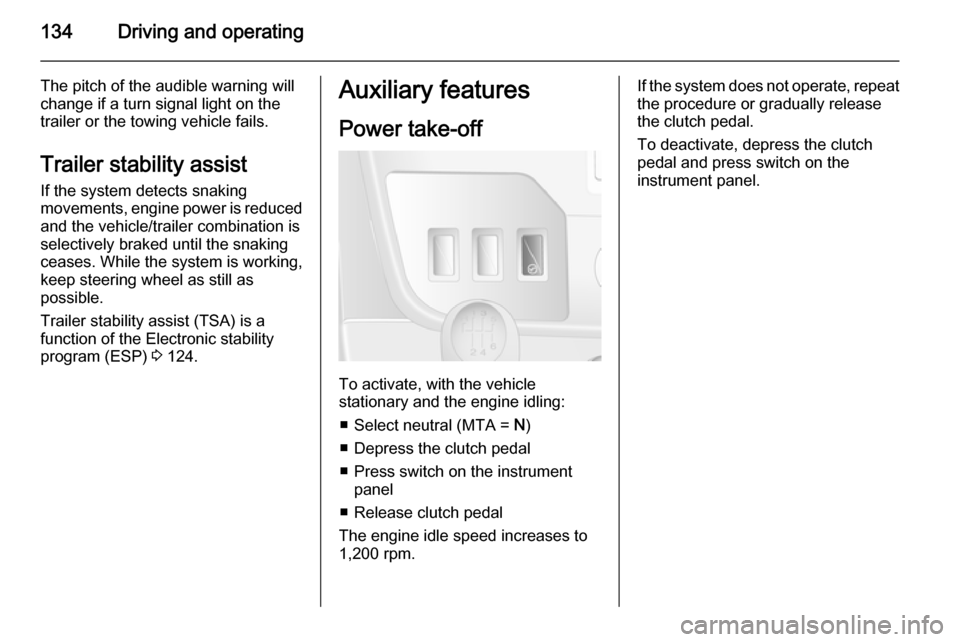
To activate, with the vehicle
stationary and the engine idling:
■ Select neutral (MTA = N)
■ Depress the clutch pedal
■ Press switch on the instrument panel
■ Release clutch pedal
The engine idle speed increases to 1,200 rpm.
If the system does not operate, repeat
the procedure or gradually release
the clutch pedal.
To deactivate, depress the clutch
pedal and press switch on the
instrument panel.
Page 154 of 209
152Vehicle careInstrument panel
illumination Have bulbs replaced by a workshop.Electrical system
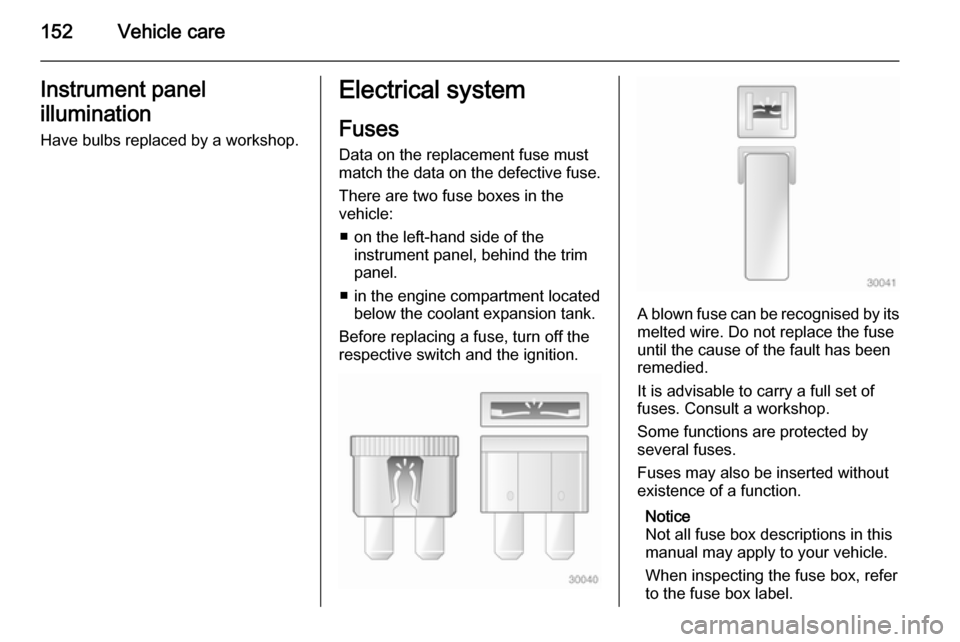
Fuses
Data on the replacement fuse must match the data on the defective fuse.
There are two fuse boxes in the
vehicle:
■ on the left-hand side of the instrument panel, behind the trim
panel.
■ in the engine compartment located below the coolant expansion tank.
Before replacing a fuse, turn off the respective switch and the ignition.
A blown fuse can be recognised by its melted wire. Do not replace the fuse
until the cause of the fault has been
remedied.
It is advisable to carry a full set of
fuses. Consult a workshop.
Some functions are protected by
several fuses.
Fuses may also be inserted without
existence of a function.
Notice
Not all fuse box descriptions in this
manual may apply to your vehicle.
When inspecting the fuse box, refer to the fuse box label.
Page 155 of 209
Vehicle care153
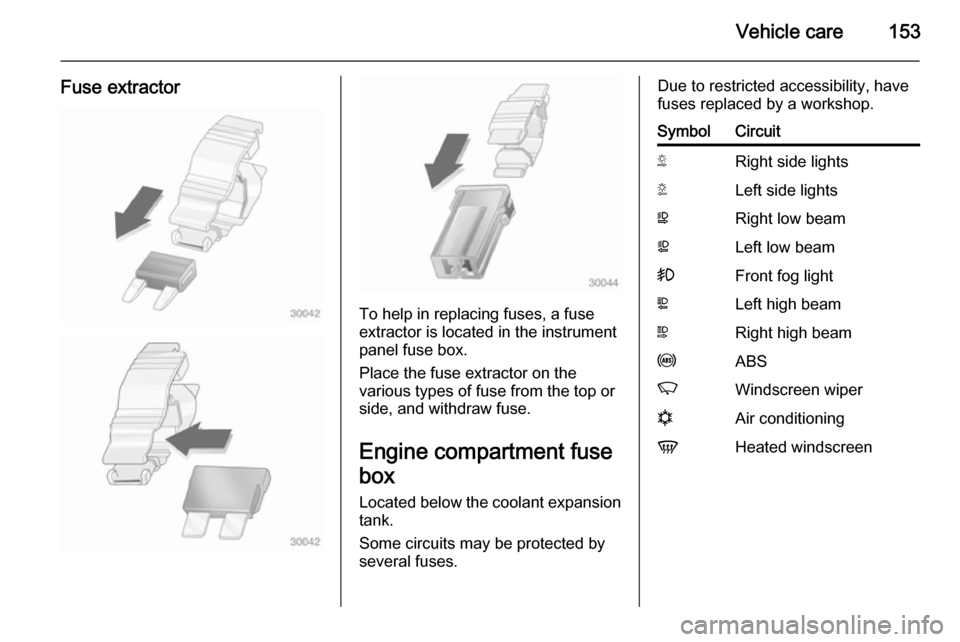
Fuse extractor
To help in replacing fuses, a fuse
extractor is located in the instrument
panel fuse box.
Place the fuse extractor on the
various types of fuse from the top or
side, and withdraw fuse.
Engine compartment fusebox
Located below the coolant expansion tank.
Some circuits may be protected by
several fuses.
Due to restricted accessibility, have
fuses replaced by a workshop.SymbolCircuitSRight side lightsTLeft side lightsWRight low beamaLeft low beam>Front fog lightLLeft high beamNRight high beamuABSKWindscreen wipernAir conditioningVHeated windscreen
Page 156 of 209

154Vehicle careInstrument panel fuse box
Located behind the trim panel on the
left-hand side of the instrument panel. Pull upper part of trim panel to
remove.
Do not store any objects behind this
panel.
Some circuits may be protected by
several fuses.
SymbolCircuitZInfotainment system, seat
heating, vehicle display
screen, audio connections,
alarm?Power outletÌCigarette lightereInstrument panelUCentral lockingOTurn signals, rear fog lights,
body control moduleDIAGDiagnostic connectoruABS, Electronic stability
programdInterior lights, brake lightsZBody control moduleSTOPBrake lightIBody control module, power windows, air conditioningmLeft heated rear windowSymbolCircuitnRight heated rear windowRWindscreen washerMElectronic immobiliserUHeated seatsFBLCornering lightlHands-free connection&TachographPTOPower take-offjHornÍPreheating, diesel fuel filterxClimate control fanADPAdditional adaptations,Power windows, body
control module
Page 175 of 209

Vehicle care173
Paintwork damageRectify minor paintwork damage witha touch-up pen before rust forms.
Have more extensive damage or rust areas repaired by a workshop.
Underbody Some areas of the vehicle underbody
have a PVC undercoating while other
critical areas have a durable
protective wax coating.
After the underbody is washed, check the underbody and have it waxed if
necessary.
Bitumen/rubber materials could
damage the PVC coating. Have
underbody work carried out by a
workshop.
Before and after winter, wash the
underbody and have the protective
wax coating checked.
Towing equipment
Do not clean the coupling ball bar with
a steam-jet or high-pressure jet
cleaner.Interior care
Interior and upholsteryOnly clean the vehicle interior,
including the instrument panel fascia
and panelling, with a dry cloth or
interior cleaner.
Clean leather upholstery with clear
water and a soft cloth. In case of
heavy soiling, use leather care.
The instrument cluster and the
displays should only be cleaned using
a soft damp cloth. If necessary use a
weak soap solution.
Clean fabric upholstery with a
vacuum cleaner and brush. Remove
stains with an upholstery cleaner.
Clothing fabrics may not be
colourfast. This could cause visible
discolourations, especially on light- coloured upholstery. Removable
stains and discolourations should be
cleaned as soon as possible.
Clean seat belts with lukewarm water or interior cleaner.Caution
Close Velcro fasteners as open
Velcro fasteners on clothing could damage seat upholstery.
The same applies to clothing with
sharp-edged objects, like zips or
belts or studded jeans.
Plastic and rubber parts
Plastic and rubber parts can be
cleaned with the same cleaner as
used to clean the body. Use interior cleaner if necessary. Do not use any
other agent. Avoid solvents and petrol in particular. Do not use high-
pressure jet cleaners.
Page 206 of 209

204
HHand brake - see Parking brake. 122
Hazard warning flashers ..............91
Headlight flash ............................. 90
Headlight range adjustment ........90
Headlights ...................... 89, 90, 144
Headlights when driving abroad ..90
Head restraint adjustment .............8
Head restraints ............................ 36
Heated mirrors ............................. 31
Heated rear window ..................... 34
Heating ........................................ 41
Heating and ventilation system ...96
High beam ............................. 83, 90
Hill start assist ........................... 123
Horn ....................................... 13, 70
I
Identification plate .....................179
Idle speed control ......................111
Ignition switch positions .............110
Immobiliser .................................. 29
Indicators ...................................... 74
Information displays...................... 84
Initial drive information.................... 6 Instrument cluster ........................74
Instrument panel fuse box .........154
Instrument panel illumination .....152
Instrument panel overview ........... 10Instrument panel storage .............61
Interior care ............................... 173
Interior lighting .............................. 92
Interior lights ........................ 92, 151
Interior mirrors .............................. 31
Interruption of power supply ......121
Introduction .................................... 3
ISOFIX child restraint systems ....60
J
Jack ............................................ 155
Jump starting ............................. 168
K Keys ............................................. 18
Keys, locks ................................... 18
L
Lashing eyes ............................... 64
Light covers, misted...................... 92
Lighting ......................................... 89
Lighting features ........................... 94
Light switch .................................. 89
Load compartment lighting ..........93
Loading information .....................67
Low fuel ....................................... 83
M
Malfunction indicator light ............80
Manual adjustment ......................30Manual anti-dazzle ......................31
Manual mode ............................. 119
Manual transmission .................. 117
Manual transmission automated 117
Manual windows ..........................32
Messages ..................................... 85
Mirror adjustment ........................... 8
Mirrors .................................... 30, 31
Misted light covers .......................92
N New vehicle running-in ..............109
Number plate light .....................150
O Object detection systems ...........128
Octane rating .............................. 182
Odometer ..................................... 74
Oil ............................................... 137
Oil, engine .......................... 176, 181
Oil level ......................................... 75
Oil pressure .................................. 82
Outside temperature ....................71
Overcab storage ..........................63
Overhead console .......................63
Overrun cut-off ........................... 111
P Parking ................................ 17, 113
Parking assist ............................ 128