tyre pressure VAUXHALL MOVANO_B 2015 Owner's Manual
[x] Cancel search | Manufacturer: VAUXHALL, Model Year: 2015, Model line: MOVANO_B, Model: VAUXHALL MOVANO_B 2015Pages: 209, PDF Size: 4.92 MB
Page 18 of 209

16In brief
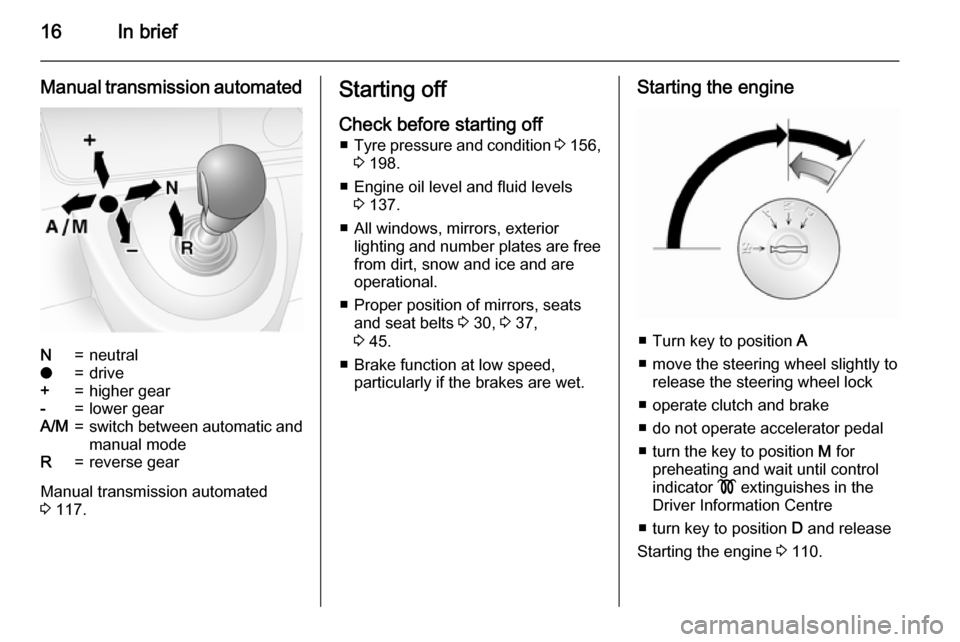
Manual transmission automatedN=neutralo=drive+=higher gear-=lower gearA/M=switch between automatic and
manual modeR=reverse gear
Manual transmission automated
3 117.
Starting off
Check before starting off ■ Tyre pressure and condition 3 156,
3 198.
■ Engine oil level and fluid levels 3 137.
■ All windows, mirrors, exterior lighting and number plates are free
from dirt, snow and ice and are
operational.
■ Proper position of mirrors, seats and seat belts 3 30, 3 37,
3 45.
■ Brake function at low speed, particularly if the brakes are wet.Starting the engine
■ Turn key to position A
■ move the steering wheel slightly to release the steering wheel lock
■ operate clutch and brake
■ do not operate accelerator pedal
■ turn the key to position M for
preheating and wait until control
indicator ! extinguishes in the
Driver Information Centre
■ turn key to position D and release
Starting the engine 3 110.
Page 70 of 209

68Storage9Warning
Always make sure that the load in
the vehicle is securely stowed.
Otherwise objects can be thrown
around inside the vehicle and
cause personal injury or damage
to the load or vehicle.
■ The payload is the difference between the permitted gross
vehicle weight (see identification
plate 3 179) and the EC kerb
weight.
To calculate the payload, enter the
data for your vehicle in the Weights
table at the front of this manual.
The EC kerb weight includes
weights for the driver (68 kg),
luggage (7 kg) and all fluids (tank
90% full).
Optional equipment and
accessories increase the kerb
weight.
■ Driving with a roof load increases the sensitivity of the vehicle to
cross-winds and has a detrimental
effect on vehicle handling due to
the vehicle's higher centre of
gravity. Distribute the load evenly
and secure it properly with retaining
straps. Adjust the tyre pressure and vehicle speed according to the load
conditions. Check and retighten the straps frequently.
Do not drive faster than 75 mph.
■ The permissible roof load (which includes the weight of the roof rack)
is 200 kg for standard roof variants.
The roof load is the combined
weight of the roof rack and the load.
Page 84 of 209

82Instruments and controlsEngine coolant
temperature
W illuminates red.
Illuminates when the engine is running
If W illuminates (possibly in
combination with control indicator
C ), stop vehicle and switch off
engine.Caution
Coolant temperature too high.
Check coolant level 3 138.
If there is sufficient coolant, consult a workshop.
Preheating
! illuminates yellow.
Preheating is activated.Only
activates when outside temperature is low.
Diesel particle filter
8
Not used.
Diesel particle filter 3 80, 3 115.
Tyre pressure monitoring
system
w illuminates or flashes.
Illuminates
Tyre pressure loss. Stop immediately and check tyre pressure.
Control indicator w illuminates
together with C 3 80 and a
corresponding message appears in
the Driver Information Centre when a
puncture or severely under-inflated
tyre is detected.
Flashes
Fault in system. After a delay the
control indicator illuminates
continuously. Consult a workshop.
Control indicator w illuminates
together with A 3 80 and a
corresponding message appears inthe Driver Information Centre when a tyre without a pressure sensor ismounted (e.g. spare wheel).
Tyre pressure monitoring system
3 157.
Engine oil pressure
I illuminates red.
Illuminates briefly when the ignition is switched on.
Illuminates when the engine is runningCaution
Engine lubrication may be
interrupted. This may result in
damage to the engine and/or
locking of the drive wheels.
1. Depress clutch.
2. Select neutral gear, set selector lever to N.
Page 89 of 209

Instruments and controls87
■ Distance travelled
■ Average speed
■ Distance before service 3 76
■ Clock 3 72
■ Cruise control and speed limiter stored speed 3 125
■ Tyre pressures 3 157
■ Fault and information messages
Fuel used
Displays the amount of fuel
consumed since the last reset.
The measurement can be restarted at
any time by pressing and holding
button.
Average consumption
The value is displayed after driving a
distance of 0.25 miles.
Average consumption is displayed,
taking into consideration the distance
travelled and the fuel used since the
last reset.
The measurement can be restarted at
any time.Instantaneous consumption
The value is displayed after reaching
a speed of 20 mph.
Range The value is displayed after driving adistance of 0.25 miles.
The range is calculated from the
current contents of the fuel tank and
the average consumption since the
last reset.
The range will not display if control
indicator Y is illuminated in the
instrument cluster 3 83.
The measurement can be restarted at
any time.
Distance travelled Displays the distance driven since the
last reset.
The measurement can be restarted at
any time.
Average speed The value is displayed after driving adistance of 0.25 miles.
The average speed since the last
reset is displayed.The measurement can be restarted at
any time.
Interruptions in the journey with the
ignition off are not included in the
calculations.
Reset trip computer information
To reset the trip computer, select one
of its functions then press and hold
button on end of wiper lever.
The following trip computer
information will be reset:
■ Fuel used
■ Average consumption
■ Range
■ Distance travelled
■ Average speed
The trip computer will reset
automatically when the maximum
value of any of the parameters is
exceeded.
Page 135 of 209

Driving and operating133
If the trailer starts snaking, drive moreslowly, do not attempt to correct the
steering and brake sharply if
necessary.
When driving downhill, drive in the
same gear as if driving uphill and
drive at a similar speed.
Adjust tyre pressure to the value
specified for full load 3 198.
Trailer towing Trailer loads
The permissible trailer loads are
vehicle-dependent and engine-
dependent maximum values which
must not be exceeded. The actual
trailer load is the difference between
the actual gross weight of the trailer
and the actual coupling socket load
with the trailer coupled.
The permissible trailer loads are
specified in the vehicle documents. In general, they are valid for gradients
up to max. 12 %.
The permitted trailer load applies up to the specified incline and up to an
altitude of 1000 metres above sealevel. Since engine power decreases as altitude increases due to the airbecoming thinner, therefore reducing
climbing ability, the permissible gross
train weight also decreases by 10 % for every 1000 metres of additional
altitude. The gross train weight does
not have to be reduced when driving on roads with slight inclines (less than 8 %, e.g. motorways).
The permissible gross train weight
must not be exceeded. This weight is
specified on the identification plate
3 179.
Vertical coupling load
The vertical coupling load is the load
exerted by the trailer on the coupling
ball. It can be varied by changing the
weight distribution when loading the
trailer.
The maximum permissible vertical
coupling load is specified on the
towing equipment identification plate
and in the vehicle documents. Always aim for the maximum load, especially
in the case of heavy trailers. The
vertical coupling load should never
fall below 25 kg.In the case of trailer loads of
1200 kg or more, the vertical coupling load should not be less than 50 kg.
Rear axle load When the trailer is coupled and the
towing vehicle fully loaded (including
all occupants), the permissible rear
axle load (see identification plate or
vehicle documents) must not be
exceeded.
Towing equipmentCaution
When operating without a trailer,
remove the coupling ball bar.
Towing equipment audible
warning For vehicles fitted with towing
equipment, when connected to a
trailer the pitch of the audible warning
changes upon operation of the turn
signals.
Page 137 of 209

Vehicle care135Vehicle careGeneral Information...................135
Vehicle checks ........................... 136
Bulb replacement .......................144
Electrical system ........................152
Vehicle tools .............................. 155
Wheels and tyres .......................156
Jump starting ............................. 168
Towing ....................................... 170
Appearance care .......................171General Information
Accessories and vehicle
modifications
We recommend the use of genuine parts and accessories and factory
approved parts specific for your
vehicle type. We cannot assess or
guarantee reliability of other products
- even if they have a regulatory or
otherwise granted approval.
Do not make any modifications to the electrical system, e.g. changes of
electronic control units (chip tuning).Caution
When transporting the vehicle on
a train or on a recovery vehicle, the
mud flaps might be damaged.
Vehicle storage
Storage for a long period of time
If the vehicle is to be stored for several months:
■ Wash and wax the vehicle.
■ Have the wax in the engine compartment and underbody
checked.
■ Clean and preserve rubber seals.
■ Change engine oil.
■ Drain washer fluid reservoir.
■ Check coolant antifreeze and corrosion protection.
■ Adjust tyre pressure to the value specified for full load.
■ Park vehicle in a dry, well ventilated
place. Engage first or reverse gear.
Prevent the vehicle from rolling.
■ Do not apply parking brake.
Page 138 of 209

136Vehicle care
■ Open bonnet, close all doors andlock the vehicle.
■ Disconnect the clamp from the negative terminal of the vehicle
battery. Beware that all systems are not functional, e.g. anti-theft alarm
system.
Putting back into operation When the vehicle is to be put back into
operation:
■ Connect the clamp to the negative terminal of the vehicle battery.
Activate the electronics of the
power windows.
■ Check tyre pressure.
■ Fill up the washer fluid reservoir.
■ Check the engine oil level.
■ Check the coolant level.
■ Fit the number plate, if necessary.End-of-life vehicle
recovery
Information on end-of-life vehicle
recovery centres and the recycling of
end-of-life vehicles is available on our website, where legally required. Only
entrust this work to an authorised
recycling centre.Vehicle checks
Performing work9 Warning
Only perform engine compartment
checks when the ignition is off.
The cooling fan may start
operating even if the ignition is off.
9 Danger
The ignition system generates
extremely high voltages. Do not
touch.
The caps for topping up the engine oil, the coolant, the washer fluid and the
oil dipstick handle are yellow for ease
of identification.
Page 158 of 209

156Vehicle careWheels and tyres
Tyre condition, wheel condition
Drive over edges slowly and at right
angles if possible. Driving over sharp
edges can cause tyre and wheel
damage. Do not trap tyres on the kerb when parking.
Regularly check the wheels for
damage. Seek the assistance of a
workshop in the event of damage or
unusual wear.
Tyres Factory-fitted tyres are matched to
the chassis and offer optimum driving
comfort and safety.
Winter tyres Winter tyres improve driving safety attemperatures below 7 °C and shouldtherefore be fitted on all wheels.
In accordance with country-specific
regulations, affix the maximum speed
sticker in the driver's field of view.Tyre designations
E.g. 215/65 R 16 C 109 R215=Tyre width, mm65=Cross-section ratio (tyre height
to tyre width), %R=Belt type:RadialRF=Type:RunFlat16=Wheel diameter, inchesC=Cargo or commercial use88=Load index e.g. 109 is
equivalent to approx. 1030 kgR=Speed code letter
Speed code letter:
Q=up to 100 mphS=up to 112 mphT=up to 118 mphH=up to 130 mphV=up to 150 mphW=up to 168 mph
Tyre pressure
Check the pressure of cold tyres at
least every 14 days and before any
long journey. Do not forget the spare
wheel. This also applies to vehicles
with tyre pressure monitoring system.
Tyre pressures 3 198. Always inflate
tyres to the pressures shown on the
label on the driver's door frame.
The tyre pressure data refers to cold
tyres. It applies to summer and winter tyres.
Always inflate the spare tyre to the
pressure specified for full load.
Incorrect tyre pressures will impair
safety, vehicle handling, comfort and
fuel economy and will increase tyre
wear.
Tyre pressures differ depending on
various options. For the correct tyre
pressure value, follow the procedure
below:
1. Identify the engine identifier code.
Engine data 3 182.
2. Identify the respective tyre.
The tyre pressure tables show all possible tyre combinations 3 198.
For the tyres approved for your
vehicle, refer to the EEC Certificate of
Conformity provided with your vehicle or other national registration
documents.
Page 159 of 209

Vehicle care157
The driver is responsible for correct
adjustment of tyre pressure.9 Warning
If the pressure is too low, this can
result in considerable tyre warm-
up and internal damage, leading to tread separation and even to tyre
blow-out at high speeds.
Rear-wheel drive, with twin rear
wheels When inflating the outer tyre, the
inflation tube should be passed
between the two wheels.
Tyre pressure monitoring
system
The Tyre Pressure Monitoring
System (TPMS) uses radio and
sensor technology to check tyre
pressure levels.
Caution
Tyre pressure monitoring system
warns only about low tyre pressure condition and does not replace
regular tyre maintenance by the
driver.
All wheels must be equipped with pressure sensors and the tyres must
have the prescribed pressure.
Notice
In countries where the tyre pressure
monitoring system is legally
required, the use of wheels without
pressure sensors will invalidate the
vehicle type approval.
The TPMS sensors monitor the air
pressure in the tyres and transmit tyre pressure readings to a receiver
located in the vehicle.
Each tyre, including the spare, should
be checked monthly when cold and
inflated to the inflation pressure
recommended on the tyre pressure
label.
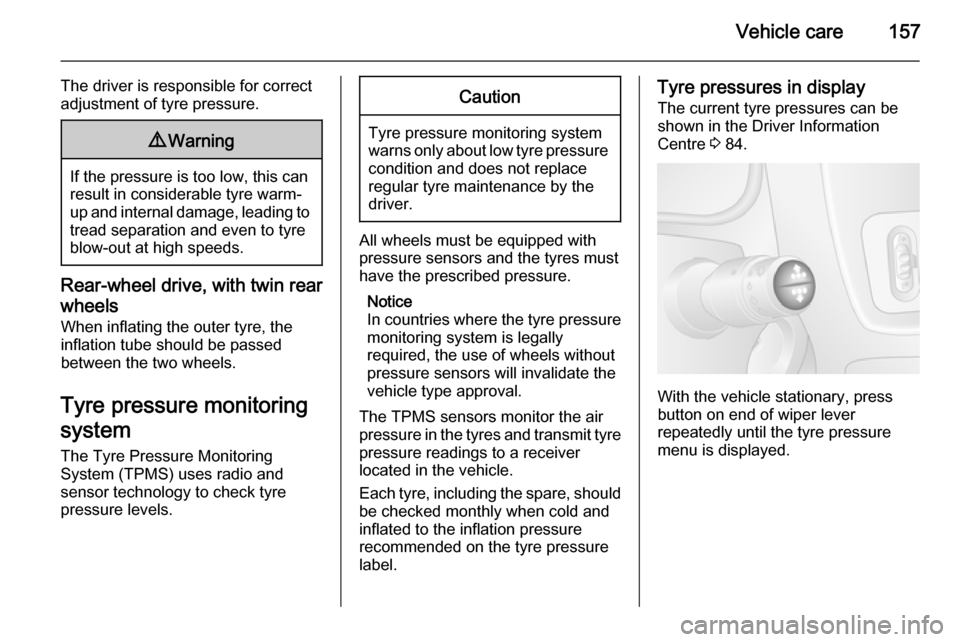
Tyre pressures in display
The current tyre pressures can be
shown in the Driver Information
Centre 3 84.
With the vehicle stationary, press
button on end of wiper lever
repeatedly until the tyre pressure
menu is displayed.
Page 160 of 209

158Vehicle care
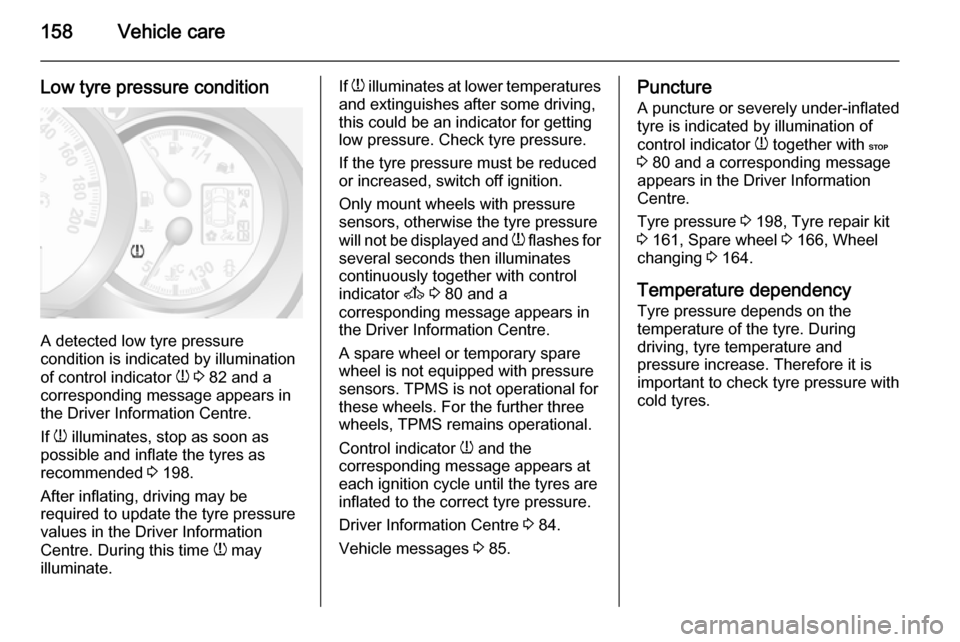
Low tyre pressure condition
A detected low tyre pressure
condition is indicated by illumination
of control indicator w 3 82 and a
corresponding message appears in
the Driver Information Centre.
If w illuminates, stop as soon as
possible and inflate the tyres as
recommended 3 198.
After inflating, driving may be
required to update the tyre pressure
values in the Driver Information
Centre. During this time w may
illuminate.
If w illuminates at lower temperatures
and extinguishes after some driving,
this could be an indicator for getting low pressure. Check tyre pressure.
If the tyre pressure must be reduced
or increased, switch off ignition.
Only mount wheels with pressure
sensors, otherwise the tyre pressure
will not be displayed and w flashes for
several seconds then illuminates continuously together with control
indicator A 3 80 and a
corresponding message appears in
the Driver Information Centre.
A spare wheel or temporary spare
wheel is not equipped with pressure
sensors. TPMS is not operational for these wheels. For the further three
wheels, TPMS remains operational.
Control indicator w and the
corresponding message appears at
each ignition cycle until the tyres are
inflated to the correct tyre pressure.
Driver Information Centre 3 84.
Vehicle messages 3 85.Puncture
A puncture or severely under-inflated
tyre is indicated by illumination of
control indicator w together with C
3 80 and a corresponding message
appears in the Driver Information
Centre.
Tyre pressure 3 198, Tyre repair kit
3 161, Spare wheel 3 166, Wheel
changing 3 164.
Temperature dependency Tyre pressure depends on the
temperature of the tyre. During
driving, tyre temperature and
pressure increase. Therefore it is important to check tyre pressure with
cold tyres.