parking brake VAUXHALL MOVANO_B 2017.5 User Guide
[x] Cancel search | Manufacturer: VAUXHALL, Model Year: 2017.5, Model line: MOVANO_B, Model: VAUXHALL MOVANO_B 2017.5Pages: 259, PDF Size: 6.15 MB
Page 139 of 259

Driving and operating137Bus
The engine is restarted automatically
when operating the power sliding
door switch on the instrument panel
during an Autostop.
Sliding door 3 27.
Restart of the engine by the stop- start system
If one of the following conditions occurs during an Autostop, the
engine may be restarted
automatically by the stop-start
system. Control indicator Ï will flash
green in the instrument cluster during an automatic engine restart.
● the vehicle battery is discharged
● the ambient temperature is too low
● the defrosting function is activated
● the brake vacuum is not sufficient
● the brake pedal is operated repeatedly
● the vehicle starts to moveAn automatic engine restart may not
be possible if a door or the bonnet is
open.
If an electrical accessory, e.g. a
portable CD player, is connected to
the power outlet, a brief power drop during restart might be noticeable.
If the Infotainment system is active,
audio sound may briefly be reduced
or interrupted during the restart.
Fault
If control indicator Ï illuminates
yellow, or the LED illuminates in
deactivation button Î without first
being pressed to deactivate the
system, there is a fault in the stop-
start system 3 98. A corresponding
message also appears in the Driver
Information Centre 3 100.
Seek the assistance of a workshop. Warning chimes 3 101.Parking9 Warning
● Do not park the vehicle on an
easily ignitable surface. The
high temperature of the
exhaust system could ignite the
surface.
● Always apply parking brake without pressing release
button. Apply as firmly as
possible on a downhill slope or
uphill slope. Depress brake
pedal at the same time to
reduce operating force.
● Switch off the engine.
● If the vehicle is on a level surface or uphill slope, engage
first gear. On an uphill slope,
turn the front wheels away from
the kerb.
If the vehicle is on a downhill
slope, engage reverse gear.
Turn the front wheels towards the kerb.
Page 151 of 259
Driving and operating149Starting the engine
Depress the brake pedal when
starting the engine. If the brake pedal
is not depressed, T illuminates in the
transmission display and the engine
cannot be started.
When the brake pedal is depressed,
the transmission automatically shifts
to N (neutral); "N" appears in the
transmission display and the engine
can be started. There may be a slight delay.
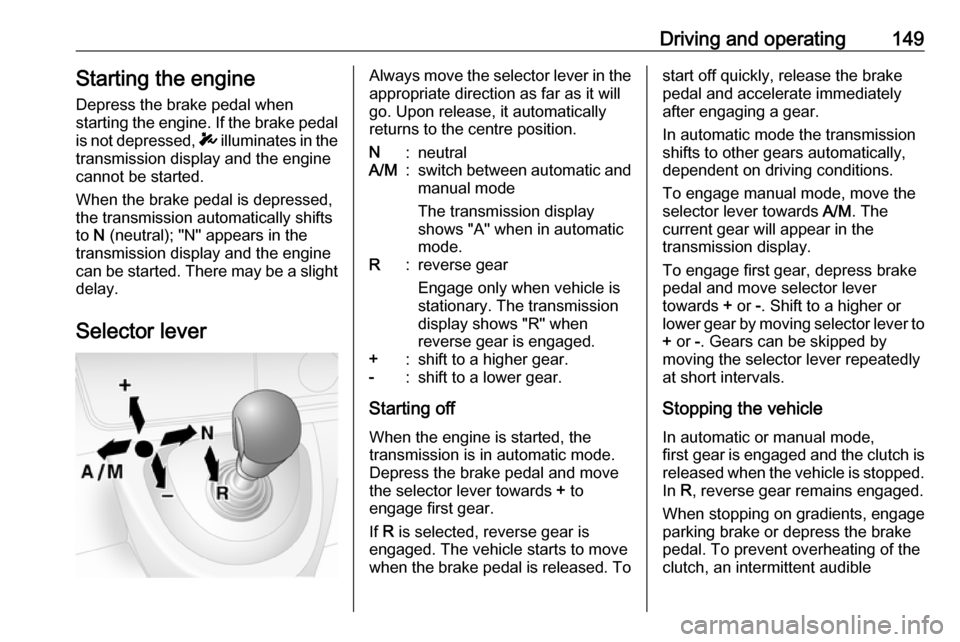
Selector leverAlways move the selector lever in the
appropriate direction as far as it will
go. Upon release, it automatically
returns to the centre position.N:neutralA/M:switch between automatic and manual mode
The transmission display
shows "A" when in automatic
mode.R:reverse gear
Engage only when vehicle is
stationary. The transmission
display shows "R" when
reverse gear is engaged.+:shift to a higher gear.-:shift to a lower gear.
Starting off
When the engine is started, the
transmission is in automatic mode. Depress the brake pedal and move
the selector lever towards + to
engage first gear.
If R is selected, reverse gear is
engaged. The vehicle starts to move
when the brake pedal is released. To
start off quickly, release the brake pedal and accelerate immediately
after engaging a gear.
In automatic mode the transmission
shifts to other gears automatically,
dependent on driving conditions.
To engage manual mode, move the
selector lever towards A/M. The
current gear will appear in the
transmission display.
To engage first gear, depress brake
pedal and move selector lever
towards + or -. Shift to a higher or
lower gear by moving selector lever to + or -. Gears can be skipped by
moving the selector lever repeatedly
at short intervals.
Stopping the vehicle In automatic or manual mode,
first gear is engaged and the clutch is
released when the vehicle is stopped.
In R, reverse gear remains engaged.
When stopping on gradients, engage
parking brake or depress the brake
pedal. To prevent overheating of the
clutch, an intermittent audible
Page 152 of 259
150Driving and operatingwarning may sound as a signal to
depress the brake pedal or apply the
parking brake.
Switch off engine if stopping for a
lengthy period, e.g. in traffic jams.
When the vehicle is parked and the
driver's door is opened, a warning
chime will sound if neutral is not
selected or the brake pedal has not
been depressed.
Engine braking
Automatic mode
When driving downhill, the manual
transmission automated does not
shift into higher gears until a fairly
high engine speed has been reached. It shifts down in good time when
braking.
Manual mode
To utilise the engine braking effect,
select a lower gear in good time when
driving downhill.Rocking the vehicle
Rocking the vehicle is only
permissible if the vehicle is stuck in
sand, mud, snow or a hole. Move the
selector lever between R and A/M (or
between + and -) in a repeat pattern,
while applying light pressure to the
accelerator pedal. Do not race the
engine and avoid sudden
acceleration.
Parking
Apply the parking brake. The most
recently engaged gear (see
transmission display) remains
engaged. With N, no gear is engaged.
When the ignition is switched off, the
transmission no longer responds to
movement of the selector lever.
If the ignition is not switched off, or the
parking brake has not been applied, a
warning chime will sound upon
opening the driver's door.
Manual mode If a higher gear is selected when the
engine speed is too low, or a lower
gear when the speed is too high, theshift is not executed. This prevents
the engine from running at too low or too high an engine speed.
If engine speed is too low, the
transmission automatically shifts to a
lower gear.
If engine speed is too high, the
transmission only switches to a higher gear via kickdown.
Electronic driving programmes
Winter mode V
Page 153 of 259
Driving and operating151Activate the Winter mode if you have
problems starting off on a slippery
road surface.
Activation
Press V. Control indicator V is shown
in the transmission display. The
transmission switches to automatic
mode and the vehicle starts off in a
suitable gear.
Deactivation
The Winter mode is switched off by:
● pressing V again
● turning off the ignition
● switching to manual mode
In order to protect the transmission at
extremely high clutch temperatures,
an intermittent audible warning may
sound. In such cases, depress the
brake pedal, select "N" and apply the parking brake to allow the clutch to
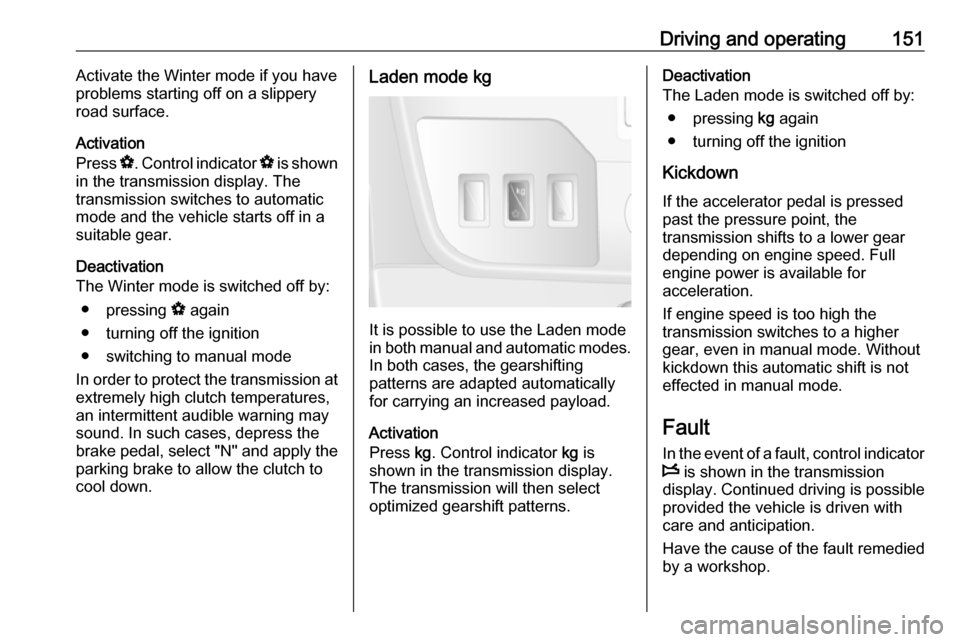
cool down.Laden mode kg
It is possible to use the Laden mode
in both manual and automatic modes. In both cases, the gearshifting
patterns are adapted automatically
for carrying an increased payload.
Activation
Press kg. Control indicator kg is
shown in the transmission display.
The transmission will then select
optimized gearshift patterns.
Deactivation
The Laden mode is switched off by:
● pressing kg again
● turning off the ignition
Kickdown If the accelerator pedal is pressed
past the pressure point, the
transmission shifts to a lower gear
depending on engine speed. Full
engine power is available for
acceleration.
If engine speed is too high the
transmission switches to a higher
gear, even in manual mode. Without
kickdown this automatic shift is not
effected in manual mode.
Fault
In the event of a fault, control indicator W is shown in the transmission
display. Continued driving is possible
provided the vehicle is driven with
care and anticipation.
Have the cause of the fault remedied
by a workshop.
Page 155 of 259
Driving and operating1539Warning
If there is a fault in the ABS, the
wheels may be liable to lock due
to braking that is heavier than
normal. The advantages of ABS are no longer available. During
hard braking, the vehicle can no longer be steered and may
swerve.
If control indicators u, A , R and
C illuminate, the ABS and ESP are
deactivated and the message
BRAKING FAULT is shown in the
Driver Information Centre. Seek the
assistance of a workshop.
Have the cause of the fault remedied
by a workshop.
Parking brake9 Warning
Always apply parking brake firmly
without operating the release
button, and apply as firmly as
possible on a downhill or uphill
slope.
To release the parking brake, pull
the lever up slightly, press the
release button and fully lower the
lever.
To reduce the operating forces of
the parking brake, depress the
brake pedal at the same time.
Control indicator R 3 96.
Parking 3 137.
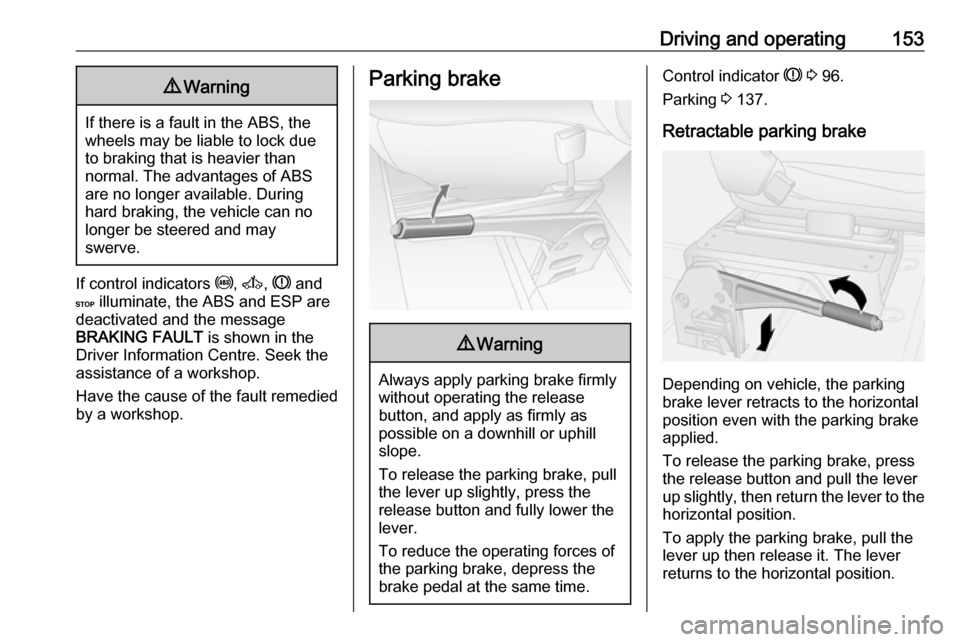
Retractable parking brake
Depending on vehicle, the parking
brake lever retracts to the horizontal
position even with the parking brake
applied.
To release the parking brake, press the release button and pull the lever
up slightly, then return the lever to the
horizontal position.
To apply the parking brake, pull the
lever up then release it. The lever
returns to the horizontal position.
Page 175 of 259
Vehicle care173General Information
Accessories and vehicle modifications
We recommend the use of genuine
parts and accessories and factory
approved parts specific for your
vehicle type. We cannot assess or guarantee reliability of other products
- even if they have a regulatory or
otherwise granted approval.
Any modification, conversion or other changes made to standard vehicle
specifications (including, without
limitation, software modifications,
modifications of the electronic control
units) may invalidate the warranty
offered by Vauxhall. Furthermore,
such changes may impact fuel
consumption, CO 2 emissions and
other emissions of the vehicle and
cause the vehicle to no longer
conform to the type approval,
impacting the validity of your vehicle
registration.Caution
When transporting the vehicle on
a train or on a recovery vehicle, the
mud flaps might be damaged.
Vehicle storage
Storage for a long period of time
If the vehicle is to be stored for several months:
● Wash and wax the vehicle.
● Have the wax in the engine compartment and underbody
checked.
● Clean and preserve rubber seals.
● Change engine oil.
● Drain washer fluid reservoir. ● Check coolant antifreeze and corrosion protection.
● Adjust tyre pressure to the value specified for full load.
● Park vehicle in a dry, well ventilated place. Engage first or
reverse gear. Prevent the vehicle
from rolling.
● Do not apply parking brake.
● Open bonnet, close all doors and
lock the vehicle.
● Disconnect the clamp from the negative terminal of the vehicle
battery. Beware that all systems
are not functional, e.g. anti-theft
alarm system.
Putting back into operation When the vehicle is to be put back into
operation:
● Connect the clamp to the negative terminal of the vehicle
battery. Activate the electronics
of the power windows.
● Check tyre pressure.
● Fill up the washer fluid reservoir. ● Check the engine oil level.
● Check the coolant level.
● Fit the number plate, if necessary.
Page 205 of 259
Vehicle care203Do not remove foreign bodies from
the tyres.
Tyre damage exceeding four mm or
that is at the tyre's sidewall near the
rim cannot be repaired with the tyre repair kit.9 Warning
Do not drive faster than 50 mph.
Do not use for a lengthy period.
Steering and handling may be
affected.
If the vehicle has a flat tyre:
Apply the parking brake and engage
neutral (manual transmission) or N
(manual transmission automated).
The tyre repair kit is located under the
front seat. Slide seat forwards fully
and fold backrest down to access kit.
1. Take the tyre repair kit out from under the front seat.
2. Remove the compressor.
3. Remove the power supply lead(s)
and air hose from the stowage
compartments on the underside
of the compressor.
4. Screw the compressor air hose to
the connection on the sealant
bottle.
5. Fit the sealant bottle into the retainer on the compressor.
Set the compressor near the tyre
in such a way that the sealant
bottle is upright.
6. Unscrew valve cap from defective
tyre.7. Screw the sealant filler hose to the
tyre valve.
8. The rocker switch on the compressor must be set to
position O.
Page 208 of 259
206Vehicle careWheel changingSome vehicles are equipped with a
tyre repair kit instead of a spare wheel
3 202.
Make the following preparations and
observe the following information:
● Park the vehicle on a level, firm and non-slippery surface. The
front wheels must be in the
straight-ahead position.
● Apply the parking brake and engage first gear or reverse gear
(manual transmission) or N
(manual transmission
automated).
● Switch off the air suspension system 3 138.
● Remove the spare wheel 3 208.
● Never change more than one wheel at a time.
● Use the jack only to change wheels in case of puncture, not
for seasonal winter or summer
tyre change.
● The jack is maintenance-free.● If the ground on which the vehicle
is standing is soft, a solid board
(max. 1 cm thick) should be
placed under the jack.
● No people or animals may be in the vehicle when it is jacked-up.
● Never crawl under a jacked-up vehicle.
● Do not start the engine when the vehicle is raised on the jack.
● Clean wheel bolts/nuts and their threads before mounting thewheel.9 Warning
Do not grease wheel bolt, wheel
nut and wheel nut cone.
1. Remove the wheel cover using the hook supplied. Vehicle tools
3 196.
Depending on vehicle, first
remove the bolt/nut covers by
hand then remove the wheel
cover, or press wheel cover at the points indicated by the arrows and
turn to release.
Rear-wheel drive, with twin rear
wheels: Remove the tyre valve
extender from the inner rear
wheel.
2. Install the wheel wrench (depending on vehicle, attach
wheel wrench to adapters)
ensuring that it locates securely
and loosen each wheel bolt/nut by half a turn.
Page 213 of 259
Vehicle care211Jump starting
The jump start terminal is located in
the engine compartment.
A vehicle with a discharged vehicle
battery can be started using jump
leads and the vehicle battery of
another vehicle.
Do not start with a quick charger.9 Warning
Be extremely careful when starting
with jump leads. Any deviation
from the following instructions can
lead to injuries or damage caused
by battery explosion or damage to the electrical systems of both
vehicles.
9 Warning
Avoid contact of the battery with
eyes, skin, fabrics and painted
surfaces. The fluid contains
sulphuric acid which can cause
injuries and damage in the event
of direct contact.
Caution
The air suspension system must
be switched off prior to jump
starting.
Air suspension 3 138.
● Never expose the vehicle battery
to naked flames or sparks.
● A discharged vehicle battery can already freeze at a temperature
of 0 °C. Defrost the frozen vehicle
battery before connecting jump leads.
● Wear eye protection and protective clothing when
handling a vehicle battery.
● Use a booster battery with the same voltage (12 volts). Its
capacity (Ah) must not be much
less than that of the discharged
vehicle battery.
● Use jump leads with insulated terminals and a cross section of
at least 25 mm 2
.
● Do not disconnect the discharged
battery from the vehicle.
● Switch off all unnecessary electrical consumers.
● Switch off the air suspension system 3 138.
● Do not lean over the vehicle battery during jump starting.
● Do not allow the terminals of one
lead to touch those of the other
lead.
● The vehicles must not come into contact with each other during
the jump starting process.
● Apply the parking brake and engage neutral (manual
transmission) or N (manual
transmission automated).
Page 254 of 259

252First aid......................................... 78
First aid kit ................................... 78
Fixed air vents ........................... 128
Fog light ....................................... 99
Fog lights ............................ 110, 186
Folding mirrors ............................. 35
Folding seat .................................. 71
Front airbag system .....................58
Front courtesy light .....................111
Front fog lights ....................106, 110
Front reading light....................... 112
Front seats.................................... 42
Front storage ................................ 71
Front turn signal lights ...............186
Fuel consumption - CO 2-
Emissions ............................... 168
Fuel economy rating (ecoScoring) ............................ 102
Fuel for diesel engines ..............166
Fuel gauge ................................... 89
Fuel tank ..................................... 242
Fuse box ............................. 193, 194
Fuses ......................................... 192
G
Gauges ......................................... 87
General information ...................169
Glass panel .................................. 40
Glovebox ..................................... 71
Glovebox cooler ......................... 128Grab handles ................................ 73
Ground clearance .......................138
H
Hand brake - see Parking brake. 153
Hazard warning flashers ............109
Headlight flash ........................... 108
Headlight range adjustment ......108
Headlights .................. 106, 107, 183
Headlights when driving abroad 108
Head restraint adjustment .............8
Head restraints ............................ 41
Heated exterior mirrors .................15
Heated mirrors ............................. 35
Heated rear window ...............15, 39
Heating ........................................ 48
Heating and ventilation system . 114
High beam ........................... 99, 107
High beam assist ..................99, 107
Hill start assist ........................... 154
Horn ....................................... 14, 82
Hub cap hook ............................. 196
I Identification plate .....................222
Idle speed control .......................134
Ignition switch positions .............132
Immobiliser .................................. 34
Indicators ...................................... 87
Info display ................................. 100
Information displays.................... 100Infotainment system ...................100
Initial drive information.................... 6
Instrument cluster ........................87
Instrument panel fuse box .........193
Instrument panel illumination .....191
Instrument panel overview ........... 10
Instrument panel storage .............70
Interior care ............................... 216
Interior lighting ............................ 111
Interior lights ...................... 111, 190
Interior mirrors .............................. 36
Interruption of power supply ......152
Introduction .................................... 3
ISOFIX .......................................... 61
J Jack ............................................ 196
Journey record............................ 102
Jump starting ............................. 211
K Keys ............................................. 19
Keys, locks ................................... 19
L
Lane departure warning .......96, 165
Lashing eyes ............................... 73
Lashing straps .............................. 73
Laying up the vehicle ..................179
Light covers, misted.................... 110
Lighting ....................................... 106