lights VAUXHALL MOVANO_B 2018.5 Owner's Guide
[x] Cancel search | Manufacturer: VAUXHALL, Model Year: 2018.5, Model line: MOVANO_B, Model: VAUXHALL MOVANO_B 2018.5Pages: 269, PDF Size: 6.41 MB
Page 116 of 269
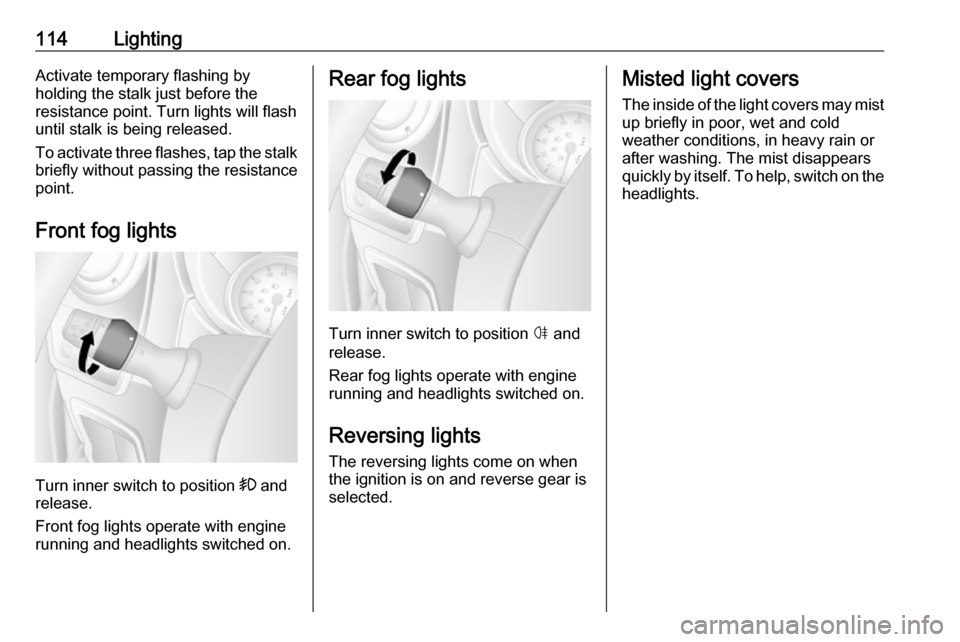
114LightingActivate temporary flashing by
holding the stalk just before the
resistance point. Turn lights will flash
until stalk is being released.
To activate three flashes, tap the stalk
briefly without passing the resistance
point.
Front fog lights
Turn inner switch to position >
and
release.
Front fog lights operate with engine
running and headlights switched on.
Rear fog lights
Turn inner switch to position ø and
release.
Rear fog lights operate with engine
running and headlights switched on.
Reversing lights
The reversing lights come on when
the ignition is on and reverse gear is
selected.
Misted light covers
The inside of the light covers may mist up briefly in poor, wet and cold
weather conditions, in heavy rain or
after washing. The mist disappears
quickly by itself. To help, switch on the
headlights.
Page 117 of 269
Lighting115Interior lighting
Interior lights
Courtesy lights illuminate when the vehicle is unlocked with the remote
control or the front doors are opened.
When the doors are closed, the
courtesy light extinguishes after a
delay or immediately after the ignition
is switched on.
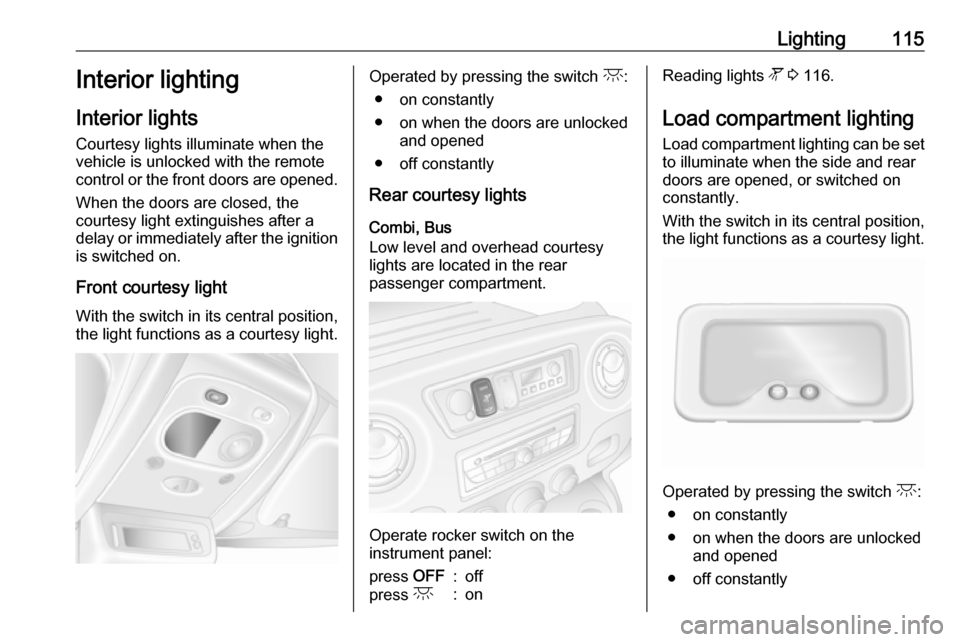
Front courtesy light
With the switch in its central position,
the light functions as a courtesy light.Operated by pressing the switch c:
● on constantly
● on when the doors are unlocked and opened
● off constantly
Rear courtesy lights
Combi, Bus
Low level and overhead courtesy
lights are located in the rear
passenger compartment.
Operate rocker switch on the
instrument panel:
press OFF:offpress c:onReading lights l 3 116.
Load compartment lighting Load compartment lighting can be setto illuminate when the side and rear
doors are opened, or switched on
constantly.
With the switch in its central position,
the light functions as a courtesy light.
Operated by pressing the switch c:
● on constantly
● on when the doors are unlocked and opened
● off constantly
Page 118 of 269
116LightingWhen the doors are closed, the
courtesy light extinguishes after a
delay or immediately after the ignition
is switched on.
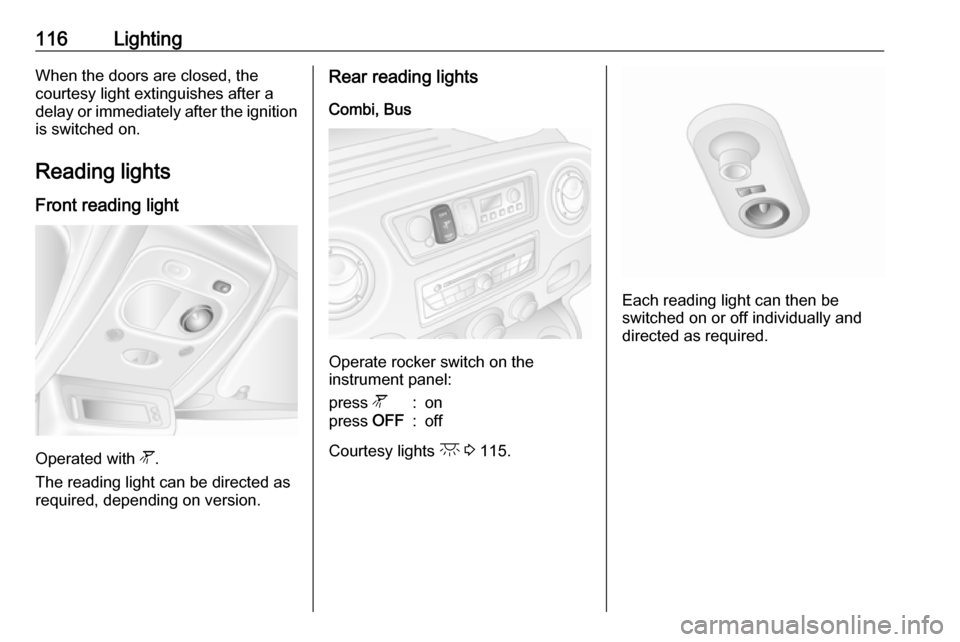
Reading lights Front reading light
Operated with l.
The reading light can be directed as
required, depending on version.
Rear reading lights
Combi, Bus
Operate rocker switch on the
instrument panel:
press l:onpress OFF:off
Courtesy lights c 3 115.
Each reading light can then be
switched on or off individually and
directed as required.
Page 119 of 269
Lighting117Lighting features
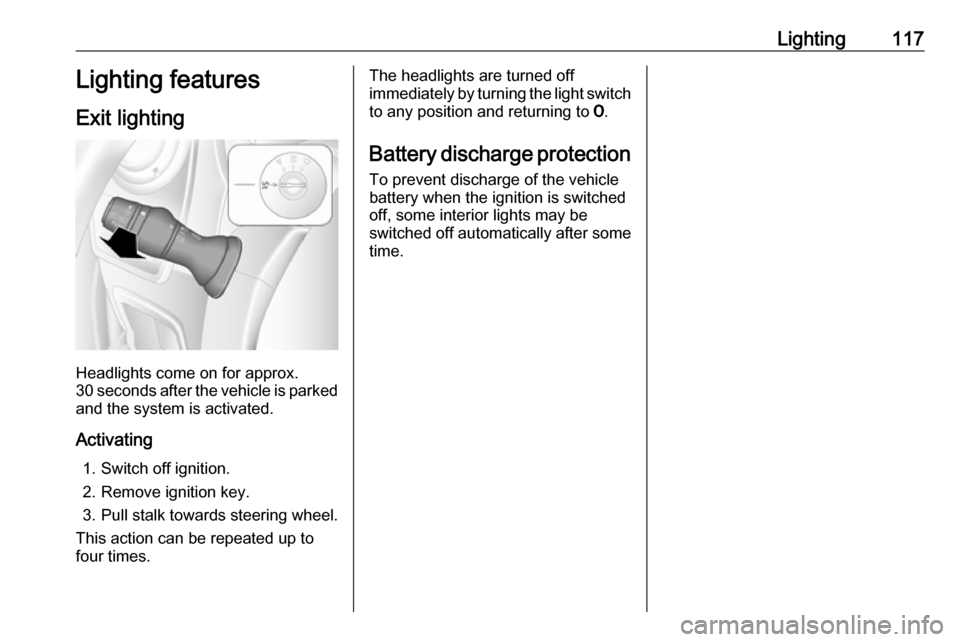
Exit lighting
Headlights come on for approx.
30 seconds after the vehicle is parked
and the system is activated.
Activating 1. Switch off ignition.
2. Remove ignition key.
3. Pull stalk towards steering wheel.
This action can be repeated up to
four times.
The headlights are turned off immediately by turning the light switch
to any position and returning to 7.
Battery discharge protection To prevent discharge of the vehicle
battery when the ignition is switched
off, some interior lights may be
switched off automatically after some
time.
Page 169 of 269

Driving and operating167System limitationsIn some cases, the active emergencybraking system may provide an
automatic braking in situations that
seem to be unnecessary, for instance
in parking garages, due to traffic signs in a curve or due to vehicles in
another lane. This is normal
operation, the vehicle does not need
service. Firmly apply the accelerator
pedal to override the automatic
braking if the situation and the
surroundings permit.
In the following cases, active
emergency braking performance is limited:
● driving on winding or hilly roads
● detecting all vehicles, especially vehicles with a trailer, tractors,
muddy vehicles, etc.
● detecting a vehicle when weather
limits visibility, such as in fog,
rain, or snow
● driving during nighttime● sensor in the windscreen or radar
unit behind the front bumper
blocked by snow, ice, slush, mud, dirt, etc.
● windscreen damaged or affected
by foreign objects, e.g. stickers
Complete attention is always required
while driving, and you should be
ready to take action and apply the
brakes and / or steer the vehicle to
avoid crashes.
Fault
In case the system requires a service, a message is displayed in the Driver
Information Centre.
Additionally, warning lights l and j
illuminate at the same time.
When the system detects that its
function is not available, warning
lights l or j illuminates and stays
on. Additionally, a message in the
Driver Information Centre appear.
The system may be temporarily
disrupted (for example: radar or
camera obscured by dirt, mud, snow
etc.). In this case,park the vehicle and
switch off the engine. Clean the
windscreen area around the cameraand the detection zone of the radar in the front bumper. When the warning
lights and messages still appear after starting the vehicle again, seek the
assistance of a workshop.
Parking assist9 Warning
It is the driver who bears full
responsibility for the parking
manoeuvre.
Always check the surrounding
area while reversing and using the rear parking assist system.
The parking assist measures the
distance between the vehicle and
obstacles behind the vehicle. It
informs and warns the driver by giving acoustic signals.
Page 173 of 269

Driving and operating171The guide line intervals are as
follows:3 (red):30 cm4 (yellow):70 cm5 (green):150 cmSettings
Settings, e.g. brightness, can be set via the Infotainment system. Refer to Infotainment manual for further
information.
Deactivation
The camera is deactivated after a
delay if reverse gear is not engaged.
Fault
The rear view camera may not
operate properly when:
● the surrounding is dark
● the sun or the beam of headlights
is shining directly into the camera lens
● ice, snow, mud, or anything else covers the camera lens. Clean
the lens, rinse it with water, and
wipe it with a soft cloth
● the rear doors are not closed correctly
● the vehicle had a rear-end accident
● there are extreme temperature changes
Lane departure warning The lane departure warning systemuses a front camera to observe the
lane markings between which the
vehicle is driving. The system detects
lane changes and warns the driver in
the event of an unintended lane
change via visual and acoustic
signals.
Criteria for the detection of an
unintended lane change are:
● no operation of turn lights
● no active steering
If the driver is performing these
actions, no warning will be issued.Activation
The lane departure warning system is activated by pressing ì in the roof
console. The LED in the button
extinguishes to indicate that the
system is switched on.
Page 174 of 269

172Driving and operating
When control indicator ì 3 101
illuminates in the instrument cluster,
the system is ready to operate. A
corresponding message also
appears in the Driver Information
Centre 3 104.
Control indicator ì extinguishes
when the system is not ready to warn the driver.
The system is only operable at
vehicle speeds above approx.
37 mph and if lane markings are
available and detected.
If the turn lights are not operated
when changing lanes, i.e. an
unintended lane change is detected,
control indicator ì flashes together
with a warning chime to alert the
driver.
Deactivation
The system is deactivated by
pressing ì; LED in the button
illuminates. A corresponding
message also appears in the Driver
Information Centre.
At speeds below approx. 37 mph the
system is inoperable.
Operation hints The lane departure warning system
may not operate properly when:
● The windscreen is not clean.
● There are adverse environmental
conditions like heavy rain, snow,
direct sunlight or shadows.
The system cannot operate when no
lane marking is detected.Fault
In the event of a fault in the system, a warning message appears in the
Driver Information Centre (possibly in
combination with control indicator j)
and the LED in the button illuminates.
Seek the assistance of a workshop.Driver Information Centre 3 104.
Page 178 of 269
176Driving and operatingIn the case of trailer loads of
1200 kg or more, the vertical coupling load should not be less than 50 kg.
Rear axle load When the trailer is coupled and the
towing vehicle fully loaded (including all occupants), the permissible rear
axle load (see identification plate or
vehicle documents) must not be
exceeded.
Towing equipmentCaution
When operating without a trailer,
remove the coupling ball bar.
Towing equipment audible
warning
For vehicles fitted with towing
equipment, when connected to a
trailer the pitch of the audible warning
changes upon operation of the turn
lights.
The pitch of the audible warning will
change if a turn light on the trailer or
the towing vehicle fails.
Trailer stability assist
If the system detects snaking
movements, engine power is reduced
and the vehicle/trailer combination is
selectively braked until the snaking ceases. While the system is working,keep steering wheel as still as
possible.
Trailer stability assist (TSA) is a
function of the Electronic Stability
Program (ESP) 3 160.Auxiliary features
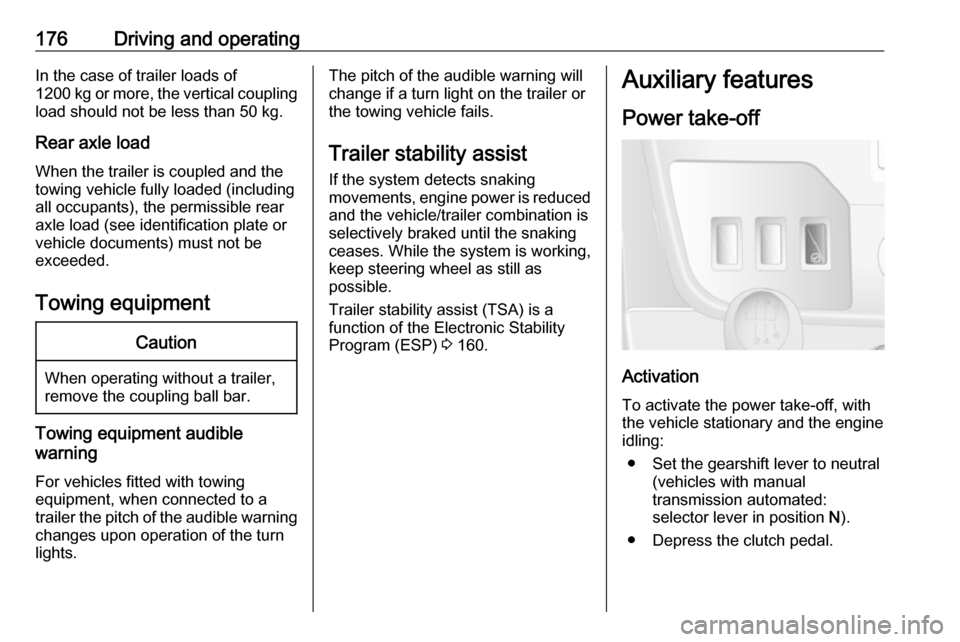
Power take-off
Activation
To activate the power take-off, with
the vehicle stationary and the engine
idling:
● Set the gearshift lever to neutral (vehicles with manual
transmission automated:
selector lever in position N).
● Depress the clutch pedal.
Page 180 of 269

178Vehicle careVehicle careGeneral Information...................179
Accessories and vehicle modifications .......................... 179
Vehicle storage ........................179
End-of-life vehicle recovery .....180
Vehicle checks ........................... 180
Performing work ......................180
Bonnet ..................................... 180
Engine oil ................................. 181
Engine coolant ......................... 183
Power steering fluid .................183
Washer fluid ............................ 184
Brakes ..................................... 185
Brake fluid ............................... 185
Vehicle battery ......................... 185
Diesel fuel filter ........................187
Diesel fuel system bleeding .....188
Wiper blade replacement ........188
Bulb replacement .......................189
Headlights ............................... 189
Fog lights ................................. 192
Front turn lights .......................192
Tail lights ................................. 193
Side turn lights ......................... 195Centre high-mounted brake
light ......................................... 195
Number plate light ...................196
Interior lights ............................ 197
Instrument panel illumination ...198
Electrical system ........................198
Fuses ....................................... 198
Engine compartment fuse box . 199
Instrument panel fuse box .......200
Load compartment fuse box ....201
Vehicle tools .............................. 203
Tools ........................................ 203
Wheels and tyres .......................204
Tyres ....................................... 204
Winter tyres ............................. 204
Tyre designations ....................204
Tyre pressure .......................... 204
Tyre pressure monitoring system .................................... 205
Tread depth ............................. 207
Changing tyre and wheel size . 208 Wheel covers ........................... 208
Tyre chains .............................. 208
Tyre repair kit .......................... 209
Wheel changing .......................212
Spare wheel ............................ 214
Jump starting ............................. 217Towing....................................... 219
Towing the vehicle ...................219
Towing another vehicle ...........220
Appearance care .......................221
Exterior care ............................ 221
Interior care ............................. 223
Page 190 of 269
188Vehicle careThe filter is drained as soon as dieselfuel emerges from the knurled screw
at the bottom. Retighten the two
screws.
Check diesel fuel filter at shorter
intervals if the vehicle is subjected to
extreme operating conditions.
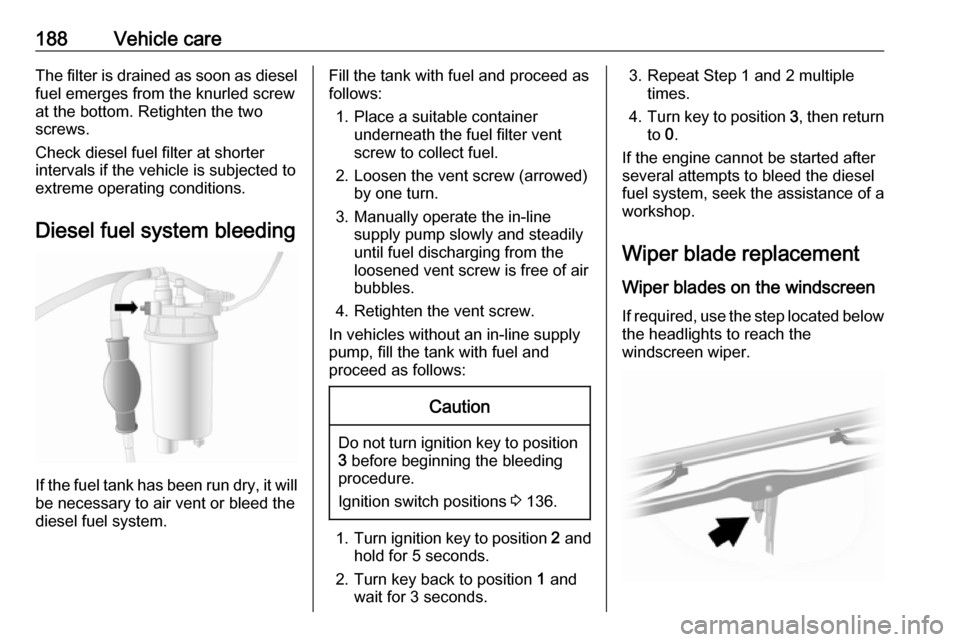
Diesel fuel system bleeding
If the fuel tank has been run dry, it will be necessary to air vent or bleed the
diesel fuel system.
Fill the tank with fuel and proceed as
follows:
1. Place a suitable container underneath the fuel filter vent
screw to collect fuel.
2. Loosen the vent screw (arrowed) by one turn.
3. Manually operate the in-line supply pump slowly and steadily
until fuel discharging from the
loosened vent screw is free of air
bubbles.
4. Retighten the vent screw.
In vehicles without an in-line supply
pump, fill the tank with fuel and
proceed as follows:Caution
Do not turn ignition key to position 3 before beginning the bleeding
procedure.
Ignition switch positions 3 136.
1. Turn ignition key to position 2 and
hold for 5 seconds.
2. Turn key back to position 1 and
wait for 3 seconds.
3. Repeat Step 1 and 2 multiple times.
4. Turn key to position 3, then return
to 0.
If the engine cannot be started after
several attempts to bleed the diesel
fuel system, seek the assistance of a
workshop.
Wiper blade replacement
Wiper blades on the windscreen If required, use the step located below
the headlights to reach the
windscreen wiper.