ESP VAUXHALL VIVARO 2014.5 Owner's Guide
[x] Cancel search | Manufacturer: VAUXHALL, Model Year: 2014.5, Model line: VIVARO, Model: VAUXHALL VIVARO 2014.5Pages: 189, PDF Size: 4.16 MB
Page 126 of 189
124Driving and operating
Deviations from the maximum speed
limit may occur briefly when driving
downhill, for physical reasons.
Vehicles also equipped with cruise
control speed limiter: the maximum
speed cannot be exceeded by
depressing the accelerator pedal firmly beyond the point of resistance.
Cruise control speed limiter 3 120.
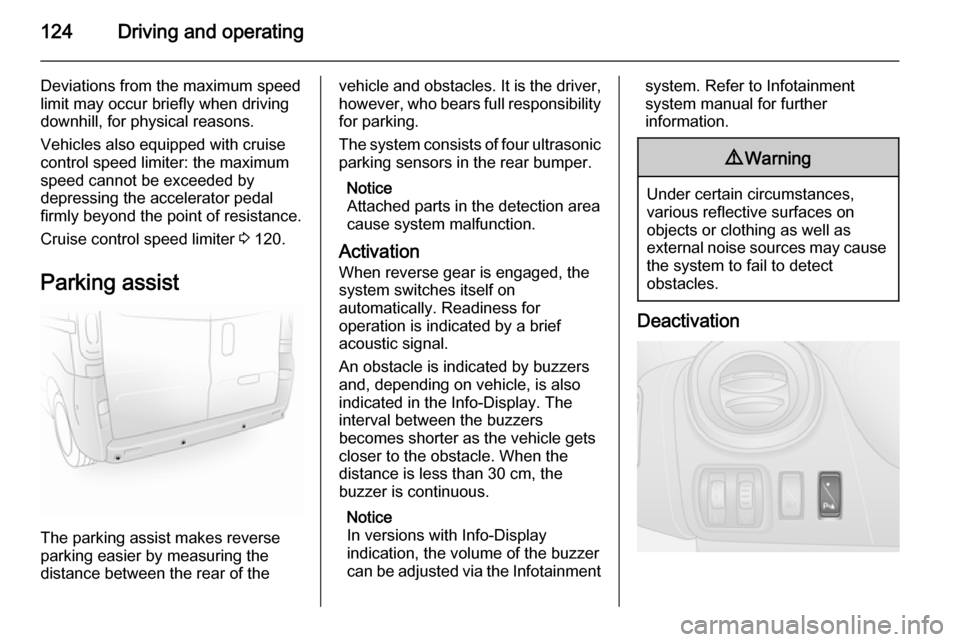
Parking assist
The parking assist makes reverse
parking easier by measuring the
distance between the rear of the
vehicle and obstacles. It is the driver,
however, who bears full responsibility for parking.
The system consists of four ultrasonic
parking sensors in the rear bumper.
Notice
Attached parts in the detection area
cause system malfunction.
Activation
When reverse gear is engaged, the
system switches itself on
automatically. Readiness for
operation is indicated by a brief
acoustic signal.
An obstacle is indicated by buzzers
and, depending on vehicle, is also
indicated in the Info-Display. The
interval between the buzzers
becomes shorter as the vehicle gets
closer to the obstacle. When the
distance is less than 30 cm, the
buzzer is continuous.
Notice
In versions with Info-Display
indication, the volume of the buzzer
can be adjusted via the Infotainmentsystem. Refer to Infotainment
system manual for further
information.9 Warning
Under certain circumstances,
various reflective surfaces on
objects or clothing as well as
external noise sources may cause the system to fail to detect
obstacles.
Deactivation
Page 127 of 189
Driving and operating125
Deactivate the system by pressing
the r button on the instrument
panel with the ignition on. LED
illuminates in the button when
deactivated. When reverse gear is
selected, no acoustic signal will
sound.
Notice
In versions with Info-Display
indication, the function can be
deactivated via the Infotainment
system. Refer to Infotainment
system manual for further
information.
The function is reactivated by
pressing button r again or the next
time the ignition is switched on.
Fault If the system detects an operating
fault, when selecting reverse gear a
continuous acoustic alarm will sound
for approx. 5 seconds, a
corresponding message appears in
the Driver Information Centre 3 86
and F illuminates in the instrument
cluster 3 82. Consult a workshop to
have the cause of the fault remedied.Caution
When reversing, the area should
be free from obstacles which could impact on the underside of the
vehicle.
Impact to the rear axle, which may
not be visible, could lead to
uncharacteristic changes in the
vehicle handling. In the event of
such an impact, consult a
workshop.
Vehicle messages 3 87.
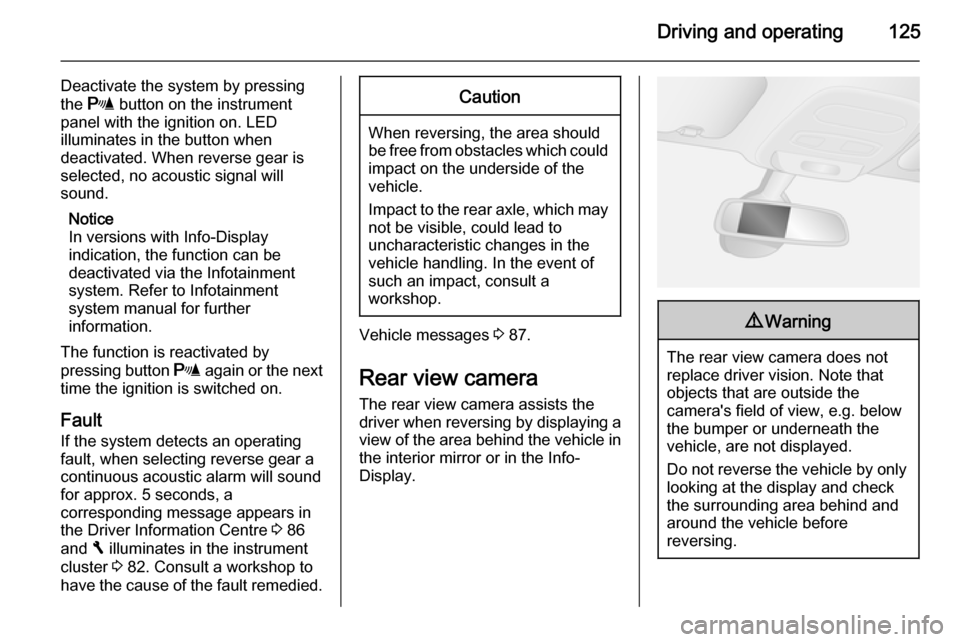
Rear view camera The rear view camera assists the
driver when reversing by displaying a view of the area behind the vehicle in
the interior mirror or in the Info-
Display.
9 Warning
The rear view camera does not
replace driver vision. Note that
objects that are outside the
camera's field of view, e.g. below
the bumper or underneath the
vehicle, are not displayed.
Do not reverse the vehicle by only looking at the display and checkthe surrounding area behind and
around the vehicle before
reversing.
Page 132 of 189

130Driving and operating
level. Since engine power decreases
as altitude increases due to the air becoming thinner, therefore reducing
climbing ability, the permissible gross
train weight also decreases by 10 %
for every 1000 metres of additional
altitude. The gross train weight does
not have to be reduced when driving
on roads with slight inclines (less than 8 %, e.g. motorways).
The permissible gross train weight
must not be exceeded. This weight is
specified on the identification plate
3 169.
Vertical coupling load
The vertical coupling load is the load
exerted by the trailer on the coupling
ball. It can be varied by changing the
weight distribution when loading the
trailer.
The maximum permissible vertical
coupling load is specified on the
towing equipment identification plate
and in the vehicle documents. Always aim for the maximum load, especially
in the case of heavy trailers. The
vertical coupling load should never
fall below 25 kg.In the case of trailer loads of
1200 kg or more, the vertical coupling load should not be less than 50 kg.
Rear axle load
When the trailer is coupled and the
towing vehicle fully loaded (including all occupants), the permissible rear
axle load (see identification plate or
vehicle documents) must not be
exceeded.
Trailer stability assist
If the system detects snaking
movements, engine power is reduced and the vehicle/trailer combination isselectively braked until the snaking
ceases. While the system is working,
keep steering wheel as still as
possible.
Trailer stability assist (TSA) is a
function of the Electronic Stability
Program 3 119.
Page 135 of 189

Vehicle care133
Move the safety catch (located
slightly right of centre) sideways to
the left and open the bonnet.
The bonnet is held open
automatically.
If the bonnet is opened during an
Autostop, the engine will be restarted automatically for safety reasons.
Stop-start system 3 113.
Closing Lower the bonnet and let it fall into the
latch from a low height (20-25 cm).
Check that the bonnet is engaged.
Engine oil
Check the engine oil level manually
on a regular basis to prevent damage
to the engine.
Ensure that the correct specification
of oil is used. Recommended fluids
and lubricants 3 166.
Check with the vehicle on a level
surface. The engine must be at
operating temperature and switched
off for at least 10 minutes.
Pull out the dipstick, wipe it clean, insert it to the stop on the handle, pull
out and read the engine oil level.Caution
It is the owner's responsibility to
maintain the proper level of an
appropriate quality oil in the
engine.
When the engine oil level has
dropped to the "add oil" mark A, top
up engine oil.
Caution
Do not allow the engine oil level to drop below the minimum level!
Page 146 of 189

144Vehicle careInstrument panel
illumination Have bulbs replaced by a workshop.Electrical system
Fuses
Data on the replacement fuse must match the data on the defective fuse.
Before replacing a fuse, turn off the
respective switch and the ignition.
A blown fuse can be recognised by its melted wire. Do not replace the fuse
until the cause of the fault has been
remedied.
It is advisable to carry a full set of
fuses. Provision is made in the fuse
box for the storing of spare fuses.
Some functions are protected by
several fuses.
Fuses may also be inserted without
existence of a function.
Page 152 of 189
150Vehicle care
Incorrect tyre pressures will impair
safety, vehicle handling, comfort and
fuel economy and will increase tyre
wear.
The tyre pressure tables show all
possible tyre combinations 3 178.
For the tyres approved for your
vehicle, refer to the EEC Certificate of Conformity provided with your vehicle
or other national registration
documents.
The driver is responsible for correct
adjustment of tyre pressure.9 Warning
If the pressure is too low, this can
result in considerable tyre warm-
up and internal damage, leading to tread separation and even to tyre
blow-out at high speeds.
Tyre pressure monitoring
system
The tyre pressure monitoring system
checks the pressure of all four wheels once a minute when vehicle speed
exceeds a certain limit.Caution
Tyre pressure monitoring system
warns only about low tyre pressure
condition and does not replace
regular tyre maintenance by the
driver.
All wheels must be equipped with pressure sensors and the tyres must
have the prescribed pressure.
Notice
In countries where the tyre pressure
monitoring system is legally
required, the use of wheels without
pressure sensors will invalidate the
vehicle type approval.
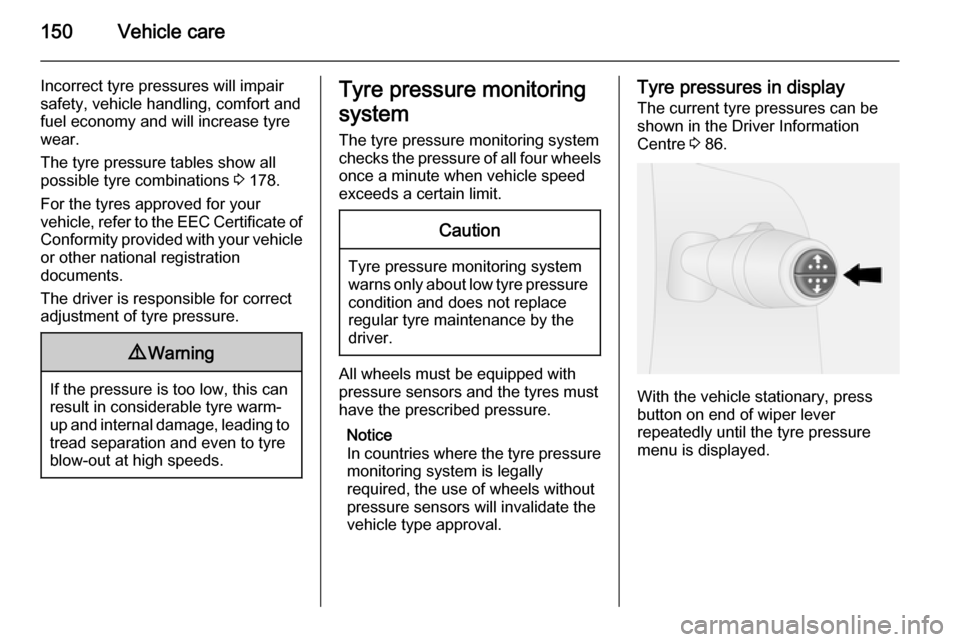
Tyre pressures in display
The current tyre pressures can be
shown in the Driver Information
Centre 3 86.
With the vehicle stationary, press
button on end of wiper lever
repeatedly until the tyre pressure
menu is displayed.
Page 153 of 189
Vehicle care151
Low tyre pressure condition
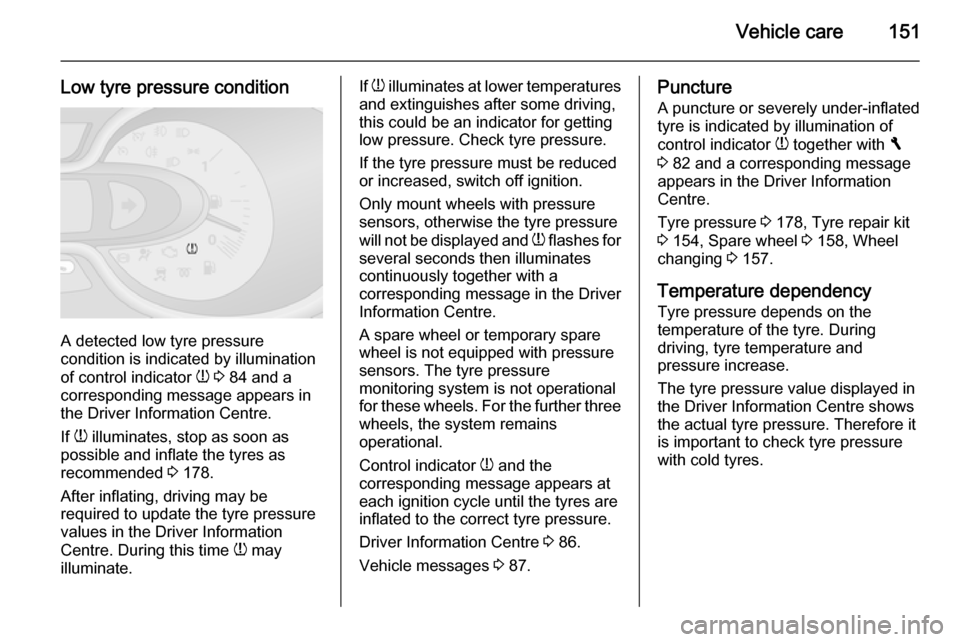
A detected low tyre pressure
condition is indicated by illumination
of control indicator w 3 84 and a
corresponding message appears in
the Driver Information Centre.
If w illuminates, stop as soon as
possible and inflate the tyres as
recommended 3 178.
After inflating, driving may be
required to update the tyre pressure
values in the Driver Information
Centre. During this time w may
illuminate.
If w illuminates at lower temperatures
and extinguishes after some driving,
this could be an indicator for getting low pressure. Check tyre pressure.
If the tyre pressure must be reduced
or increased, switch off ignition.
Only mount wheels with pressure
sensors, otherwise the tyre pressure
will not be displayed and w flashes for
several seconds then illuminates continuously together with a
corresponding message in the Driver
Information Centre.
A spare wheel or temporary spare
wheel is not equipped with pressure
sensors. The tyre pressure
monitoring system is not operational
for these wheels. For the further three wheels, the system remains
operational.
Control indicator w and the
corresponding message appears at
each ignition cycle until the tyres are
inflated to the correct tyre pressure.
Driver Information Centre 3 86.
Vehicle messages 3 87.Puncture
A puncture or severely under-inflated
tyre is indicated by illumination of
control indicator w together with F
3 82 and a corresponding message
appears in the Driver Information
Centre.
Tyre pressure 3 178, Tyre repair kit
3 154, Spare wheel 3 158, Wheel
changing 3 157.
Temperature dependency
Tyre pressure depends on the
temperature of the tyre. During
driving, tyre temperature and
pressure increase.
The tyre pressure value displayed in
the Driver Information Centre shows
the actual tyre pressure. Therefore it
is important to check tyre pressure
with cold tyres.
Page 154 of 189
152Vehicle care
Relearn function
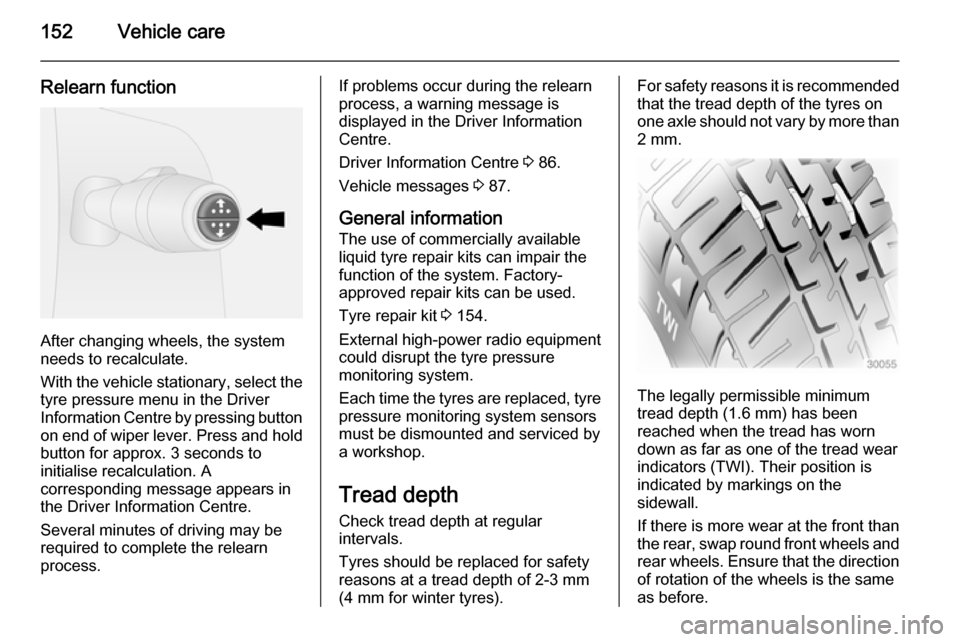
After changing wheels, the system
needs to recalculate.
With the vehicle stationary, select the tyre pressure menu in the Driver
Information Centre by pressing button
on end of wiper lever. Press and hold button for approx. 3 seconds to
initialise recalculation. A
corresponding message appears in
the Driver Information Centre.
Several minutes of driving may be
required to complete the relearn
process.
If problems occur during the relearn
process, a warning message is
displayed in the Driver Information
Centre.
Driver Information Centre 3 86.
Vehicle messages 3 87.
General information The use of commercially available
liquid tyre repair kits can impair the
function of the system. Factory-
approved repair kits can be used.
Tyre repair kit 3 154.
External high-power radio equipment
could disrupt the tyre pressure
monitoring system.
Each time the tyres are replaced, tyre
pressure monitoring system sensors
must be dismounted and serviced by a workshop.
Tread depth
Check tread depth at regular
intervals.
Tyres should be replaced for safety
reasons at a tread depth of 2-3 mm
(4 mm for winter tyres).For safety reasons it is recommended
that the tread depth of the tyres on
one axle should not vary by more than
2 mm.
The legally permissible minimum
tread depth (1.6 mm) has been
reached when the tread has worn
down as far as one of the tread wear
indicators (TWI). Their position is
indicated by markings on the
sidewall.
If there is more wear at the front than
the rear, swap round front wheels and
rear wheels. Ensure that the direction
of rotation of the wheels is the same
as before.
Page 155 of 189
Vehicle care153
Tyres age, even if they are not used.
We recommend tyre replacement
every 6 years.
Changing tyre and wheel
size If tyres of a different size than those
fitted at the factory are used, it may be necessary to reprogramme the
speedometer as well as the nominal
tyre pressure and make other vehicle modifications.
After converting to a different tyre
size, have the label with tyre
pressures replaced.9 Warning
Use of unsuitable tyres or wheels
may lead to accidents and will
invalidate the vehicle type
approval.
Wheel covers
Wheel covers and tyres that are
factory approved for the respective
vehicle and comply with all of the
relevant wheel and tyre combination requirements must be used.
If the wheel covers and tyres used are
not factory approved, the tyres must
not have a rim protection ridge.
Wheel covers must not impair brake
cooling.9 Warning
Use of unsuitable tyres or wheel
covers could lead to sudden
pressure loss and thereby
accidents.
Tyre chains
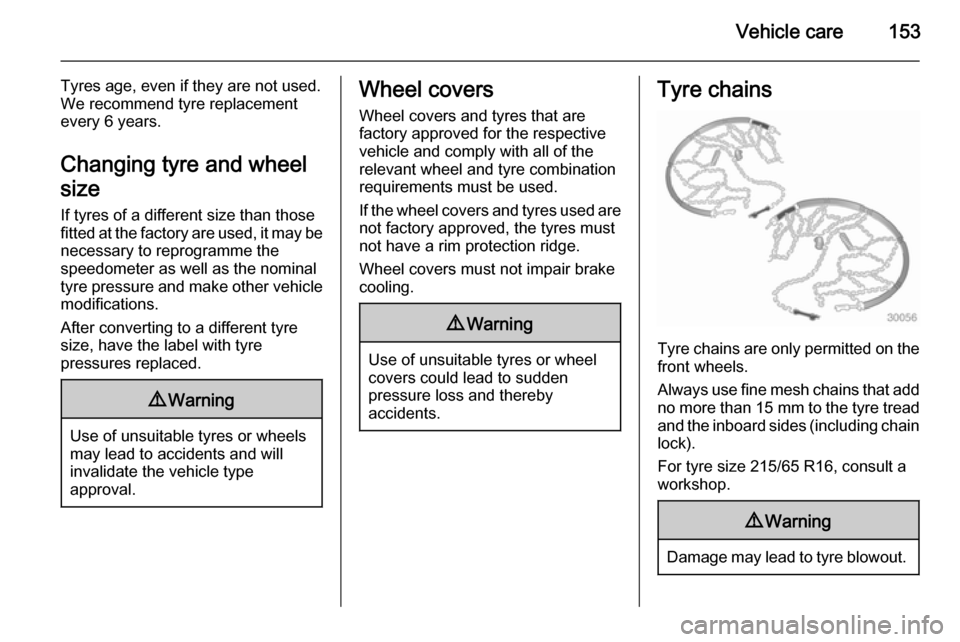
Tyre chains are only permitted on the
front wheels.
Always use fine mesh chains that add no more than 15 mm to the tyre tread
and the inboard sides (including chain lock).
For tyre size 215/65 R16, consult a
workshop.
9 Warning
Damage may lead to tyre blowout.
Page 160 of 189
158Vehicle care
5. Unscrew wheel bolts completelyby turning anticlockwise and wipe
clean with a cloth.
Put wheel bolts somewhere
where the threads will not be
soiled.
6. Change the wheel. Spare wheel 3 158.
7. Screw in the wheel bolts.
8. Lower the vehicle and remove jack.
9. Tighten each of the wheel bolts in
a crosswise sequence using the
wheel wrench. Ensure the wrench
locates securely. The wrench
should turn clockwise to tighten
the bolts. Invert the wrench if
necessary.
Tightening torque is 160 Nm.
10. Replace the wheel cover, ensuring that the valve hole in thewheel cover is aligned with the
tyre valve before installing.11. Stow the replaced wheel 3 158
and the vehicle tools 3 148.
12. Have the new wheel balanced on the vehicle.
Check the tyre pressure of the
installed tyre 3 178.
Check the wheel bolt torque.
Have the defective tyre renewed or
repaired as soon as possible.
Spare wheel
Some vehicles are equipped with a tyre repair kit instead of a spare wheel 3 154.
If mounting a spare wheel which is
different from the other wheels, this
wheel might be classified as a
temporary spare wheel and the
corresponding speed limits apply,
even though no label indicates this.
Seek the assistance of a workshop to
check the applicable speed limit.Caution
The use of a spare wheel that is smaller than the other wheels or in combination with winter tyres
could affect driveability. Have the defective tyre replaced as soon as
possible.
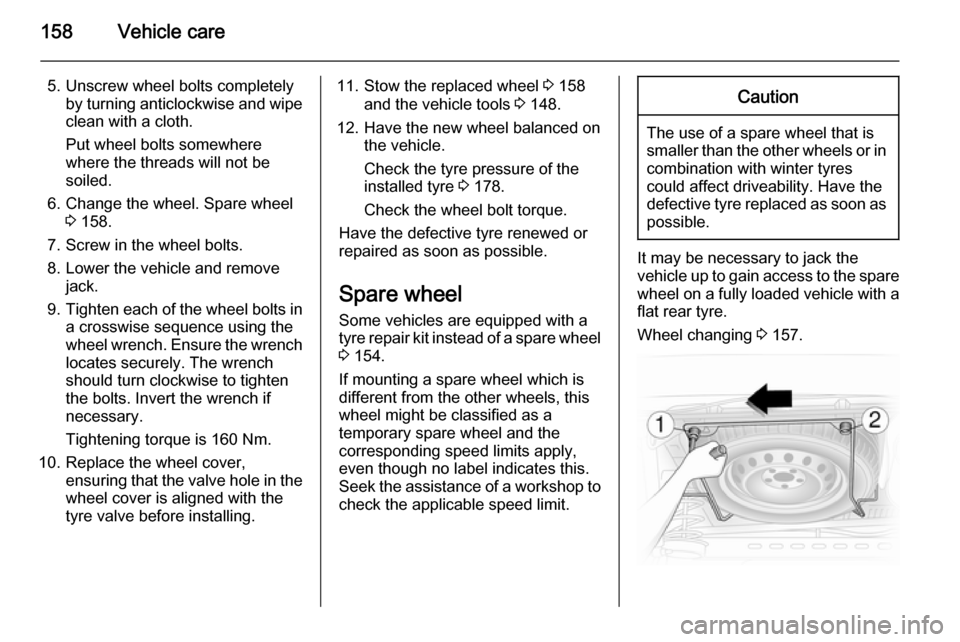
It may be necessary to jack the
vehicle up to gain access to the spare
wheel on a fully loaded vehicle with a
flat rear tyre.
Wheel changing 3 157.