stop start VAUXHALL VIVARO 2014.5 Owner's Manual
[x] Cancel search | Manufacturer: VAUXHALL, Model Year: 2014.5, Model line: VIVARO, Model: VAUXHALL VIVARO 2014.5Pages: 189, PDF Size: 4.16 MB
Page 13 of 189

In brief11
1Side air vents ...................... 106
2 Ashtray .................................. 76
Cupholder ............................ 65
3 Light switch .......................... 91
Rear fog light ......................... 93
Front fog lights .....................93
Exit lighting ............................ 96
Turn and lane-change
signals ................................... 93
Sidelights .............................. 91
Headlight flash, low beam
and high beam ......................92
4 Instruments .......................... 76
5 Horn ...................................... 72
Driver airbag ......................... 53
6 Windscreen wiper,
windscreen washer system ..72
Rear window wiper, rear
window washer system ........73
Trip computer ....................... 887Card reader for electronic
key system ............................ 21
8 Steering column controls ......72
9 Centre air vents ................... 106
10 Power outlet .......................... 75
Cigarette lighter ..................... 75
Coin tray, USB slot ................ 64
11 Driver Information Centre ...... 86
Trip computer ....................... 88
12 Storage tray ......................... 64
13 Front passenger airbag .........53
14 Glovebox .............................. 64
15 Idle speed control ...............112
16 Heated exterior mirrors .........36
Heated rear window ..............38
17 Power outlet .......................... 75
Cigarette lighter ..................... 75
18 Climate control system .......... 97
Electronic climate control
system ................................... 9919 Ashtray .................................. 76
Cupholder ............................ 65
20 Central locking system ..........23
21 Hazard warning flashers .......93
22 Gear lever, Manual
transmission ........................ 116
23 Eco button for fuel
economy mode ...................108
24 Power button for electronic
key system .......................... 110
25 Stop-start system ................113
26 Cruise control and speed
limiter ................................. 120
27 Ignition switch with
steering wheel lock .............109
28 Steering wheel adjustment ...71
29 Remote control on
steering wheel ......................71
Cruise control .....................120
30 Storage compartment ...........64
31 Bonnet release lever ...........132
32 Fuse box ............................. 145
Page 19 of 189

In brief17
Starting the engine with key
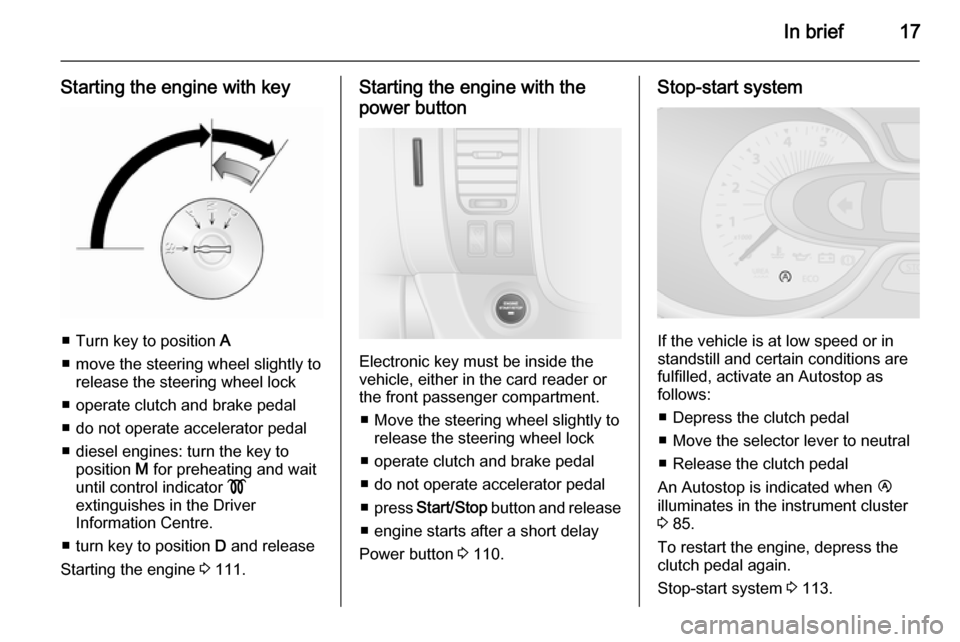
■ Turn key to position A
■ move the steering wheel slightly to release the steering wheel lock
■ operate clutch and brake pedal
■ do not operate accelerator pedal
■ diesel engines: turn the key to position M for preheating and wait
until control indicator !
extinguishes in the Driver
Information Centre.
■ turn key to position D and release
Starting the engine 3 111.
Starting the engine with the
power button
Electronic key must be inside the
vehicle, either in the card reader or
the front passenger compartment.
■ Move the steering wheel slightly to release the steering wheel lock
■ operate clutch and brake pedal
■ do not operate accelerator pedal
■ press Start/Stop button and release
■ engine starts after a short delay
Power button 3 110.
Stop-start system
If the vehicle is at low speed or in
standstill and certain conditions are
fulfilled, activate an Autostop as
follows:
■ Depress the clutch pedal
■ Move the selector lever to neutral
■ Release the clutch pedal
An Autostop is indicated when Ï
illuminates in the instrument cluster
3 85.
To restart the engine, depress the
clutch pedal again.
Stop-start system 3 113.
Page 36 of 189

34Keys, doors and windows
Press electronic key button e to
activate the anti-theft alarm system.
Electronic key system 3 21.
Deactivation
Unlocking the vehicle (with button c
or the button on any exterior door handle) or switching on the ignition
deactivates the anti-theft alarm
system. Hazard warning lights flash to confirm deactivation.
The system is not deactivated when
unlocking the driver's door with the
key or with the central locking switch
in the passenger compartment.
Notice
If the alarm has been triggered,
unlocking the vehicle with the key
will not stop the alarm siren. To stop the siren, switch on the ignition. The
hazard warning lights will not flash
upon deactivation if the alarm has
been triggered.Activation without monitoring of
passenger compartment
Disable monitoring of the passenger
compartment, e.g. when animals are
being left in the vehicle, or if the
auxiliary heater has been set for a
timed or remote controlled start
3 102.
Press and hold button e on the
remote control or electronic key; an
audible signal will sound as
confirmation.
The status will remain until the doors
are unlocked.
AlarmWhen triggered, the alarm sounds via
a separate battery-backed power
sounder, and the hazard warning
lights flash simultaneously. The
number and duration of alarm signals are stipulated by legislation.
If the vehicle battery is disconnected
or its power supply is interrupted, the
alarm siren will be triggered. First
deactivate the anti-theft alarm system
if the vehicle battery must be
disconnected.To silence the alarm siren (if
triggered) and therefore deactivate
the anti-theft alarm system, reconnect vehicle battery and unlock the vehicle
or switch on the ignition.
Immobiliser
The immobiliser is part of the ignition
switch and checks whether the
vehicle is allowed to be started with
the key being used.
The immobiliser is activated
automatically after the key has been removed from the ignition switch and
also if the key is left in the ignition
switch when the engine is turned off.
If the engine cannot be started, switch off the ignition and remove key, wait
approx. 2 seconds and then repeat
the start attempt. If start attempt is
unsuccessful, attempt to start the
engine using the spare key and seek
the assistance of a workshop.
Page 84 of 189

82Instruments and controls
If both control indicators VON and
* OFF are illuminated
simultaneously, there is a system
failure. The status of the system is not discernible, therefore no person is
permitted to occupy the front
passenger seat. Contact a workshop
immediately.
If illuminated in conjunction with v or
F , seek the assistance of a workshop.9 Danger
Risk of fatal injury for a child using
a child restraint system together
with activated front passenger
airbag.
Risk of fatal injury for an adult
person with deactivated front
passenger airbag.
Airbag system 3 50, belt tensioners
3 47, airbag deactivation 3 55.
Charging system p illuminates red.
Illuminates briefly when the ignition is
switched on.
Illuminates when the engine is
running
If control indicator p illuminates
when the engine is running
(accompanied by a warning chime):
Stop, switch off engine.
Vehicle battery is not charging.
Engine cooling may be interrupted.
Power to the brake servo unit may be
cut. Seek the assistance of a
workshop.
Malfunction indicator light Z illuminates or flashes yellow.
Illuminates when the ignition is
switched on and goes out shortly after
the engine starts.
Illuminates when the engine isrunning
Fault in the emission control system. The permitted emission limits may be exceeded. Seek the assistance of a
workshop immediately.Flashes when the engine is
running
Fault that could lead to catalytic
converter damage. Ease up on the
accelerator until the flashing stops.
Seek the immediate assistance of a
workshop.
Service vehicle soon
F illuminates in yellow.
Illuminates when the ignition is
switched on and goes out shortly after the engine starts.
May illuminate together with other
control indicators and a
corresponding message in the Driver
Information Centre. Seek the
assistance of a workshop
immediately.
Stop engine C illuminates in red.
Illuminates briefly when the ignition is
switched on.
Page 87 of 189

Instruments and controls859Warning
When the engine is off,
considerably more force is needed
to brake and steer.
Do not remove key until vehicle is stationary, otherwise the steeringwheel lock could engage
unexpectedly.
Check oil level before seeking
assistance of a workshop 3 133.
Fuel economy mode
ECO illuminates green when ECO
mode is engaged to reduce fuel
consumption.
ECO mode, driving economically
3 108.
Low fuel Y illuminates yellow.
Illuminates when level in fuel tank is
too low; refuel immediately 3 127.
Catalytic converter 3 115.
Bleeding the diesel fuel system
3 138.
Autostop
D illuminates when engine is in an
Autostop.
Stop-start system 3 113.
Exterior light 9 illuminates green.
Illuminated when the headlights are on.
8 illuminates green.
Illuminated when the sidelights are
on.
Lighting 3 91.
High beam P illuminates blue.
Illuminated when high beam is on and
during headlight flash 3 92.
Fog light
> illuminates green.Illuminated when the front fog lights
are on 3 93.
Rear fog light
r illuminates green.
Illuminated when the rear fog light is
on 3 93.
Cruise control
m , U illuminates green or yellow.
m illuminates green when a certain
speed is stored.
U illuminates green when the system
is on.
Speed limiter U illuminates yellow.
U illuminates yellow when the
system is on.
Cruise control and speed limiter
3 120.
Door open
U illuminates red.
Page 89 of 189

Instruments and controls87Vehicle messages
Messages are displayed in the Driver
Information Centre and may be
accompanied by illumination of
control indicator F or C in the
instrument cluster.
Information messages Information messages regarding,
e.g. engine starting conditions, stop-
start system, parking brake
application, central locking, steering
wheel lock etc. provide the current
status of certain vehicle functions and
instructions for use.
Fault messages Fault messages regarding, e.g. fuel
filter, airbags, exhaust emissions etc.
are displayed together with control
indicator F. Drive with caution and
seek the assistance of a workshop as
soon as possible.
To remove fault messages from the
display, press button on end of wiper
lever. After a few seconds the
message may disappearautomatically and F remains
illuminated. The fault will then be
stored in the on board system.
Warning messagesWarning messages regarding, e.g.
engine, battery or brake system
failure, are displayed together with
control indicator C and may be
accompanied by a warning chime.
Stop engine immediately and seek
the assistance of a workshop.
Fuel economy messages
Fuel economy messages provide tips to improve fuel efficiency. Journeys
can be saved in the system memory,
enabling you to compare
performances.
Refer to Infotainment system manual
for further information.
Fuel economy rating 3 88.
Warning chimes
A corresponding message may also
appear in the Driver Information
Centre when a warning chime is
sounded.When starting the engine or
whilst driving: ■ If seat belt is not fastened 3 47.
■ During operation of the turn and lane-change signals 3 93.
■ During illumination of certain control indicators.
■ If the parking assist detects an object 3 124.
■ If the vehicle speed briefly exceeds
a set limit 3 123.
■ If a door or the bonnet is not properly closed when vehicle
exceeds a certain speed.
■ If the electronic key is outside of the
detection range.
Electronic key system 3 21, Power
button 3 110.
When the vehicle is parked and/ or the driver's door is opened: ■ If the key has been left in the ignition.
■ If the electronic key has been left in
the card reader.
Page 90 of 189

88Instruments and controls
Electronic key system 3 21, Power
button 3 110.
■ If the vehicle is in an Autostop. Stop-start system 3 113.
■ If the exterior lights are on.
Engine oil level If the minimum engine oil level is
reached, a message is displayed in
the Driver Information Centre for 30 seconds after the engine is
started.
Check oil level 3 133.Trip computer
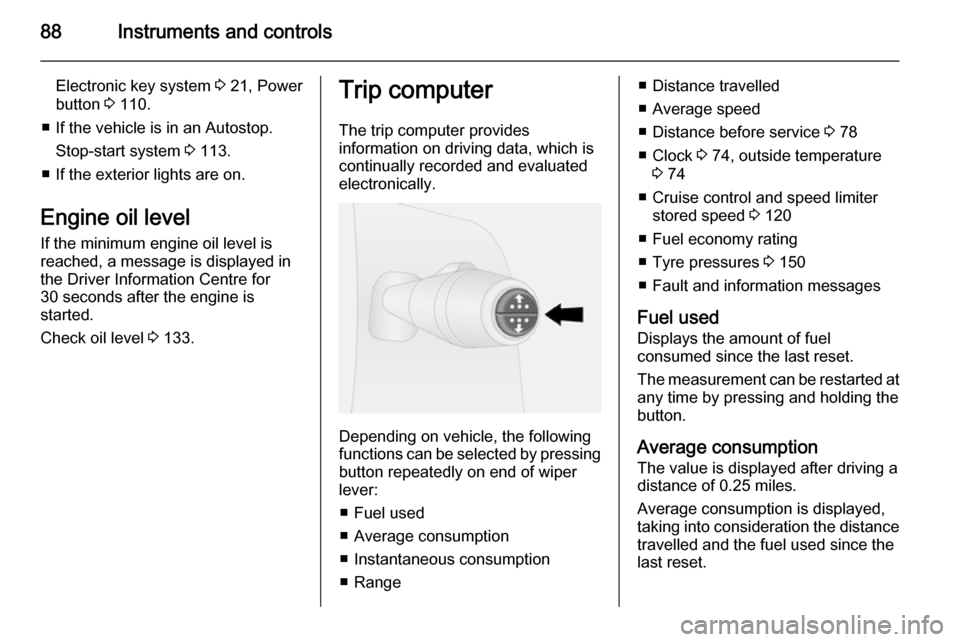
The trip computer provides
information on driving data, which is
continually recorded and evaluated electronically.
Depending on vehicle, the following
functions can be selected by pressing button repeatedly on end of wiper
lever:
■ Fuel used
■ Average consumption
■ Instantaneous consumption
■ Range
■ Distance travelled
■ Average speed
■ Distance before service 3 78
■ Clock 3 74, outside temperature
3 74
■ Cruise control and speed limiter stored speed 3 120
■ Fuel economy rating
■ Tyre pressures 3 150
■ Fault and information messages
Fuel used Displays the amount of fuel
consumed since the last reset.
The measurement can be restarted at
any time by pressing and holding the
button.
Average consumption
The value is displayed after driving a
distance of 0.25 miles.
Average consumption is displayed,
taking into consideration the distance
travelled and the fuel used since the
last reset.
Page 102 of 189

100Climate control
If the minimum temperature is set, the
climate control system runs at
maximum cooling.
If the maximum temperature is set, the climate control system runs at
maximum heating.
Demisting and defrosting the windows ■ Press button Ê. LED illuminates in
the button when activated.
■ Temperature, air distribution and cooling are regulated automaticallyand the fan runs at high speed.
■ Heated rear window Ü is switched
on automatically 3 38.
To return to Automatic mode: press button Ê or AUTO .
Notice
Demisting and defrosting of the
windows may inhibit an Autostop.
Stop-start system 3 113.
Manual settings Manually changing any of the
following settings will deactivate
Automatic mode:Fan speed Z
Adjust the air flow manually by
switching the fan to the desired
speed.
If the fan is switched off, the air
conditioning is also deactivated.
To return to Automatic mode: Press
AUTO button.
Air distribution M
Press appropriate button for desired
adjustment. LED illuminates in the
button when activated.R=to windscreen and front door
windows.M=to head area.S=to foot well.
Combinations of settings are possible
by pressing two buttons until both
LEDs are illuminated.
To return to Automatic mode: Press
AUTO button.
Cooling AC
Activate or deactivate cooling with the AC button. LED illuminates in the
button when cooling has been
deactivated.
The air conditioning system cools and
dehumidifies (dries) the air when
outside temperature is above a
specific level. Therefore
condensation may form and drip from under the vehicle.
Notice
Air conditioning performance is
reduced when ECO mode has been
activated 3 108.
If no cooling or drying is required,
switch the cooling system off to save
fuel.
To return to Automatic mode: Press
AUTO button.
Air recirculation mode u
Activate or deactivate manual air
recirculation mode with the u button.
LED illuminates in the button when
activated.
Page 104 of 189

102Climate control
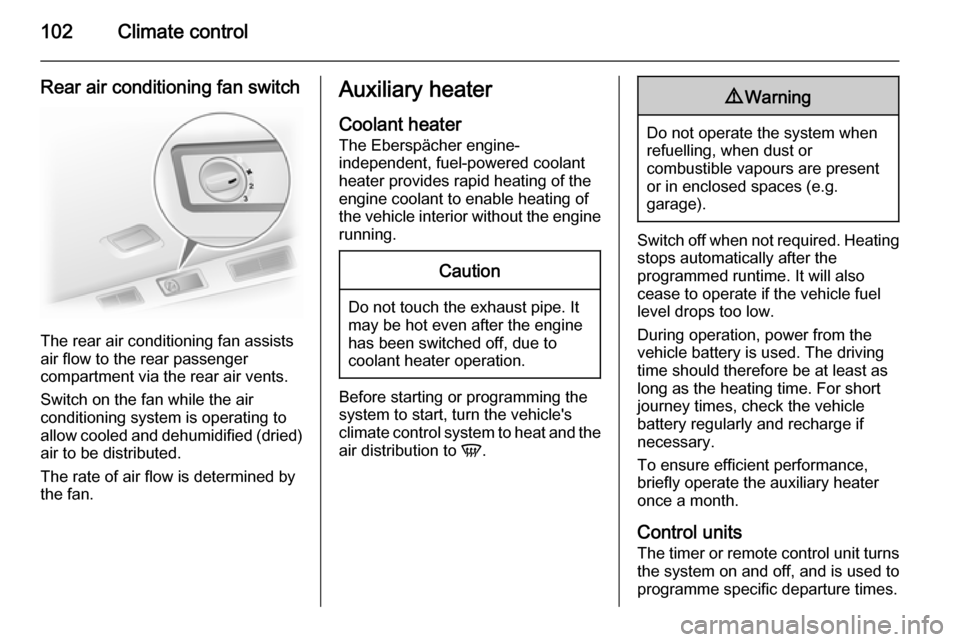
Rear air conditioning fan switch
The rear air conditioning fan assists
air flow to the rear passenger
compartment via the rear air vents.
Switch on the fan while the air
conditioning system is operating to
allow cooled and dehumidified (dried) air to be distributed.
The rate of air flow is determined by
the fan.
Auxiliary heater
Coolant heater The Eberspächer engine-
independent, fuel-powered coolant
heater provides rapid heating of the
engine coolant to enable heating of
the vehicle interior without the engine
running.Caution
Do not touch the exhaust pipe. It
may be hot even after the engine
has been switched off, due to
coolant heater operation.
Before starting or programming the
system to start, turn the vehicle's
climate control system to heat and the
air distribution to V.
9Warning
Do not operate the system when
refuelling, when dust or
combustible vapours are present
or in enclosed spaces (e.g.
garage).
Switch off when not required. Heating stops automatically after the
programmed runtime. It will also
cease to operate if the vehicle fuel
level drops too low.
During operation, power from the
vehicle battery is used. The driving
time should therefore be at least as
long as the heating time. For short
journey times, check the vehicle
battery regularly and recharge if
necessary.
To ensure efficient performance,
briefly operate the auxiliary heater
once a month.
Control units The timer or remote control unit turns
the system on and off, and is used to
programme specific departure times.
Page 107 of 189

Climate control105
To switch off, select x in the menu bar
again and confirm.
Programming P
Up to 3 preset departure times can be
programmed, either during one day or over one week.
■ Select P in the menu bar and
confirm
■ Select desired preset memory number 1, 2 or 3 and confirm
■ Select day and confirm
■ Select hour and confirm
■ Select minutes and confirm
■ Select Y or x and confirm
■ If necessary, adjust the runtime duration prior to departure and
confirm
The next preset memory number to
be activated is underlined and the
weekday is displayed. Repeat the
procedure to programme the other
preset memory numbers.
Pressing button X during the
procedure will exit without storing
programme adjustments.To delete a preset departure time,
follow the steps for programming until
heating symbol Y flashes. Press
button q or r until oFF appears in
the display and confirm.
Heating stops automatically
5 minutes after the programmed
departure time.
Notice
The remote control system features
a temperature sensor which
calculates the runtime according to
the ambient temperature and the desired heating level (ECO or
HIGH). The system starts
automatically between 5 and
60 minutes prior to the programmed
departure time.
Set weekday, time and heating
duration Ö
If the vehicle battery is disconnected
or its voltage is too low, the unit will
need to be reset.
■ Select Ö and confirm
■ Select weekday and confirm ■ Change hours and confirm■ Change minutes and confirm
■ Change the default heating duration and confirm
Heating level Y
The preferred heating level for
programmed departure times can be
set to either ECO or HIGH.
Select Y and confirm. ECO or HIGH
flashes in the display. Adjust using the q or r button and confirm.